Your profile picture is arguably the most important and sometimes overlooked part of your professional profile.
Cause if you think about it, no matter if you're scrolling through people on LinkedIn or company profiles on Facebook — what’s the first thing you see? What’s the first indicator that tells you, hey, this person looks friendly or interesting? It’s their profile picture.

This is why we reckon it’s worth investing time into your profile picture, and for some of you, investing in a professional photographer might even make sense.
This is especially true for business owners or public figures whose picture will be spread across platforms and different media outlets.
Having a professional profile picture will:
Build & strengthen your personal brand: it helps people remember your face and associate you with a particular profession or company.
Give people a first impression: it gives people an idea of the type of person you are and what they can expect when dealing with you in a professional context.
Make you more approachable: people are also a lot more likely to see you as active on the professional platform and will engage with you.
Leave a professional and lasting impression: putting a face to your name can build that initial trust for them to contact you in the first place or remember you when they need your product or service.
Networking and meeting people professionally online has now become the norm, which is all the more reason why your profile picture is gaining importance across the board — wondering how to create a professional profile picture?
We have quite a few tips and tricks up our sleeve so you can create the perfect one.
목차
- 1. DIY your profile picture or go with a professional photographer
- 2. Make sure it reflects what you actually look like
- 3. Keep it square
- 4. Frame your face
- 5. Don’t even think about taking a selfie
- 6. Choose a plain background
- 7. Make sure your face is in focus
- 8. Use soft natural light
- 9. Take several shots so you can choose your favorite one
- 10. Rename your file for easy finding
1. DIY your profile picture or go with a professional photographer
Professional photos are something that used to be left to photographers, but if you ask us, an iPhone with the latest technology can do a pretty spectacular job at snapping a photo that will impress.
So if you have access to a phone with an incredible camera, you can definitely consider going down that route. The advantage of DIYing is that it’s low budget, you can take as many photos as you like, experiment as much as you want, and spend an unlimited amount of time perfecting it.

On the other hand, professional photographers have their profession for a reason. They are fantastic at making people feel comfortable in front of the camera.
They may even discuss what you want to portray professionally, give you tips on posing and outfits, and shoot different options with very high quality and a crisp look and feel.
They could charge anywhere between $150-450 for a professional headshot. This might seem like a lot for some of you, but just think about how often you could use that image, for example every time you get an interview request on LinkedIn or Clubhouse — your possibilities are endless.
You can also use the opportunity to book a more extensive package and get social media or blog photos as well.
It’s an investment in yourself, your profession, and your personal brand. Whether you want to make that investment really is up to you. If you’re unsure and not stuck for time, we recommend giving DIYing a try, and if all else fails, you can always contact a professional photographer in the aftermath.
2. Make sure it reflects what you actually look like
It’s incredibly confusing if you hop on a call with someone or invite them to an interview at your office headquarters and when you meet them at the reception — you barely recognize them.
Turns out their profile picture looks nothing like they do; their hair is short and dark brown instead of blonde, and a couple of years seem to have passed.
The person is also wearing glasses, and you don’t seem to remember that from their LinkedIn profile. Sounds familiar?
This is a situation you want to avoid putting people in simply by making sure your profile pic reflects what you look like.

We recommend updating it at least every 3-5 years, depending on whether you’ve changed your style a lot or perhaps had braces and not anymore.
If you’re looking at your profile picture right now, and it was taken by a professional photographer ten years ago, but you don’t wanna invest a ton of money in a new one no worries. Phone cameras do an amazing job nowadays — it’s something you can definitely also DIY at home.
Just keep in mind that you're going to use a professional profile picture over and over again. Not just on your own social channels, but if you as a business owner or professional are ever invited to be featured on another company’s social channels, podcast interview, or in a magazine — this is the picture you’re gonna be sharing.
You could also use it on your resume if you decide to switch careers. For some more detailed tips on this topic, you can check out our blog post about how to take a photo for CV.
3. Keep it square
Most platforms have square or round profile pictures — having a square one on hand is the way to go because you can apply it to both formats.
LinkedIn requires a 400 x 400-pixel profile picture, and generally speaking, this is a format you can usually apply to pretty much all platforms.
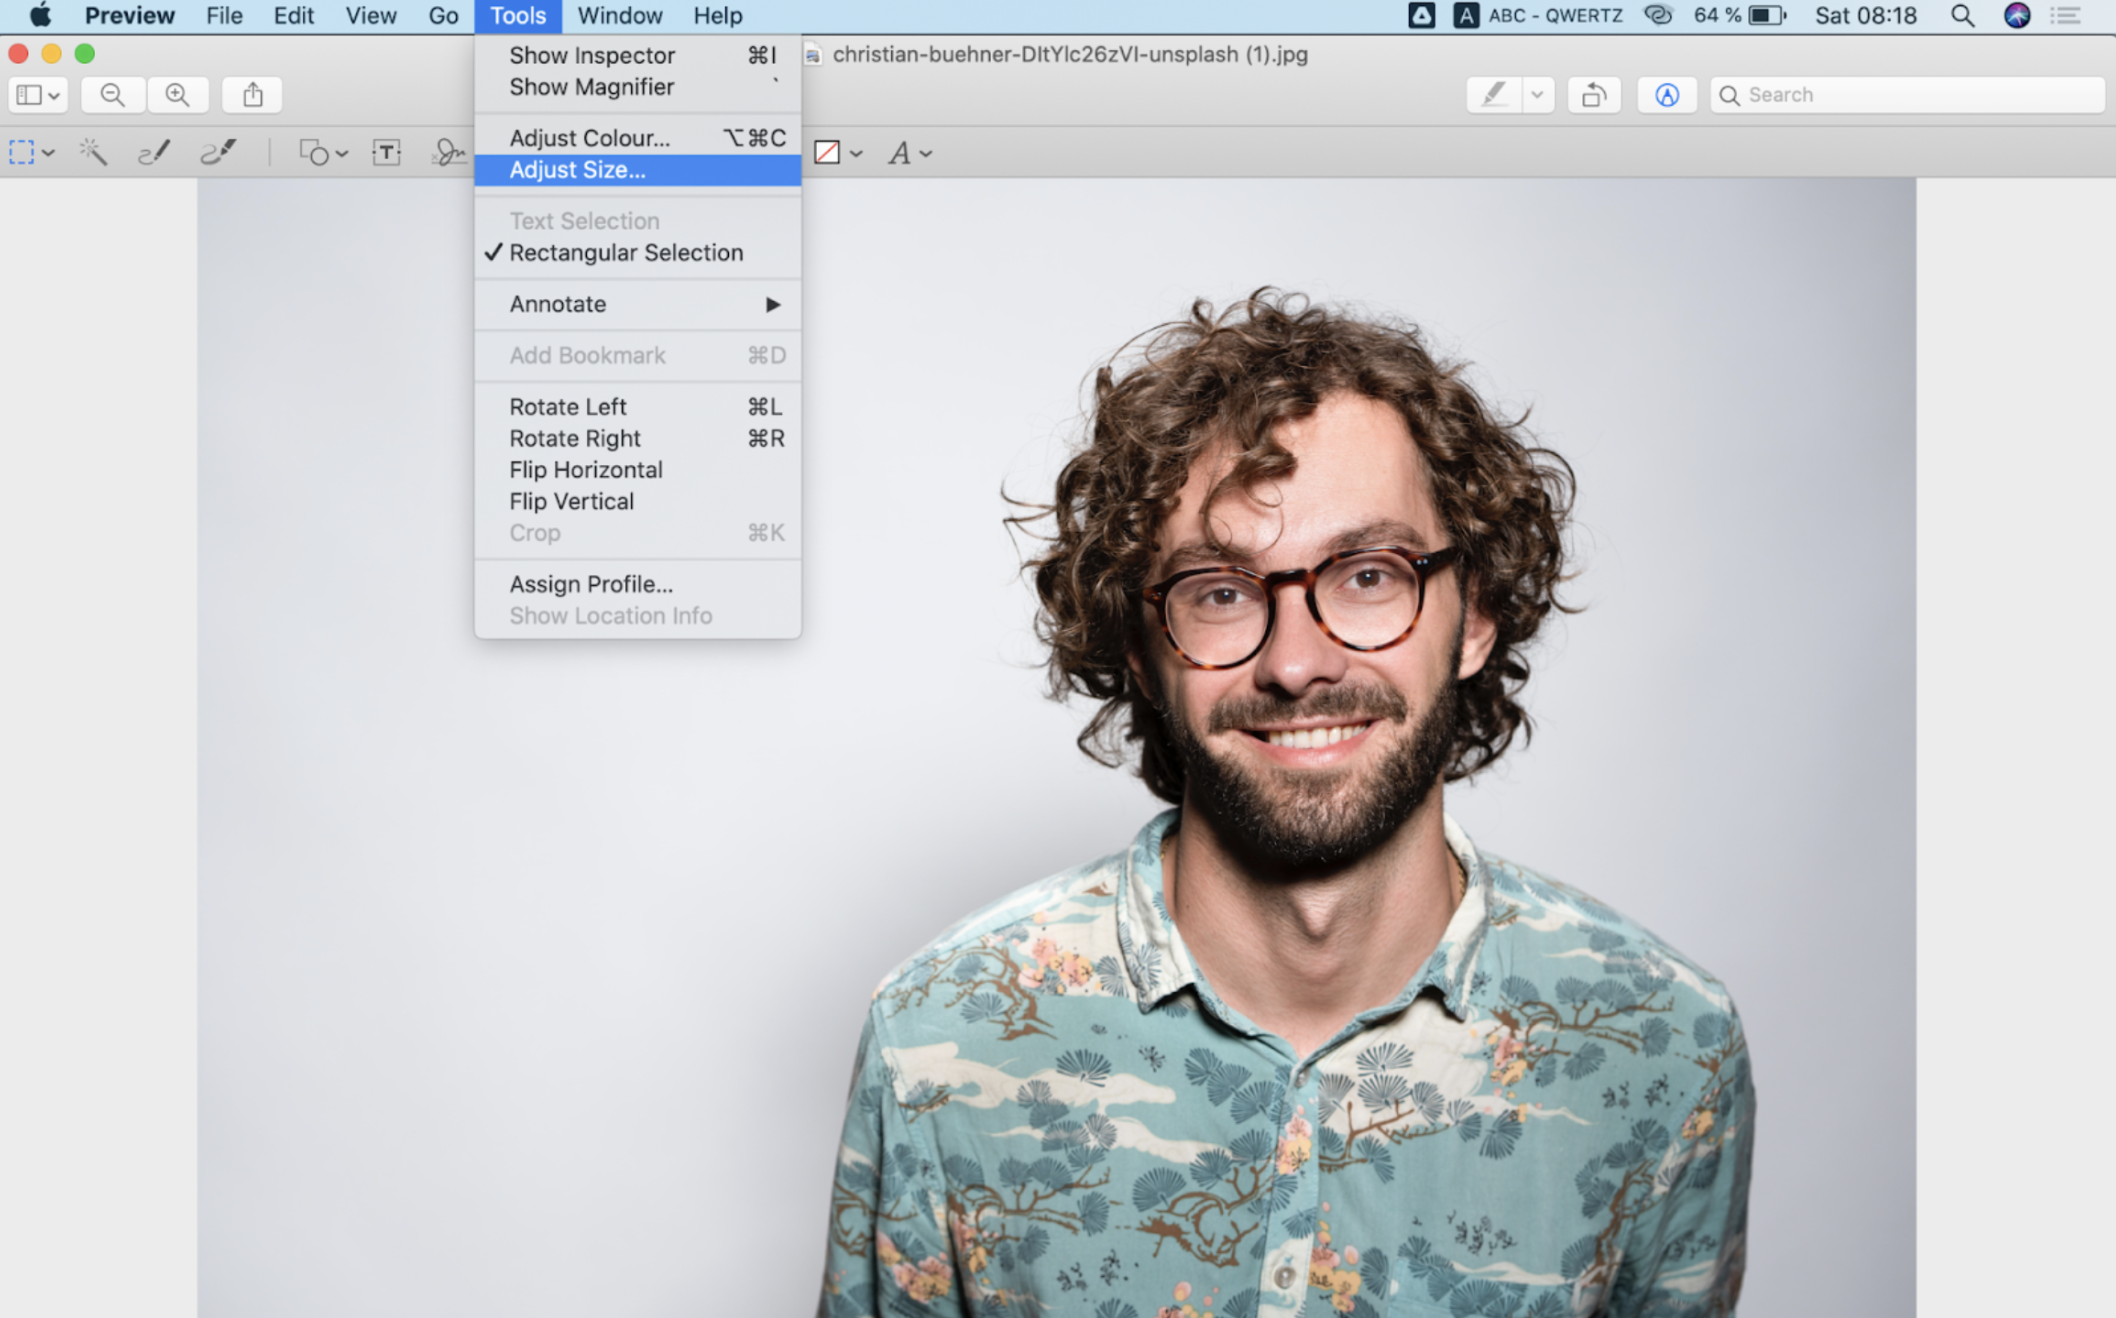
Here’s how you can easily change the size of a profile picture on your Mac:
1. Open the image, then go to > Tools > Adjust Size.
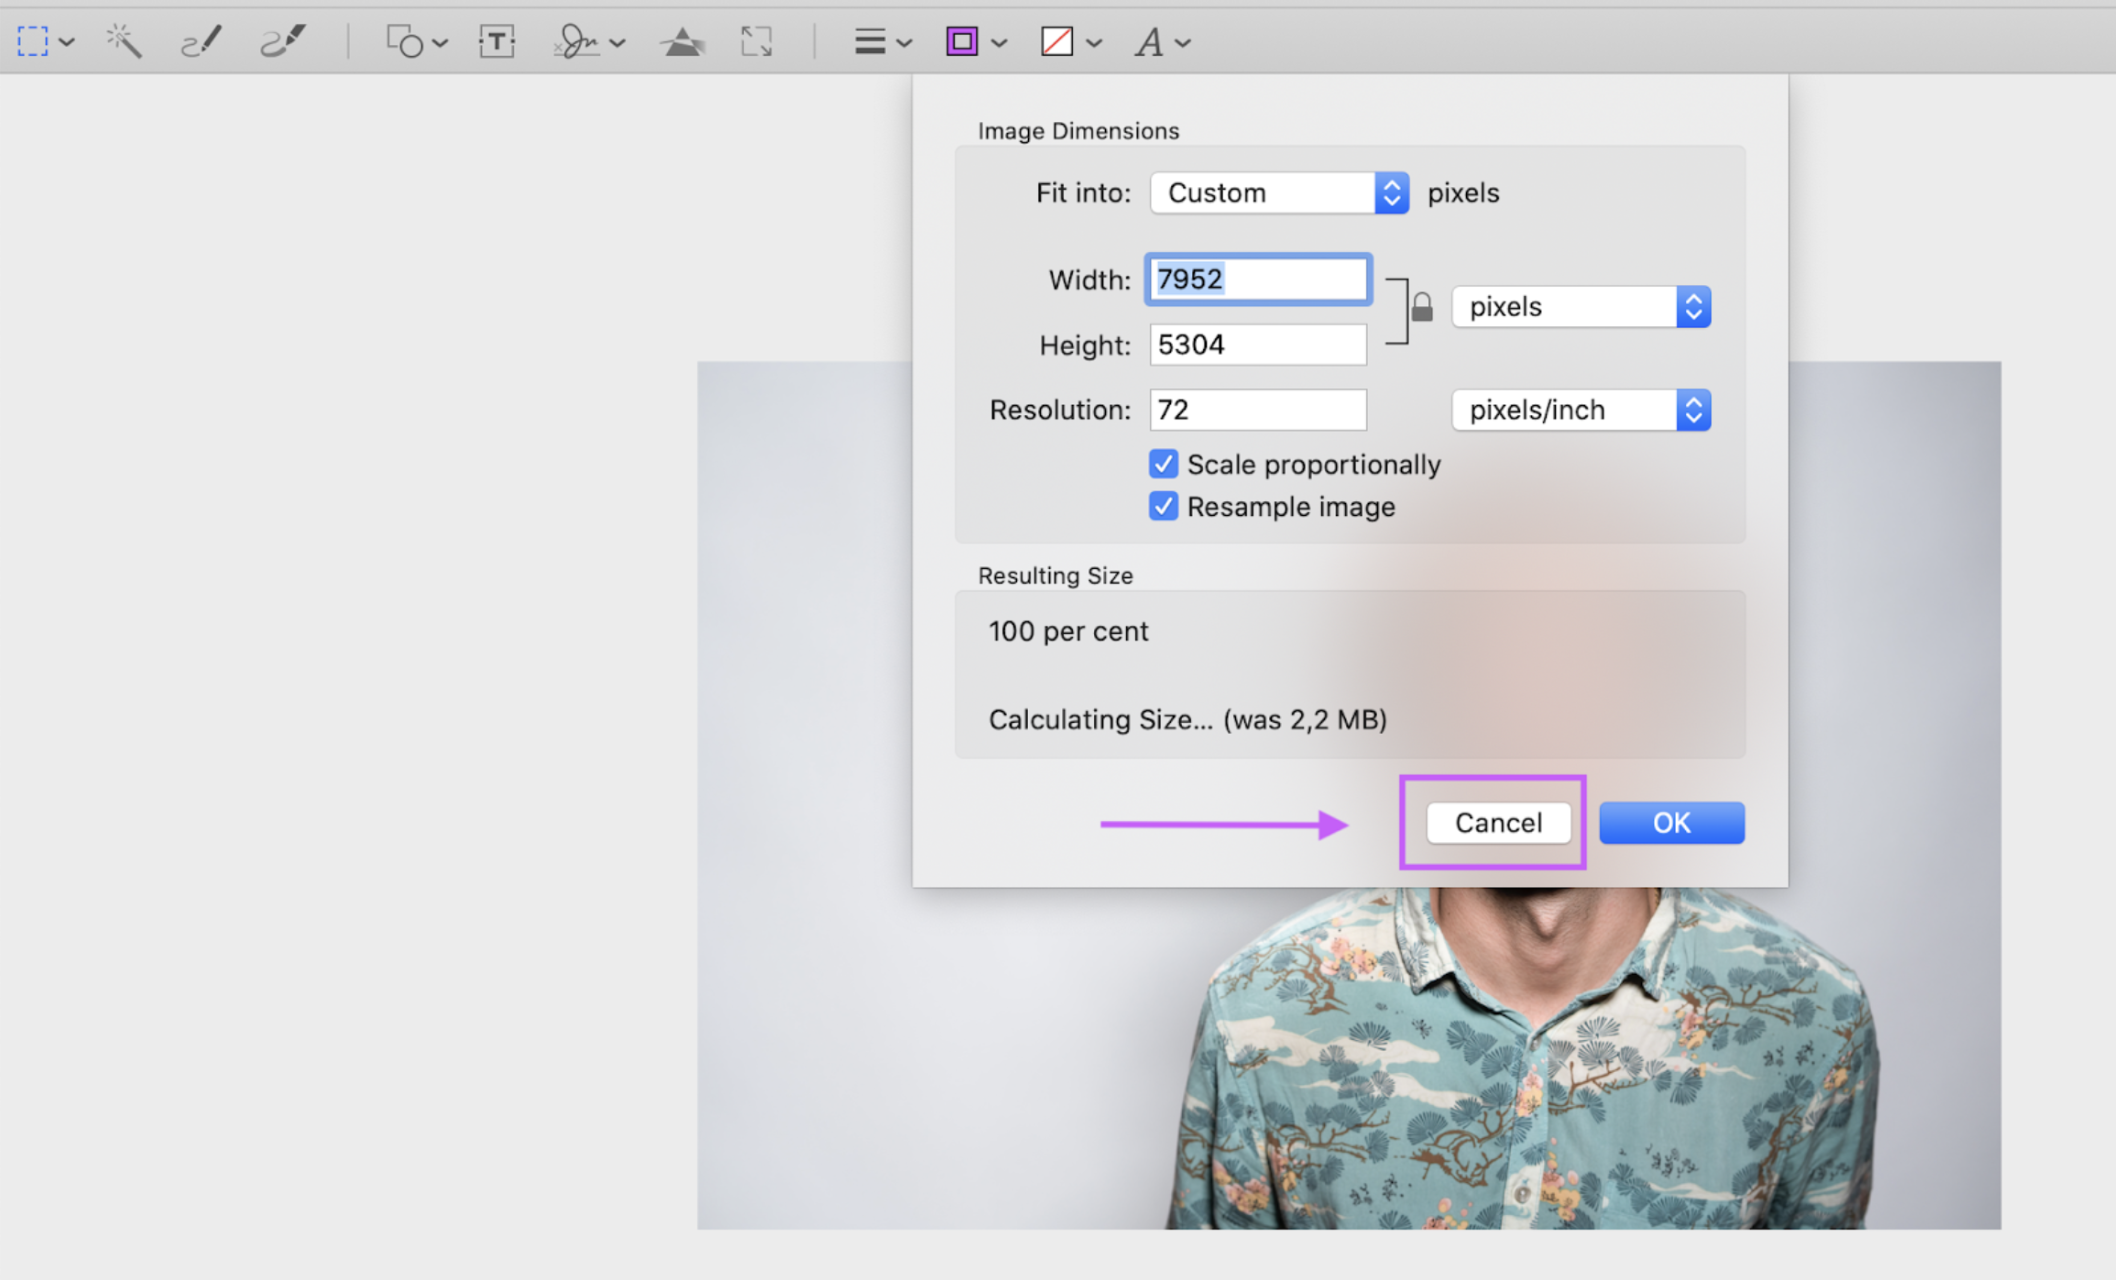
2. The size adjustment tab will open up; press > Cancel.
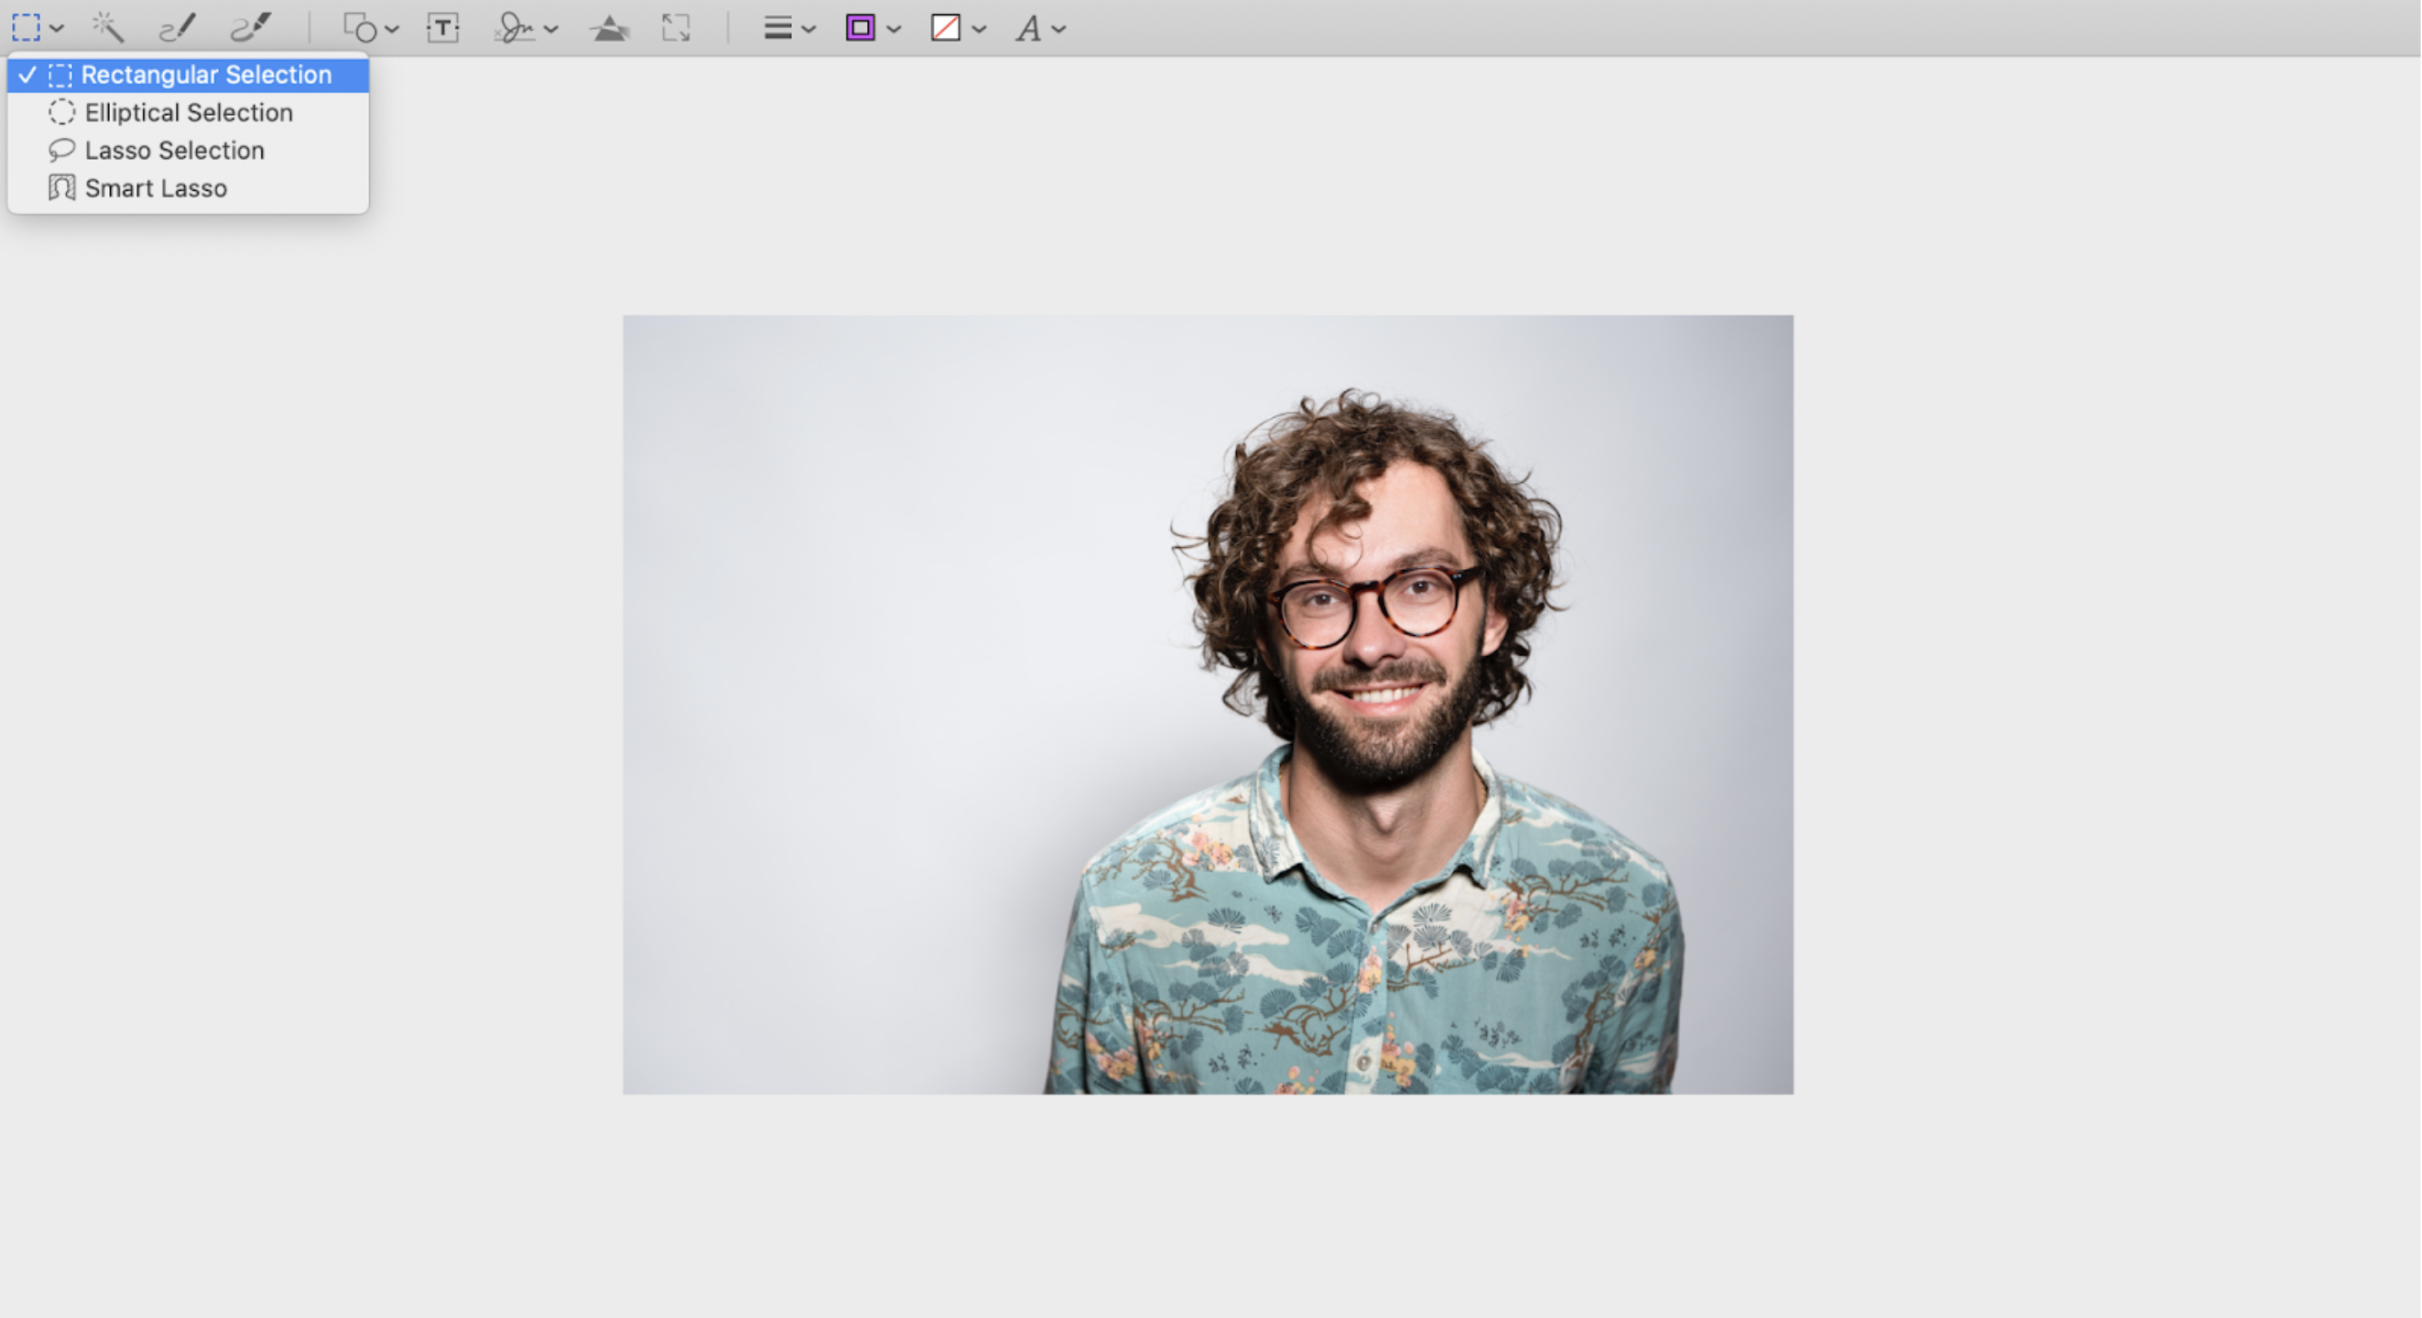
3. Then go ahead and go to the left square symbol and select > Rectangular Selection.
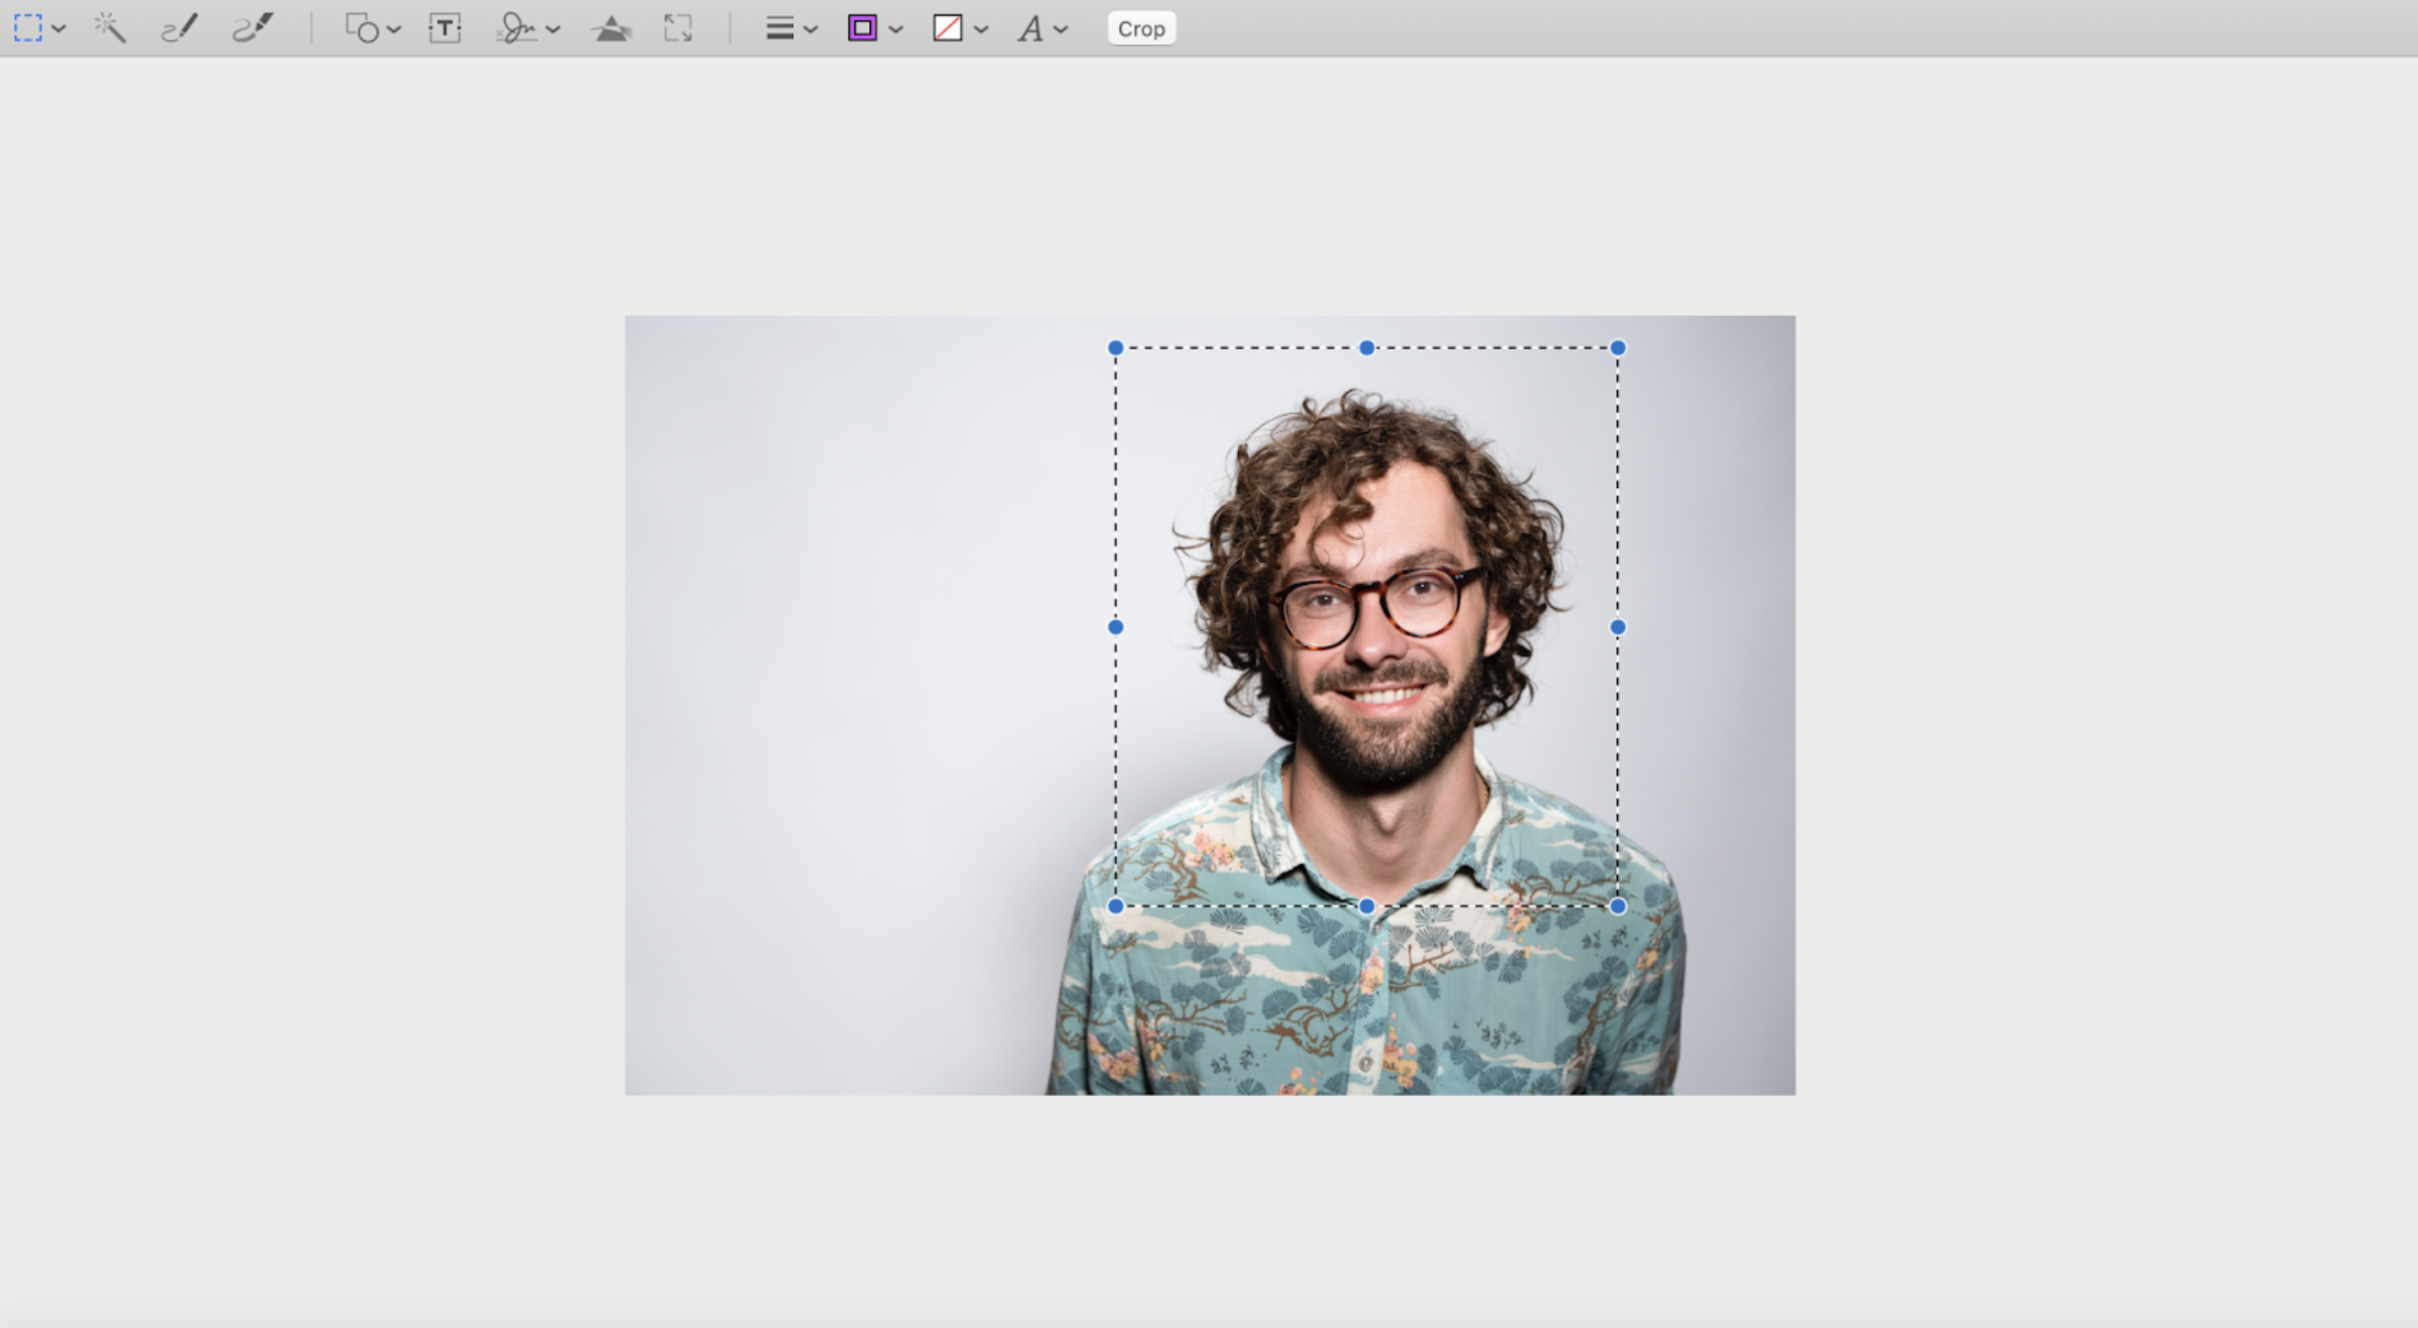
4. Then draw around the face in a square format to frame the profile picture.
5. Now it’s time to adjust the pixels, so open up > Tools > Adjust Size again and add a height of 410 pixels.
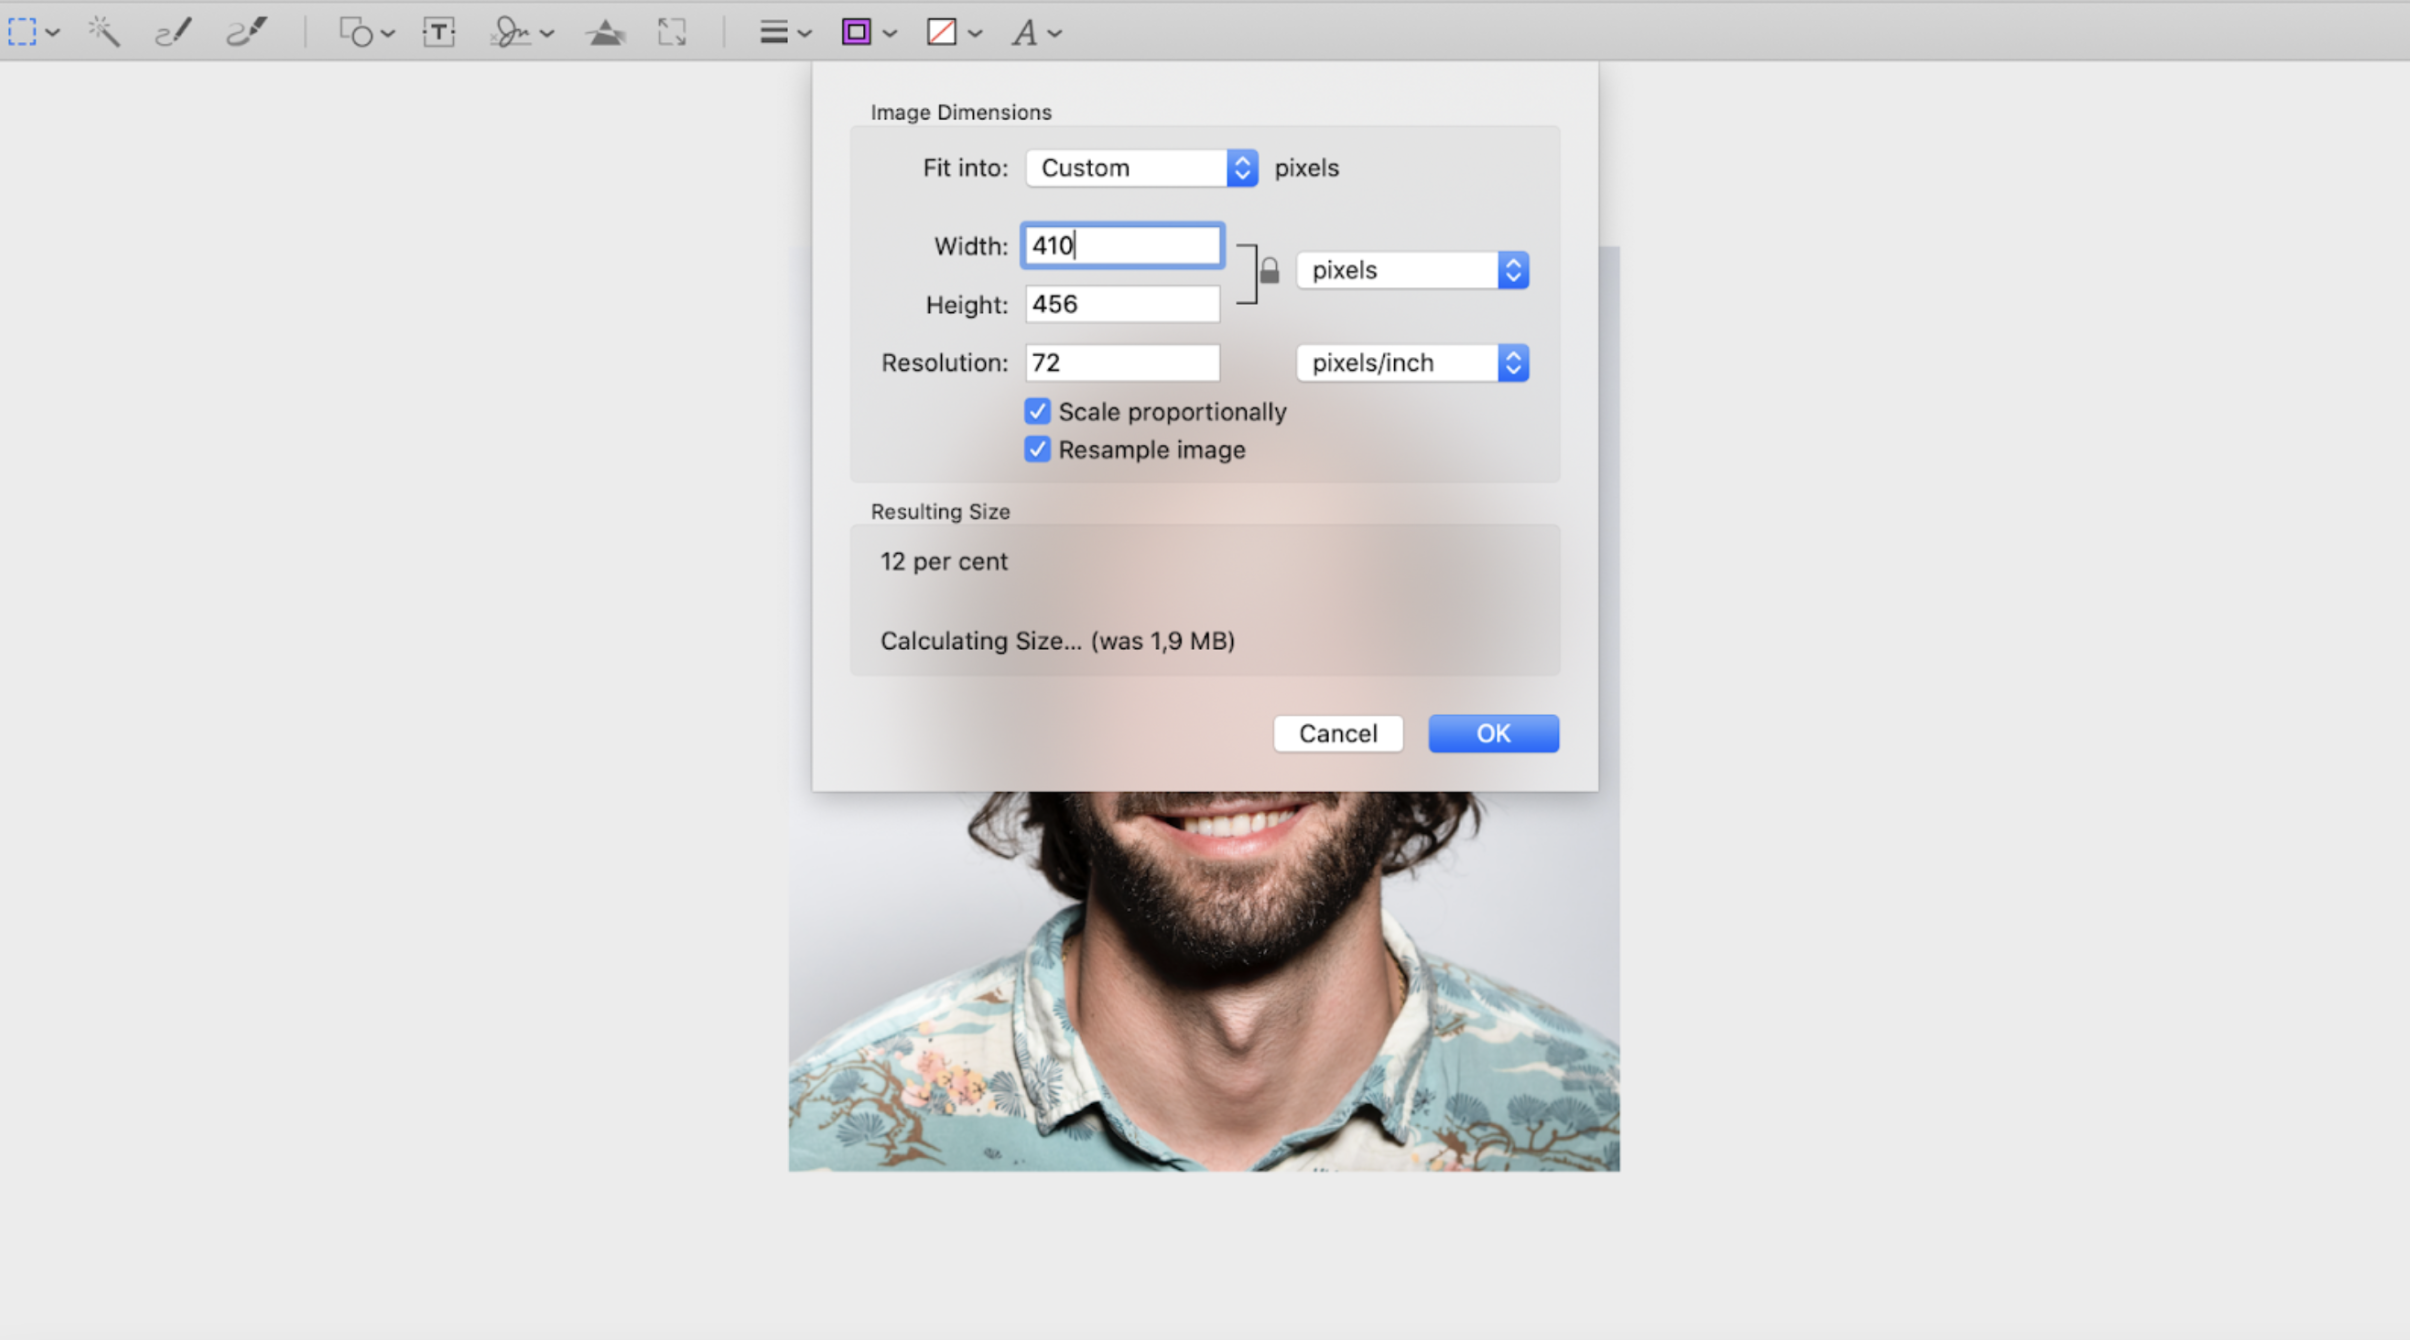
6. Now go back to your rectangle selector in the top left hand corner.
This time draw a 400 x 400 pixel rectangle and center it around the head. Like this:

7. Voilà! Now your profile picture will be the perfect size and ready to go on social. Hit > File > Save.
4. Frame your face
A mistake many people make when taking or cropping a profile picture is that your face is too far in the distance and takes up too little of the profile picture. That’s the shyness coming through — because when you’re only looking at the picture on its own, it can seem rather in your face to take up so much space, right?
It seems a little ‘too much,’ but the thing is, once you upload it to a platform like LinkedIn, you’ll see that your profile picture is actually not that big, and there are a ton of other elements around your face that distract from it.
Your face should actually take up 60-70% of the full shot, and little background should be seen. We also recommend testing out different versions of your profile picture and cutting out less or more background to find the perfect ratio for your profile. Then, use a simple photo editing tool like your desktop photo app on Mac or Windows or Canva to crop your image. Just like we showed you above.
5. Don’t even think about taking a selfie
When it comes to being professional, a selfie is not going to cut it. We know it makes things a little harder if you’re doing this on your own but hey — grab your colleague, a tripod, or even make one by propping your phone against some books on a shelf.
Get creative and use the timer function on your phone to take some pictures. Having someone else take it is the best way to go because they can help you adjust poses and feel more comfortable in front of the camera.
6. Choose a plain background
The background of your profile picture really shouldn’t take away from you. It should be as plain and simple as possible and compliment your face rather than distract from it.
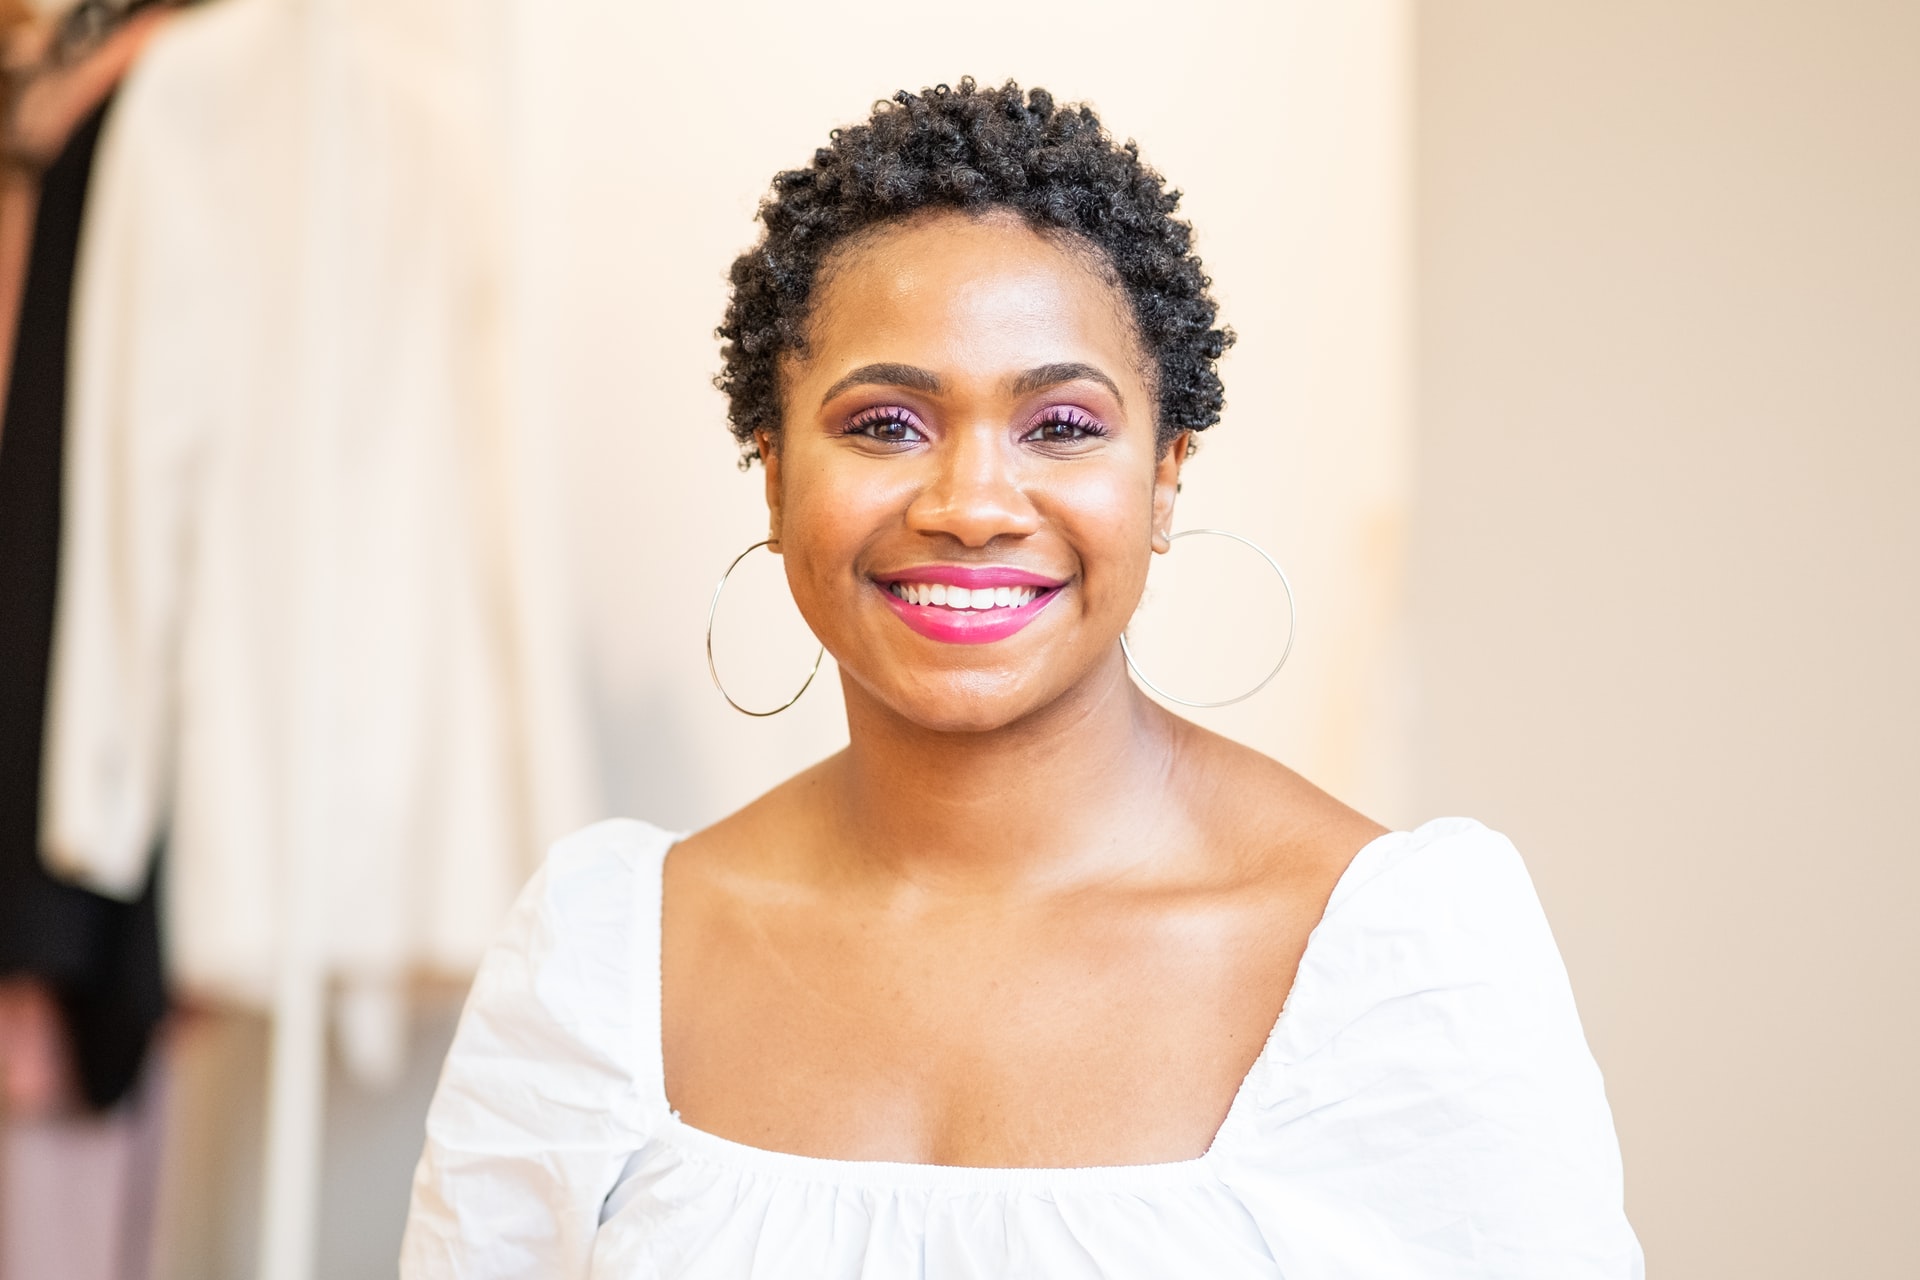
Your safest bet is a white or beige background. The plain background is perfect for a social profile because it can already be quite busy with the text, or banner image. Keeping the background minimal doesn’t distract from what matters most; your face & expression as well as all the other interesting details in your profile.
If there is some noise in the background, it’s best to use a function in the setting that will blur out the background, like this one:
Below, we’ll show you how you can change your background to white, beige, blurry, or whatever color you like in just a few seconds.
You might also choose another background color if it’s on-brand and blends into the rest of the profile well, like this one:

You may remember the hype around the platform Clubhouse; having a colored background actually became a complete hype because just by the nature of the app — tiny pictures of people next to each other, — you could barely stand out from the masses. So people started putting really loud colors as their background, and it worked.
You can easily change the color of your professional profile picture in seconds using remove.bg. Simply go ahead and:
1. Open up remove.bg
2. Drag and drop your profile picture onto the platform. Then, wait a couple of seconds for the AI to do its magic and remove the background; it’ll look like this:
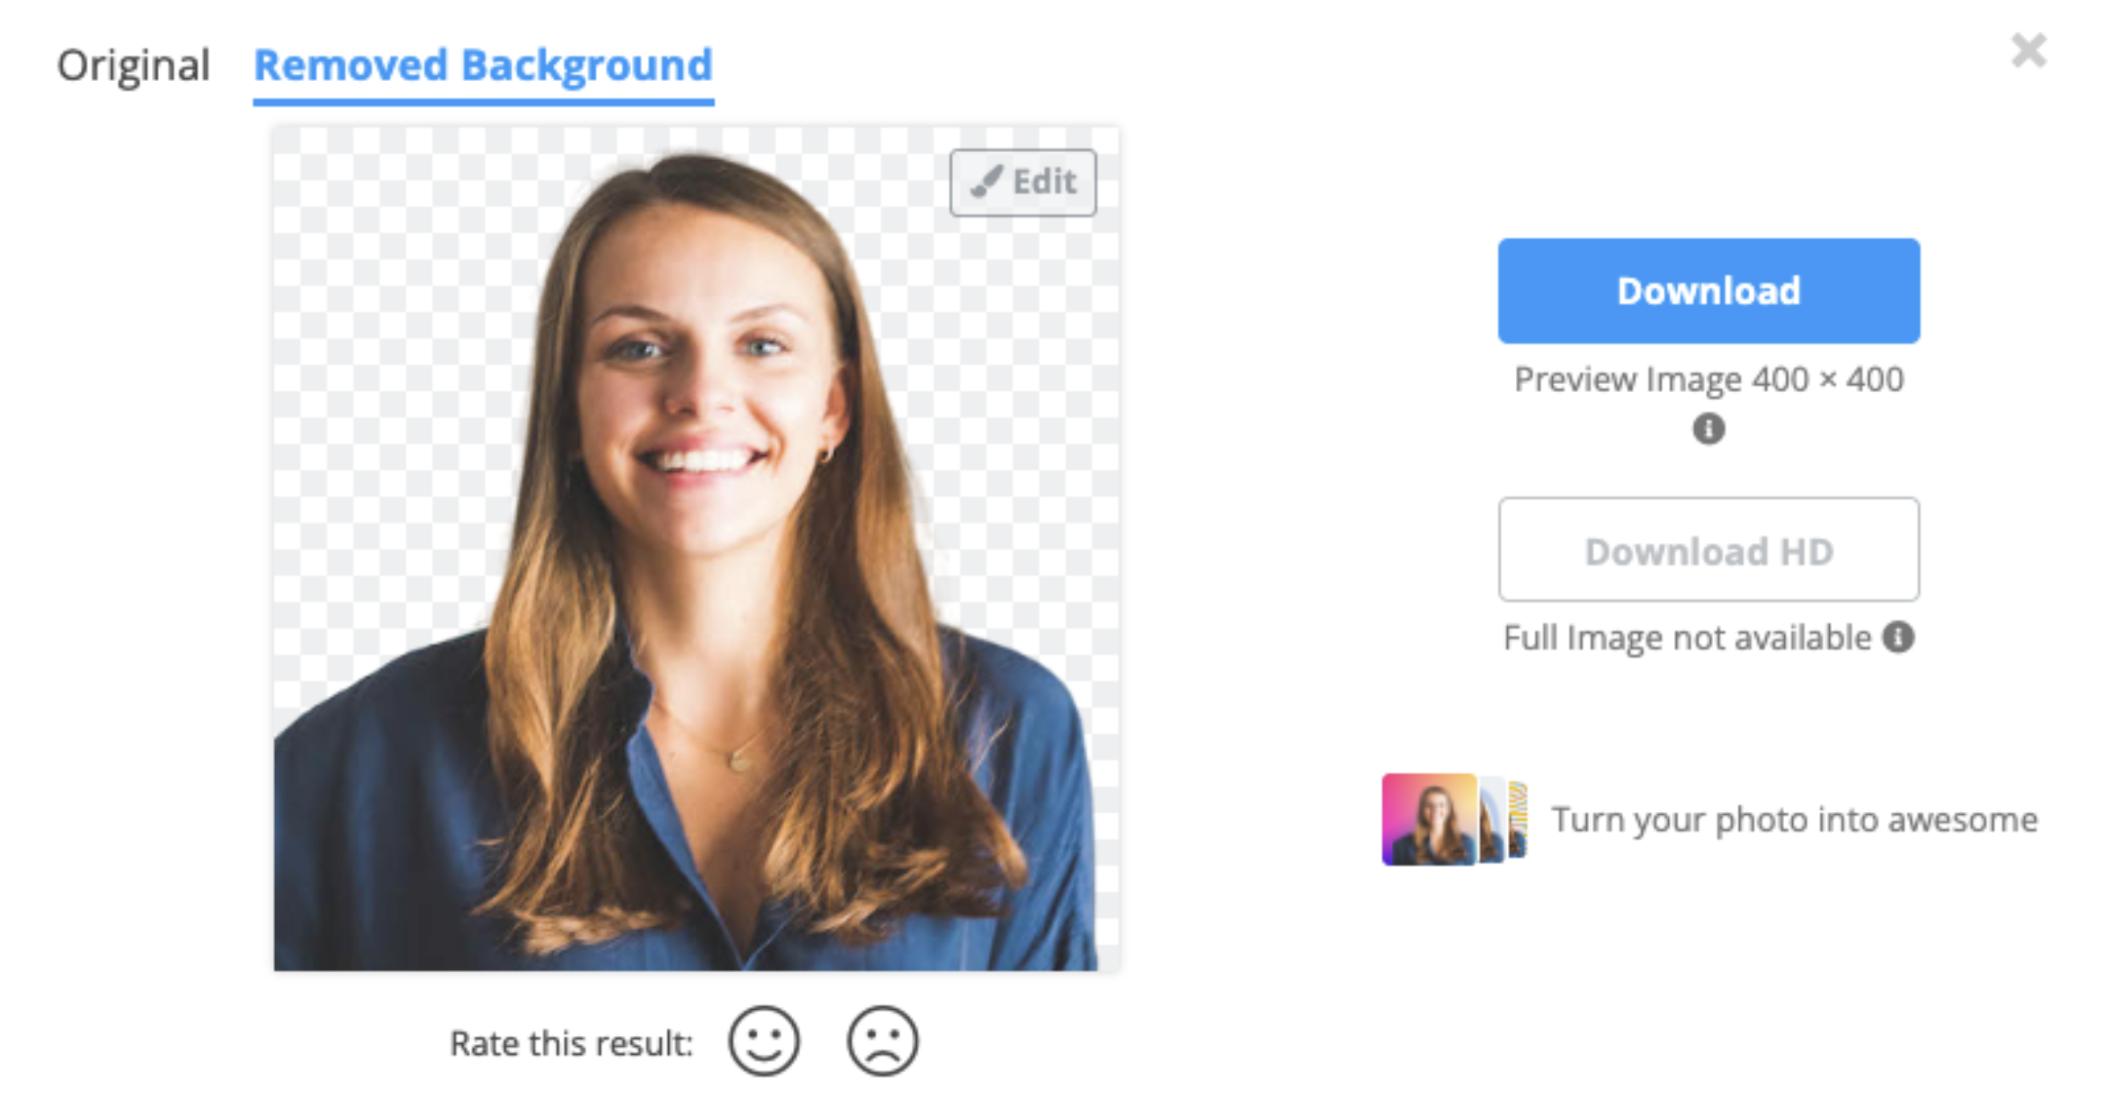
3. Within seconds, you’ll have your headshot without the background; now, you can go ahead and hit > Edit > Background > Color.
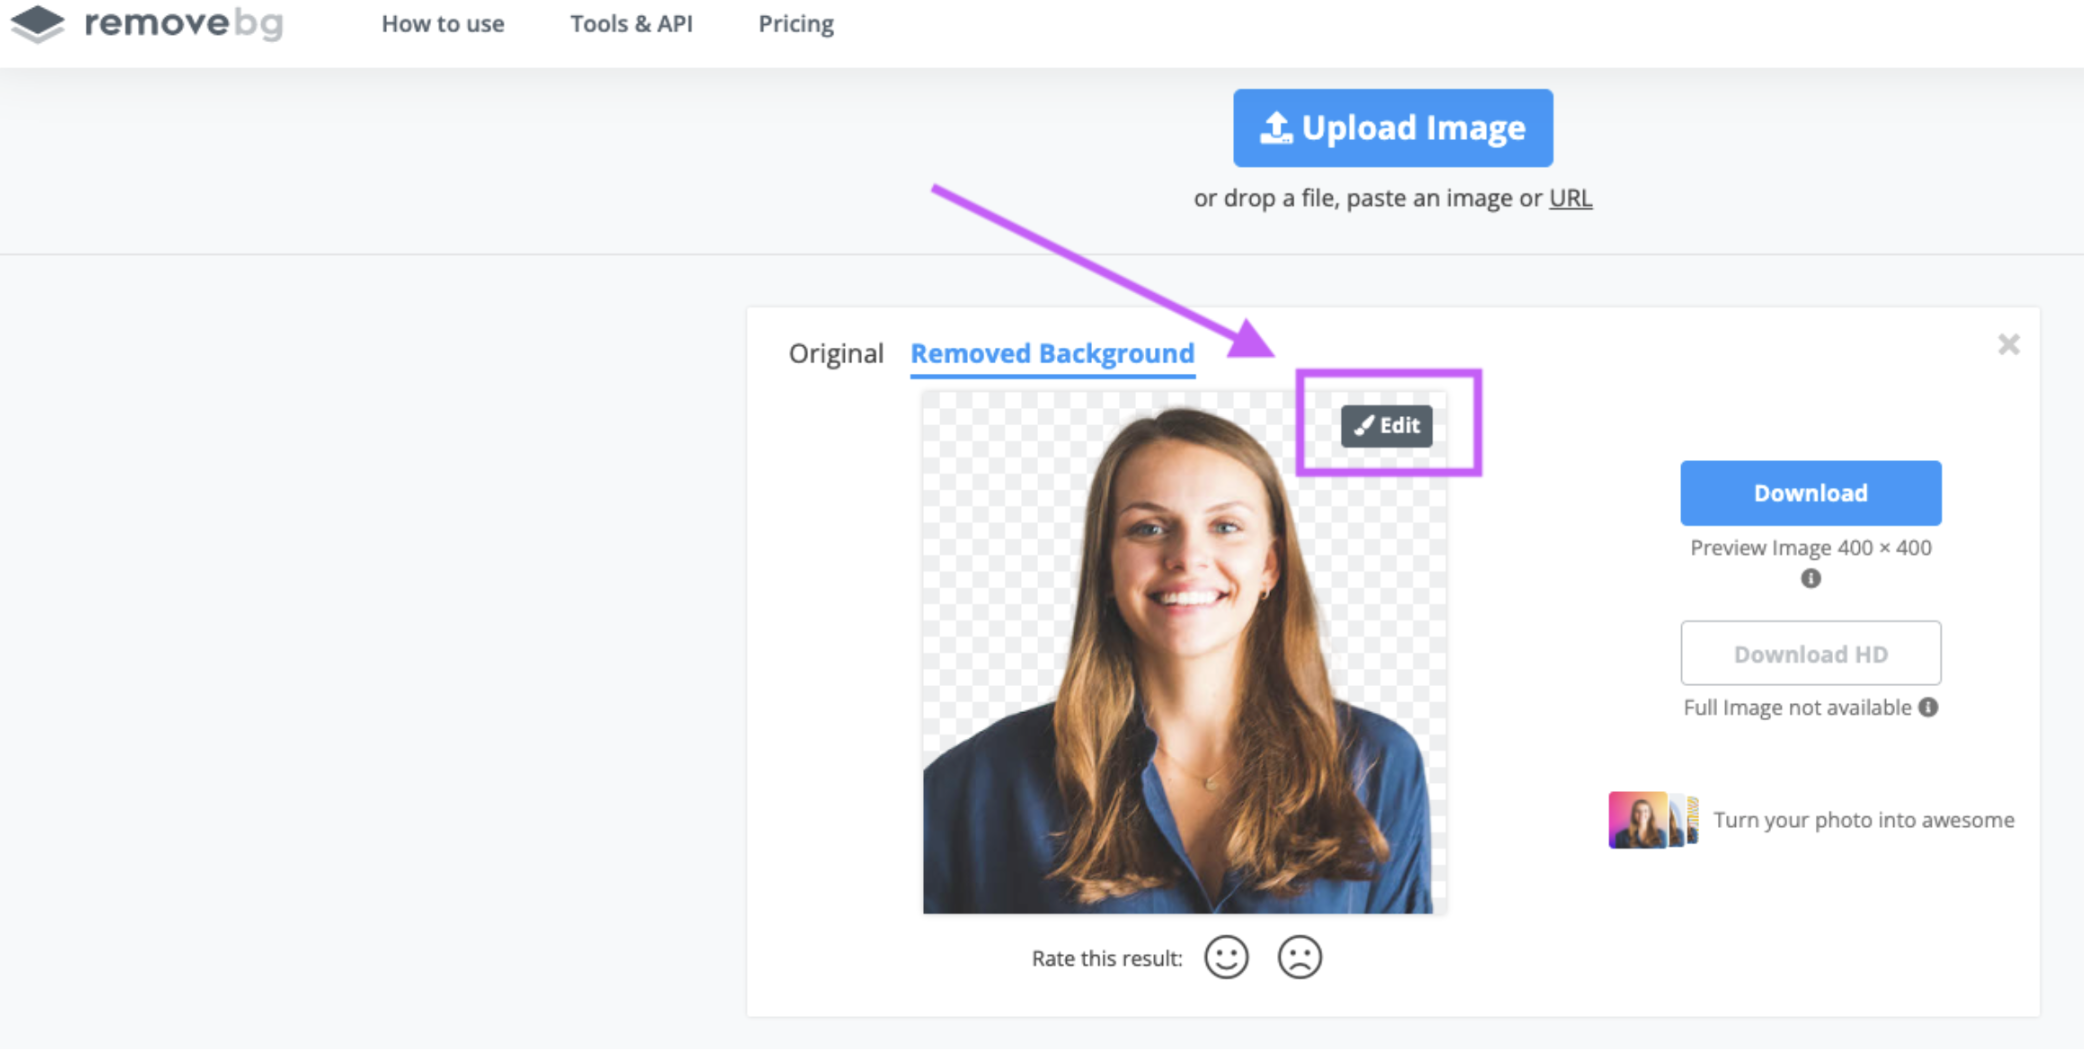
Now you can select the white background or any color of your choice. By clicking on the icon with colors in it, you can even add your very own brand HEX color.
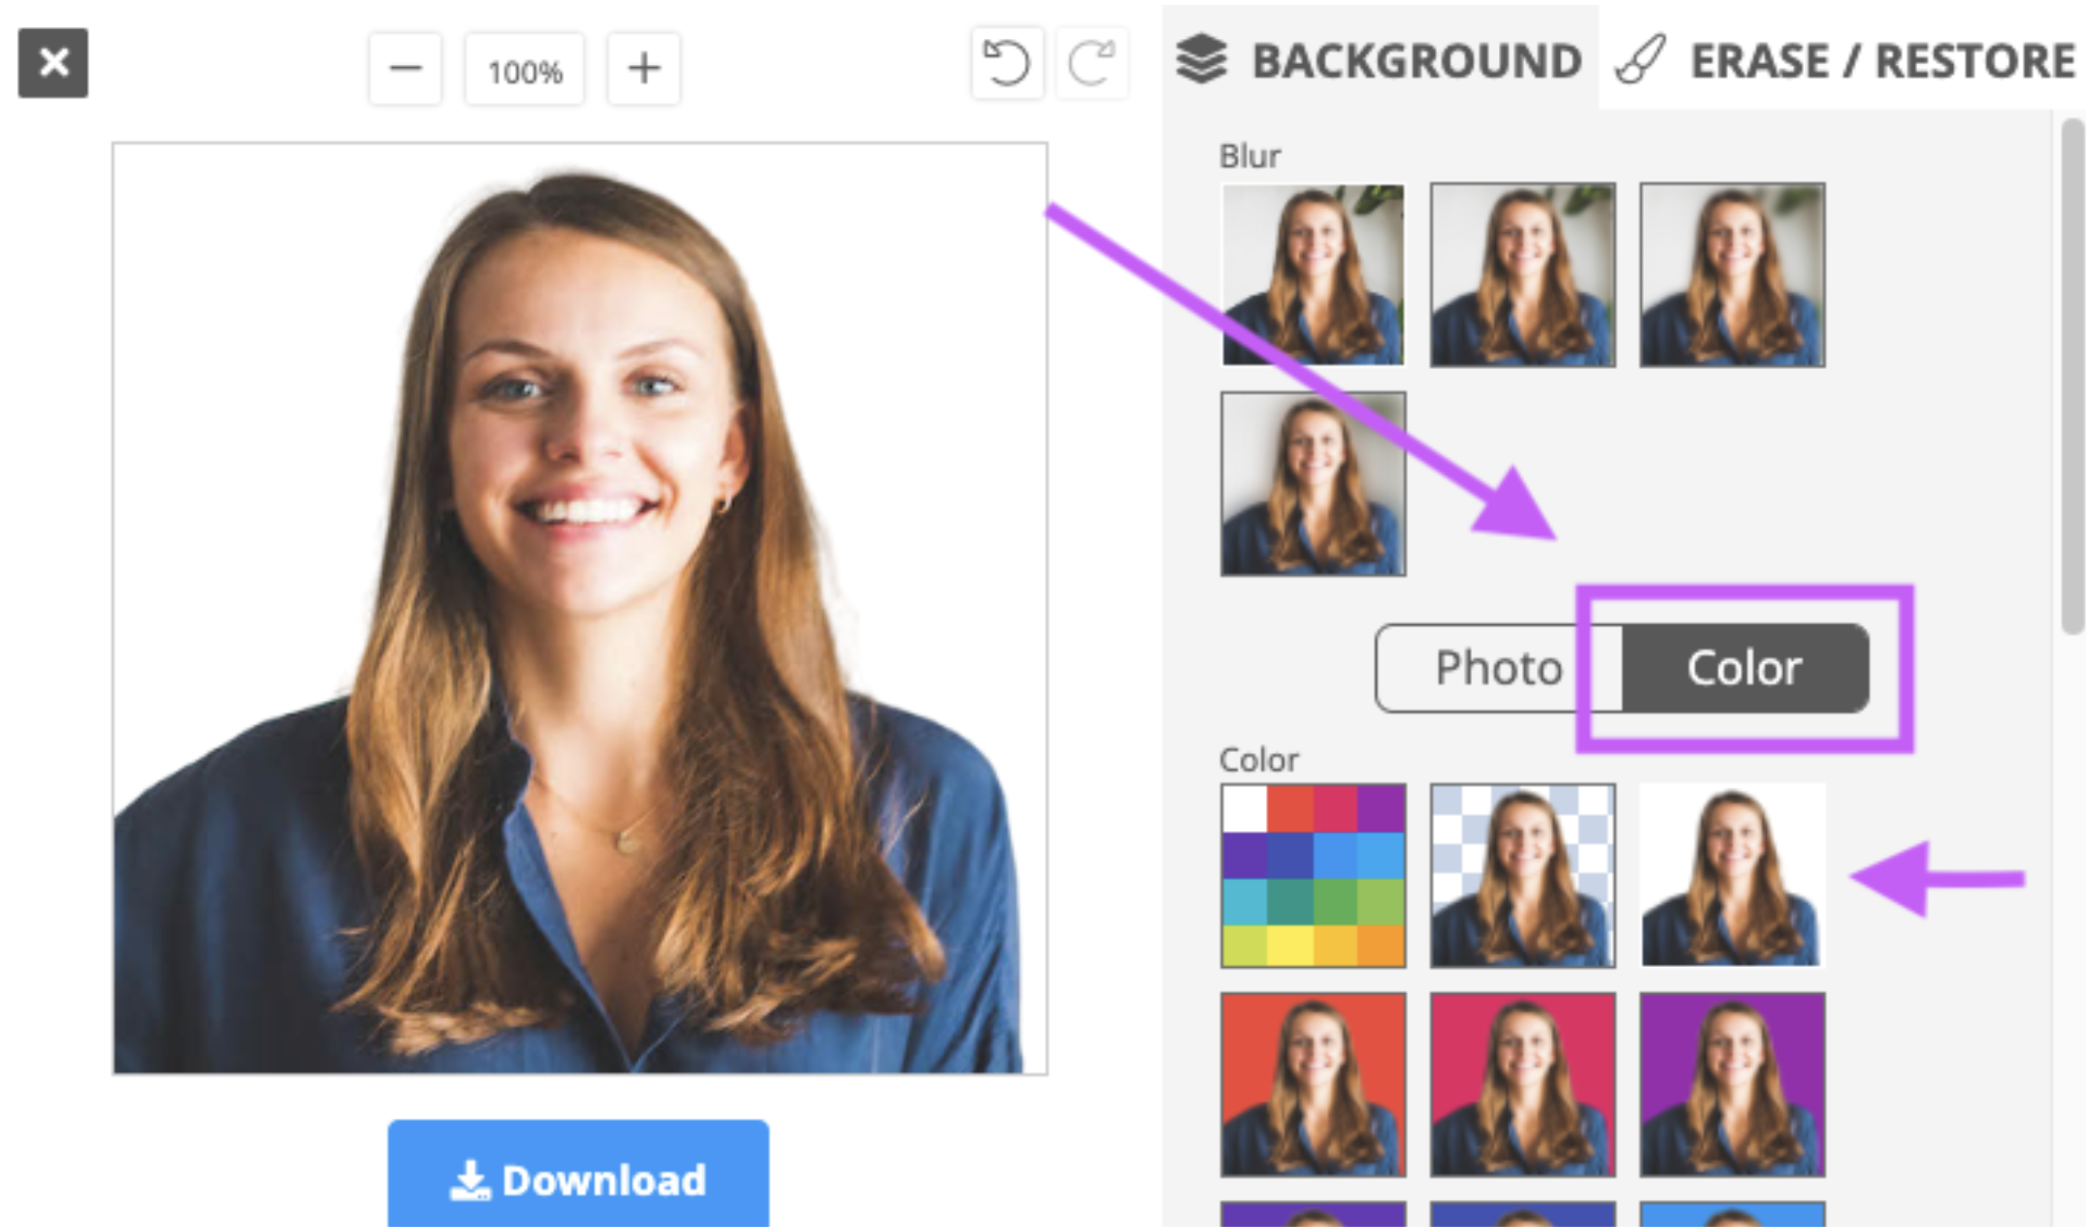
4. Above the colors, you will also find the Blur effect; here, you can blur the background to make it seem like you were using a DSLR camera. Pretty neat, right?
5. Now hit > Download, and voilà, your profile picture is ready!
Whether you choose to go for a white or colored background, we recommend keeping it to one or two colors max; otherwise, it’s just too messy.
7. Make sure your face is in focus
A blurry profile picture seems unprofessional. Make sure your camera is in focus, no matter if it’s a physical one or a phone. On the phone, you can ensure it’s focused by simply tapping the person’s face on the screen, and the lens will refocus.
8. Use soft natural light
To keep things natural and friendly, we definitely recommend just going for natural lighting — you can stand near a window and face it to get the best possible result. This will make your profile picture look more authentic and friendly.
Want to find out more about lighting and how to control it in your photo? Check out our post on color temperature and managing the lighting in your images.
9. Take several shots so you can choose your favorite one
When you’re shooting your pics, it's good to just go for it: try different angles and poses and really switch it up to find the perfect one. You can use Pinterest to brainstorm some ideas.
The moral of the story is: take a lot of shots so you can truly pick your favorite one. If you're doing it with a professional photographer, they will do the same, preselect the best ones (especially looking at image quality), and give you some options.
10. Rename your file for easy finding
Once you are done shooting your profile picture, the most underestimated tip of all is where and how you save it for easy access.
As you move along in your career, you’ll frequently be asked to share a professional picture of yours. You’ll need to access it quickly, which is why we recommend changing the file name to YOUR NAME - PROFILE PICTURE. Then store it on your desktop or shared cloud drive, so it’s easily accessible, and you’ll have it at the ready in just a few clicks.
Alright, that sums up our tips on how to create a professional profile picture. Already have one and want to switch up the background? Head on over to remove.bg to do just that in seconds.
Bonus Tip: If you are a large organization and you need to create headshots for your team or your whole company, there are all-in-one solutions, that let you manage and coordinate business photos on a bigger scale.
댓글