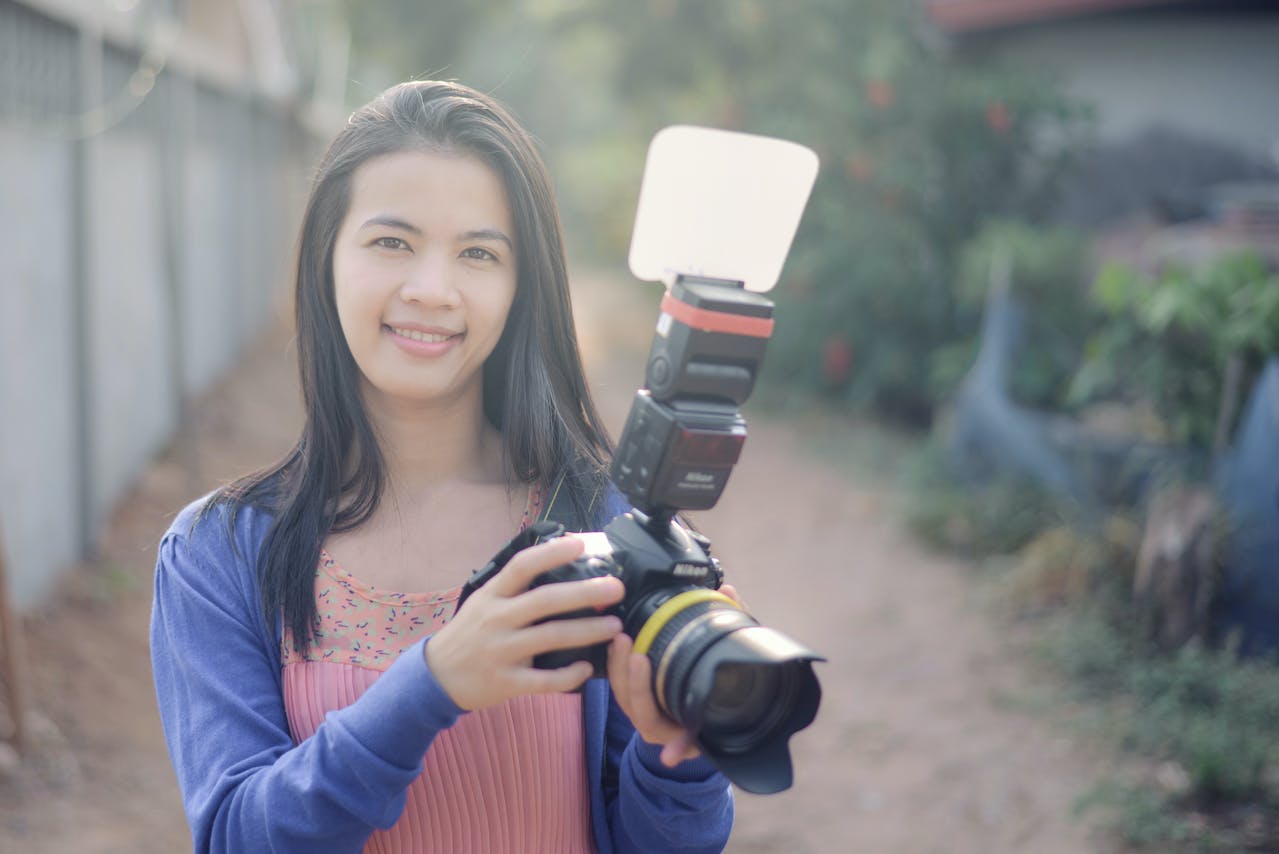
High-volume photography is a challenging and fast-moving business that requires incredible amounts of precision and efficiency on top of a passion for photography.
Customers – often proud parents – demand high-quality images. They want the best possible pictures to look back on as their loved ones grow and change or have an excellent memento of an important event such as a new baseball season.

Photography businesses must produce expert results and meet constant deadlines even when there is increased seasonal demand, such as the annual fall rush of yearbooks in the United States. The quality needs to remain consistent even with, say, the addition of ten or more extra contract photographers in the field. If a studio’s quality output falls or they constantly miss deadlines, their reputation and workload will suffer.
As well as photographers, high-volume photo studio managers need to run a staff of editors, tech support, and administrative staff to keep producing excellent results on time and to the client’s specifications.
目錄
Tech knowledge required
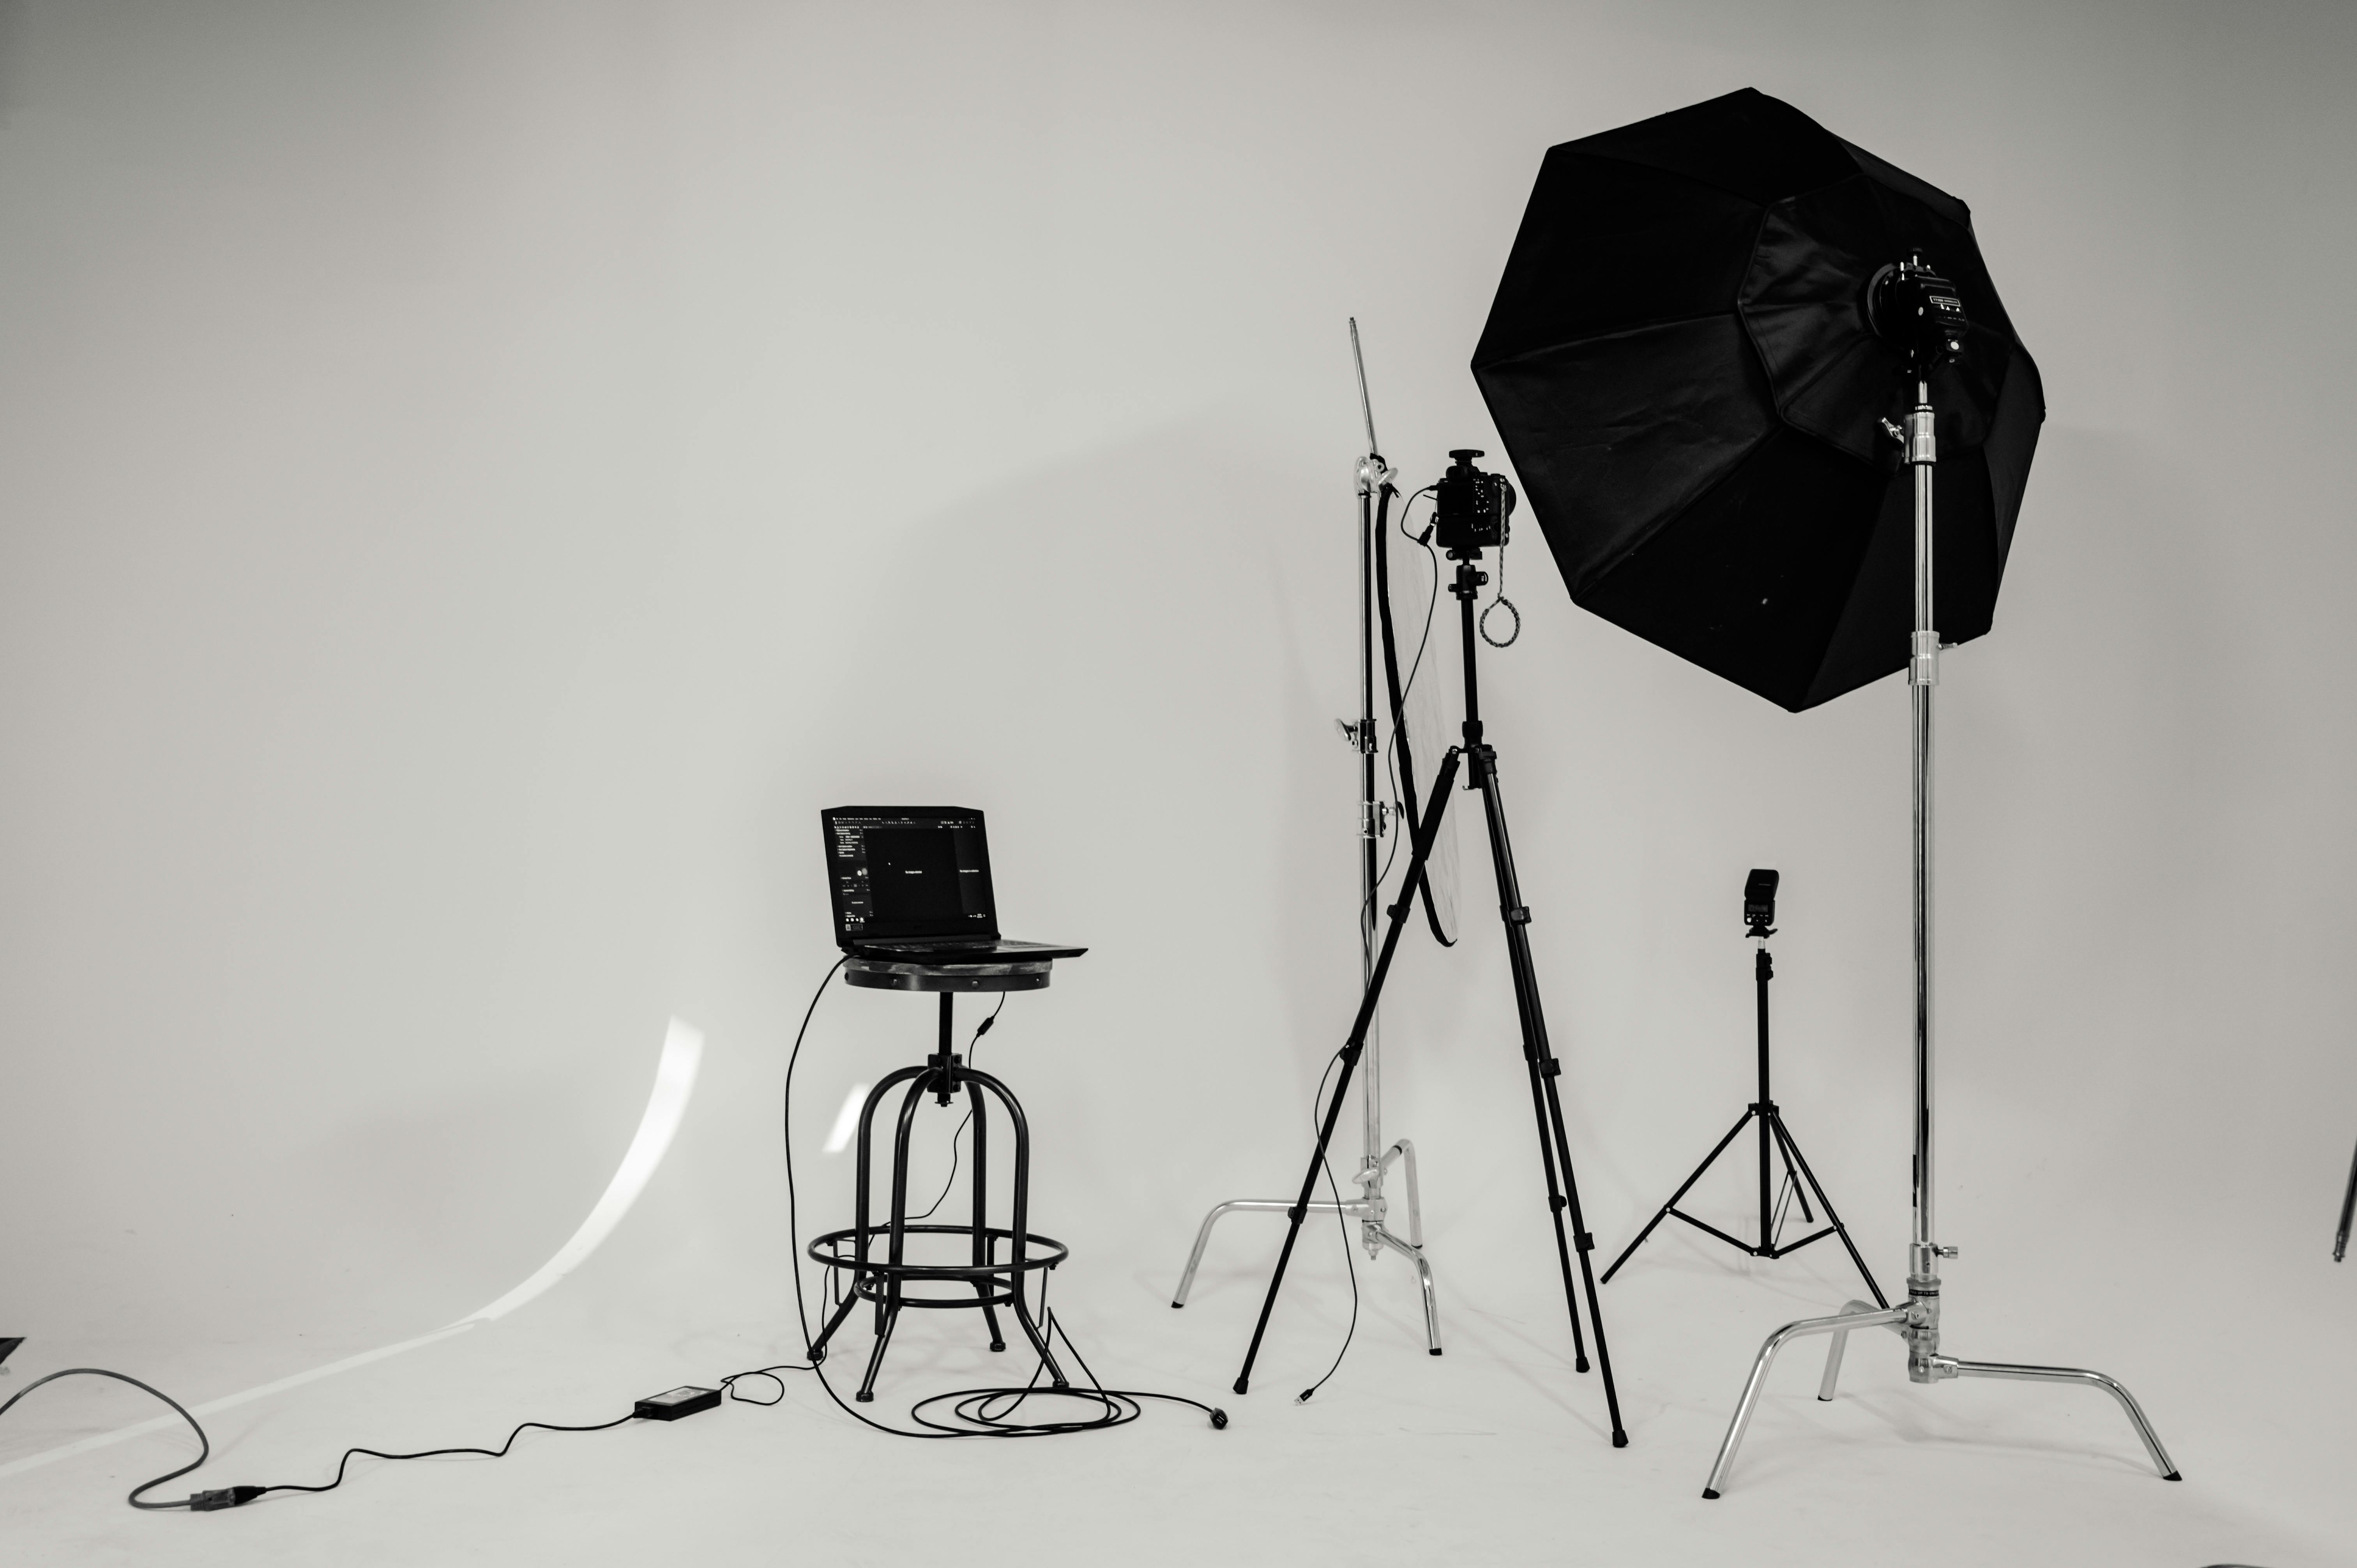
To ensure efficiency, quality, and creativity, high-volume photo studios constantly investigate the latest technology and software so things run as smoothly as possible. This is typically founded on specialized cameras and lenses so images can be captured and uploaded with the minimum fuss. Many studios also rely on greenscreen technology so they can switch out backgrounds back in the studio.
Increasingly, business is carried out online once the photograph has been taken with an intricate production workflow ending up in delivering sales online to customers in a secure area.
Nearly all high-volume studios also use a quality control (QC) system in this workflow. This makes sure the exposure is correct, the image is in focus, the colors are accurate, and more. Increasingly, AI can flag any suspect exposures.
Some studios send bulk images to editing teams in lower-wage countries who carry out these tasks, including background removal and replacement, for cents rather than dollars.
Workflow management and automation software can be used to manage images as they move through these processes, tracking progress, and ensuring timely delivery.
Complex to set up
While the benefits of QS and workflow management are so obvious that many studios consider them essential, they are expensive and can be complex to set up. The process needs to be carefully considered from booking clients, taking, uploading, and editing photos through to payment and delivery.
As mentioned, high-volume photography studios are always looking for ways to improve their workflow. remove.bg helps photographers make removing backgrounds easier, better, and more efficient while saving time and money – and freeing up resources for more profit-making activities or a much-needed rest!
remove.bg is completely revolutionizing the post-production process of school photos. You can remove and add a new background to a whole batch of photos in just a couple of minutes — an incredibly effective way to scale your business.
It has developed a number of tools for making industry-standard background removal simple including a simple online editing interface for consumers and an API.
But the two tools which are most valuable to high-volume clients are the remove.bg desktop app, most useful for bulk processing, and the remove.bg Photoshop plugin, which can be used on a more ad hoc basis.
Before we dive into the explanation of how these tools work, we are going to walk you through:
How you can improve your school portrait workflow before and during production.
Tips on how to raise the standard of your shopping experience for parents: increase your offering and have every school coming back for more.
How to improve your pre-production and production workflow for school portraits
There are many things you can do pre-production to improve your workflow — so you can work efficiently, scale, and provide the best possible service out there.
Prep is half the work
So that everything goes smoothly on the day you want to prepare for what’s to come. Make sure you know:
How many kids will you get to photograph?
How much time will you have?
How will you be delivering the images to the kids? Can you give the kids a QR code to hand to their parents or similar to make things simple?
Will you have the opportunity to sell to the school subtly? Hand them a discount for their next booking or similar.
Know where the photos will be used. This will help you define the angle and shot.
Taking notes of these things in a notebook will make things easier later down the line.
Prepare how you’re going to file and organize your images
You need to stay organized with so many kids and classes. Be sure to schedule your work beforehand or while shooting in a way that makes post-production much less chaotic. Calculate the number of kids you have and the you can allocate to each kid.
Also, matching kids to photos without a plan in action is absolutely impossible, but here are some great insider tips:
Have a memory card for every grade.
Have each kid hold up a sign or a dry-erase board with their name and grade on it so you can easily identify them later.
Or use a tool like ENTAGGED, which specializes in tagging large-volume photos. You scan a barcode assigned to each kid and attach a small device to your camera — it will then assign the photos automatically to the kid's name.
This will not just make life easier but will also raise your margin as you work more efficiently.
Find a spot in the school where the kids have peace and quiet
When shooting your shots, but you want the kids to feel comfortable. Choose a quiet spot where you can both have privacy. So you can focus on your work, and they don't feel like they are being watched. At the very least, put a divider in the room so the other kids don’t see /can’t distract the one who’s in the limelight.
Have your camera and setup ready in time
Time really is of the essence when you’re shooting so many kids — make sure you always have your setup ready, whether at the beginning of the day when you arrive 1–2 hours early or using the minutes between kids to adjust settings.
Time tracking might actually help you as well — just having a simple stopwatch at hand to know how much time you can devote to each kid.
Make sure your lighting is on point and consistent
The kids' pictures need to be consistent; otherwise, the yearbook is going to look very odd — the best way to ensure that is to use artificial lighting. Use lights from both sides, pointing straight ahead at the kids — but definitely use a filter to avoid it being too harsh.
Artificial lighting is a great way to ensure that the kids are well-lit, so we recommend opting for it instead of natural light. This will also streamline editing in the aftermath.
Get the kids comfortable and ready to take their pic
You have a lot of kids to get through — we get it, but take a couple of minutes to get them comfortable. Chat with them about their favorite game, give them a quick challenge, or let them take a peek into the camera. Getting them comfortable will ensure the pics you get of them will also look good.
Make sure you get a group shot
Every kid wants to remember their classmates and school teacher (well, most do, if they didn’t have a bad experience). Either way, a group shot is a valuable thing to have to look back at in time.

Make sure you get the entire class together with their teacher so they can have that snapshot for later down the line.
Alrighty, that wraps up all of our tips on how to improve things before and during your school portrait production. But what about after? Let’s dive in.
How to improve your post-production and sales workflow for school portraits
Once you’re done with your school portrait shoot, it’s time to make the post-production process efficient.
You’re also going to want to hand over the school photos in a way that makes the shopping experience easy and fun so that they feel happy to order more than one product.
Use remove.bg to remove and change the background of school portraits
A great way to scale your school portrait side of the business — is to give parents more options to choose from. The easiest way to do just that is to change the portrait's background: different colors, styles, and designs. And with remove.bg doing that is no longer a process of a couple of hours; it takes minutes.
Here’s how you can test out a school portrait to see what the results will look like. Here’s a quick example:
Open up remove.bg.
-
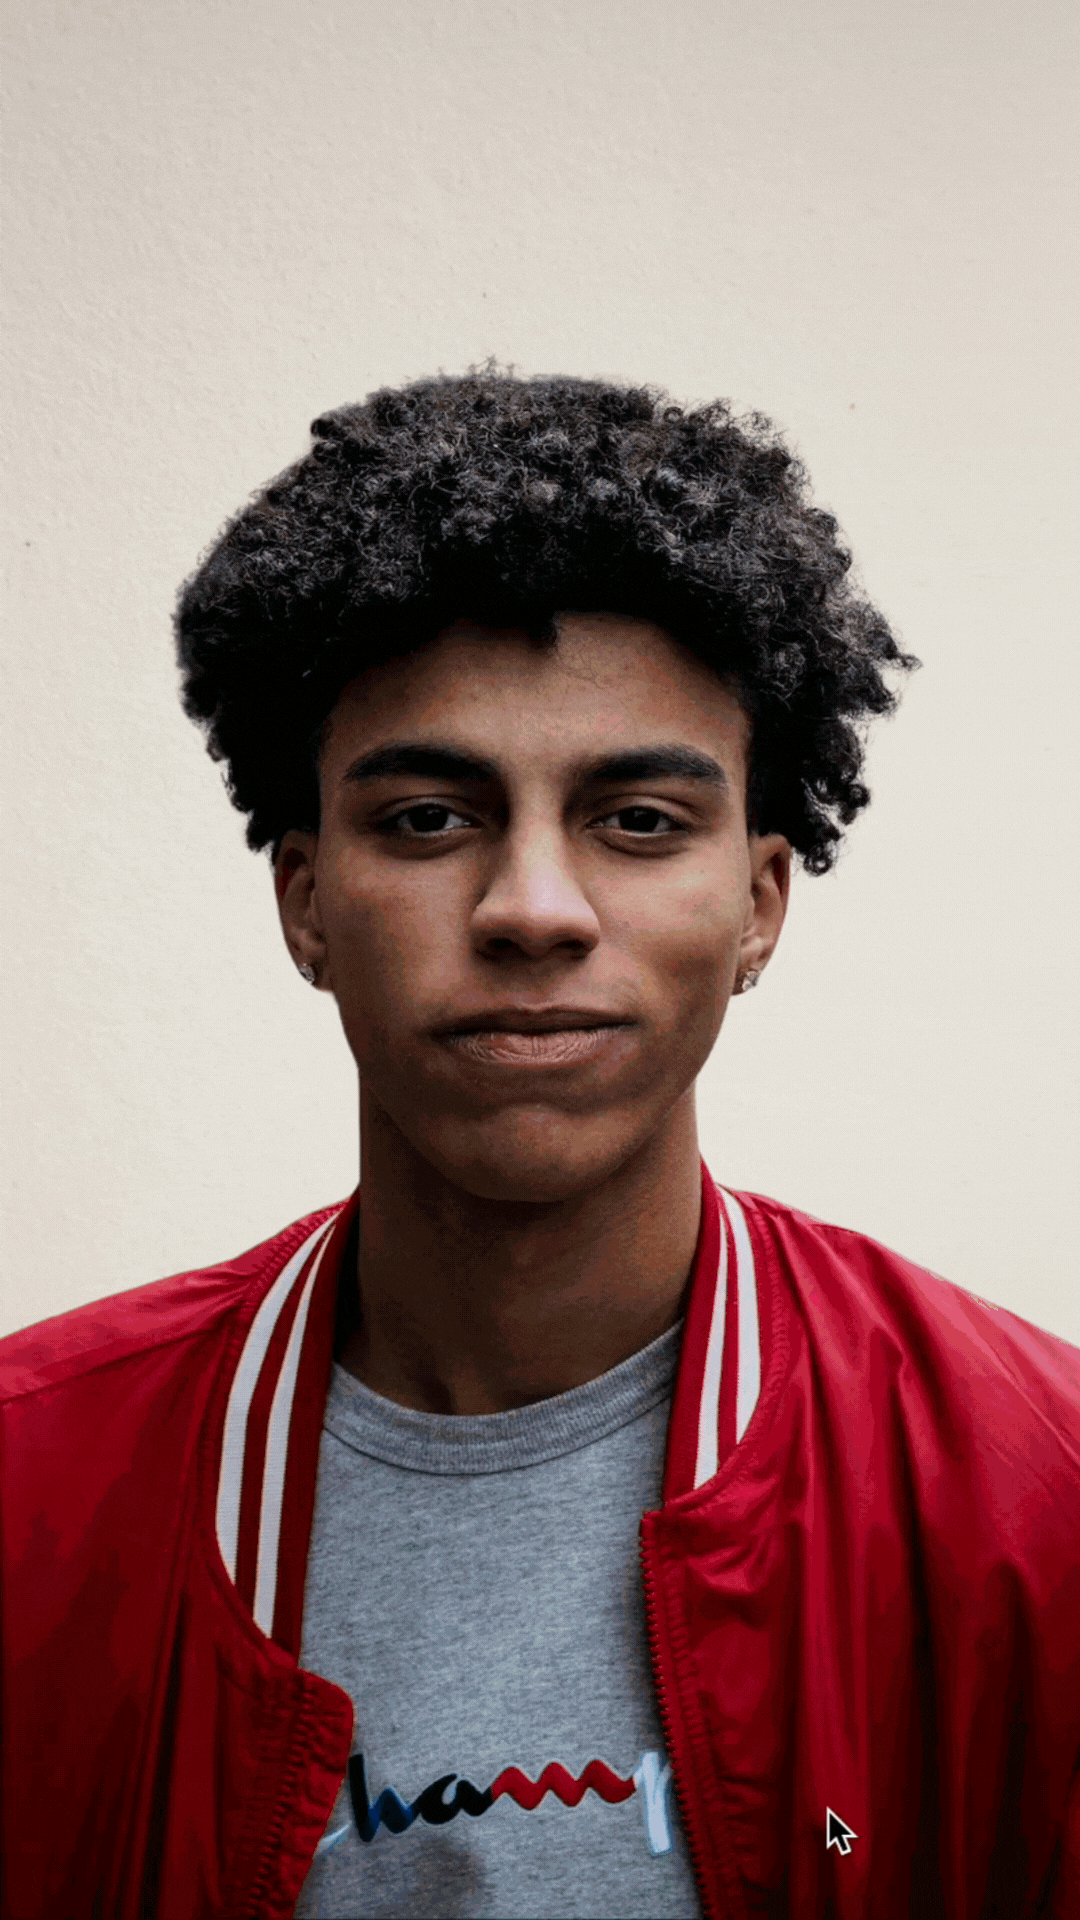
Drag and drop a portrait onto the tool. In just a few seconds, remove.bg will remove the background like this:
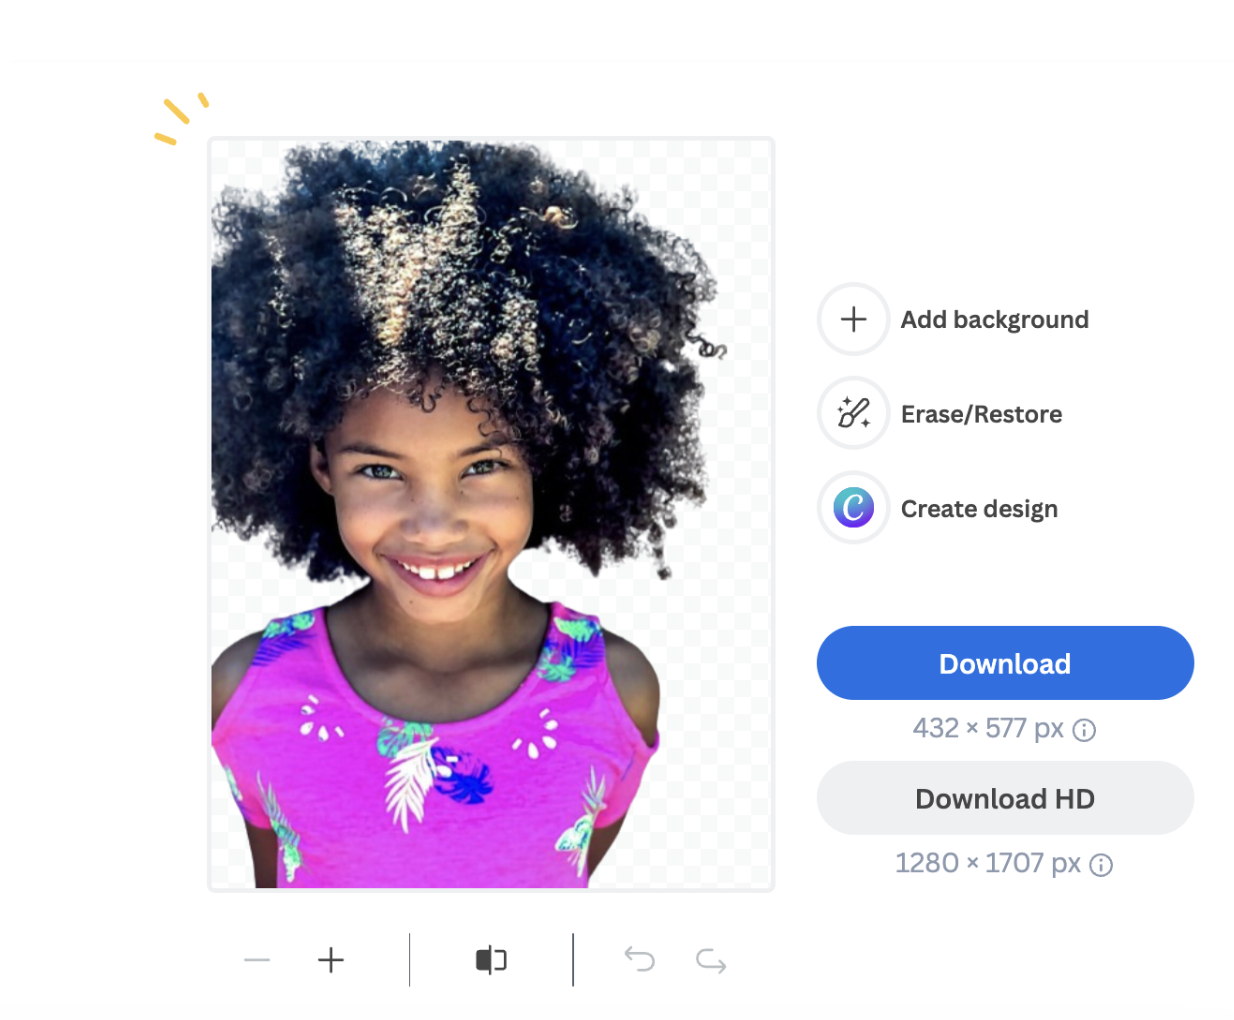
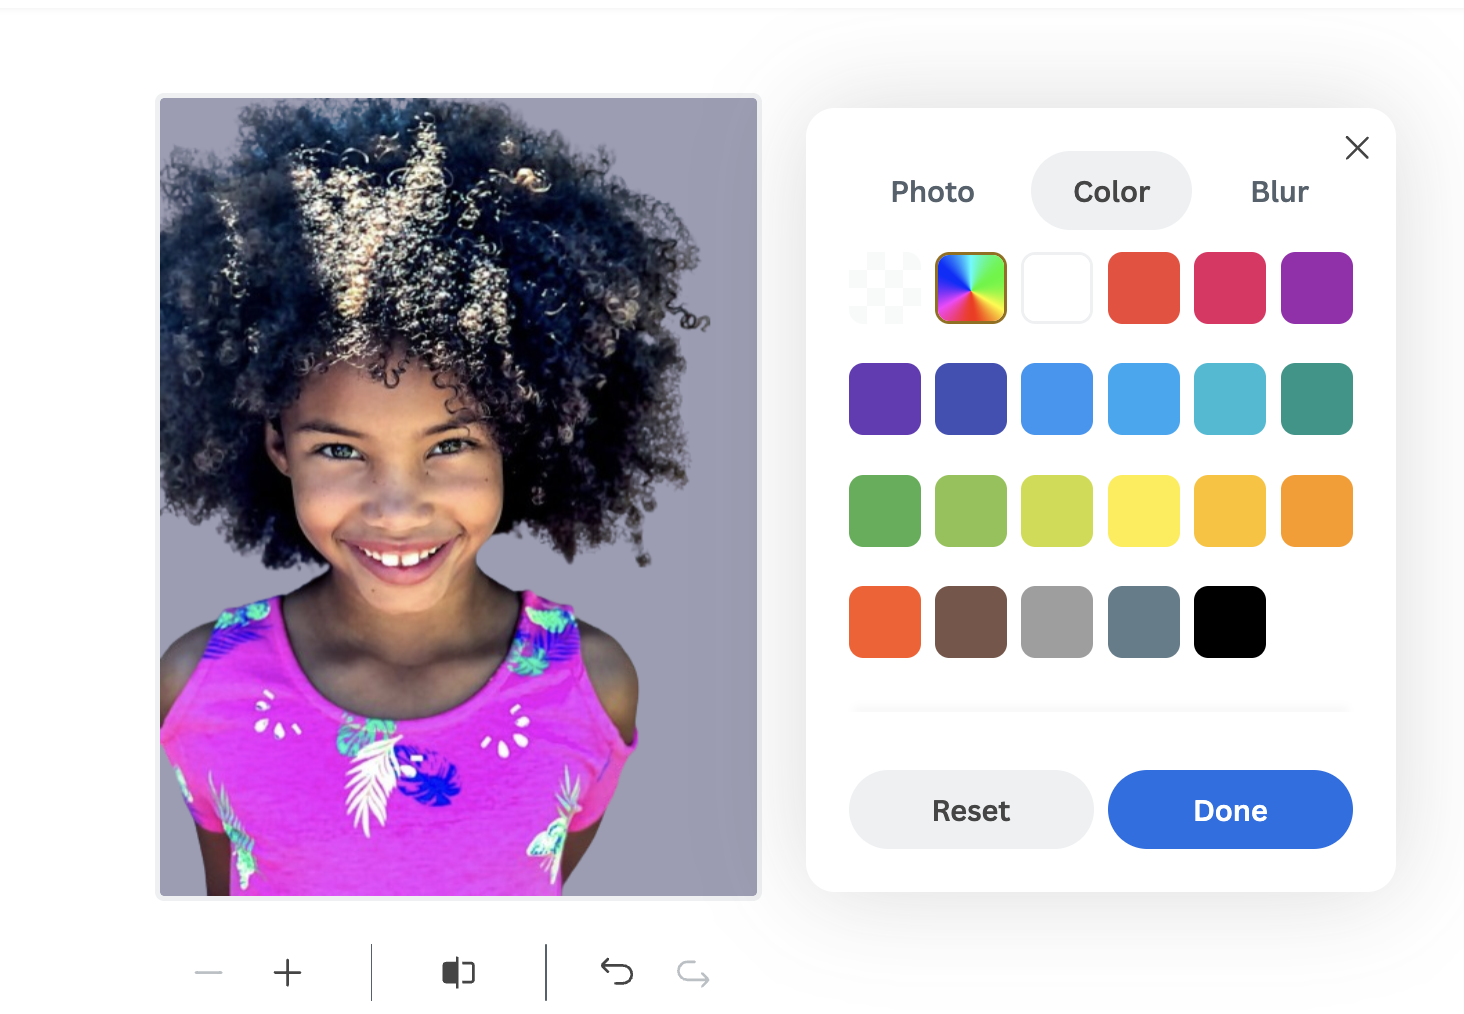
3. Now go to > Add background and choose a background you like.
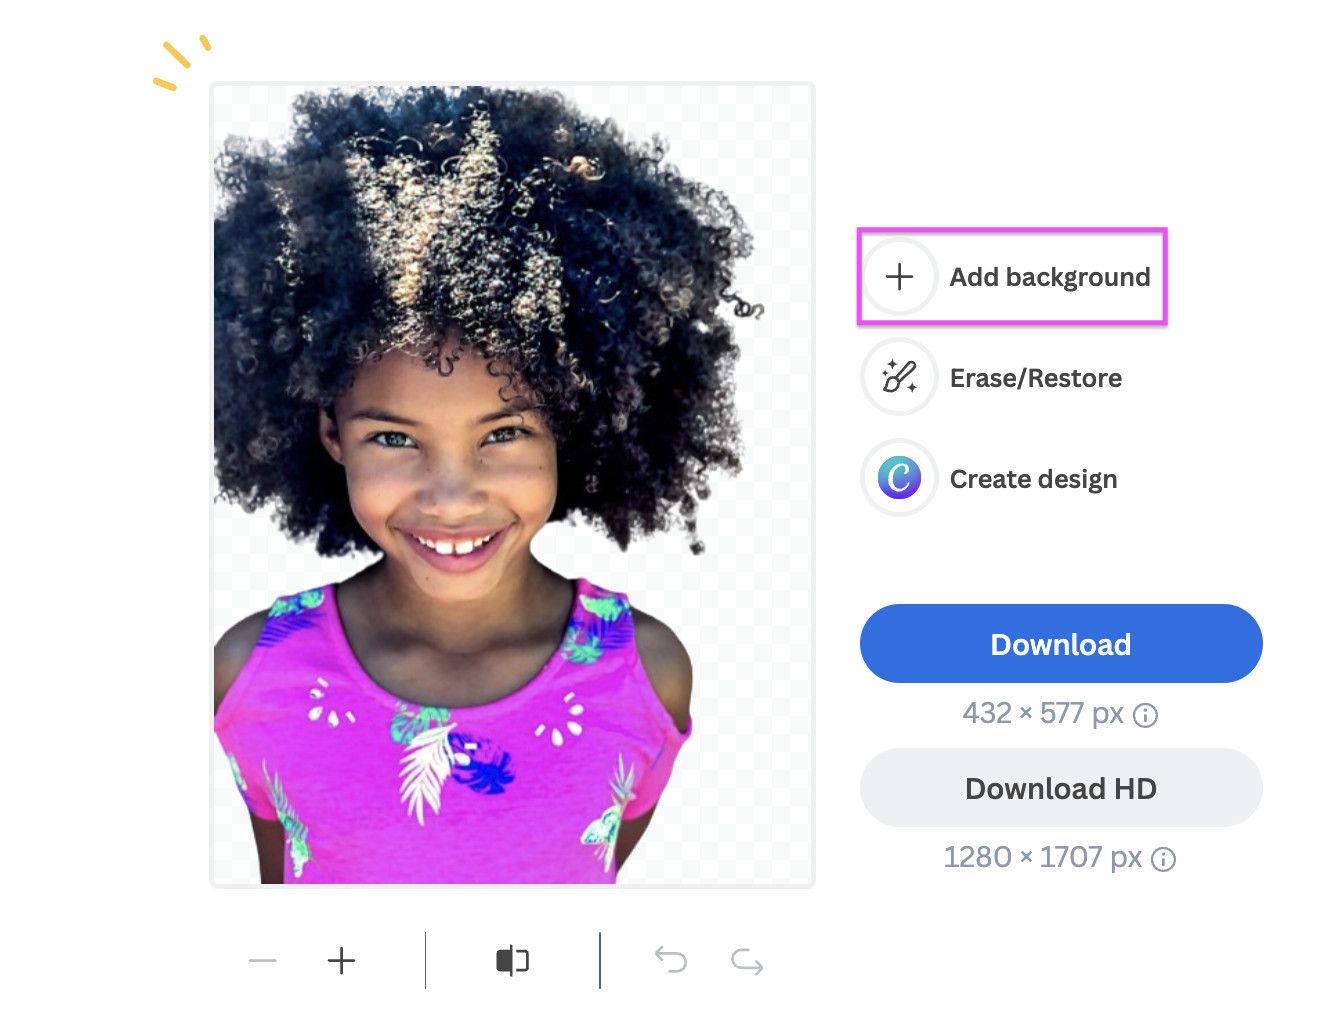
We played around with these “color” ones:
Below, we’ll show you how you can batch edit the background of images, so ultimately, you can process your images in bulk with many different backgrounds.
4. You can also upload a unique one by clicking on > + (Upload background).

5. Once you’re happy with the image, go ahead and download it by selecting > Download or Download HD (for 1 credit).
Amazing! This is what our finished result looks like:

If you want to apply a background across all your school portraits, you will need to use the remove.bg desktop app. That way, you can use it for bulk image background removal, processing all your photos at once. It’s magic, really, because you can simply upload all the kids’ portraits and apply the same backgrounds.
remove.bg desktop app
Here’s a quick overview of how you can go about doing this:
Go ahead and download the remove.bg desktop app — either Windows, Linux, or Mac, depending on the device you work on.
Once the download is complete, go ahead and open the application.
3. Click on > Get started and log in or sign up to create a remove.bg account. Once you’re logged in click on > Close.
4. Now it’s time to upload your portraits. You can do that by dragging and dropping them into remove.bg.

5. Choose the background you want to apply to all images by going to either:
Transparent background, in case you just want to remove the background and continue your editing in another tool like Adobe.
Colored background, here you can add a custom color by adding the # hex code.
Or perhaps you want to upload your own unique background. To do this skip to the next paragraph.
6. Choose the output size between auto, full image or preview only. A preview image will be smaller but you won’t use up a credit.
7. Make sure you have the desired Output Folder or click change.
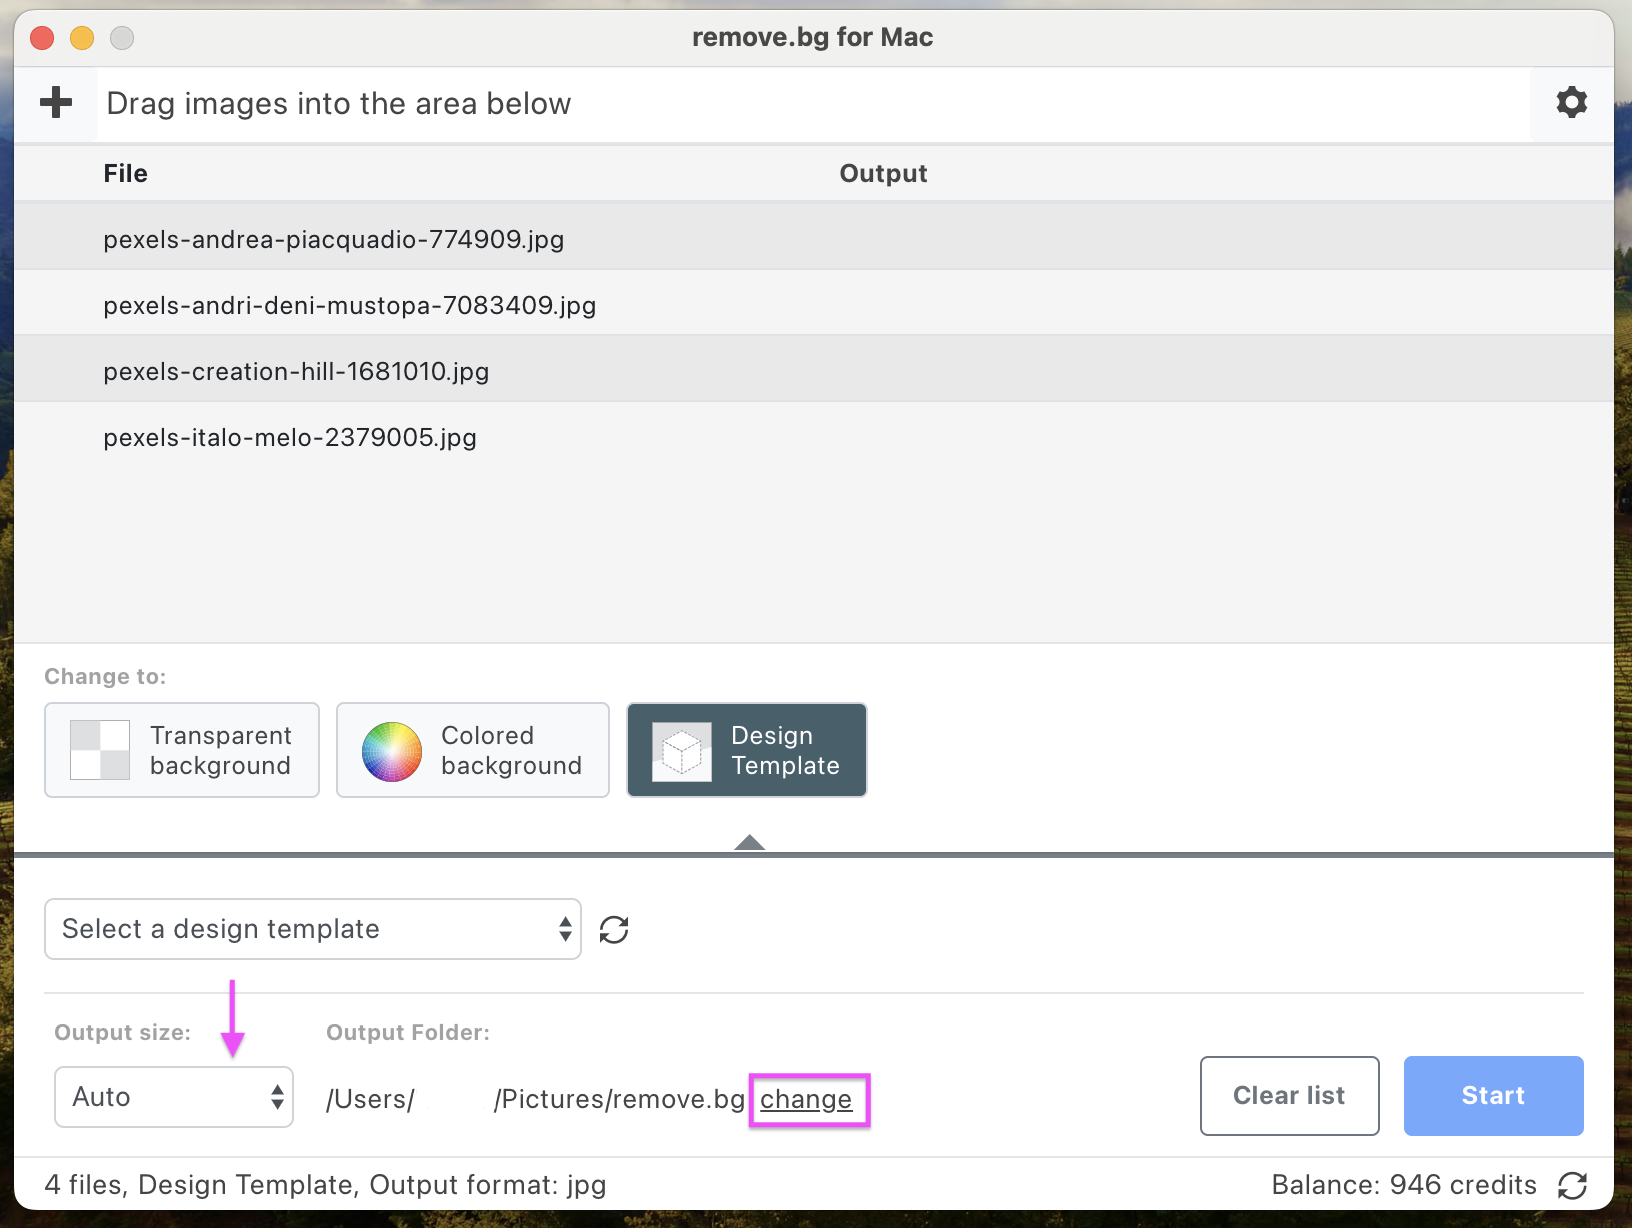
8. Press > Start.
9. Within seconds, the new images will appear within the desktop app. You'll see a green checkmark next to the image once remove.bg is done processing it.
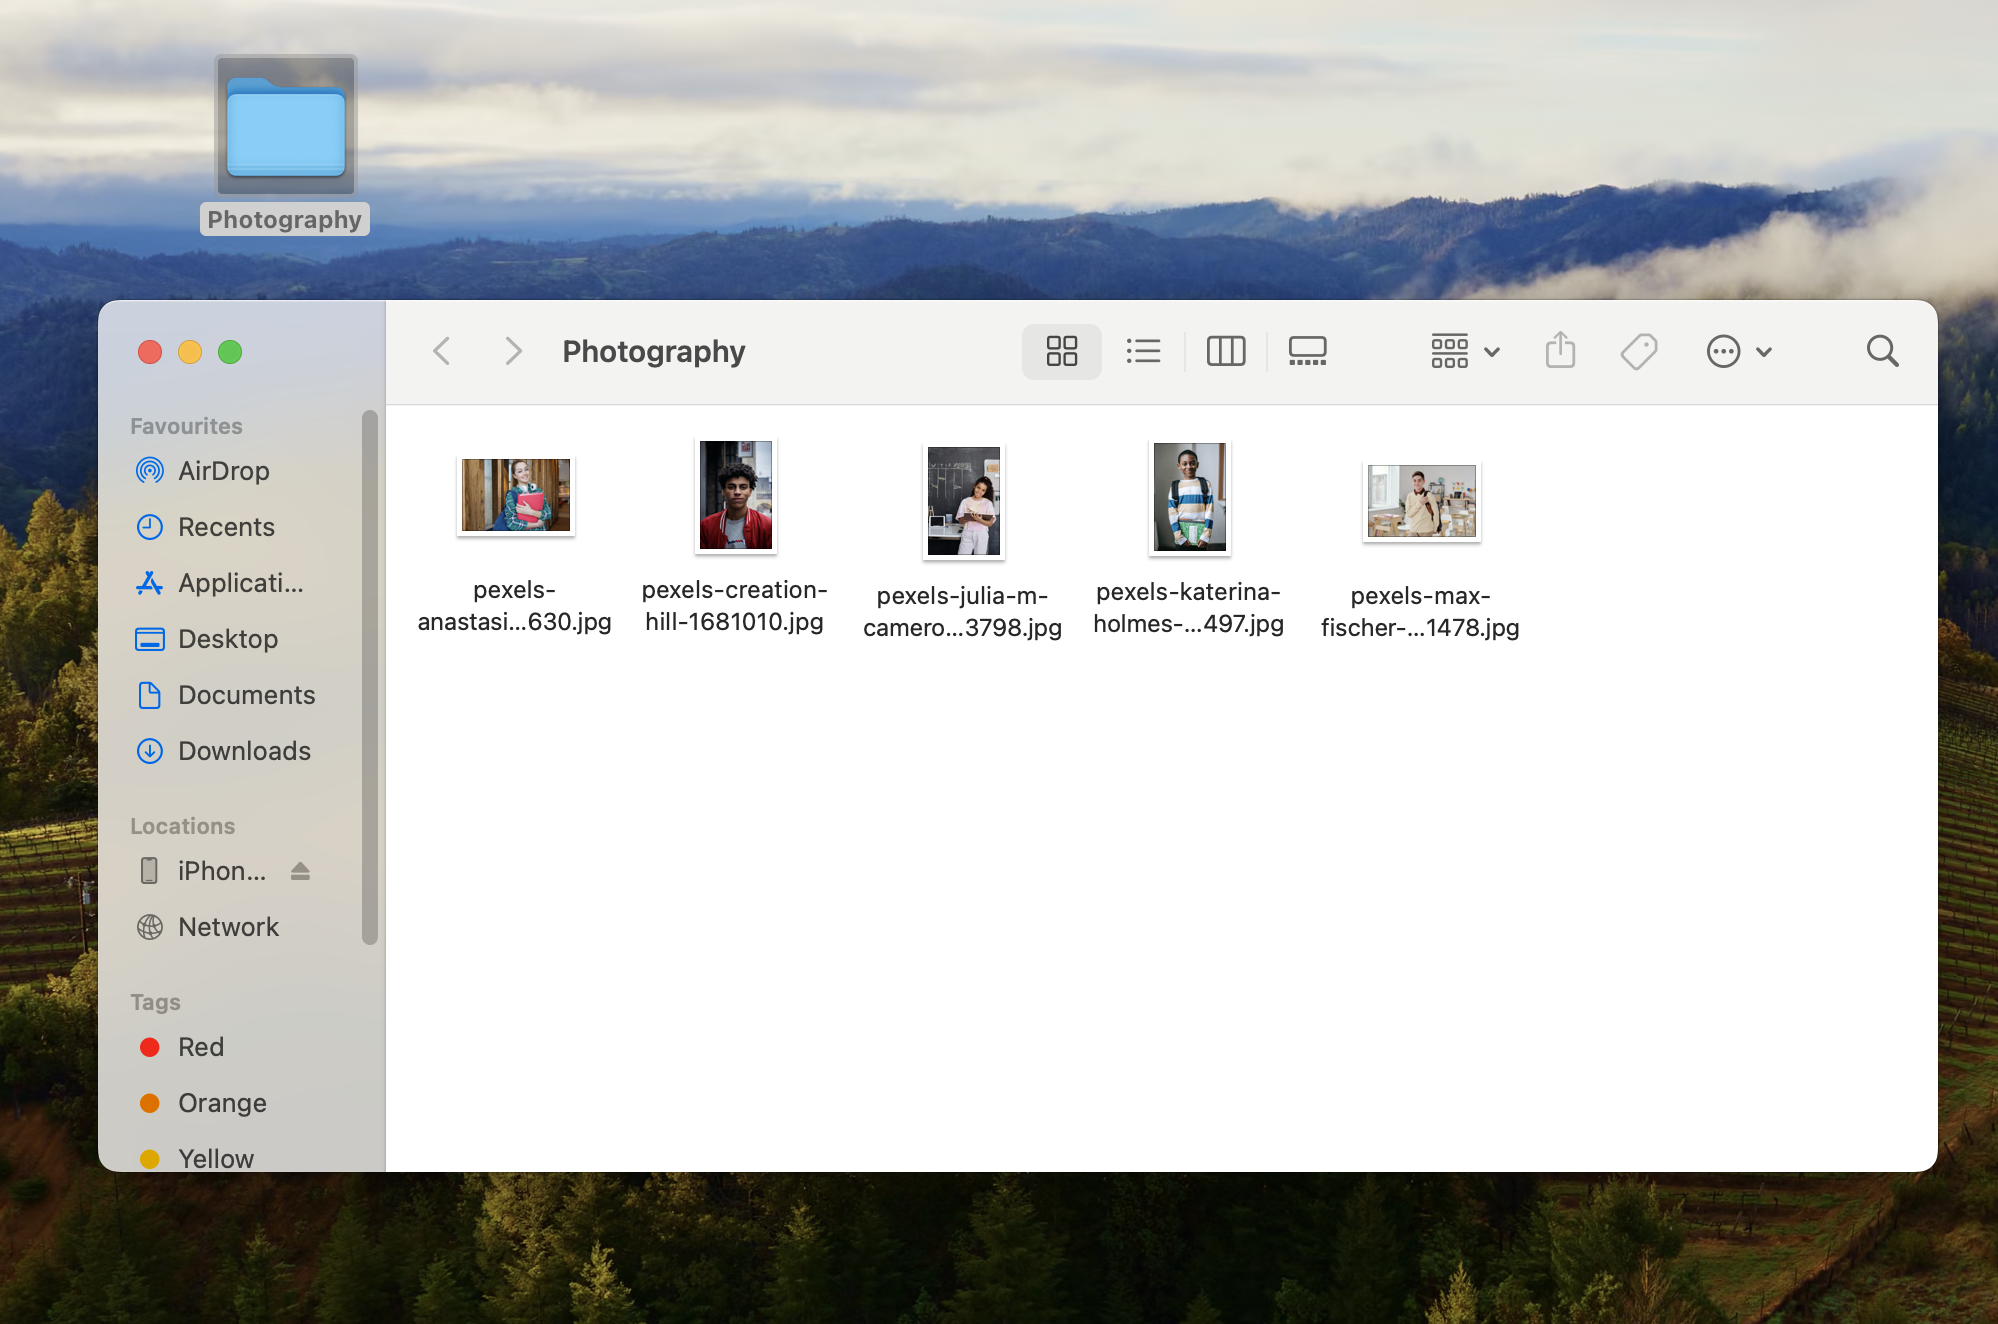
10. The new images are automatically saved to your computer, to locate the folder go ahead and select > Open output folder. And it will take you straight to the folder they're located in. Now you can use that folder to organize your portraits or move them elsewhere so you can deliver them to your students and families.

That’s it!
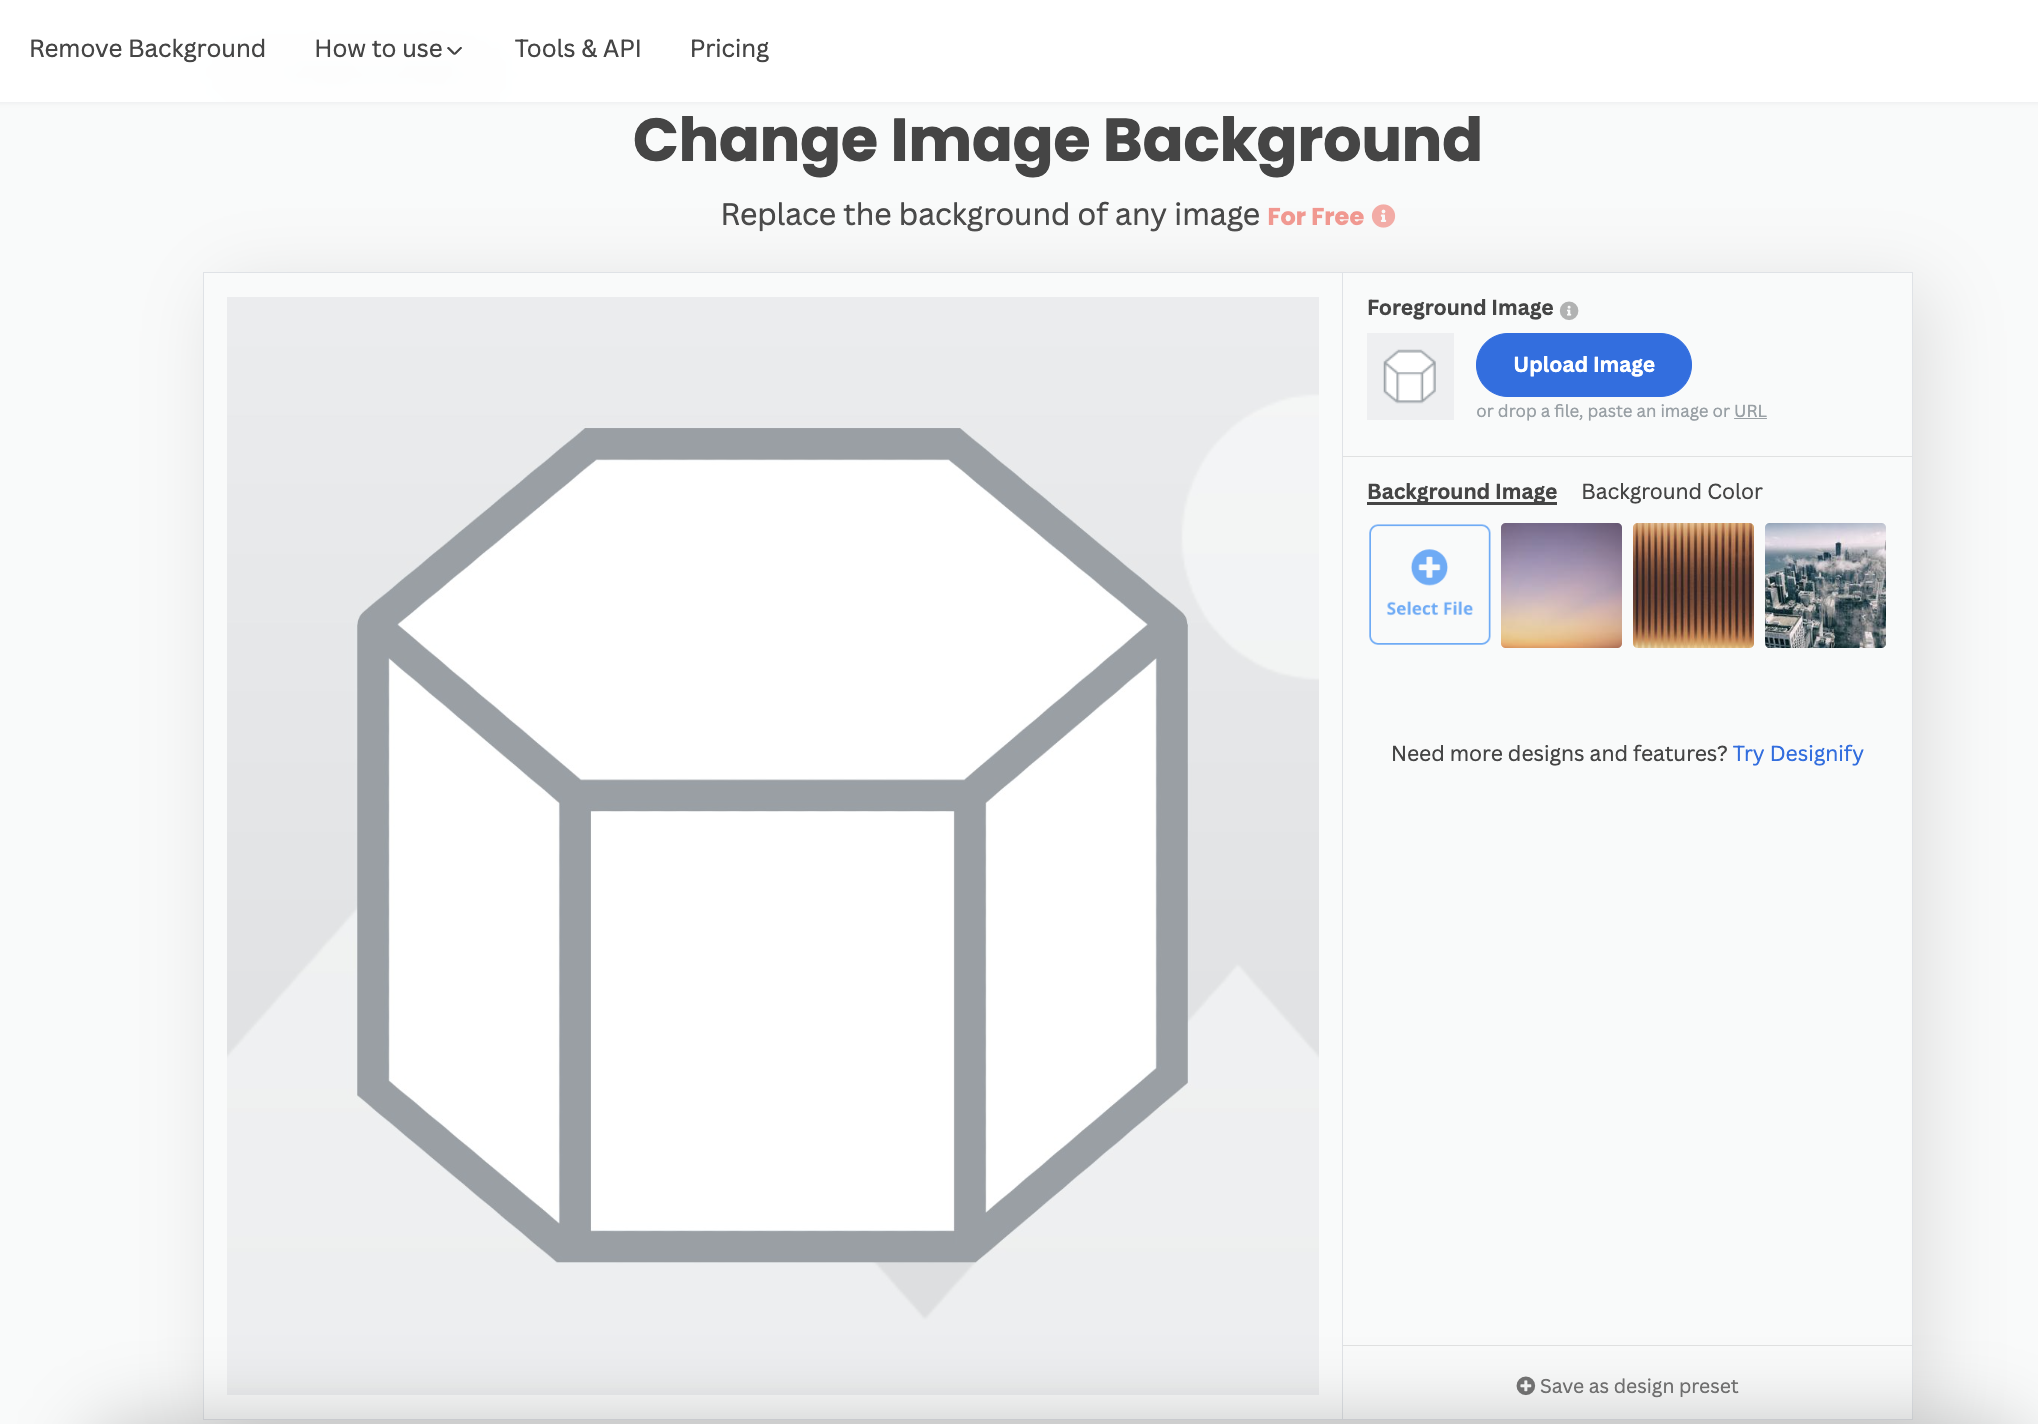
Create your own backgrounds for increased customer choice
If you're using the desktop app and you want to switch up backgrounds you can use the change image background feature. The service allows high-volume studios to create custom layers for their photographs to be used either in the Desktop App or Photoshop. You can give parents a selection between, say, the school as a backdrop including the school shield, logo and year.
If they like the photo part but aren’t so keen on the school aspect, they can choose an outdoor scene – or even a Disney Castle. Your only limit is your imagination!
You can download backgrounds to be used as a design preset in the desktop app and hook it up to your front end via the API so parents can automatically select their choice.
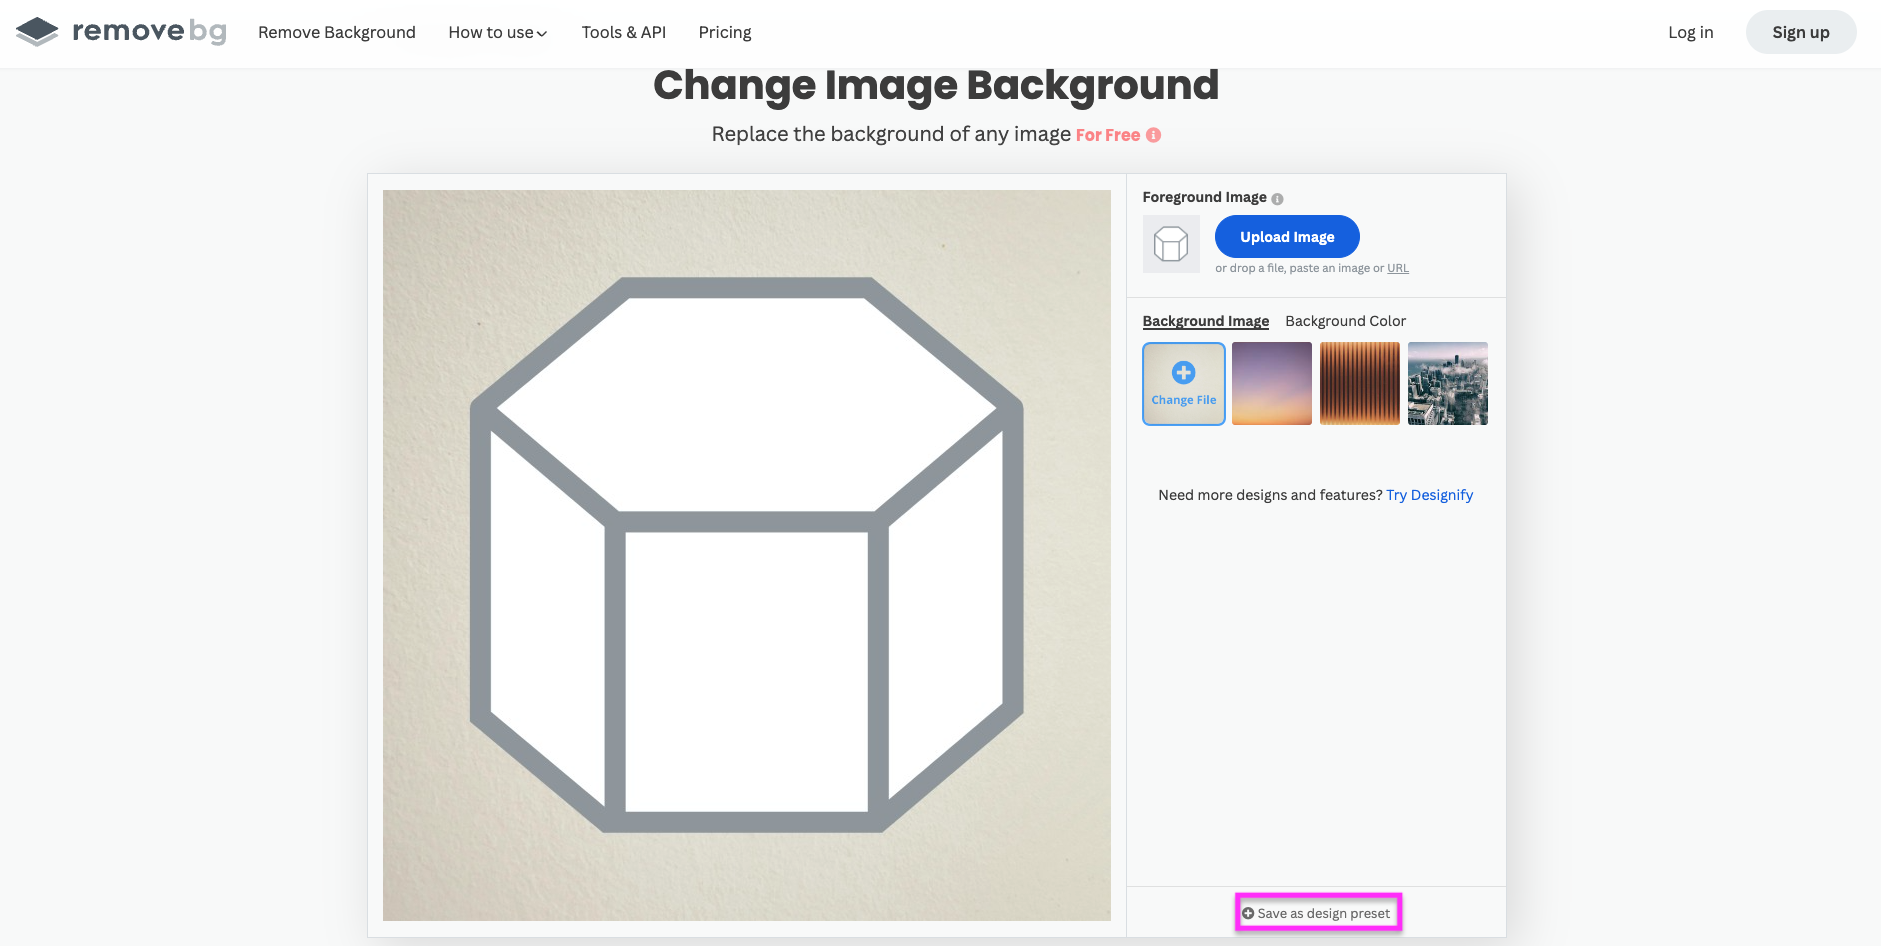
To create your own background for batch processing:
Click on > Change Image Background from the dropdown menu.
-
Select > Try this design template.
2. Click > Select file and upload your background.
3. Click > Save as design preset.
You can name your design preset something that will help you remember which background it is.
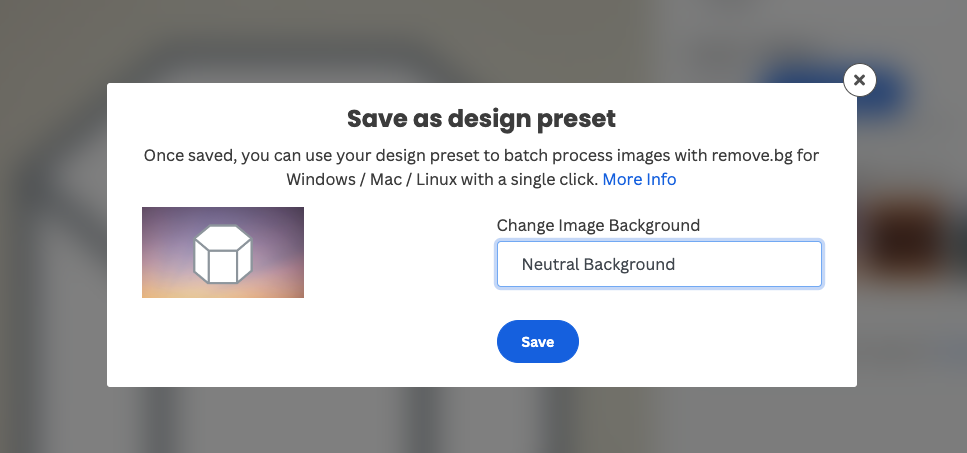
4. Name your file and click > Save.
5. Once you have saved the preset — go ahead and open up the desktop app again. You will find your design preset in the dropdown list on remove.bg desktop app’s Design Preset tab.
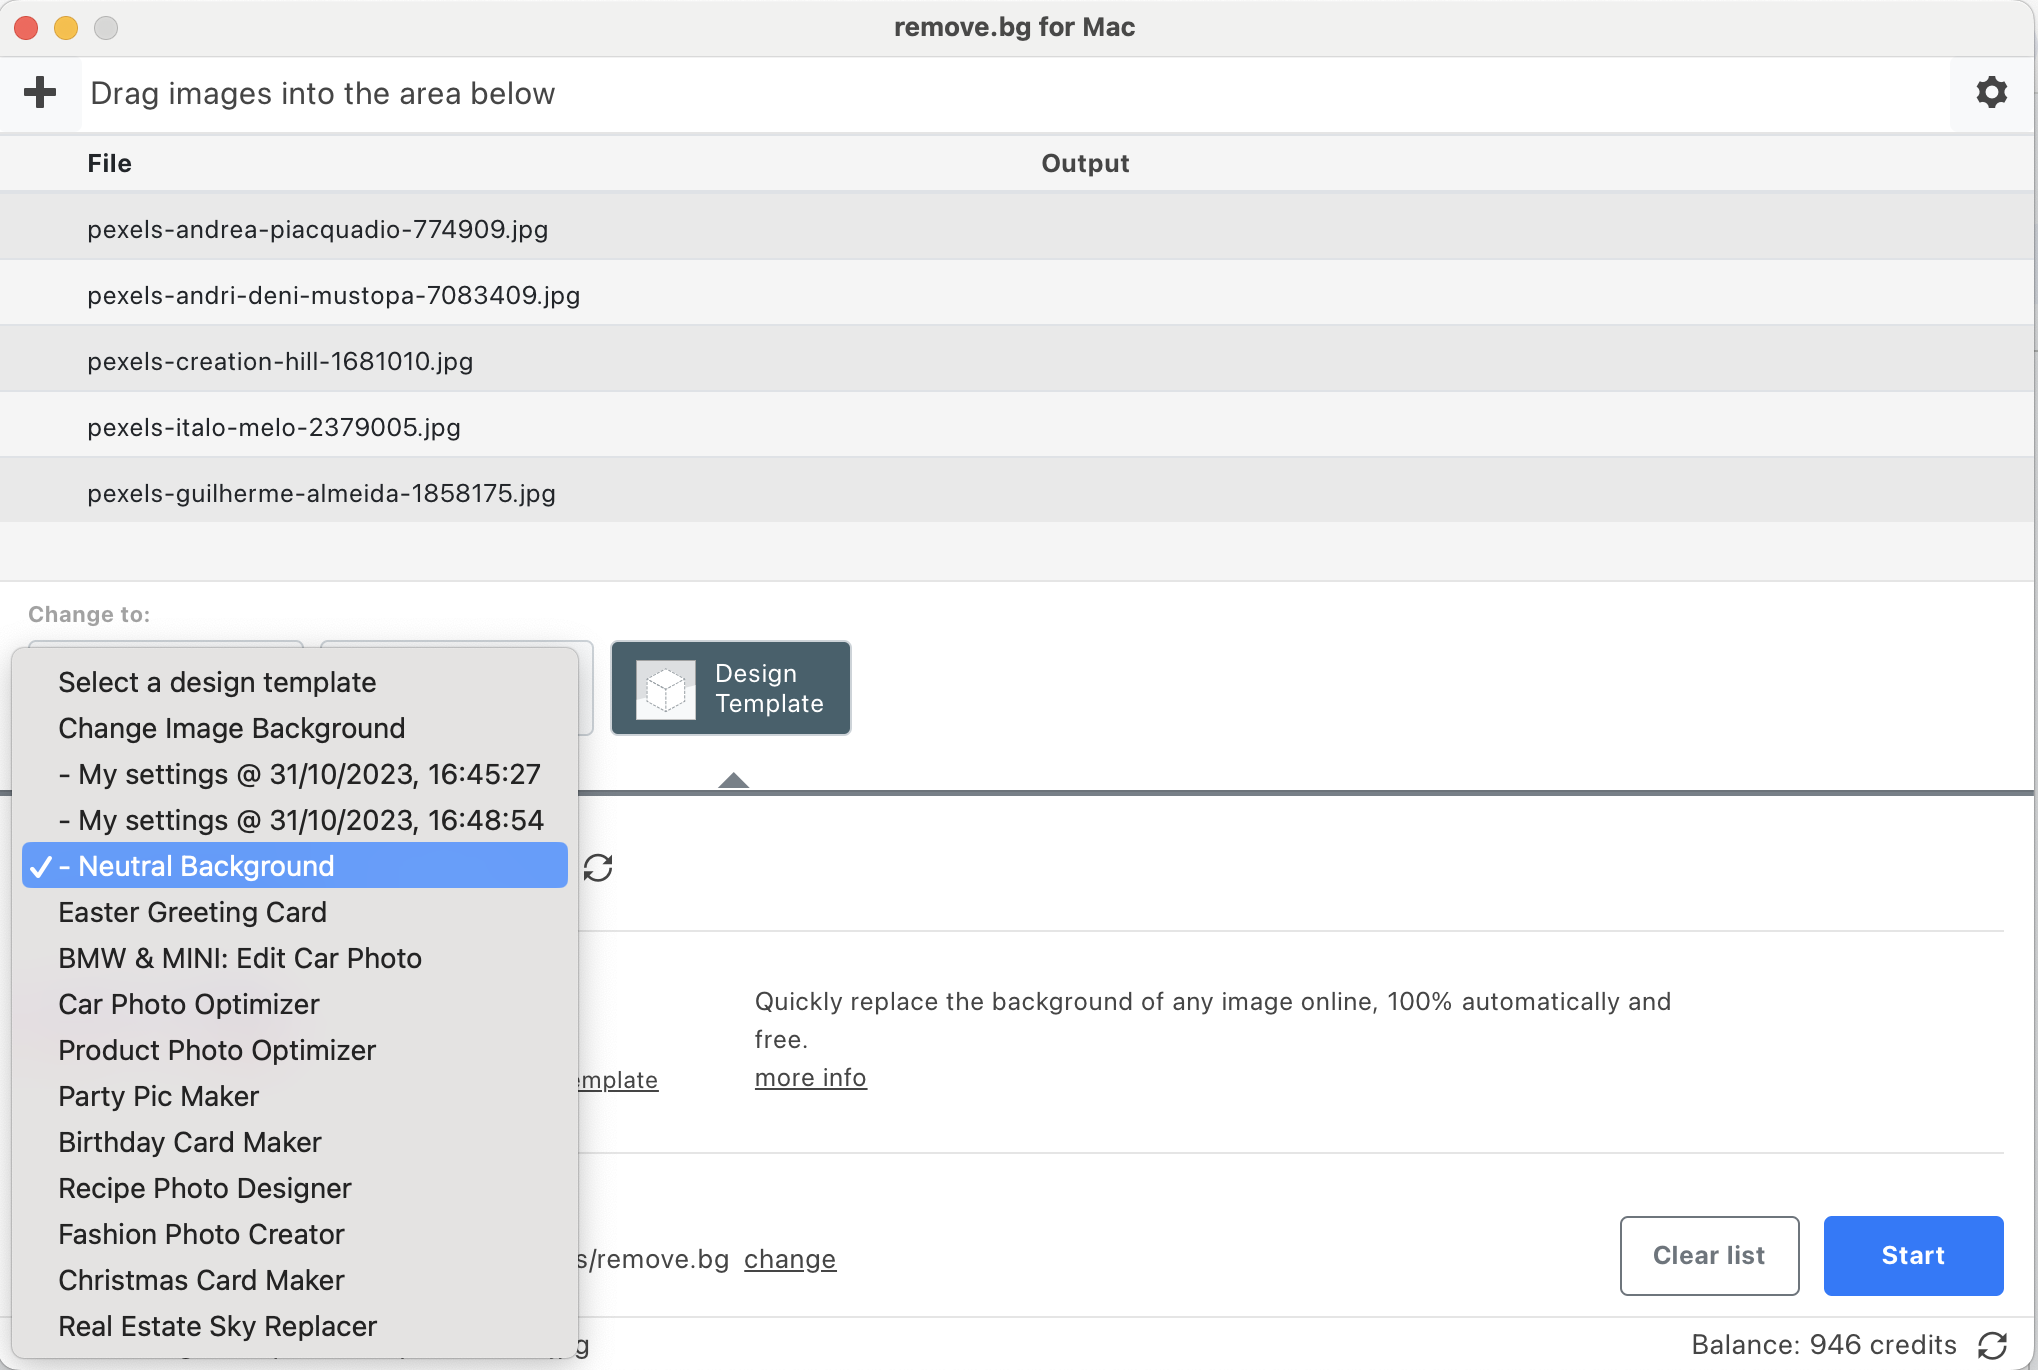
6. Select the preset and click start. All your portraits will now have the same background!
We cover bulk image backgrounds in detail in this article if you’d like to take a bit more of a deep dive into the topic.
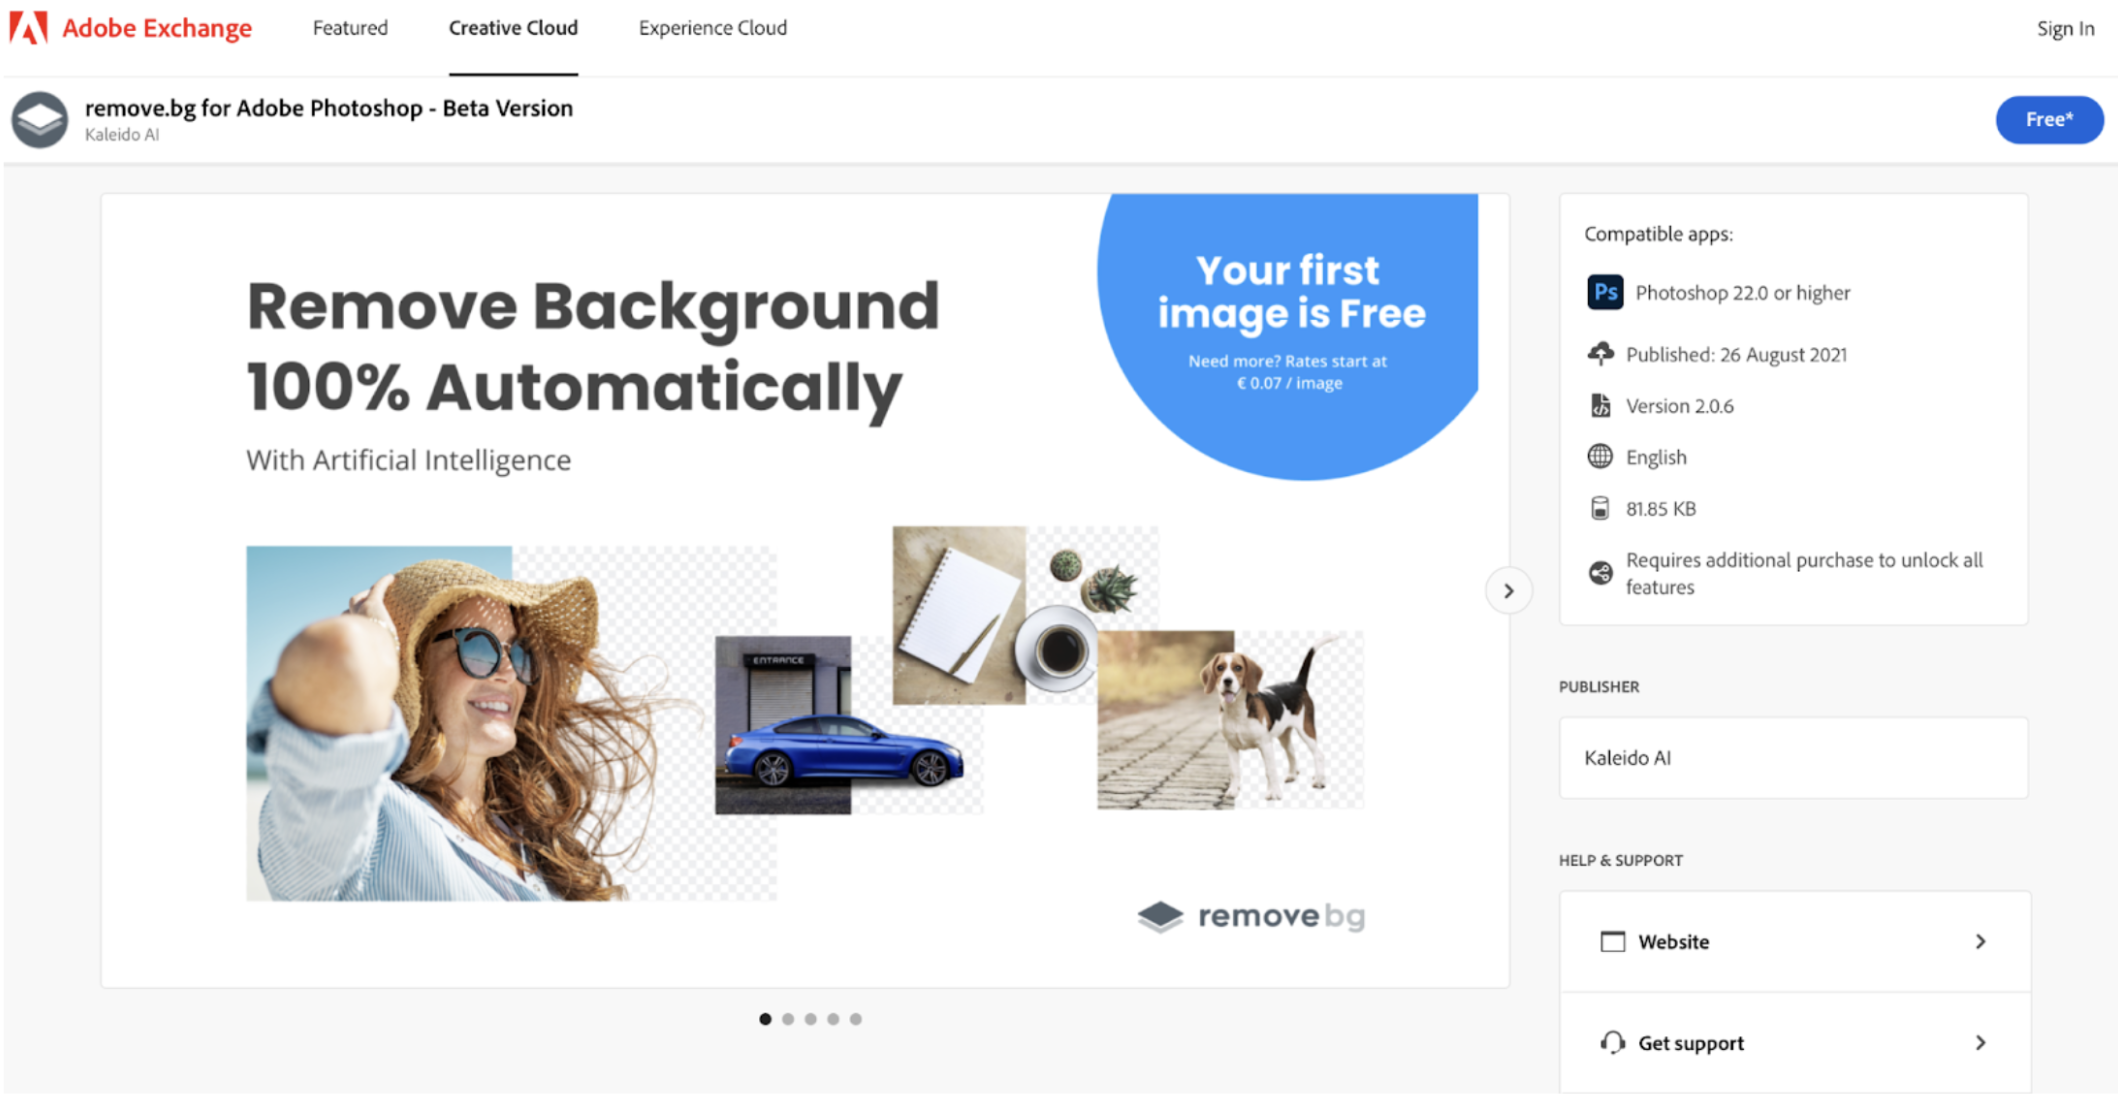
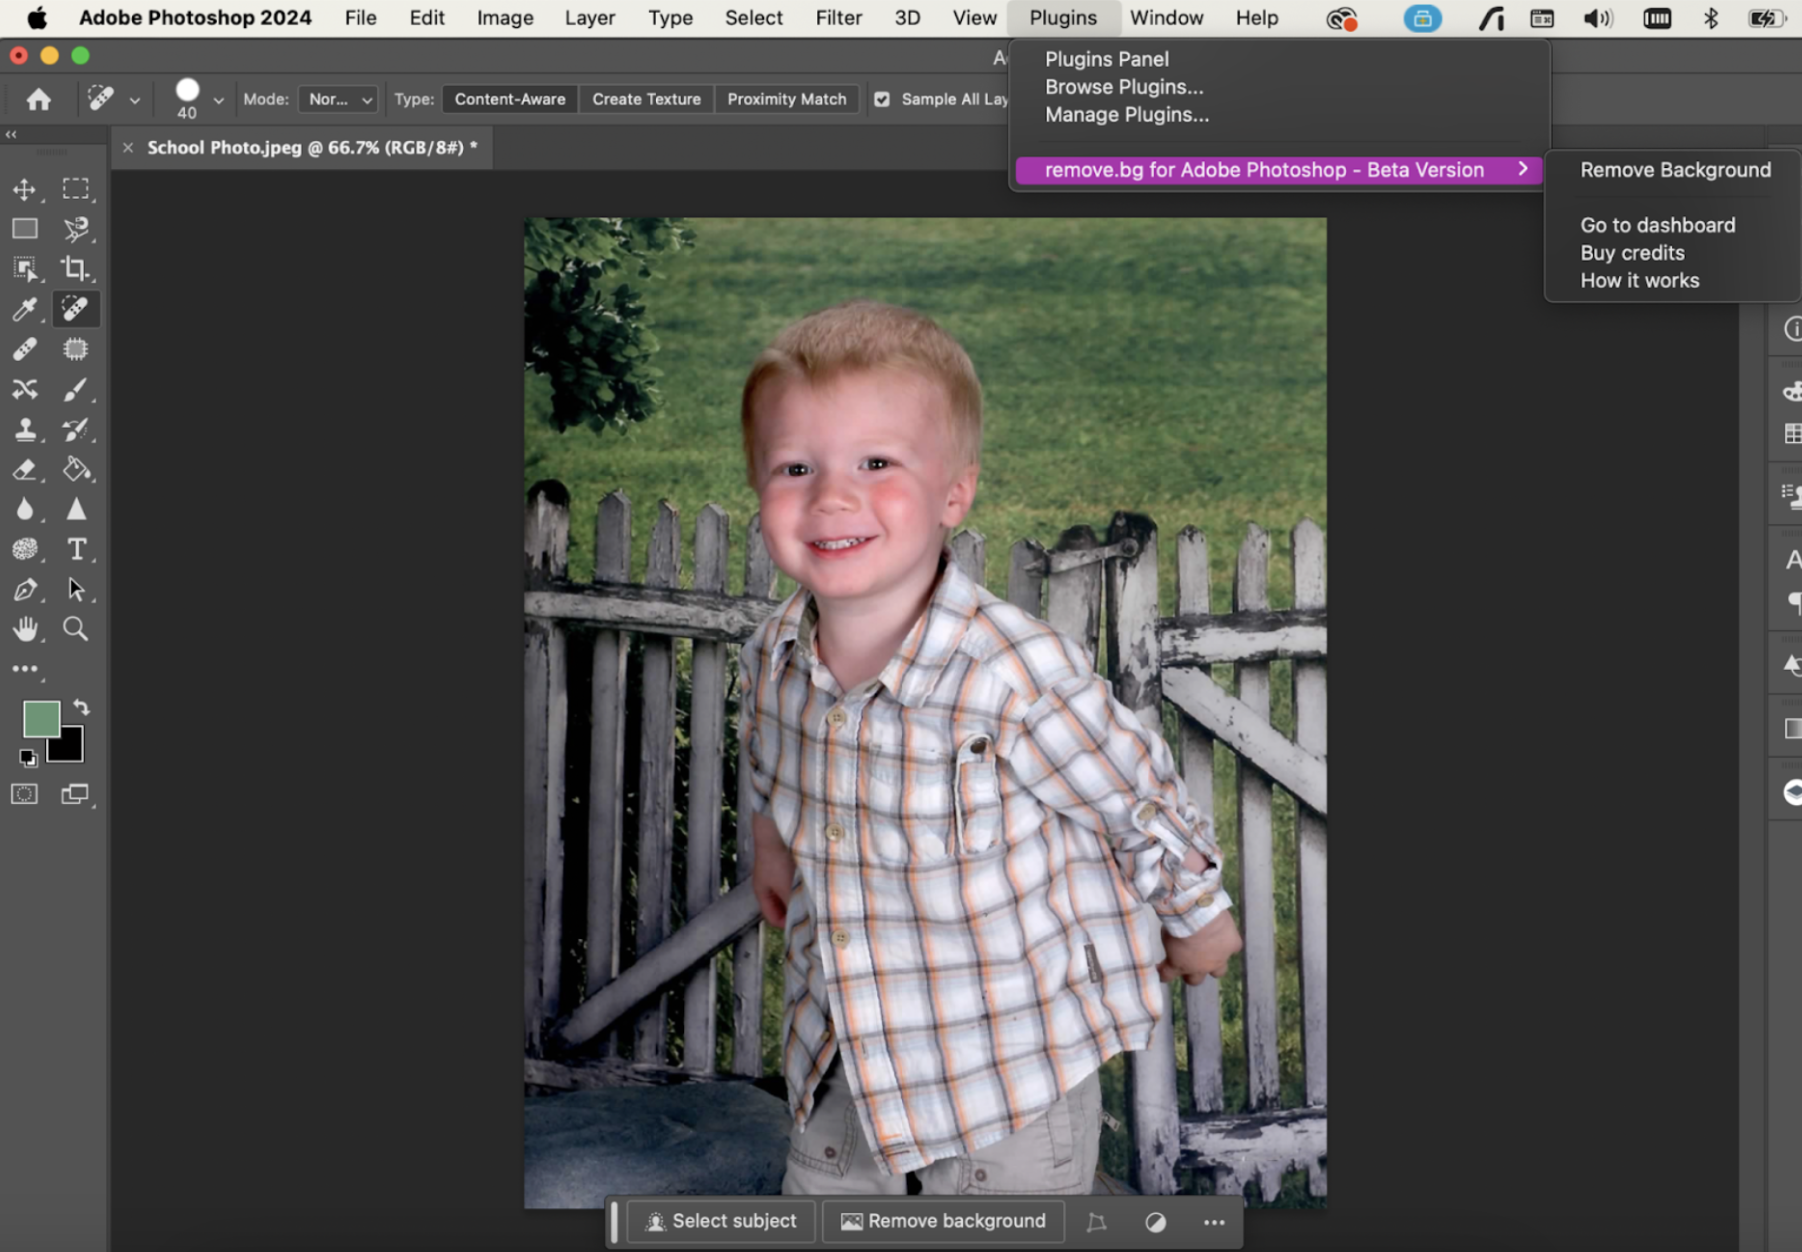
remove.bg Photoshop plugin
The remove.bg Photoshop extension allows you to speed up your workflow by automatically removing backgrounds from images directly within Photoshop.
How to install
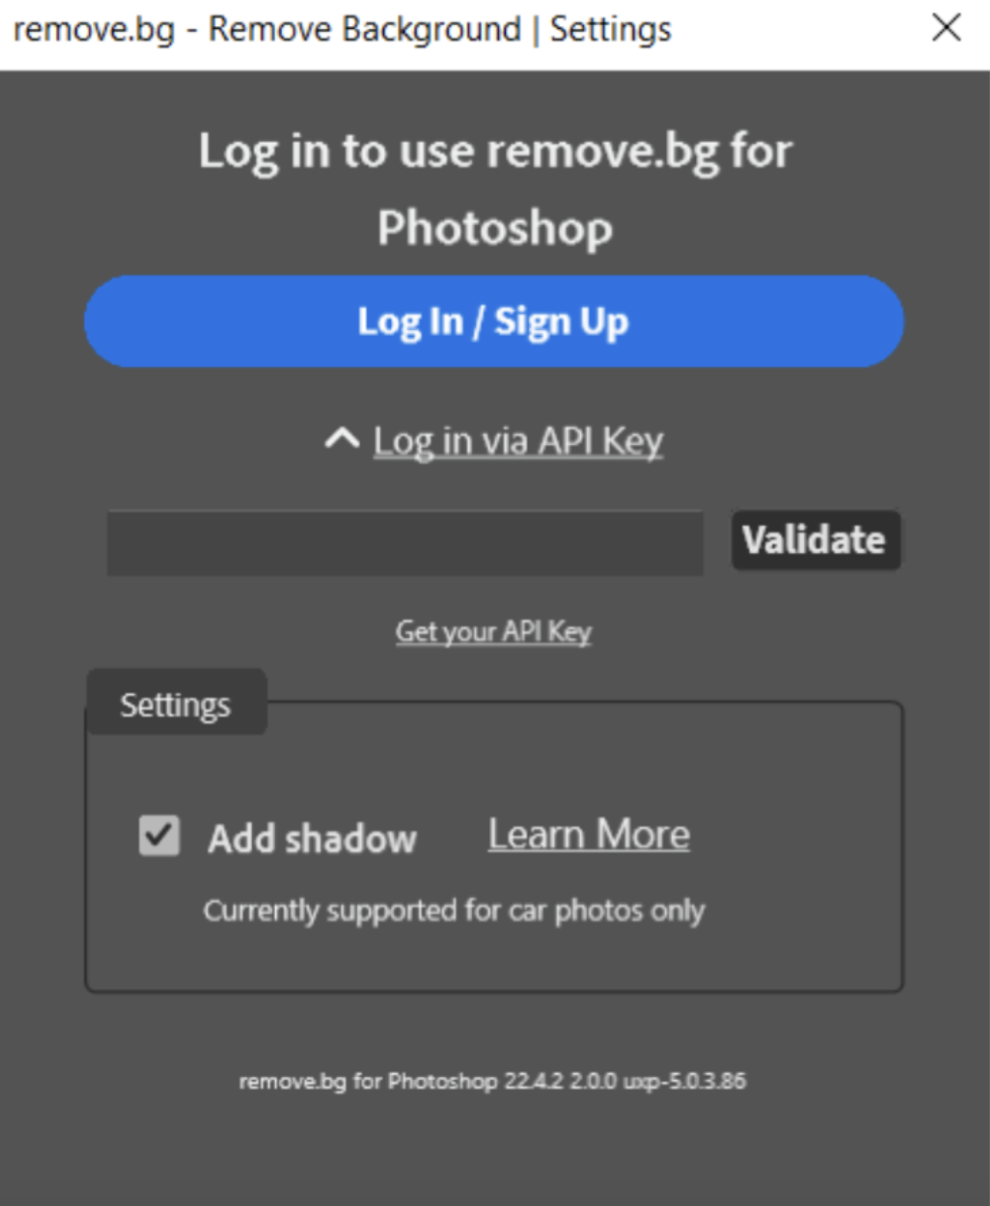
Sign into Adobe.
2. Download remove.bg for Adobe Photoshop at Adobe Exchange.
3. Select Plugins > remove.bg for Adobe Photoshop > Remove Background and log in to your remove.bg account (the first 50 API calls in small size each month are free).
4. You're ready to go: Remove any background with 1 click.
How to use
Open any image.
Go to Plugins > remove.bg for Adobe Photoshop > Remove Background to show the remove.bg panel.
3. Click > Remove Background.
4. After a few seconds, a new layer is added that only contains the foreground (and a layer mask to hide the rest). If necessary, you can make manual adjustments to the layer mask.
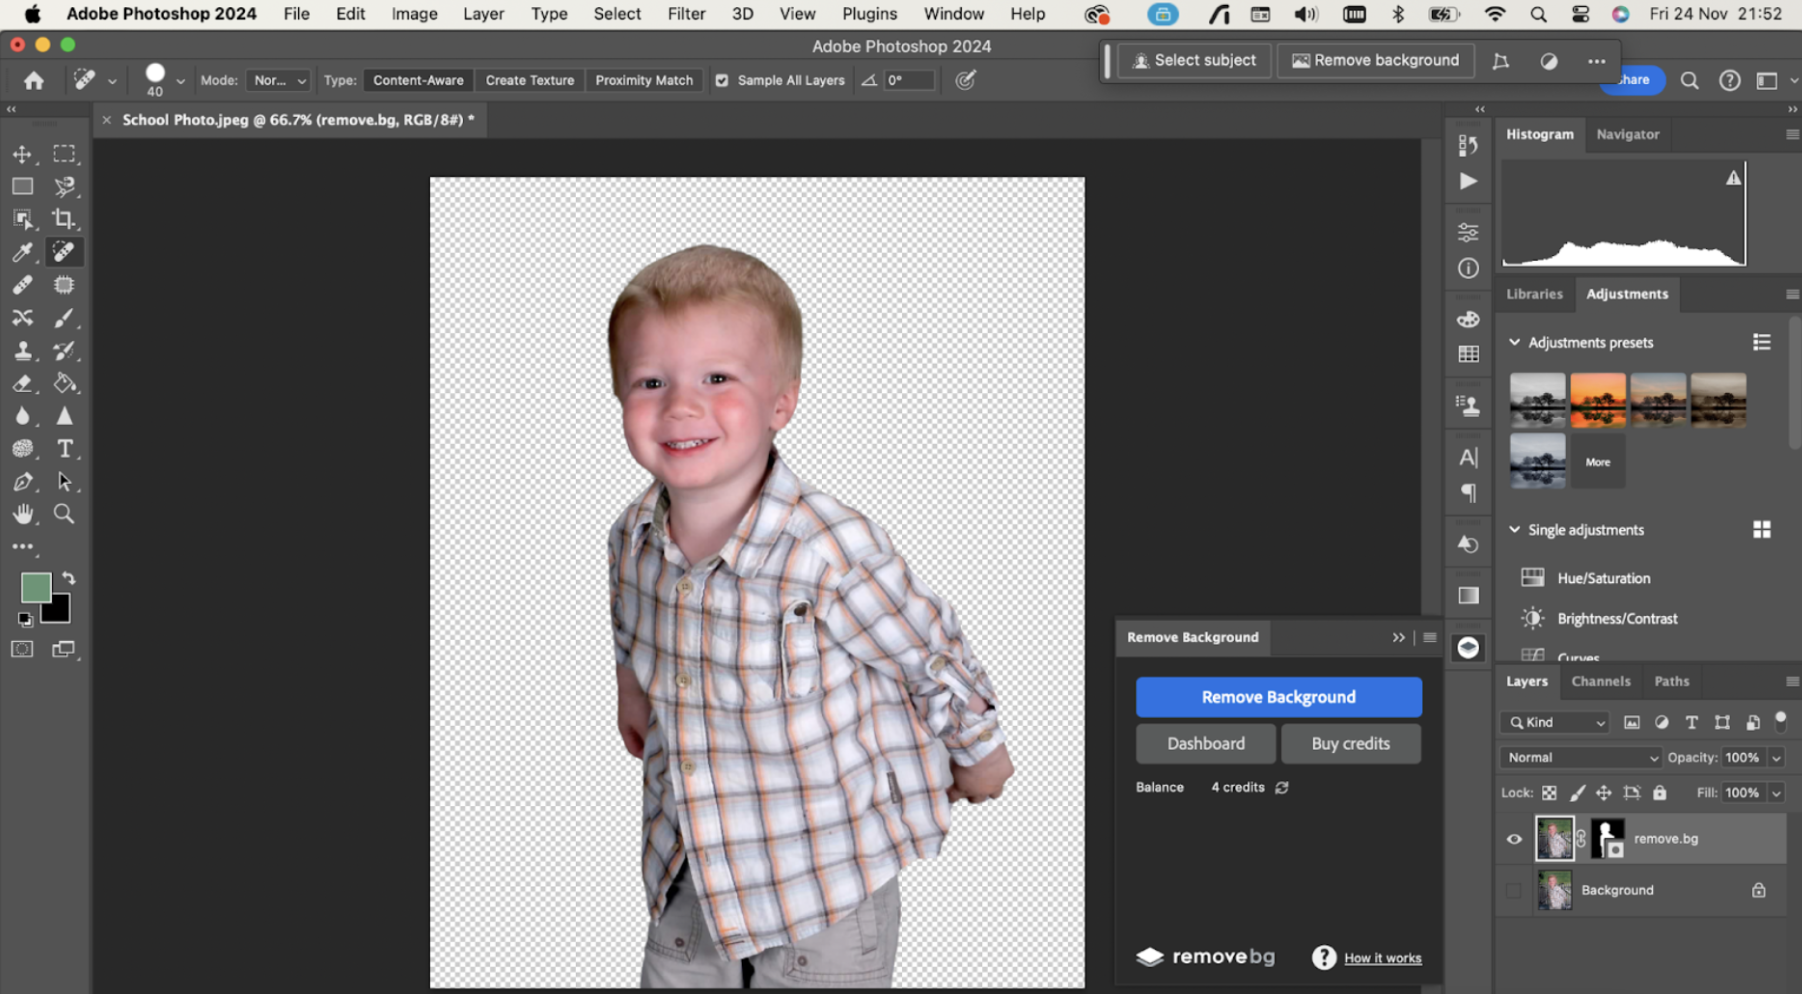
5. Add a background of your choice to a new layer.

6. You’re done.
Why you should consider remove.bg for your business
No learning curve
As you can see, the remove.bg software takes almost no expertise beyond the ability to press a button. Editors will be up and running in no time. The API eliminates even this requirement with simple integration into any workflow.
Wiping green screen
remove.bg replaces the traditional green screen solution many studios have relied upon for decades. As well as requiring bulky and expensive equipment, green screen creates significant challenges in achieving consistent, even lighting on the screen.
A green screen can also cause a cast on the subject, which requires clean-up in the editing. High-volume studios using remove.bg can replace the green screen with a simple backdrop or simply swap out the room background captured onsite.
Bring outsourcing back home
Studios traditionally remove photo backgrounds by sending them to a lower-cost workforce in countries such as India or Bangladesh with an overnight deadline. The work traditionally costs between 50c and $1 per image depending on the amount of editing required. Removing a background with remove.bg can cost as little as € 0.07 per image. Customers can save as much as 60% per image processed. Images are processed in as little as five seconds. Kemmetmueller Photography saved more than 12.5 weeks of work when they switched to our automated method.
Delight your customers
Everything a great high-volume studio does is about delivering on-time excellence to delight your customers. The increased quality and precision of images lifted from the background – with no green cast and none of the “lost hairs” and other ragged edges or fuzzy errors of inferior rivals – will ensure you keep your customers satisfied.
With fewer people or more budget freed up from removing backgrounds by hand, you will be able to put resources on other needed tasks and absorb more work during the high season.
Free time
remove.bg celebrates the time you will spend removing backgrounds. You will be able to put more focus into advertising your business and promoting yourself on social media. Perhaps you will research other time-saving tools or improve the efficiency of your workflow. Or perhaps you will finally get around to doing more of what brought you into the business in the first place – taking photographs of what you love.
Big savings with remove.bg’s high-volume solutions
High-volume photography studios process thousands of images a year. If you work with more than 100,000 and you think remove.bg is the right tool for you – and we think it is – you should take advantage of its high-volume solutions.
You could save more than 70% on image process credits, a substantial saving. You will also have access to a dedicated client support manager who will work with you to help you install remove.bg into your workflow, optimize the algorithm to your specific needs through training on recurrent problem images.
Contact the dedicated enterprise sales team now to learn more and get a free demo.
Further reading
Hopefully, this guide has given you a clear understanding of how remove.bg can streamline your high-volume photography business by saving time with bulk editing and easy-to-use plugins.
If you're ready to explore this topic further, download remove.bg's free e-book, "Photography Hacks: 7 Ways AI Can Help You Save Time."
Inside, you'll uncover practical insights on how AI tools can revolutionize your workflow, helping you save valuable time and boost your profits.

留言