Готовите презентацию и хотите сделать фон прозрачным в Google Slides? Отличная идея. Мы расскажем вам обо всех способах, как это сделать, чтобы вы сэкономили ценное время и силы.

Прозрачный фон — отличное решение, если вы хотите:
Добавить изображения в Google Slides, не загромождая основной текст.
Освободить больше пространства на слайдах.
Создать аккуратные, профессионально выглядящие слайды.
Впечатлить руководителя навыками оформления презентаций.
Прозрачный фон в Google Slides выводит презентации на новый уровень, но вы, возможно, не знаете, как это сделать? Не беспокойтесь — все ответы здесь.
Содержание
- Всё, что нужно знать о создании прозрачного фона в Google Slides
- Как создать прозрачный фон в Google Slides
- Как сделать несколько изображений прозрачными одновременно в Google Slides
- Как сделать фон изображения прозрачным в Google Slides — сохранив главный объект нетронутым
- Как сделать фон изображения прозрачным в Google Slides
- Как сделать фон нескольких изображений прозрачным в Google Slides
- Как сделать фон прозрачным на iPhone и загрузить изображение в Google Slides
- Как сделать фон прозрачным на Android и загрузить изображение в Google Slides
- Сделать фон прозрачным в Photoshop и загрузить в Google Slides
Всё, что нужно знать о создании прозрачного фона в Google Slides
Есть два основных способа: можно сделать всё фоновое изображение более или менее прозрачным — как на картинке ниже.

Или сделать фон изображения прозрачным, сохранив главный объект или человека нетронутым, вот так:

Как видите, эти два варианта дают совершенно разный результат. Мы разберём оба, чтобы вы могли выбрать понравившийся — или совместить их.
Как создать прозрачный фон в Google Slides
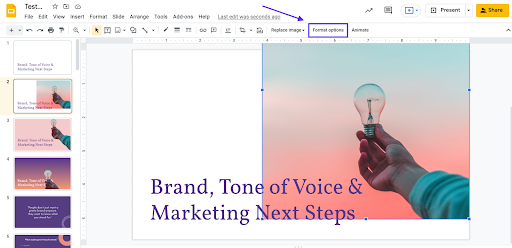
Чтобы получить результат, как на картинке ниже — сделать всё изображение фоном слайда и сделать его прозрачным — следуйте следующим шагам.

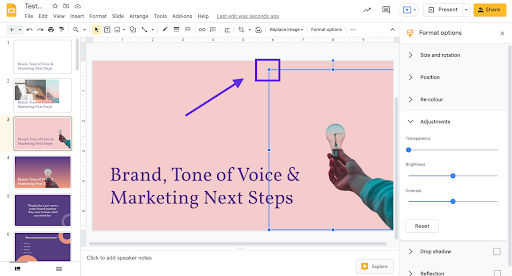
1. Загрузите выбранное изображение — мы взяли руку с лампочкой на фоне красивого заката. Изображения с людьми или руками — отличный способ сделать презентацию более эмоциональной и личной.
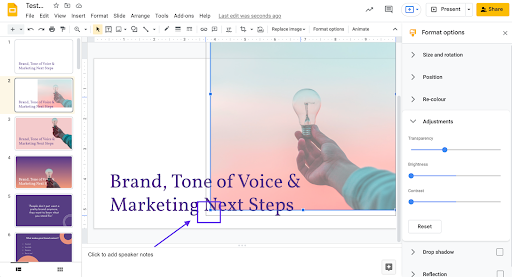
2. После загрузки изображения щёлкните по нему, чтобы выделить.
3. Теперь выберите > Параметры формата.
4. Перейдите в > Настройки > Прозрачность. С помощью этого ползунка вы можете регулировать прозрачность изображения. Попробуйте и найдите подходящий вариант. Если изображение перекрывает текст — не беспокойтесь, на следующем шаге вы сможете перенести его на задний план.

5. Когда результат устроит, растяните изображение, потянув за углы, чтобы оно покрыло весь слайд.
6. Вы также можете использовать стрелки вверх и вниз для изменения положения на слайде. Если не уверены, как это выглядит, нажмите > Презентовать на верхней панели — так вы увидите полноэкранный вид. Нажав клавишу Escape (Esc.) на клавиатуре, вы вернётесь в режим редактирования.
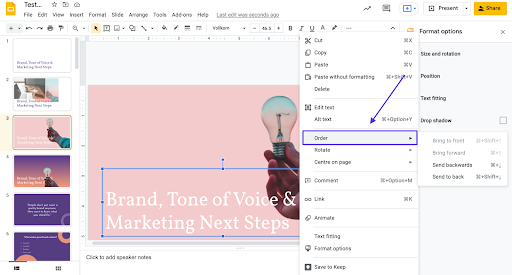
7. Пока изображение ещё выделено, щёлкните по нему правой кнопкой мыши и выберите > Порядок > На задний план. Теперь у вас есть прозрачное изображение в качестве фона слайда.
8. Если хотите применить это ко всем слайдам, щёлкните правой кнопкой мыши по изображению и выберите > Тема. Если хотите добавить только на пустые слайды, выберите > Пустой.
Готово! Теперь в Google Slides у вас есть прозрачное изображение в качестве фона. Если вы не хотите, чтобы все слайды выглядели одинаково, можно сделать несколько изображений прозрачными и назначить их конкретным слайдам.
Как сделать несколько изображений прозрачными одновременно в Google Slides
Если у вас много изображений, которые нужно сделать прозрачными, но вы не хотите делать это по одному — вот как обработать все сразу.
1. Если загружаете изображения с компьютера, выделите все сразу и перетащите их на один слайд.

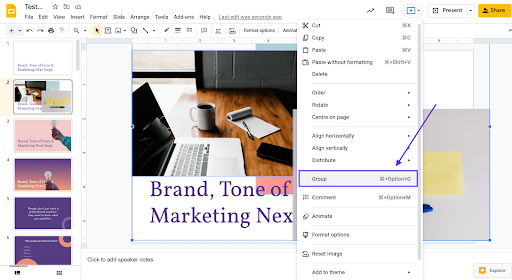
2. Затем нужно сгруппировать все изображения на одном слайде Google. Выделите все нужные изображения, щёлкая и перетаскивая мышь поверх них.
3. Теперь перейдите в > Упорядочить > Группировать.
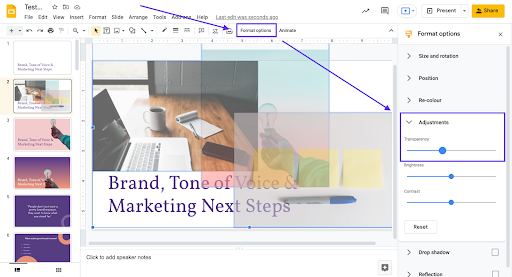
4. Пока все изображения ещё выделены, перейдите в > Параметры формата > Настройки > Прозрачность. Теперь, используя ползунок, вы измените прозрачность для всех изображений сразу.
5. Если хотите перемещать изображения по отдельным слайдам или изменить их размер, нужно сначала разгруппировать их. Снова щёлкните правой кнопкой мыши и выберите > Разгруппировать.
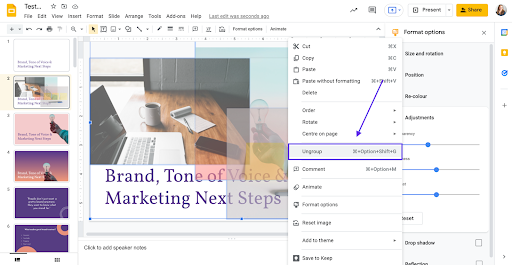
6. Хотите добавить одно из изображений в качестве фона другого слайда? Нет проблем. Просто выделите нужное изображение. Затем нажмите Command + X (Mac) или Ctrl + X (Windows), чтобы вырезать его.
7. Теперь перейдите на нужный слайд и нажмите Command + V (Mac) или Ctrl + V (Windows). Потяните за углы, чтобы изображение покрыло весь фон.
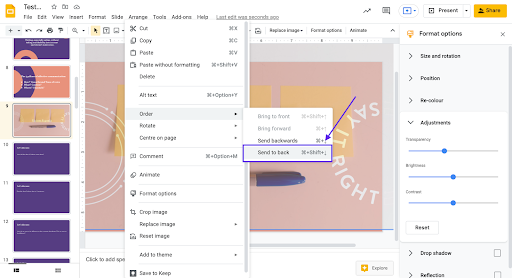
8. Чтобы текст оставался хорошо читаемым, переместите изображение на задний план. Щёлкните правой кнопкой мыши и выберите > Порядок > На задний план.
Это отличный способ, если вы хотите сохранить единый стиль слайдов и значительно ускорить рабочий процесс — а это всегда хорошо, правда?
Как сделать фон изображения прозрачным в Google Slides — сохранив главный объект нетронутым
Но что если вы хотите только сделать весь фон изображения прозрачным, сохранив главный объект или человека нетронутым?

Это отличный подход, если вы хотите:
Добавить индивидуальность слайдам с помощью персональных фотографий объектов и людей.
Сделать слайды гораздо более живыми по сравнению с прозрачными изображениями — ведь вы сохраняете яркие цвета.
Совместить несколько изображений в одно и создавать коллажи или мудборды в Google Slides.
Хотя в самом Google Slides это сделать нельзя, у нас есть инструмент, который справится с задачей за секунды. С помощью remove.bg вы можете легко перетащить изображения, удалить фон и загрузить их в Google Slides.
Создаёте Google Slides на десктопе, телефоне или уже работаете в Photoshop — мы покажем, как действовать в любом случае.
Как сделать фон изображения прозрачным в Google Slides
1. Откройте remove.bg.
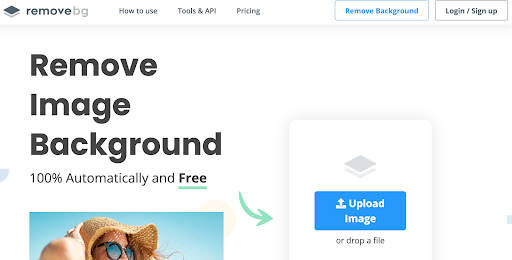
2. Просто перетащите изображение или загрузите его.
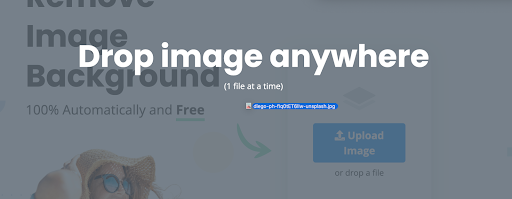
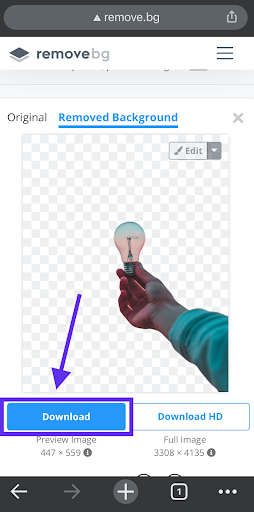
3. Через несколько секунд изображение появится снова, но уже без фона.
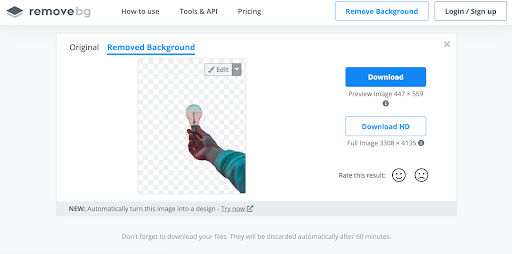
4. Нажмите > Скачать, и изображение с прозрачным фоном сохранится на вашем устройстве.
5. Теперь вернитесь в Google Slides и перетащите новое изображение на нужный слайд или выберите > Вставка > Загрузить с компьютера.

6. Готово — ваше изображение с прозрачным фоном теперь на слайде Google. Чтобы изменить размер, просто потяните за углы.
7. Если вы хотите, чтобы текст — или его часть — был поверх изображения, вы также можете изменить порядок наложения, щёлкнув правой кнопкой мыши и выбрав > Порядок > Переместить назад/На задний план/Переместить вперёд/На передний план.
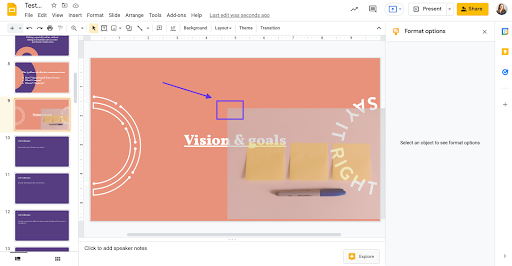
Как видите, это особенно эффектно смотрится, когда белый текст накладывается на красочное изображение.
8. Перемещайте изображение по слайду, щёлкнув и удерживая его; используйте второй палец на ноутбуке или мышь, чтобы перетащить изображение в нужное место.
Как сделать фон нескольких изображений прозрачным в Google Slides
Нравится вид изображений без фона на слайдах, но хотите ускорить работу? Мы поможем. Вы можете удалить фон у нескольких изображений и загрузить их в Google Slides оптом. Однако это можно сделать только на десктопе.
1. Скачайте десктопное приложение remove.bg для Windows, Mac или Linux.
2. После завершения загрузки откройте десктопное приложение.
3. Затем зарегистрируйте аккаунт remove.bg (это займёт всего несколько секунд) или войдите, если уже пользовались нашим сервисом.
4. После входа просто перетащите изображения, у которых хотите удалить фон.
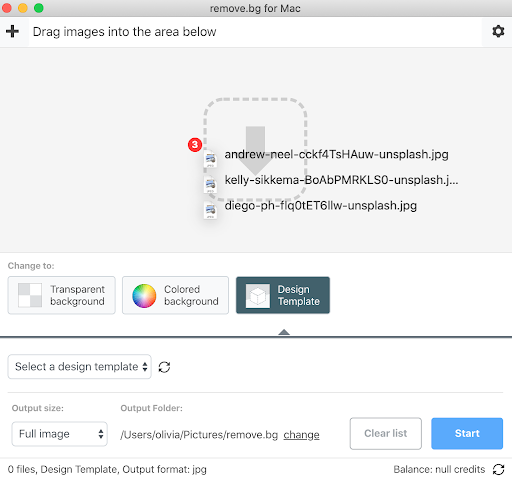
5. Нажмите > Прозрачный фон > Начать.
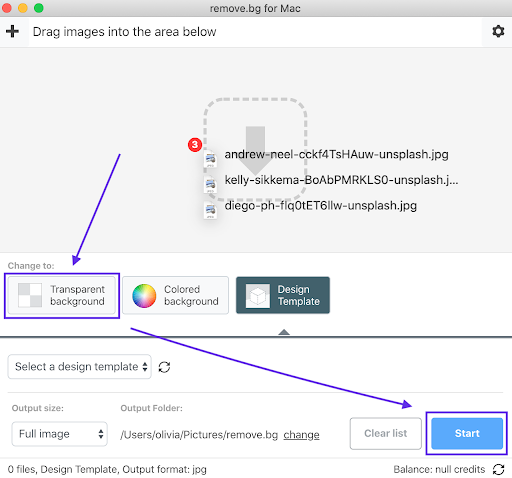
6. Когда обработка завершится, скачайте изображения на рабочий стол.
7. Откройте Google Slides и создайте пустой слайд — неважно, где он будет находиться и как выглядит: после выполнения следующих шагов его можно удалить.
8. Выделите все изображения, которые хотите загрузить в Google Slides, и перетащите их на пустой слайд. Конечно, вы также можете загружать изображения по одному — сразу распределяя их по нужным слайдам, если изображений около трёх. Но если их десять и больше, этот способ самый быстрый.
9. После загрузки изображений снимите выделение, щёлкнув по фону слайда.
10. Теперь выберите изображение, которое хотите перенести на другой слайд, и используйте сочетание клавиш Option + X (Windows) или Command + X (Mac), чтобы вырезать его.
11. Перейдите на нужный слайд, щёлкните по нему и используйте сочетание клавиш Option + V, чтобы вставить изображение.
12. Повторяйте этот процесс, пока каждое изображение не окажется на нужном слайде — конечно, несколько изображений можно совместить на одном слайде, создав коллаж или мудборд.
Хотите узнать больше о том, как максимально использовать возможности нашего массового удаления фона изображений? Ознакомьтесь с нашей статьёй по ссылке выше.
Как сделать фон прозрачным на iPhone и загрузить изображение в Google Slides
Работаете с Google Slides на телефоне и хотите добавить изображение без фона? Нет проблем. Мы пошагово покажем, как сделать это за секунды с помощью remove.bg.
1. Откройте remove.bg в Safari.

2. Загрузите изображение — remove.bg сделает всё остальное и удалит фон за секунды.
3. Теперь скачайте изображение и сохраните его в фотогалерею.
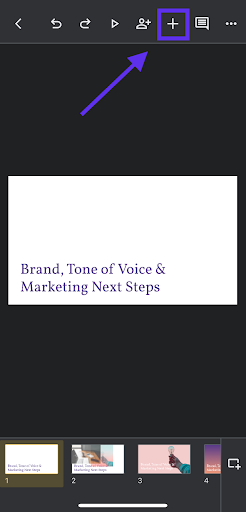
4. Откройте приложение Google Slides и нажмите знак +.
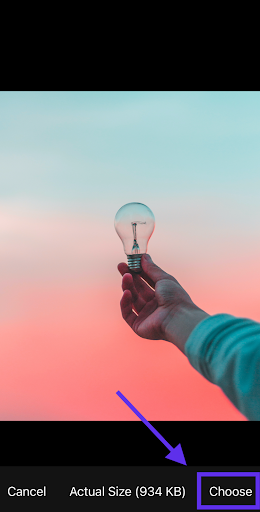
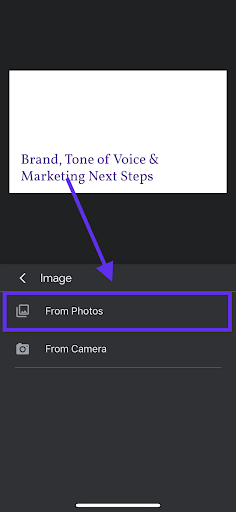
5. Выберите > Из фотографий.
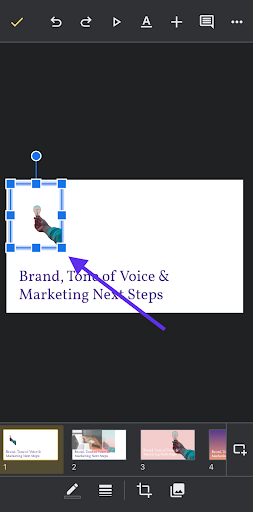
6. После выбора фото (оно должно быть последним в библиотеке) оно появится на слайде. Потяните за углы, чтобы изменить размер, или нажмите, удержите и перетащите, чтобы изменить расположение на слайде.
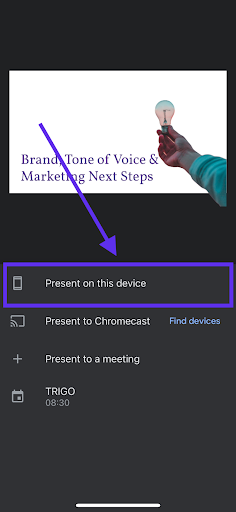
7. Чтобы увидеть результат, нажмите кнопку воспроизведения в верхней панели > Презентовать на вашем мобильном устройстве.
Готово! Если хотите более подробную инструкцию о том, как удалить фон на iPhone, мы уже подготовили её для вас.
Как сделать фон прозрачным на Android и загрузить изображение в Google Slides
На Android вы можете использовать приложение remove.bg для удаления фона изображения. После этого откройте приложение Google Slides и добавьте изображение на нужный слайд.
Хотите узнать больше об удалении фона изображения на Android? Читайте нашу последнюю статью о лучших приложениях для удаления фона на Android.
Сделать фон прозрачным в Photoshop и загрузить в Google Slides
Если вы уже редактируете изображения в Photoshop для Google Slides, возможно, захотите использовать его и для удаления фона. Процесс создания прозрачного фона в Photoshop мы подробно разобрали в одной из предыдущих статей. Обязательно посмотрите.
А если вы хотите пойти дальше, мы подготовили пошаговое руководство по 5 различным способам удаления фона в Photoshop. Поверьте, это стоит прочитать.
Когда хочется создать красивые презентации, готовые шаблоны могут стать отличным вариантом. Существует множество онлайн-платформ, например SlidesCarnival, которые предлагают разнообразные современные шаблоны Google Slides, легко настраиваемые под ваши нужды и помогающие быстро создавать презентации. Кроме экономии времени, использование шаблонов с таких платформ помогает добиться отполированного и профессионального вида.
Когда у вас есть шаблон, прозрачный фон — это быстрый и простой способ поднять эстетику слайдов на новый уровень. Делая фоновые изображения прозрачными, как описано в этой статье, вы можете сохранить аккуратный профессиональный вид и одновременно донести своё сообщение. Это эффективно улучшает общую эстетику презентации и придаёт ей единый, стройный вид.
Попробуйте сами — откройте remove.bg, загрузите тестовое изображение, вставьте его в Google Slides и посмотрите, что получится.
Комментарии
Thanks for the sharing.