Ready to launch your products on the biggest e-commerce site in the world? Want to ensure you’ve got everything you need before taking the plunge with this online megastore? Then you’ve come to the right place.

There are a few key things to consider before setting yourself up as a seller on Amazon. This guide will walk you through it step-by-step so that you can focus on driving sales and promoting your brand to the tech giant’s 300 million customers worldwide.
Содержание
Best practices: Things to consider before setting up an Amazon seller account
Selling on Amazon can be a fantastic opportunity for an e-commerce business, but there are some things you’ll need to know before you take the first step. Make sure you’ve thought about the following points before jumping in.
What type of seller plan do you need?
The type of plan you’ll need will depend on the scale of your operation. You’ve got two options to choose from: Individual or Professional.
An Individual plan is free to hold, allows you to sell a maximum of 40 items per month from 20 product categories, and will charge $0.99 per unit sold. A Professional plan has a monthly subscription fee of $39.99 and allows you to sell unlimited items from 30 product categories.
How will you fulfill your orders?
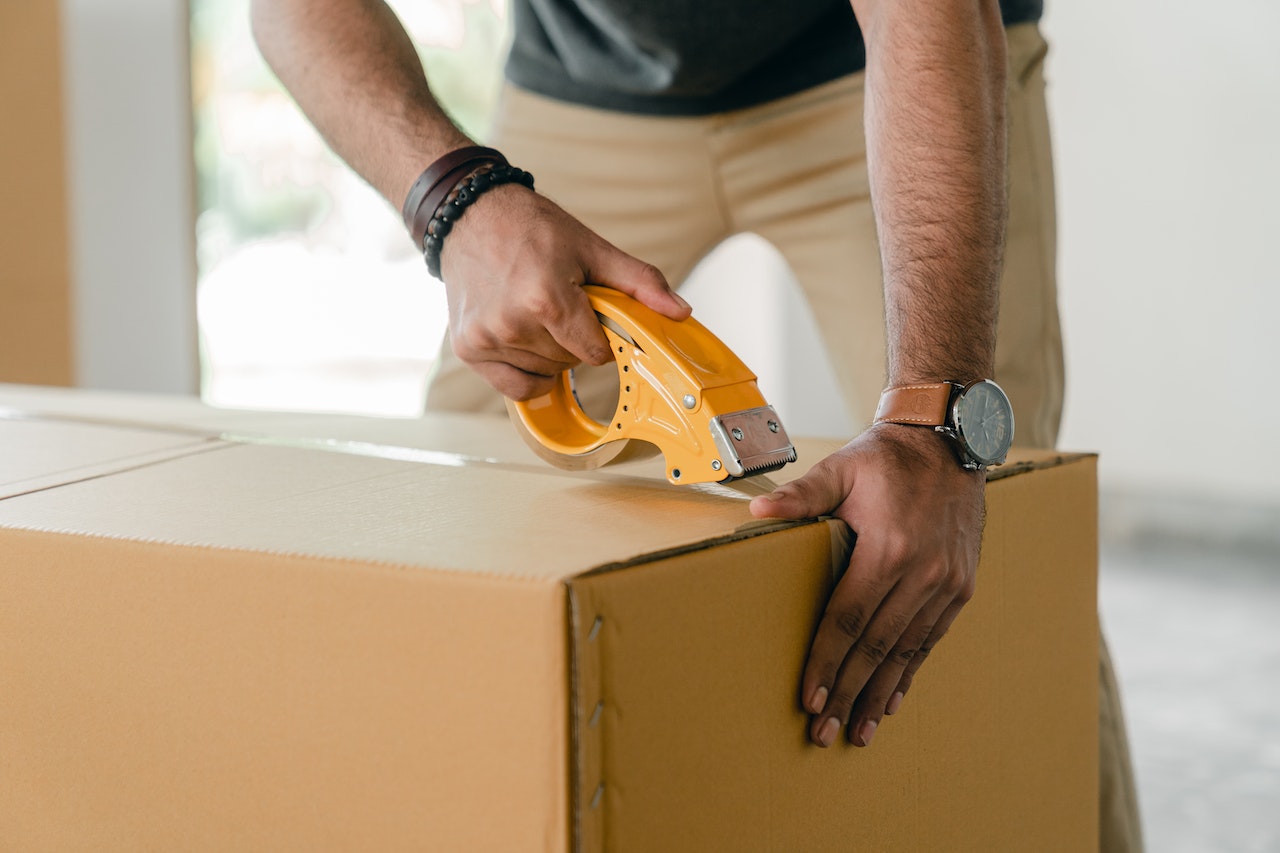
Fulfillment refers to the responsibilities of storing, picking, packing, and shipping products to customers. Again, you’ve got two options: Fulfillment by Amazon (FBA) or Fulfillment by Merchant (FBM).
With FBA, you pay a fee to store your products in an Amazon fulfillment center. Amazon will then pick, pack, and ship your products for you. Amazon also takes care of returns. With FBM, you handle all aspects of storage and order fulfillment. You are also responsible for missing or damaged packages and returns.
Referral fees and other costs
Amazon charges a referral fee for every item sold. The referral fee is calculated as a percentage of the total sales price and can vary greatly between categories — from 7.14% on Consumer Electronics to 45.9% on Amazon Device Accessories.
Other potential costs to consider include: long-term storage fees, overage fees, removal order fees, high-volume listing fees, and refund administration fees.
International sales tax and VAT
Depending on the nature of your business and the products you sell, you may be required to register for and pay VAT in Europe and sales tax in the US. This depends on multiple factors, including your business address, fulfillment model, and annual sales.
Awareness of Amazon’s VAT and tax requirements and understanding how to comply with them is an essential part of knowing how to set up an Amazon business account.
Amazon product photo requirements
Amazon has strict rules regarding its product photo requirements, including format, dimensions, background, and scaling. We’ve already covered them in this article, but here’s a quick recap:
Format: you will need to save your product photo as either a JPEG or a TIFF file. Amazon makes it clear that JPEG images are preferred.
Dimensions: your Amazon product photo size must be at most 10,000 pixels on the longest side. Amazon recommends 1,600px for an optimized zoom experience.
Color: make sure you save your product photos in RGB or CMYK color mode. RGB is preferred because CMYK can display tonal variations when shown on the website. Main Amazon product photo backgrounds must be pure white.
Scale: Main images must have the product fill at least 85% of the frame. Variant images may be further zoomed in or out.
Take a look at this list of Amazon product photo requirements for the full rundown.

Amazon Seller Central and Amazon Seller University
Geez, this Amazon seller account setup is feeling complicated already! There is a lot to think about, but thankfully, Amazon has made the process as transparent and accessible as possible.
Check out the Amazon Seller Central and Amazon Seller University pages to brush up on your knowledge before setting up your Amazon seller account. Their easy-to-follow resources and handy video guides will have you ready to go in no time.
How to set up an Amazon seller account
So, you’ve calculated your costs, graduated from Amazon Seller University, and feel ready to take on the world. Great! Let’s get you set up. Here’s how to make an Amazon seller account.
Type “Amazon Seller Central” in Chrome or any other search engine and click on the top Amazon Seller Central page. This will be localized to the country from which you are searching.
Hit the “Sign up” button.
If you have an existing account, enter your email and password and click “Next” to proceed. Note: If your existing account has been set up with a personal email address, it may be worth setting up a second account with your business email address by clicking on “Create your Amazon account” instead.
Read through the welcome page and click “Begin.”
Fill in your business information, including your location and business type. Then click “Agree and continue.”
Complete the account creation process by submitting the required details. This will include your company registration details (if relevant), business postal address, billing details, and store & product information.
Lastly, upload any necessary documentation. This might include a scanned copy of your passport and a recent bank account statement. Then click “Submit” to finalize your Amazon seller account setup. Amazon will email you with your approval.
Amazon product photo editing
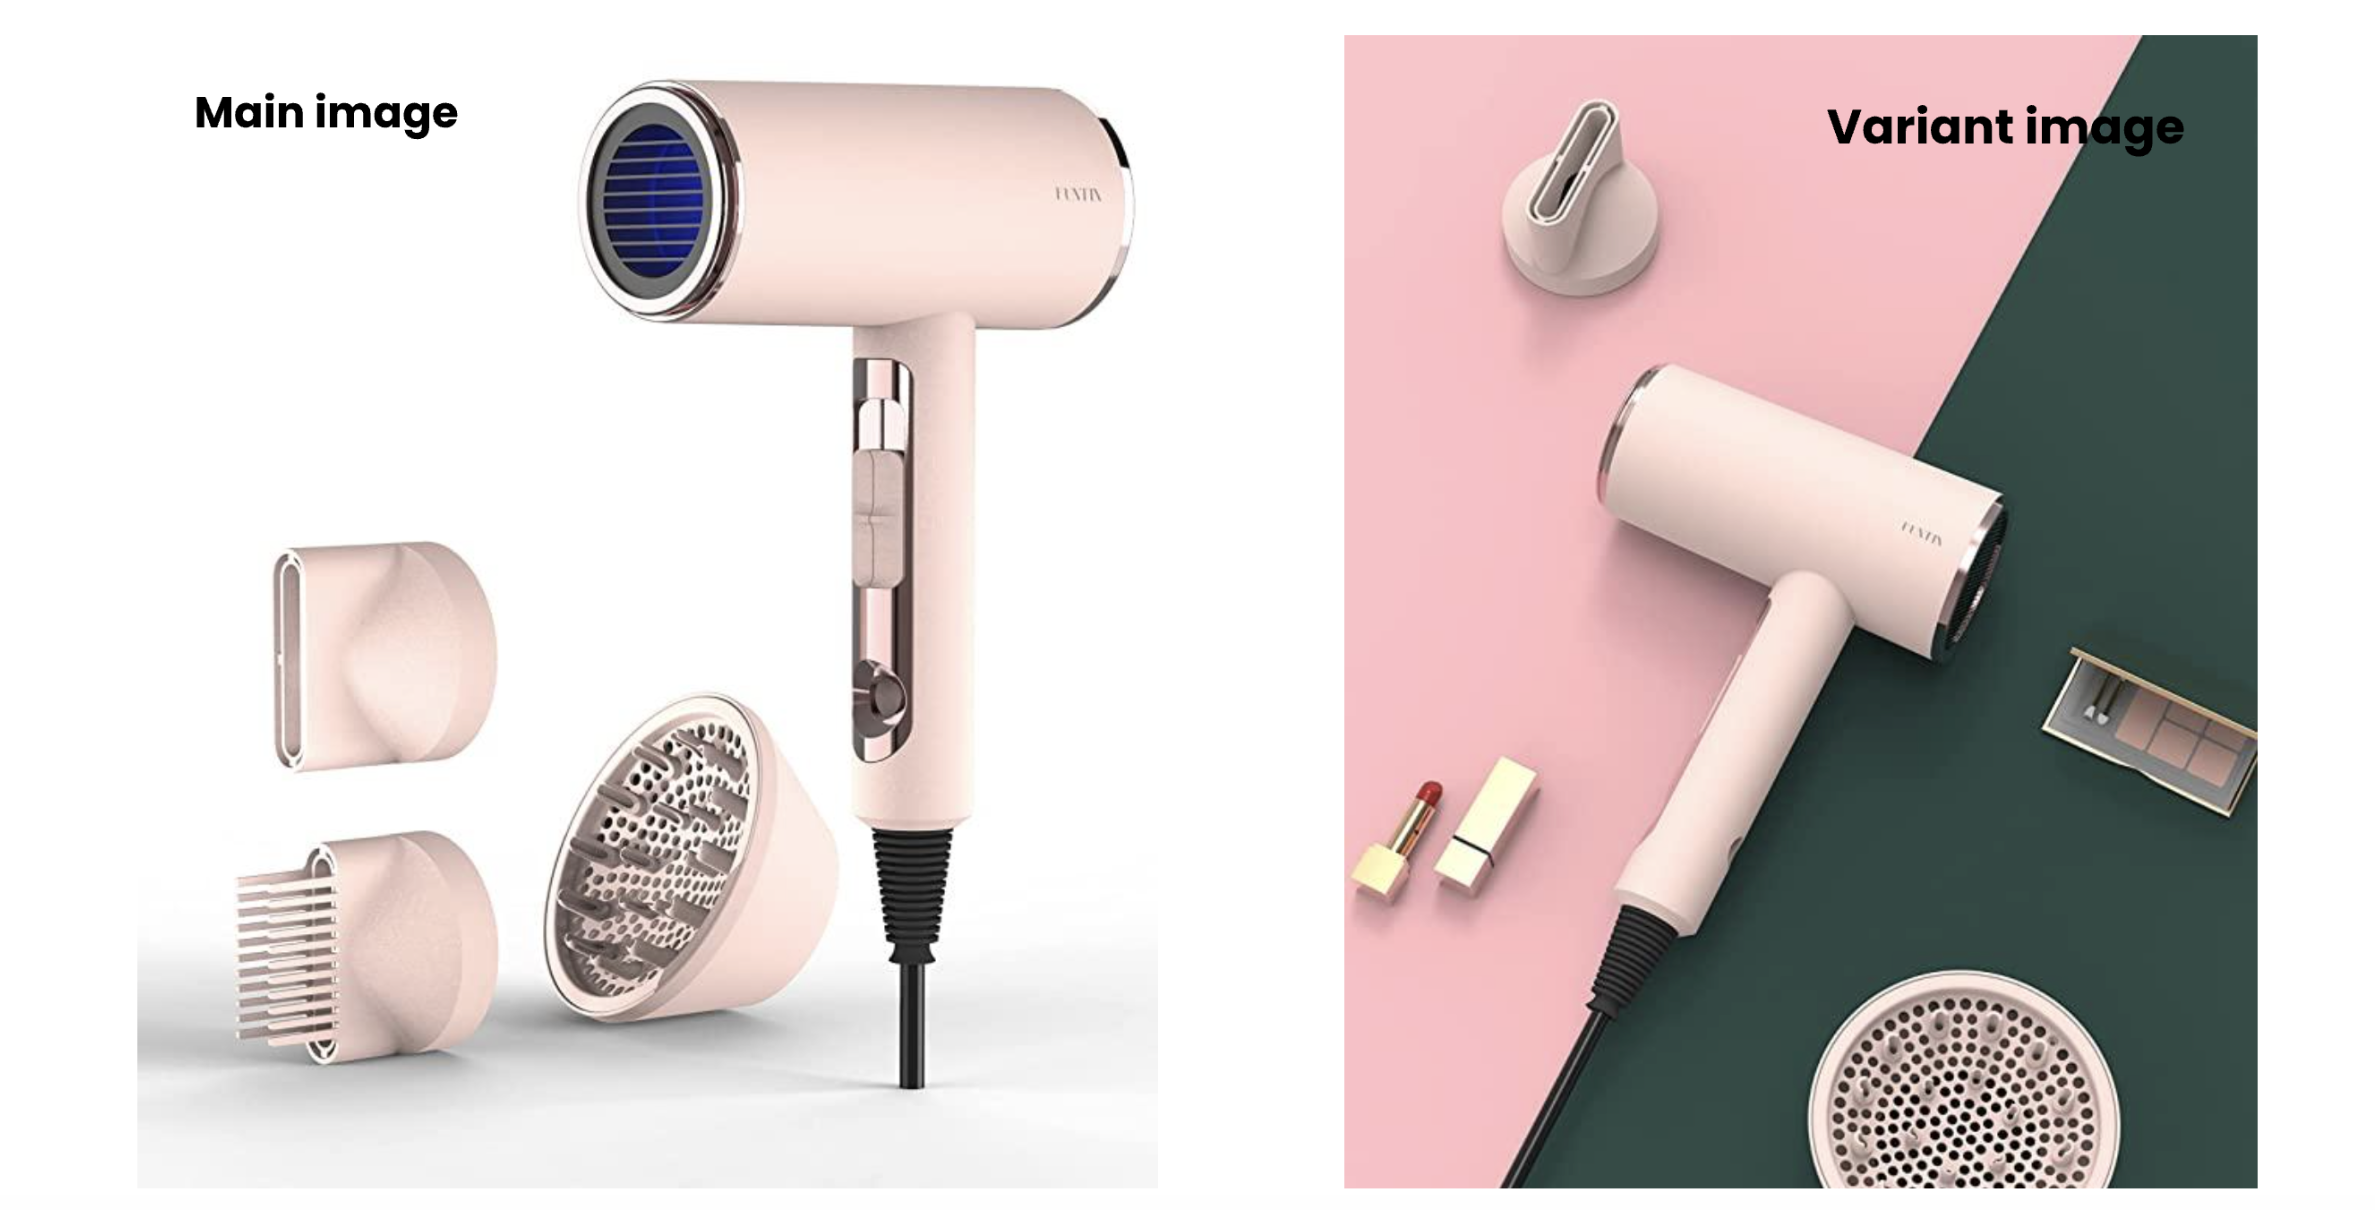
Based on customer studies, Amazon suggests that having a minimum of 5 and a maximum of 7 images per product produces the best results. The first and most important image in your photo set is called the main image. This is the image shoppers see when looking at your product in search results. Any additional images are known as variant images.
Amazon has different rules for main and variant images — mainly:
Main images must always have a white background, whereas variants may have a different background.
Main images must have the product fill at least 85% of the frame, whereas variants may be further zoomed in or out.
Main images must not have props, whereas variants may be fully styled with props included.
Edit your Amazon product photos with Designify
So, once you’ve shot and color-corrected your Amazon product photos, the main task is to switch up the backgrounds to get them ready for upload — pure white for your main images and something more creative for your variant images.
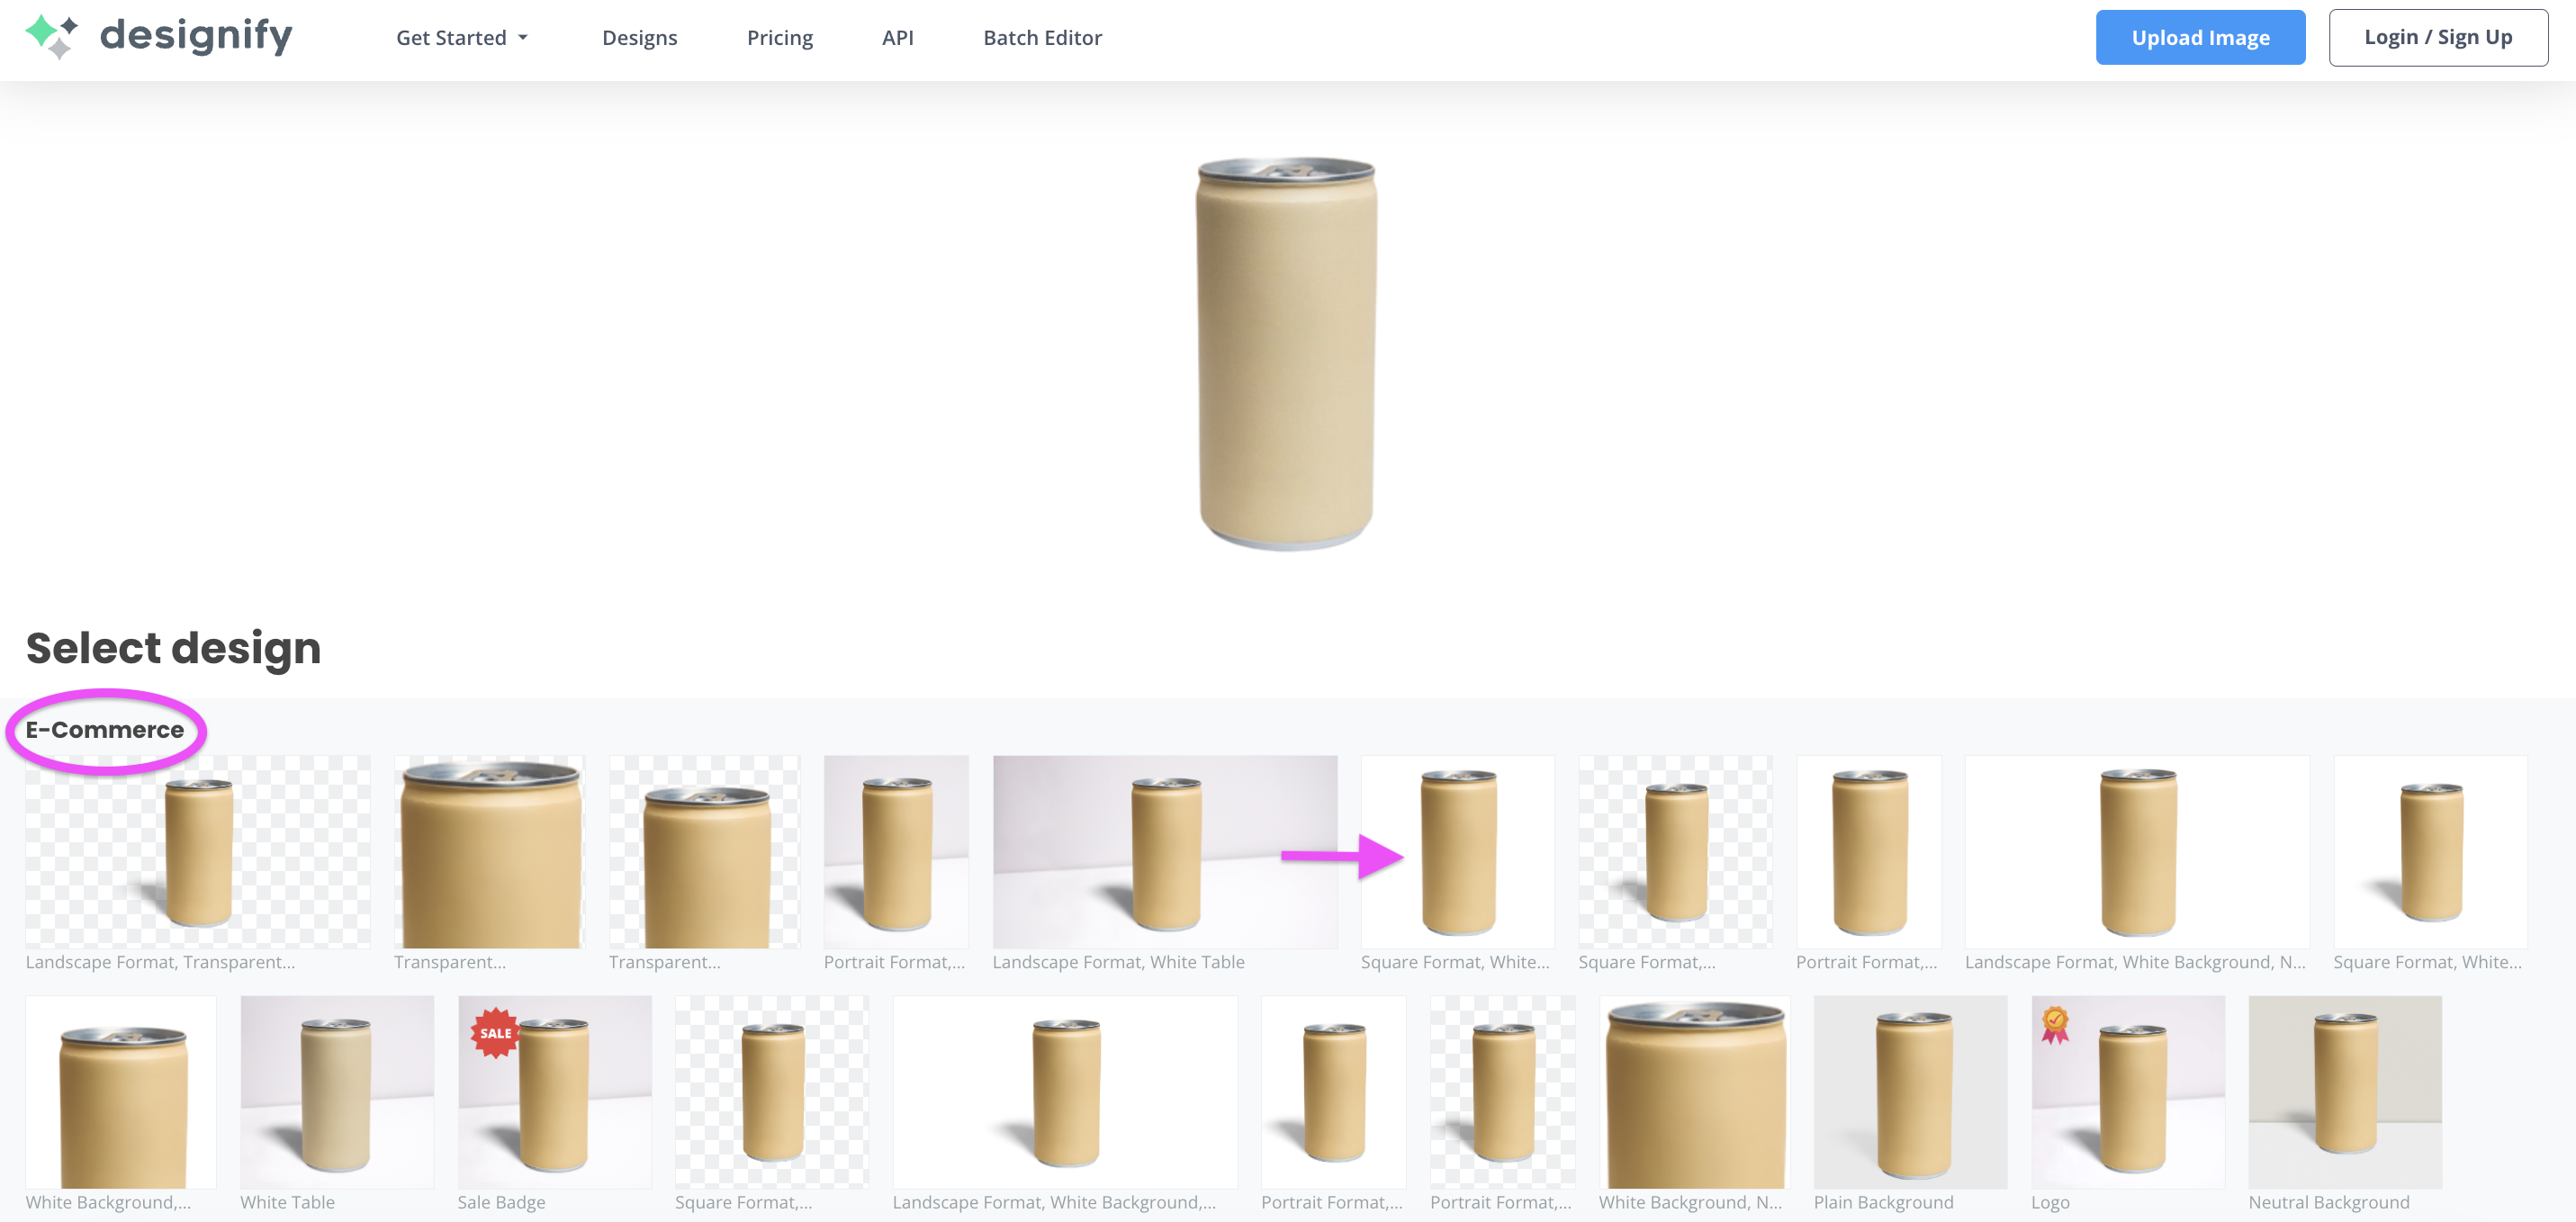
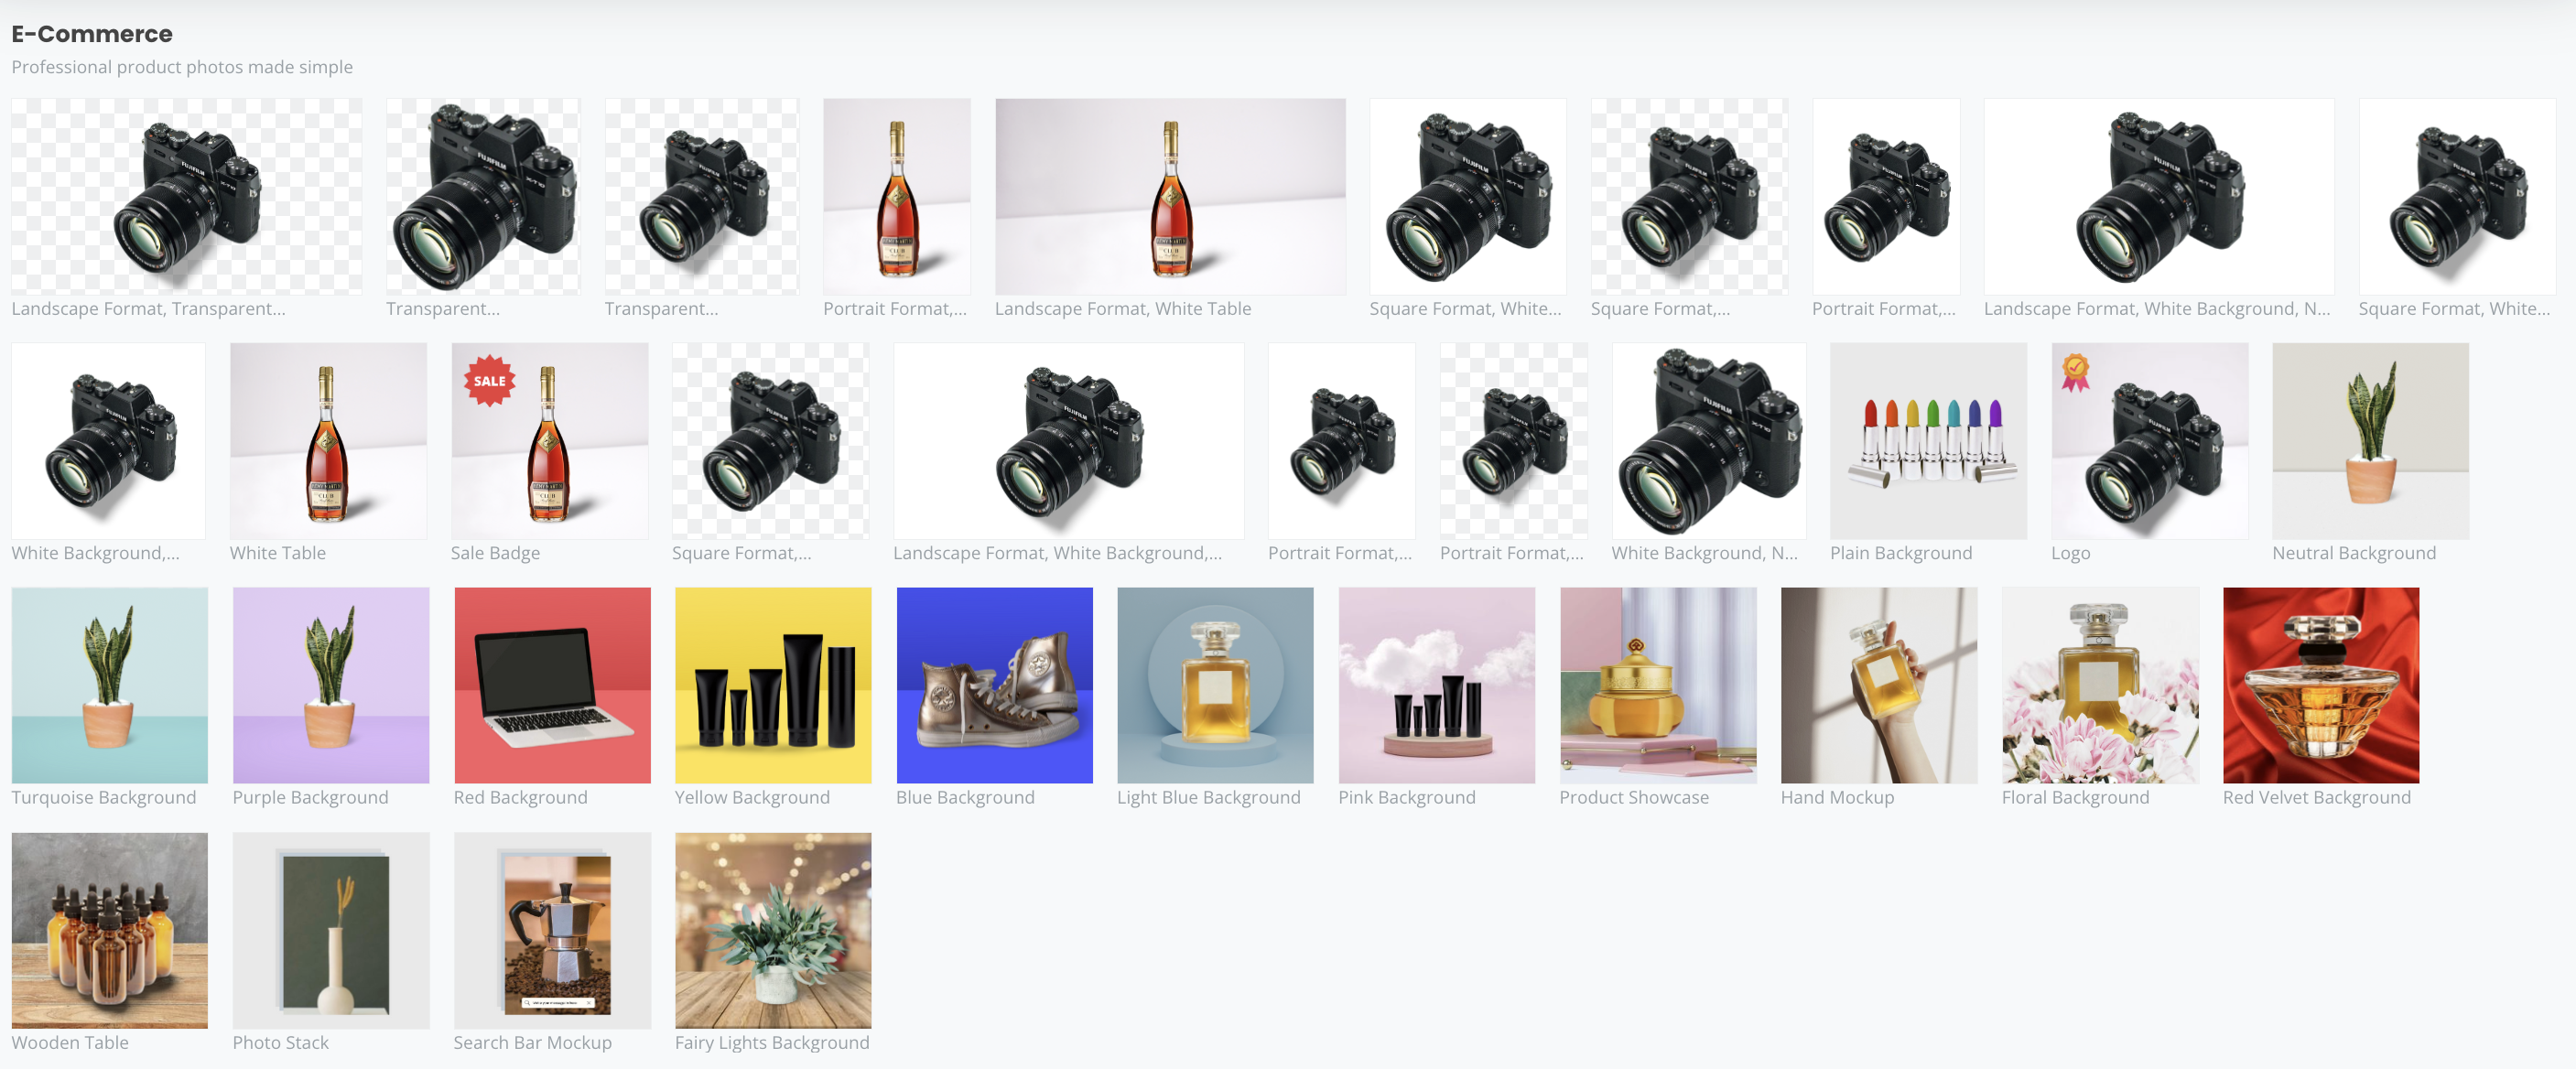
Designify is a powerful online tool that lets you batch-edit your photos in minutes. With Designify, you can remove, add, or change the background to create a unified design in no time. Here’s how:
Upload your product photo by dragging and dropping it into Designify.
-
For your main images, select the template > Square Format, White Background, No Shadow from the specially-designed e-commerce template section.
-
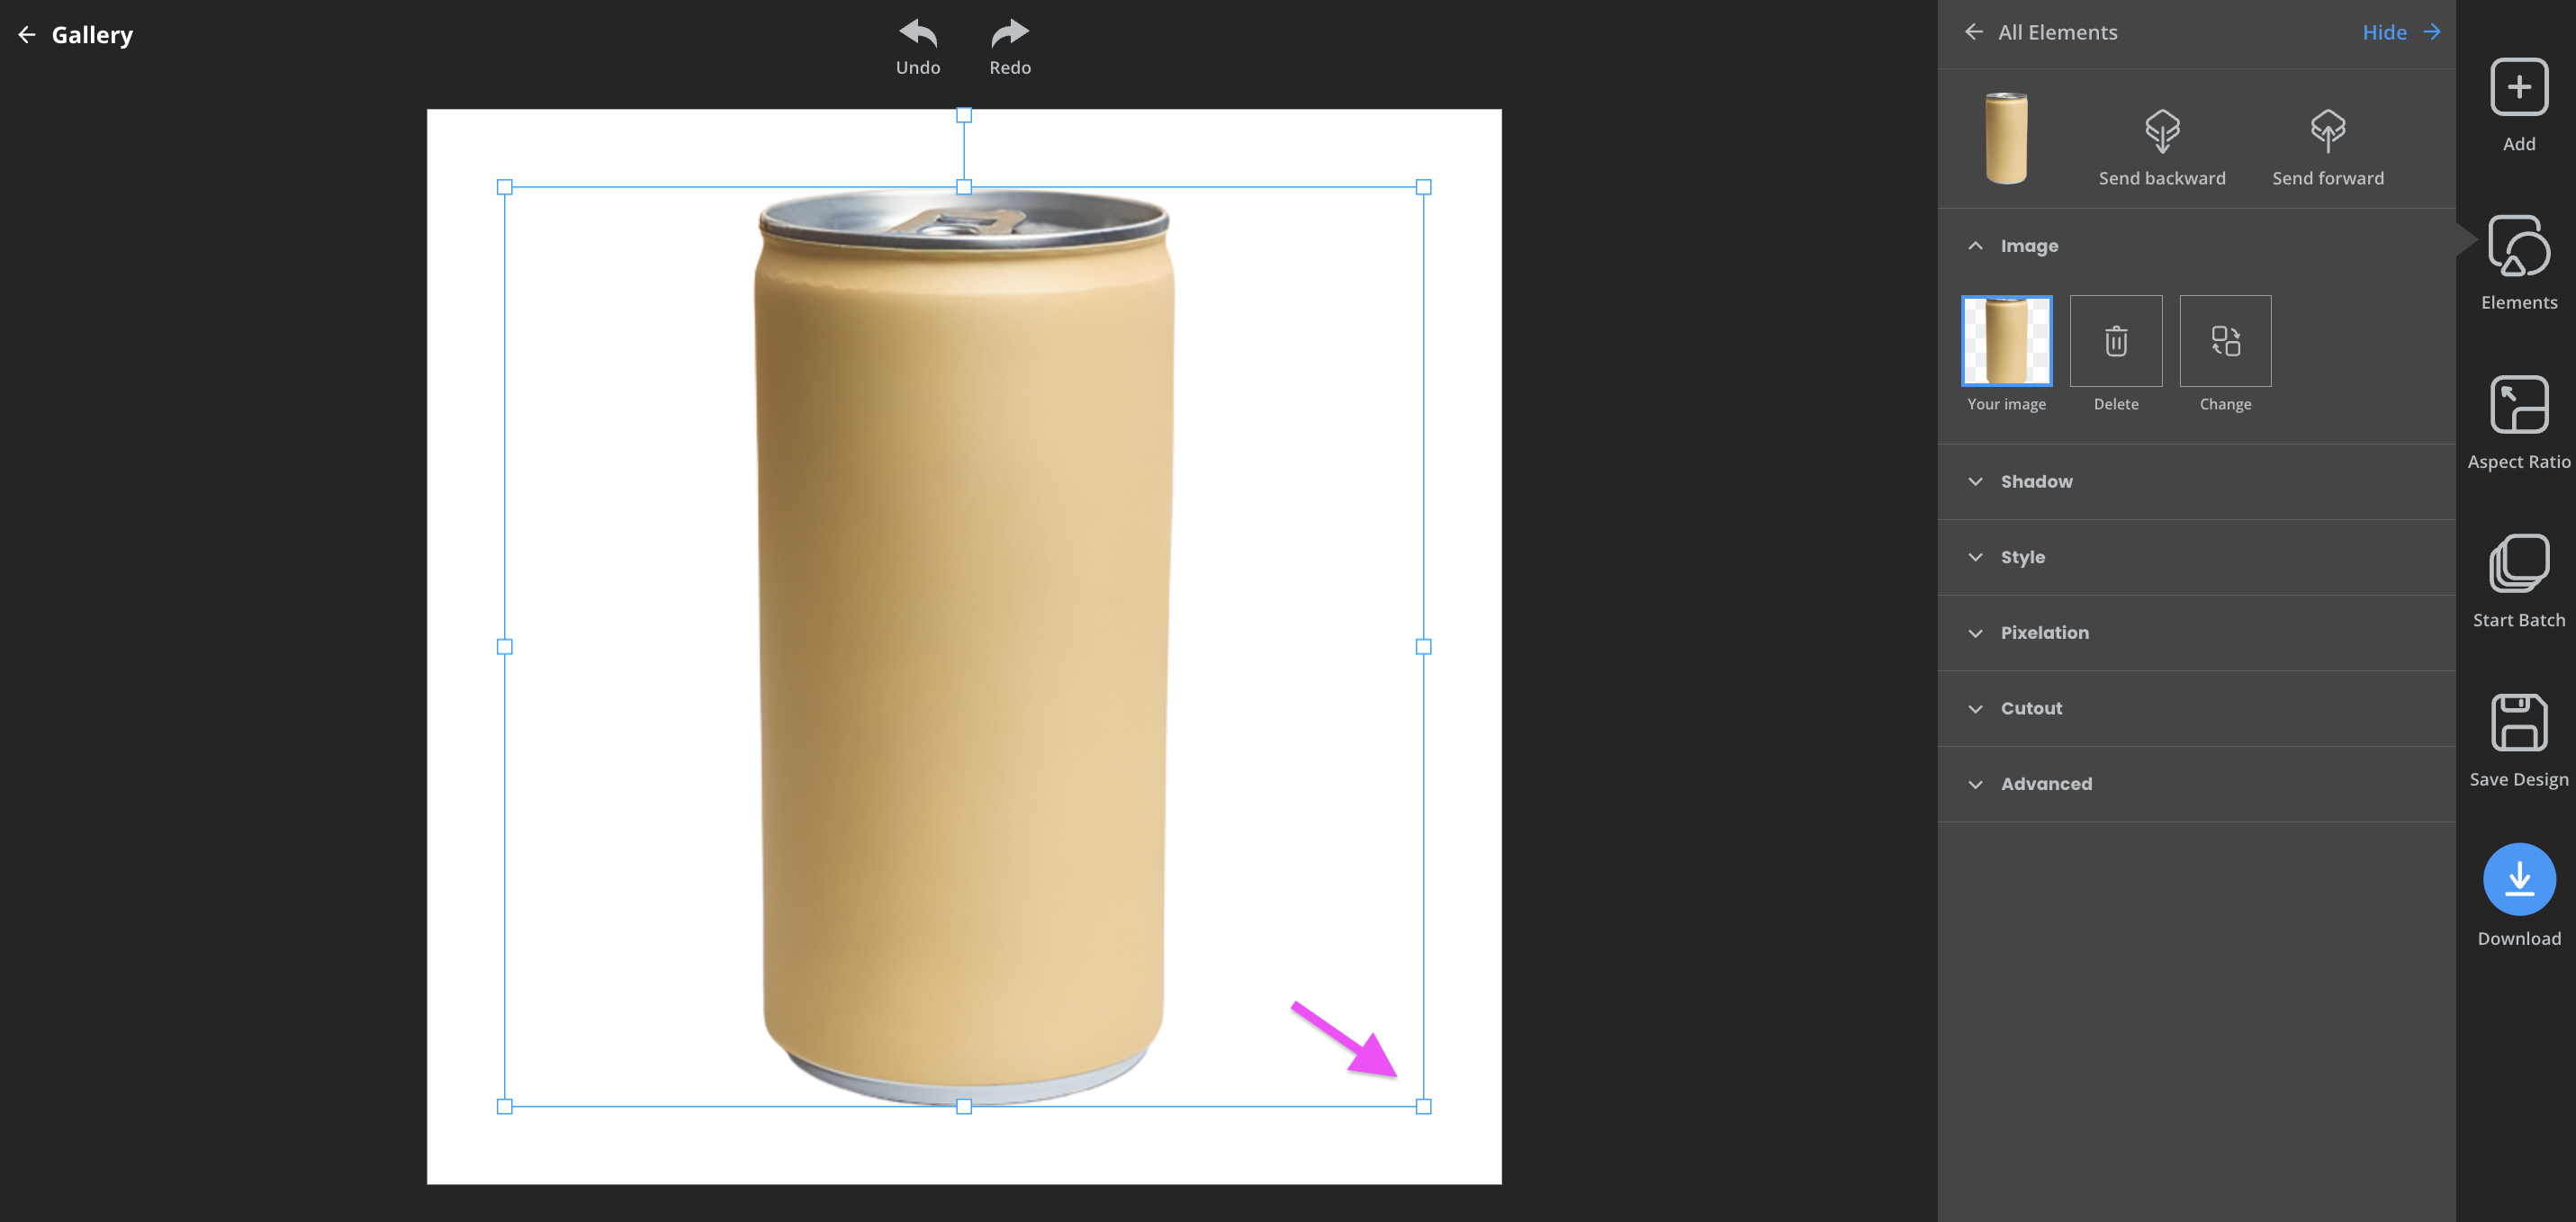
Then you can scale the image to ensure it fills 85% of the frame as required by clicking > Edit, selecting the image, and dragging the corners.
-
You can even take advantage of Designify’s pre-set aspect ratio settings. There’s an Amazon-ready 1:1 setting — perfect!
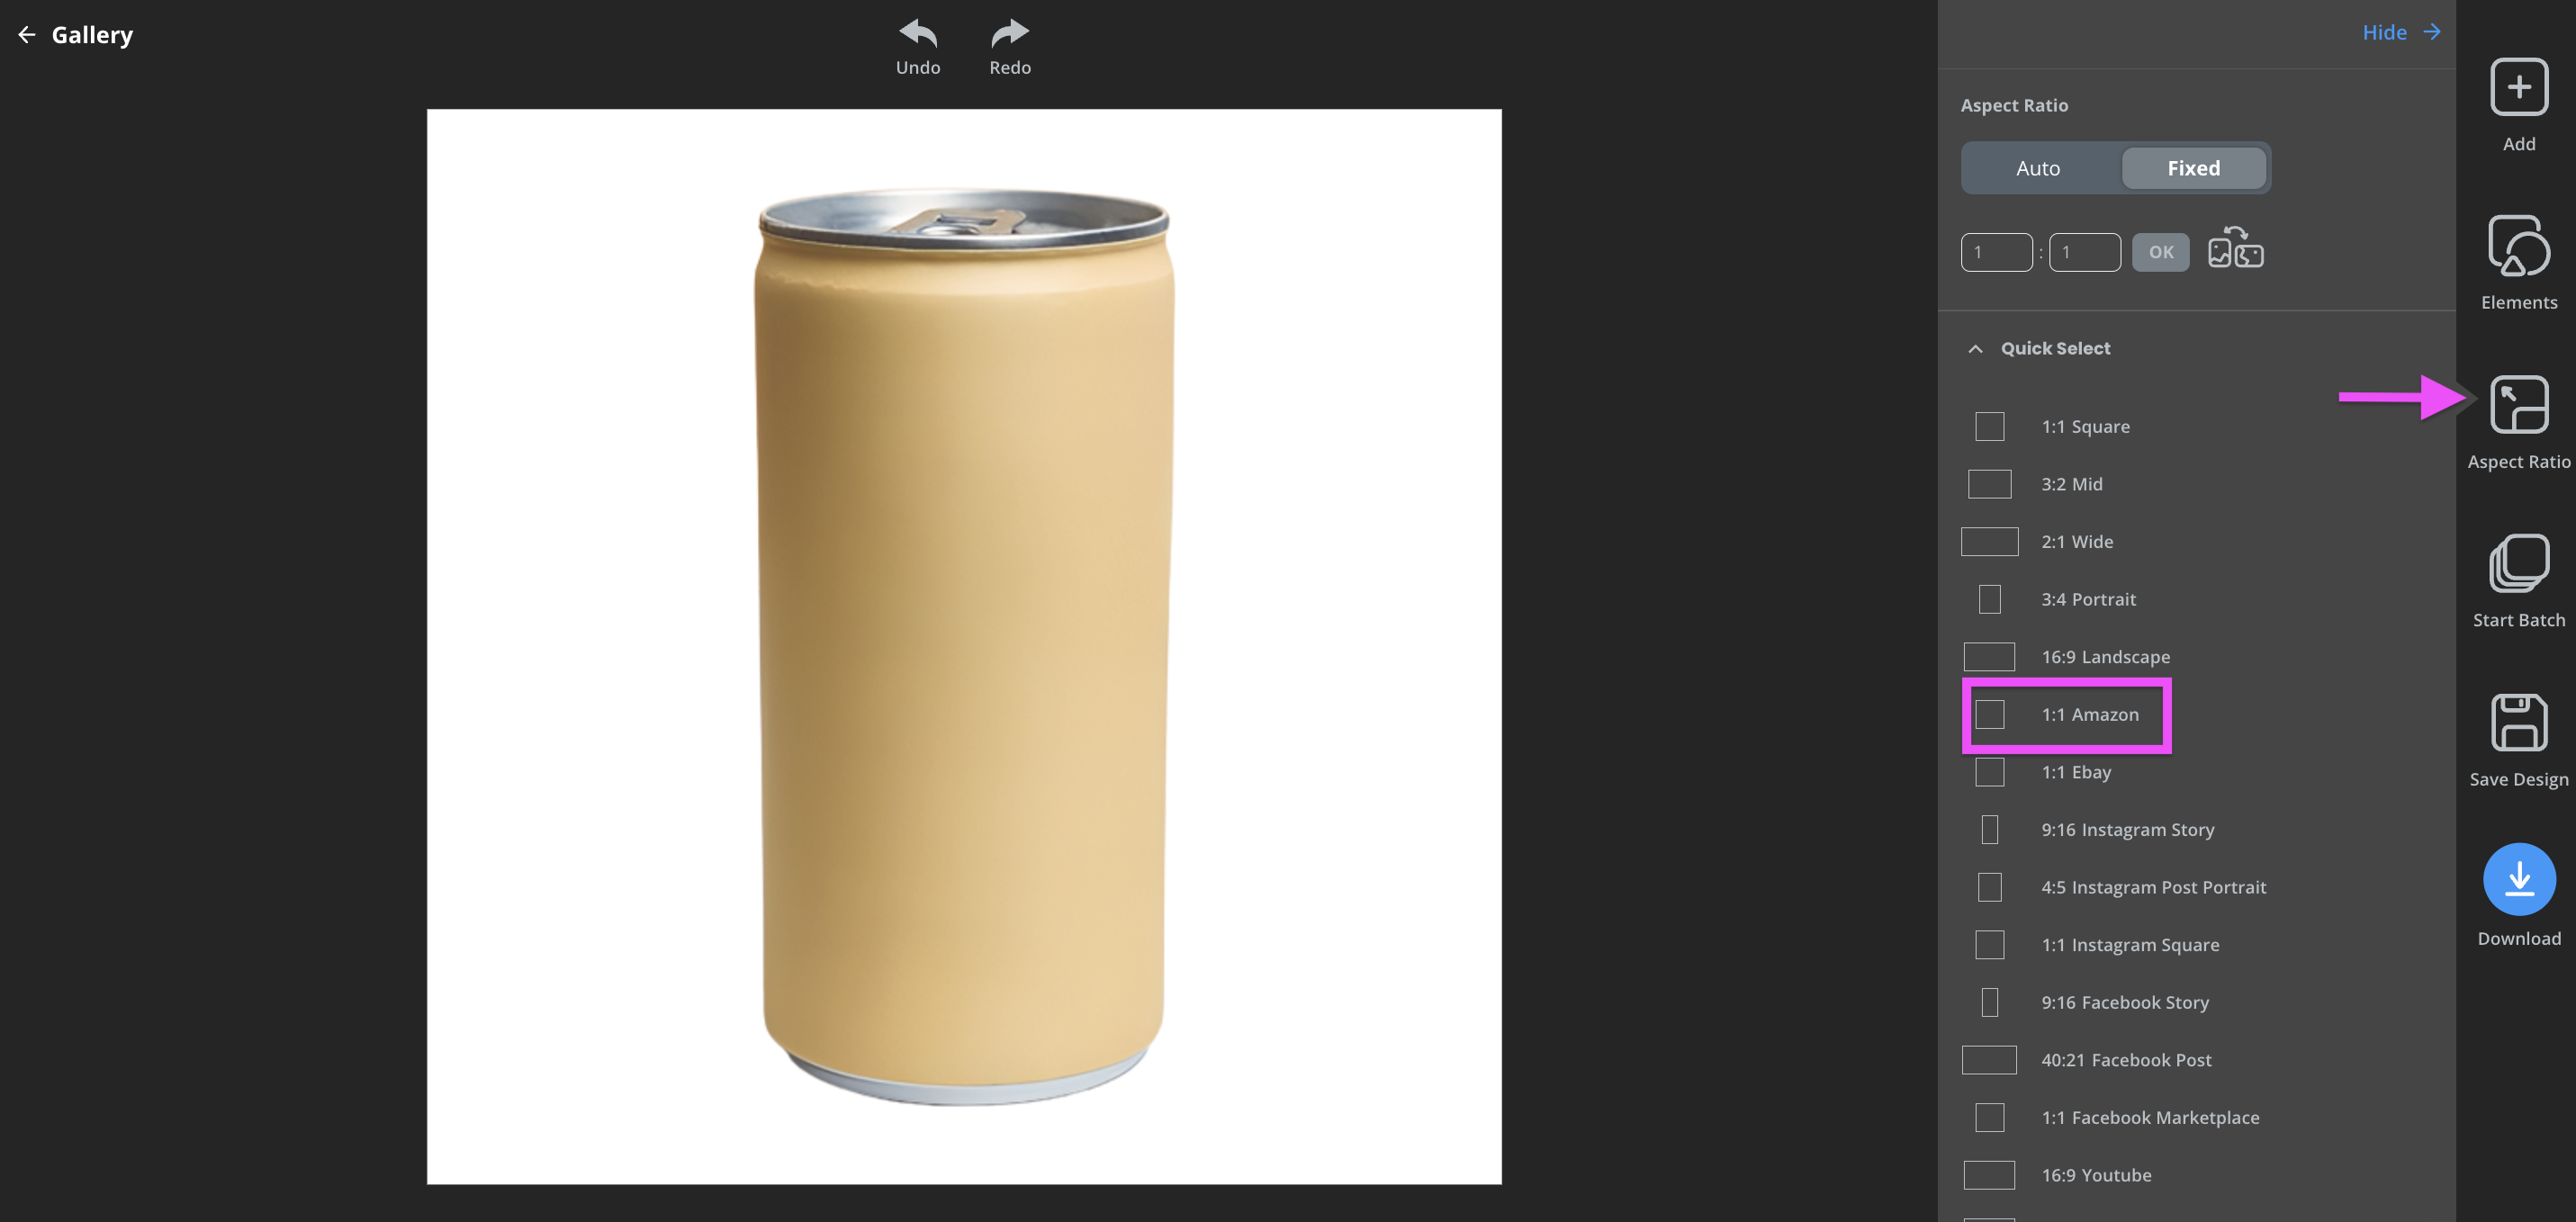
Next, hit > Download. Your main Amazon product image is ready!
-
Now, let’s move on to your variant images. Simply head back to the gallery and choose another stylish template from the e-commerce section.
Once you’ve selected a template, you can click on > Edit to adjust the graphics or even upload your own background.
-
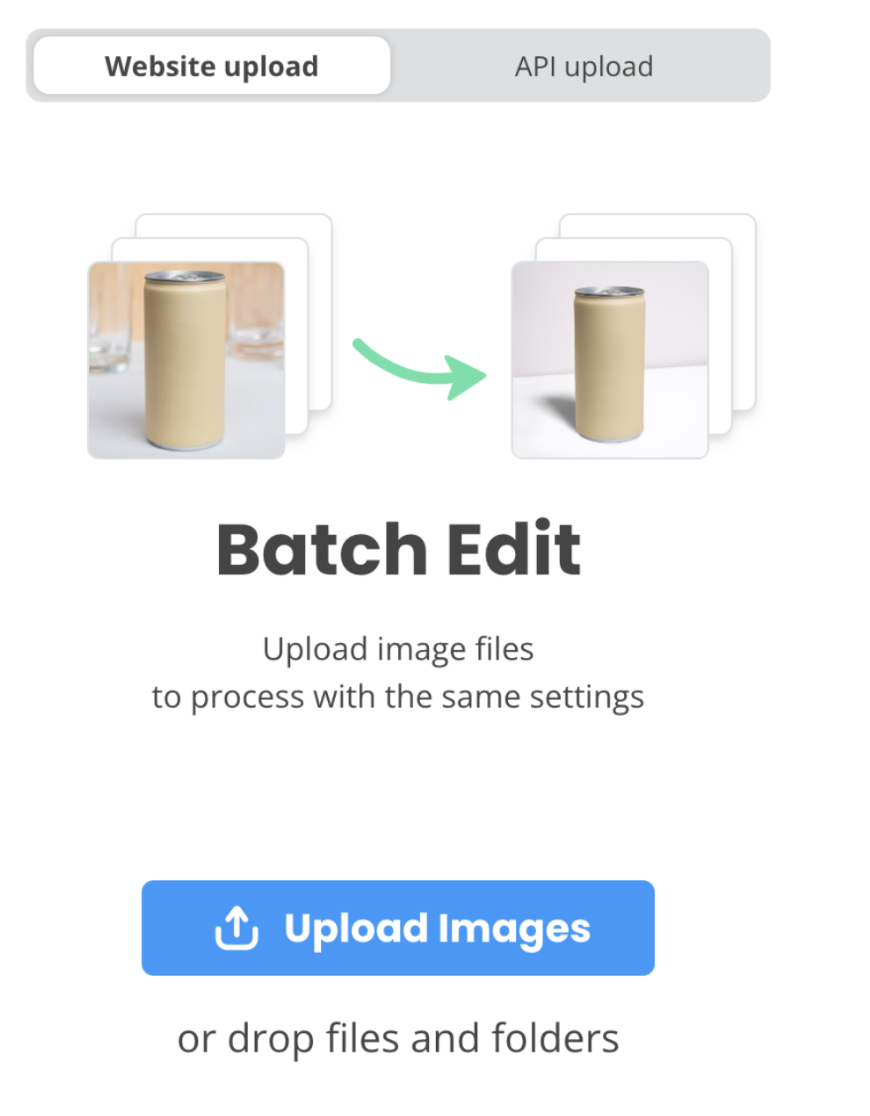
Once you’re happy, you can select > Start Batch to apply your template and settings to up to 10 product photos in just one click. That should save you some time, right?
Lastly, download the photos to your computer, insert them into your Amazon store, and get selling!
Set up an Amazon Seller Account with the right tools and tricks
Setting up an Amazon seller account is no small task. Still, with the right preparation and the help of some awesome tools to automate your workflow, you can easily achieve a professional finish in no time. Just remember to:
Pick the plan that suits you best.
Choose how to fulfill your orders.
Have product photos that comply with Amazon's requirements.
For this last step, you can head to Designify to edit your Amazon product photos easily and quickly.
Комментарии
Пока нет комментариев.