What do successful social posts have in common? They have great visuals that grab people's attention and hold onto it. They're also optimized for different platforms like Instagram, Facebook, and LinkedIn to ensure the algorithm pushes them to the top.
To be effective in the world of visual content, you need to stand out from the crowd. This is why we’re here to walk you through the essentials of social media design, innovative trends, best practices, and step-by-step how to create eye-catching social posts.
Let's dive right in.
Índice
- Coming up with social media content ideas
- Social media post design: How to and what tools to use
- Essential social media graphic design tips to optimize across platforms
- Versatile social post designs for Facebook, Instagram, LinkedIn, and more
- How to design YouTube thumbnails with remove.bg & Canva
- How to design Instagram stories with remove.bg & Canva
- Creative design for your social media graphics
Coming up with social media content ideas
When it comes to coming up with new content ideas for social media posts — can get tough. But here are some fantastic hooks that can help you brainstorm every single month. That way you can get designing in no time.

Grab a pen and paper and write down the first ideas that come to mind when you think about:
Any fun events or celebrations on the horizon at work?
Any cool projects we've wrapped up that we're eager to share with everyone?
Are there any collaborations that have us super excited and wanting to spread the word?
Did any interesting questions pop up during sales calls or product reviews?
Cute pics hanging out in your Slack channel?
Got any random ideas from the team that we could integrate into our content?
Which content topics are already performing well that we can build upon?
Just going through these, instead of brainstorming with a blank page is bound to get your creative juices flowing. We recommend, doing this brainstorming session once a month with a yummy cup of tea in hand and treating it as your me-time.
Social media post design: How to and what tools to use
A social media content creator/designer's new best friends are tools. They're not just essential to get the job done, but finding new and unique ways to use them can give you that edge you're looking for.
You're going to want to mix and match tools so you can get the best end results. These are the ones we love most:
remove.bg: to remove the background of images and start creating posts with your own images & personal branding shots.
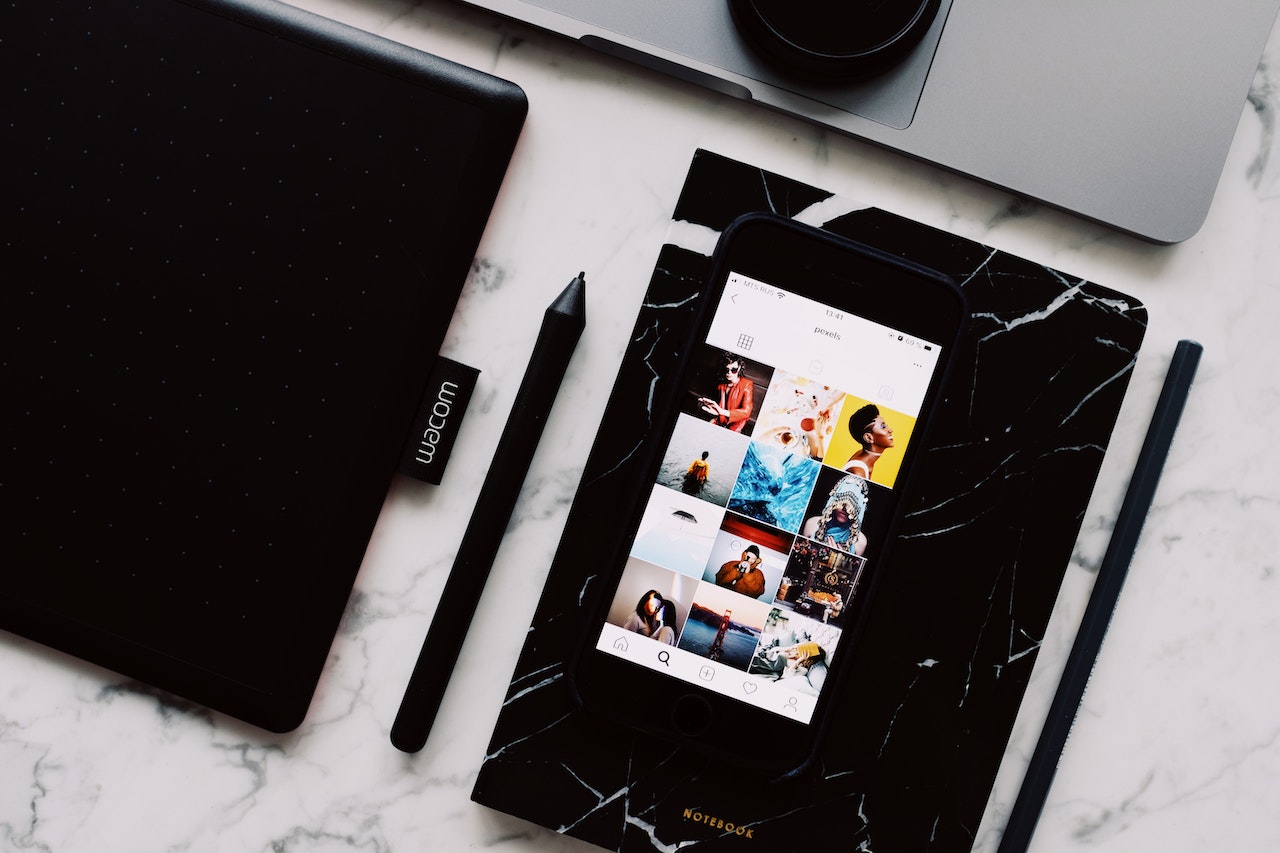
Pexels: to source stock images (although we do recommend taking your own to make content unique as well).
Canva: an easy-to-use and intuitive design platform.
Canva color palettes: to inspire consistent coloring throughout your social media designs.
We cover examples of how you can use these tools and what type of posts you can create using them below. But first, let's dive into the essential graphic design tips that will take your visuals to the next level.
Essential social media graphic design tips to optimize across platforms
Whether you're publishing a video, podcast, or image with text, each social media platform has its own unique set of audiences, preferences, and algorithms that impact how well content performs. This is why it's key to follow essential design rules and optimize your graphic designs for the platform you're posting on.
This is what can take your designs from good to great:
-
Personal branding: By adding personal images of you and your team, you can add a face to your company and brand. This can make your posts more engaging and create something unique.
For example:
-
Visual hierarchy: Strategically arrange post elements to guide the viewer's attention and highlight the most important information.
For example, do it like this:
-
Brand consistency: A regular logo, color palette, and typography help to build a cohesive visual experience for your audience.
For example the makeup brand Saie is absolutely nailing their branding. You can find their lilac color throughout their profile pic as well as their story highlights.

You can also find their lilac and black color palette consistency on their website.
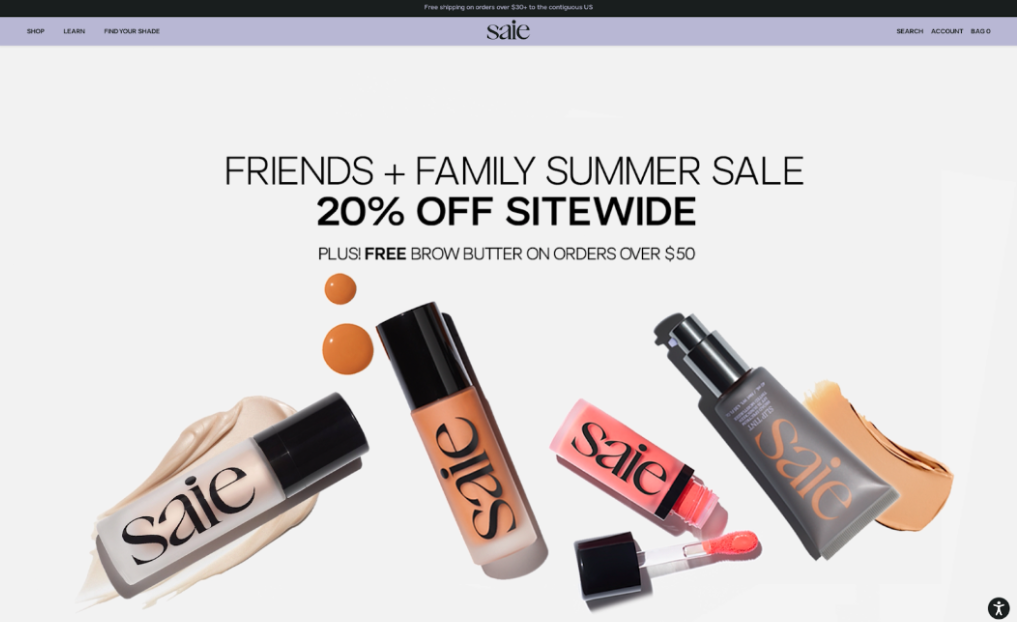
And what makes their makeup products recognizable and have a high-quality look and feel? Their beautiful packaging with a prominent elegant logo. It’s consistent across all of their products, making it look and feel homogeneous — from their social channels all the way to offline once the customer is holding the product in their hand.
-
Quality images: Opt for high-resolution images where possible to enhance the visual appeal of your social media posts.
For example, do it like this:
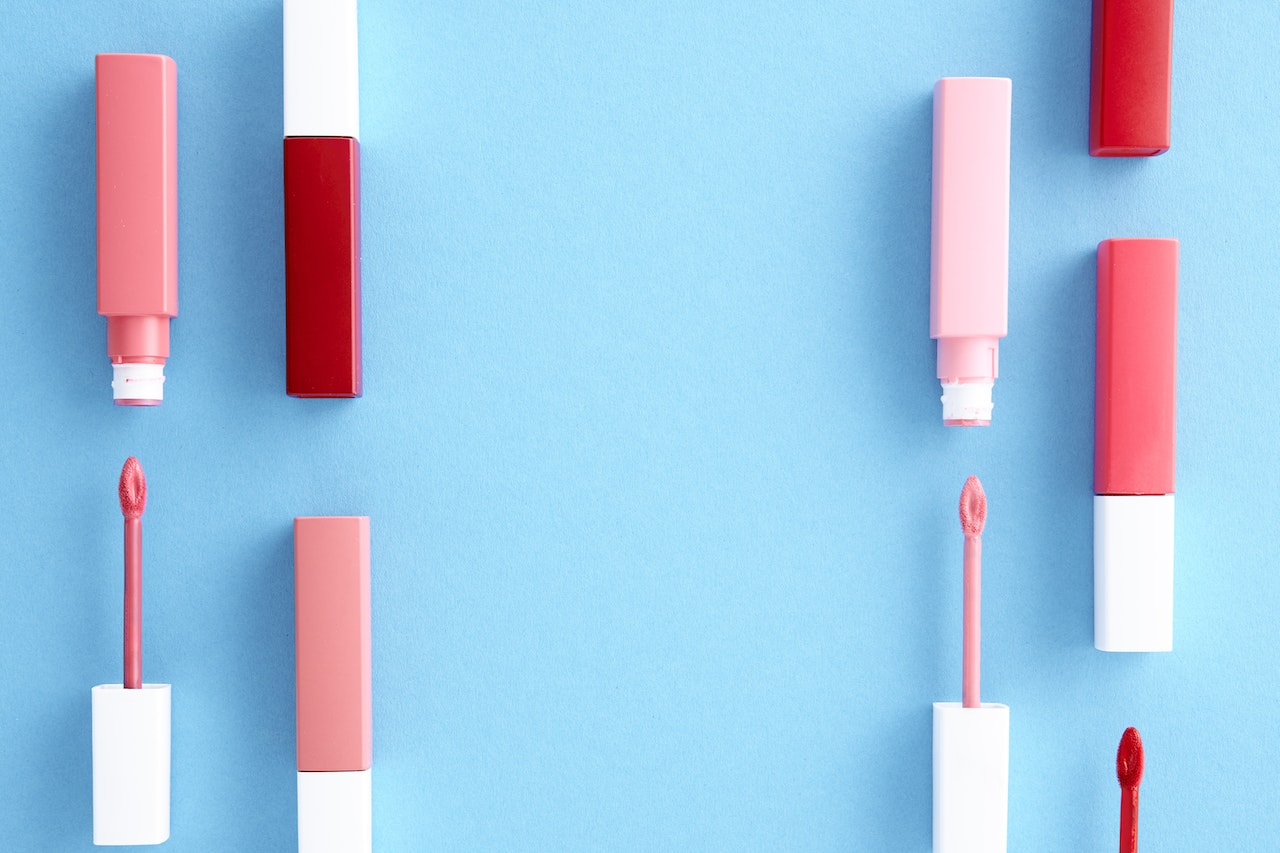
The image has colors that pop, is clear, clean, and has an appealing aesthetic.
Not like this:

The image is grainy, the glass creates a reflection and line in the middle of the image and you can’t see the woman’s face. It might be an ok artsy shot — but this is a no-go for marketing social media designs.
-
Typography: Selecting appropriate fonts influences the message (and tone) you want to convey.
Here is a full article with examples of how to use typography in social media design — which fonts reflect what type of brand and more.
-
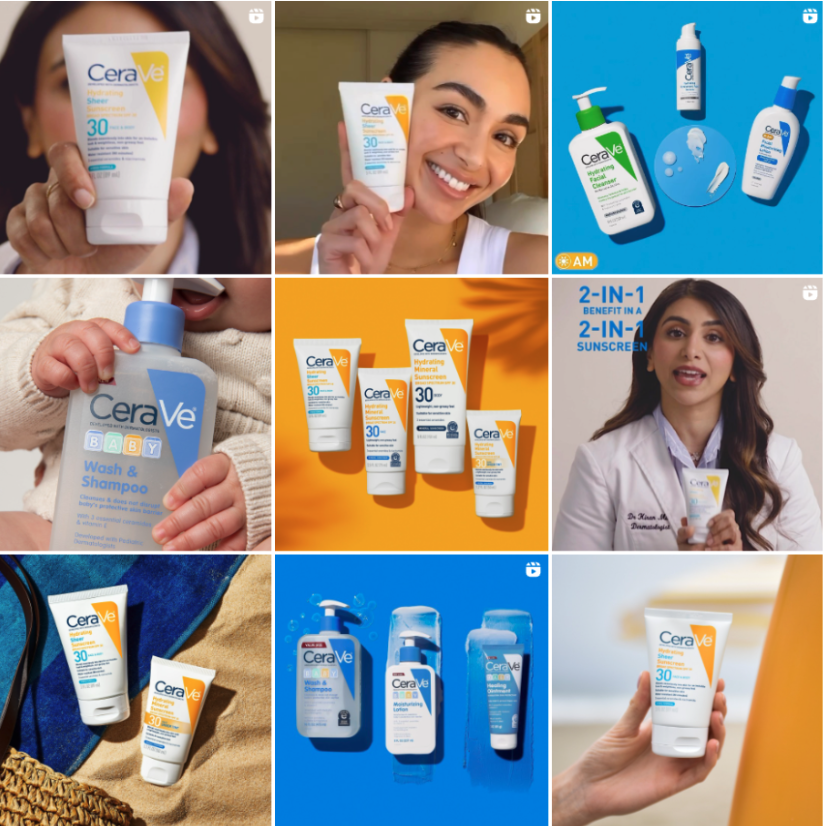
The psychology of color: Certain colors are associated with certain emotions and can reinforce your brand identity. This is why using a consistent color palette makes Canva color palettes a great place for inspo.
Here’s a great example of a brand that has a great color palette in place: CeraVe. The backgrounds of their images match the products, and overall the posts' colors complement each other within the feed.
Content size and formatting: In general, we recommend using design formats that cover the most visual space in the social media feed. Plus, it should be the format that boosts the algorithm and get the best results. You can use this Social Media Image Size Cheat sheet to refer to sizing. Different platforms also support various image formats, such as JPEG, PNG, or GIF. You should use the format that meets the platform's requirements for optimal visual quality.
-
Content types: Whether you post a video, audio, slides, or photo with text — can have an impact on how the algorithm of a platform (Instagram, TikTok, Facebook, etc.) pushes the post in your audience's feed. So this is something you'll want to think about.
Leveraging these graphic design tips for social media will help you create attention-grabbing graphics that are bound to boost engagement.
Versatile social post designs for Facebook, Instagram, LinkedIn, and more

Okay, now we know why social media design is important in general. What tools can we use, and how can you go about creative social media post design?
First, you will want to decide what platform you want to design for (e.g. Facebook, Instagram, or LinkedIn) and what size your image should be in.
But here's a best practice you can use on many platforms:
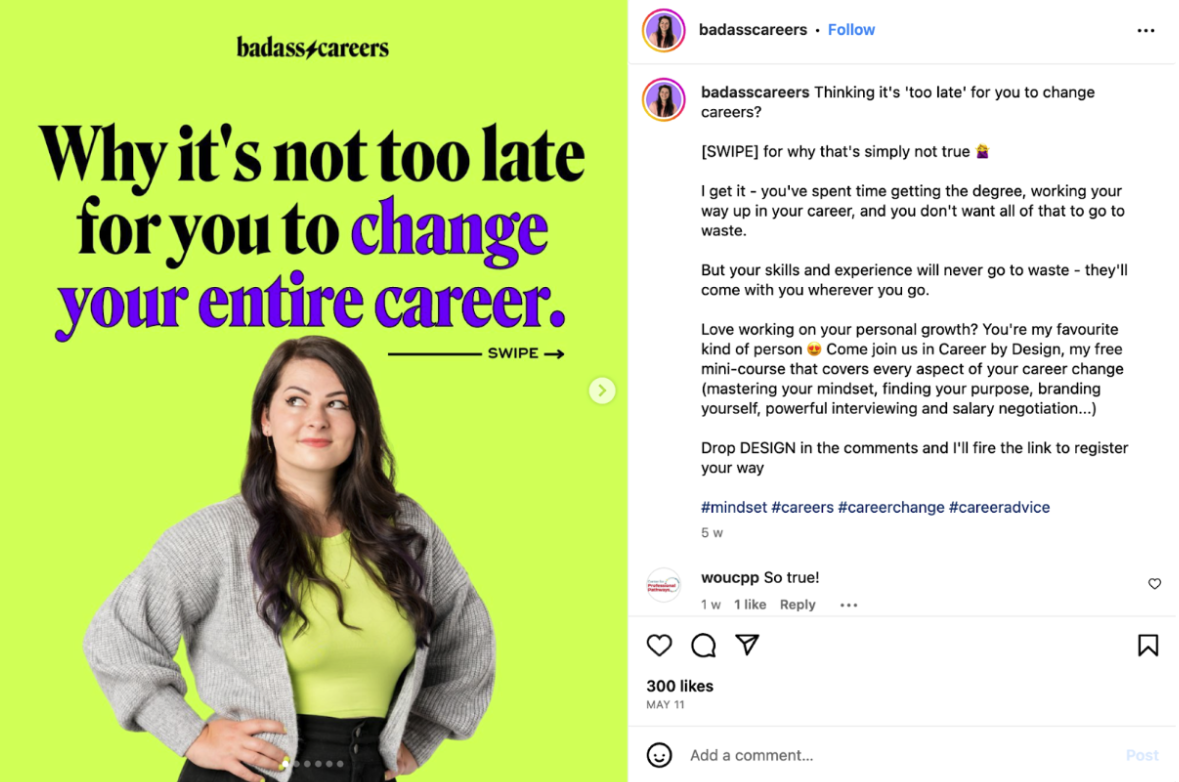

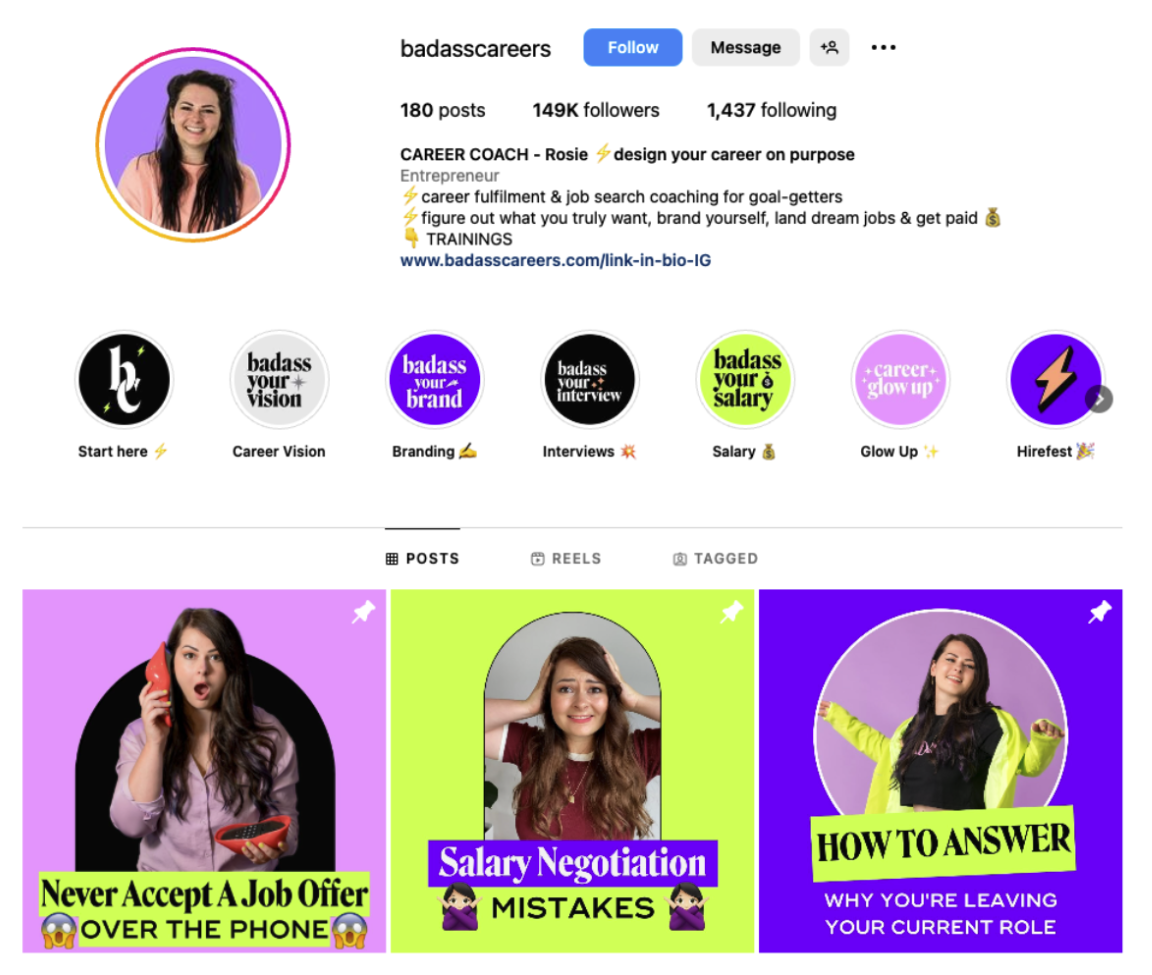
The bada** careers Instagram page is built on personal branding, with an impressive 194k following. And posts like this are a great way to get the message across while also building a strong personal brand. The color scheme is consistent and bold — and truly represents the personality of the company.
This is also the best size for Instagram posts if you want them to be vertical like this one: 1080px by 1350px with a 4:5 aspect ratio. But you can also use this on many other platforms like LinkedIn, Twitter, and Facebook.
Using a vertical format like this is fantastic because it takes up plenty of space in the feed. The only thing you have to watch out for is the fact that on your grid, people will still only see the square cut out. So it's important to keep the main message within that square.
To get designing a personal branded post:
-
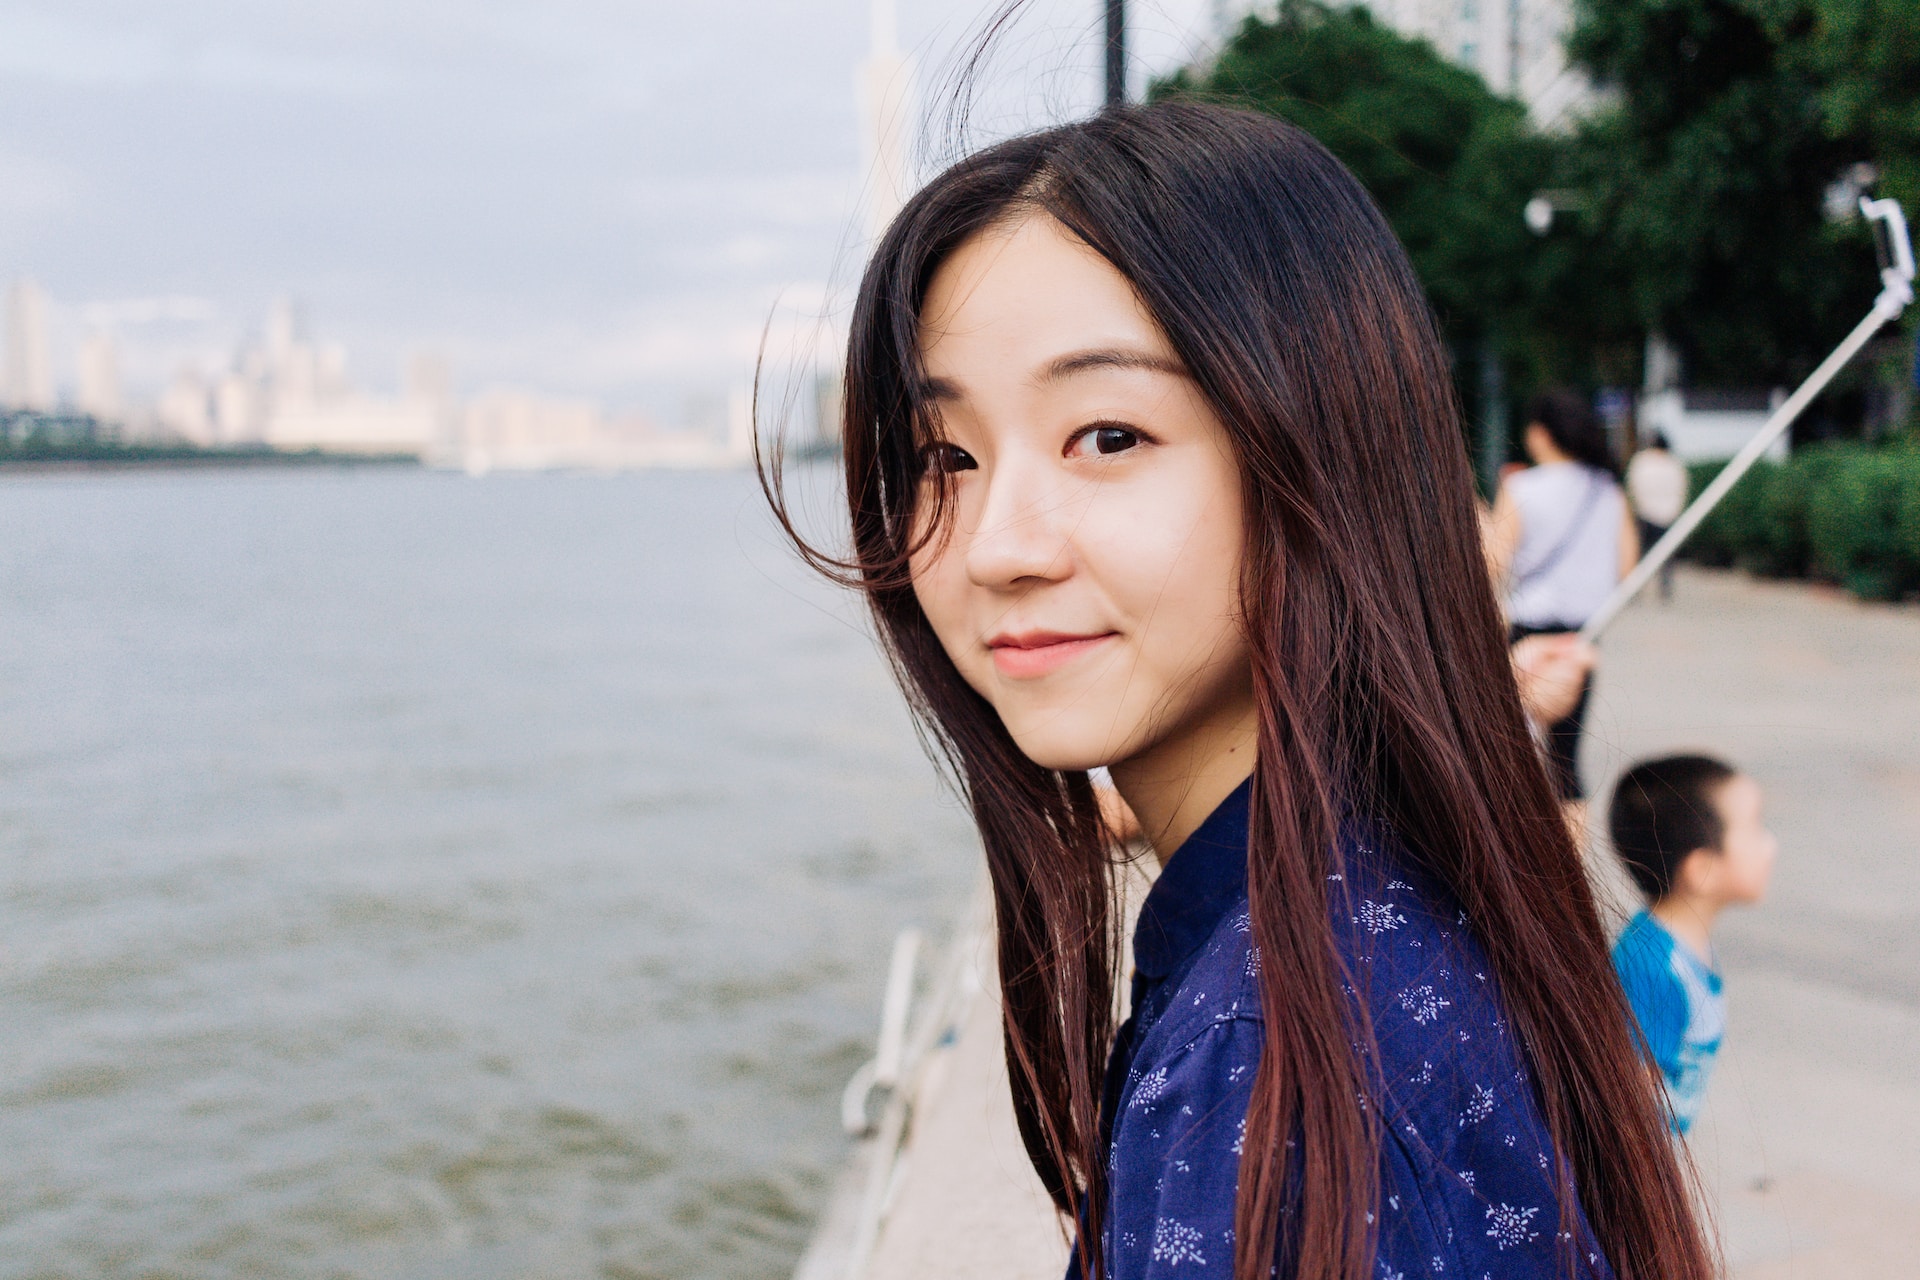
Grab your favorite personal branding photo. We're going to use this one as an example.
-
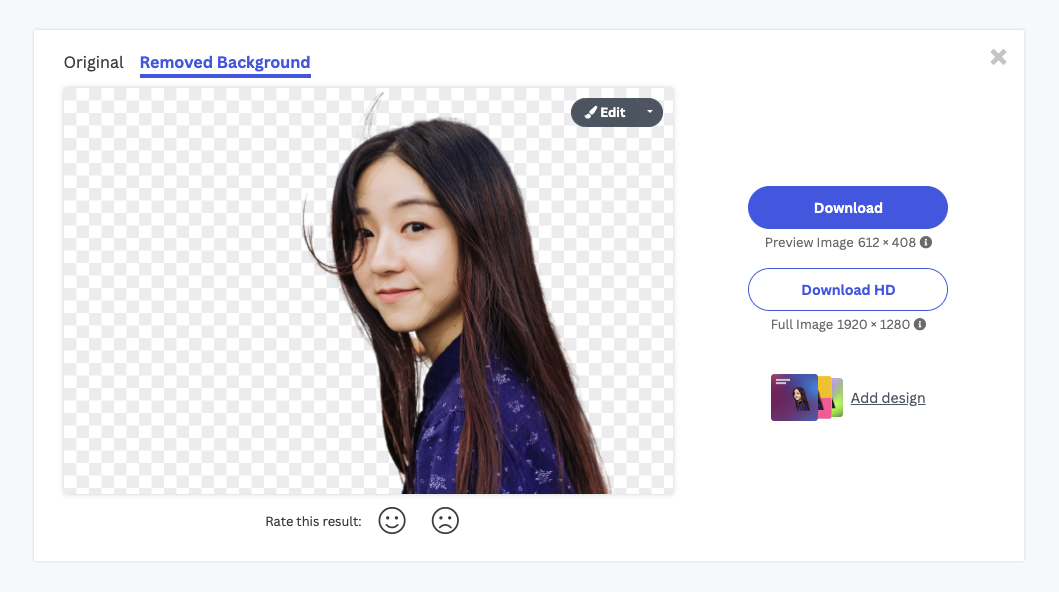
Hop on over to remove.bg and upload it by simply dragging and dropping it onto the site. You'll end up with something like this:
Then go ahead and click on > Add design > Create a free design. Canva will open up with our design in it.
-
Now you need to resize the image. Go ahead and select > Resize at the top of the page. And add the dimensions 1080px by 1350px.
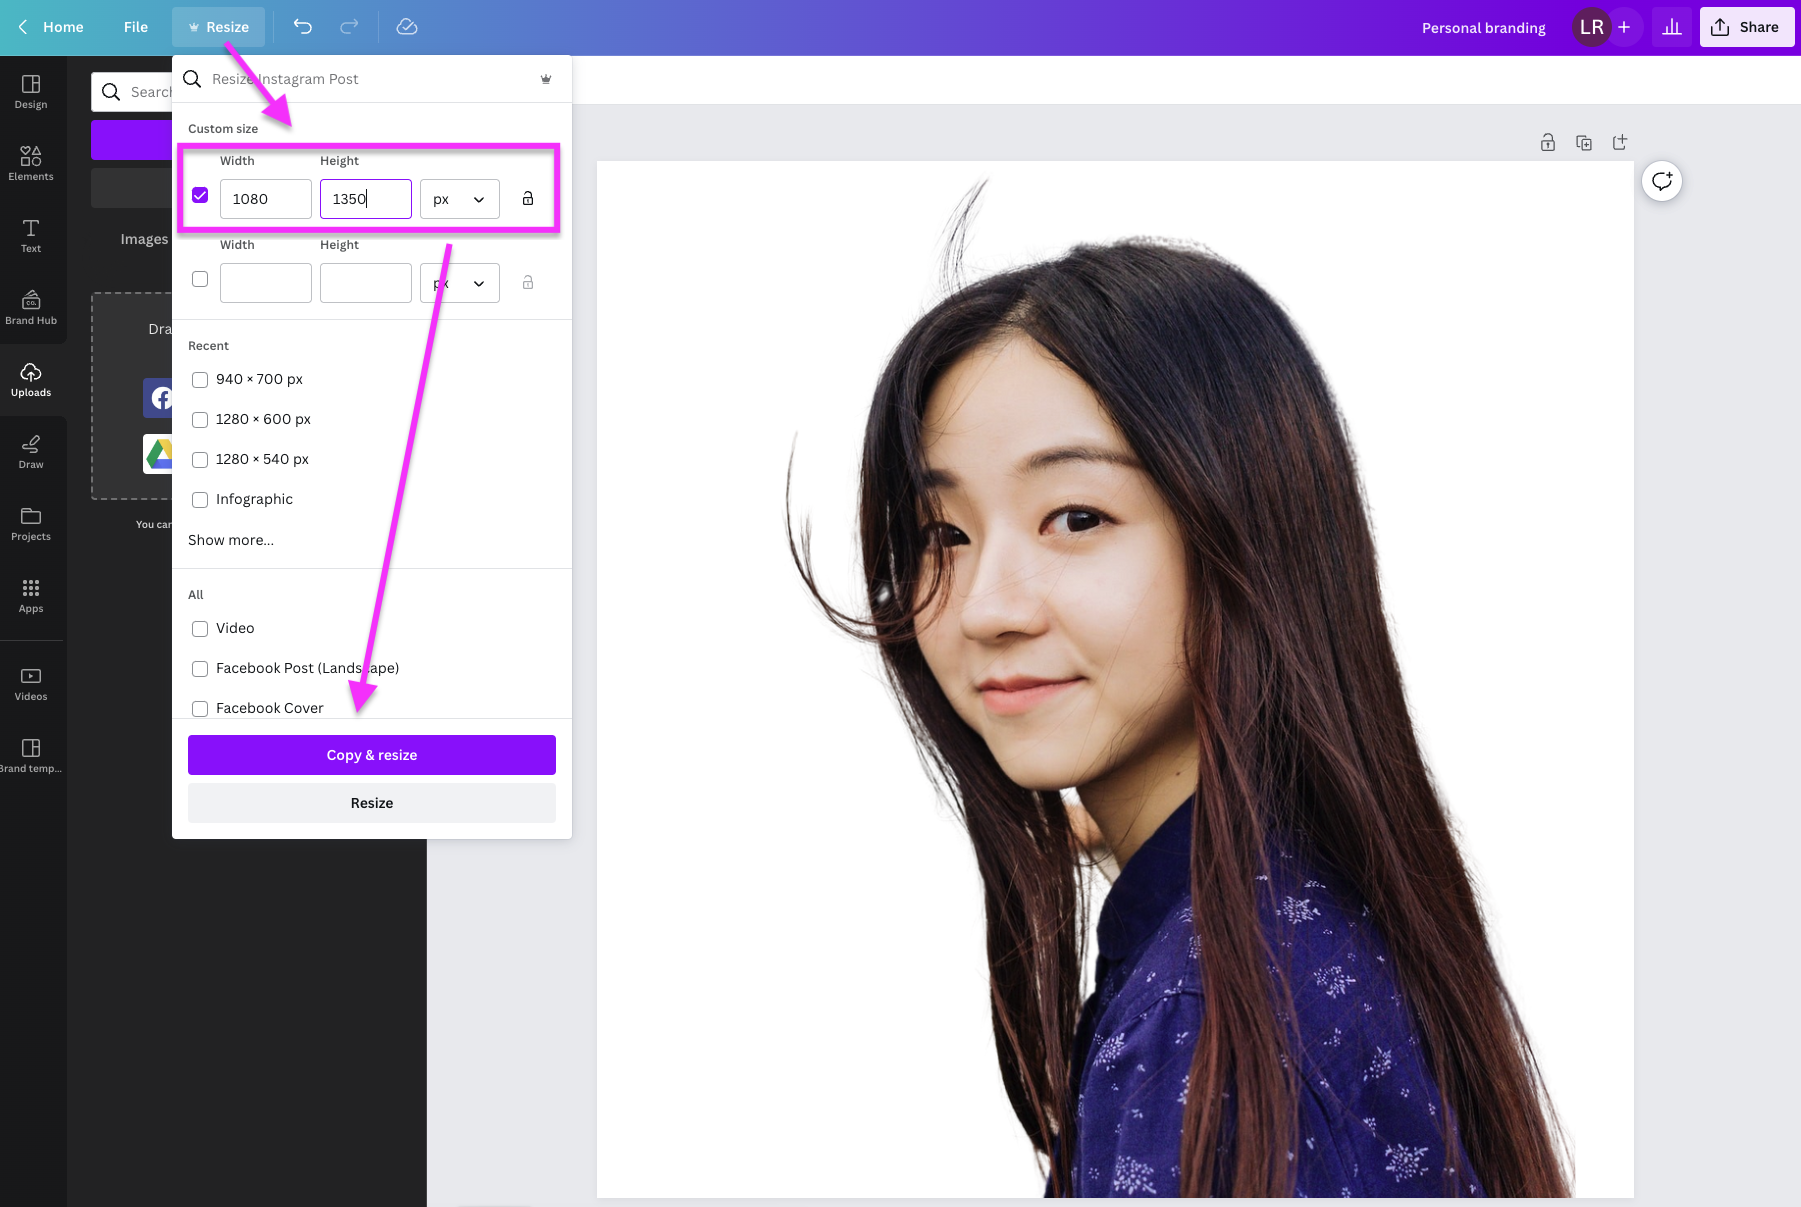
Side note: you can only do this if you have Canva Premium. (But if you don't have it, no worries. Simply go to Canva, create a new design in the format 1080px by 1350px, and copy and paste the image without a background.)
Now go ahead and move the image to the center and bottom of your post — play around with the size as you see fit.
-
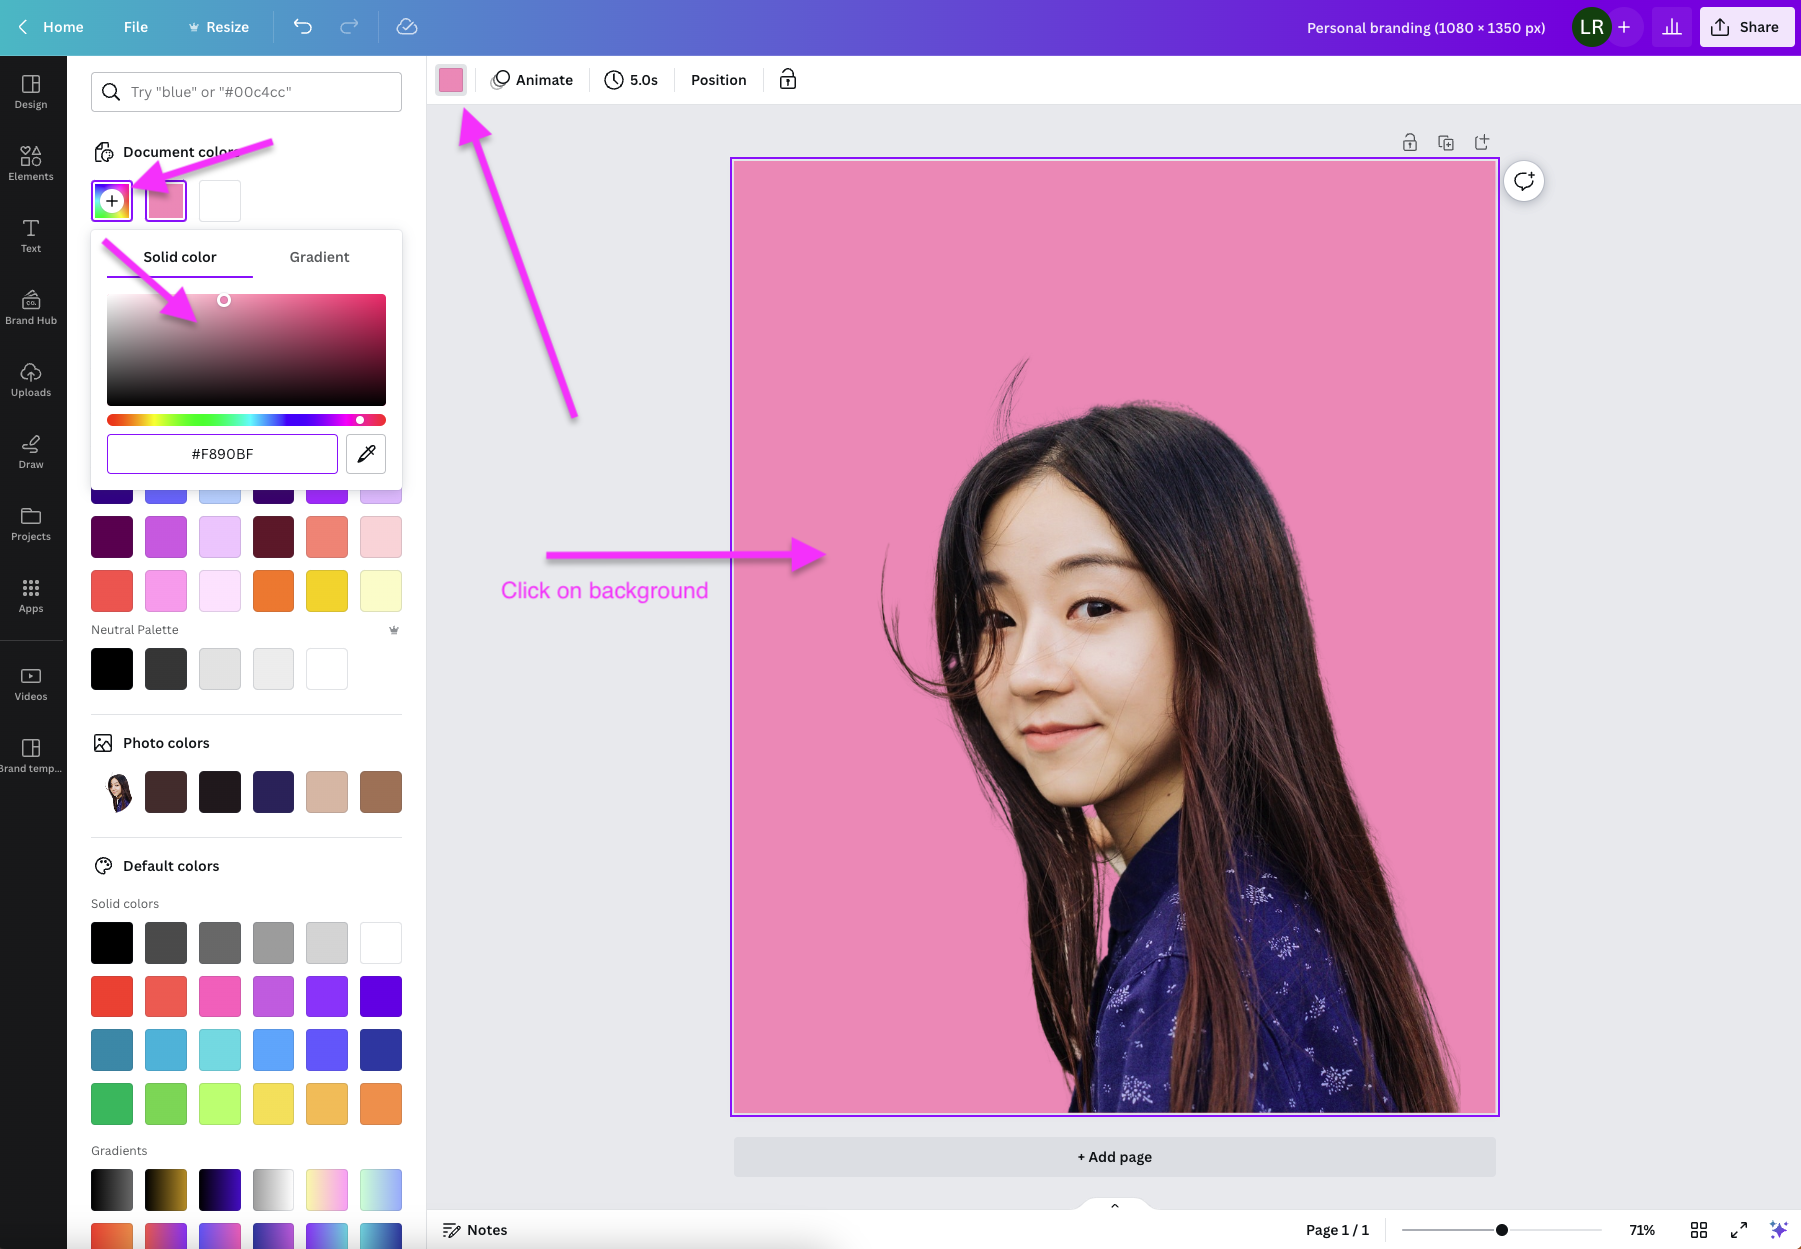
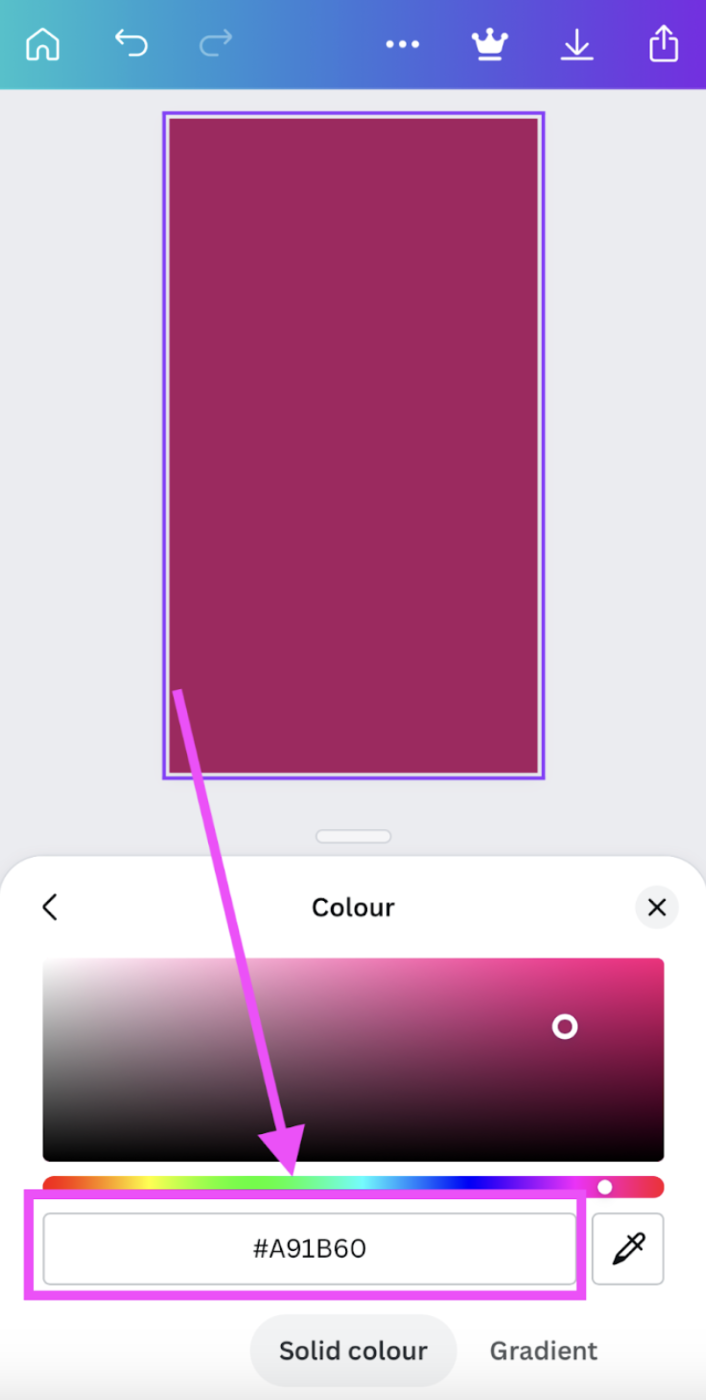
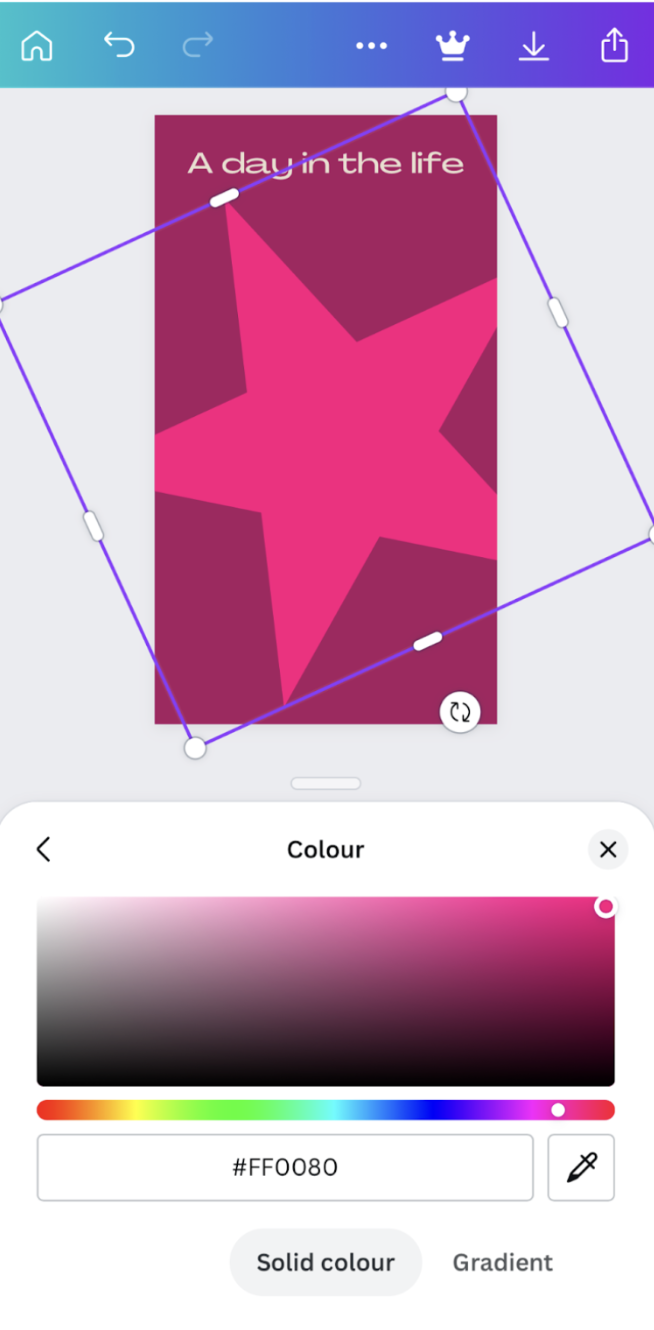
Select the background by simply clicking on it, and go to > Background color. By clicking on the colorful square with the plus sign, you can add any color you like. Move around the circles to find the perfect one you're looking for, or if you have brand colors, add the hex code.
-
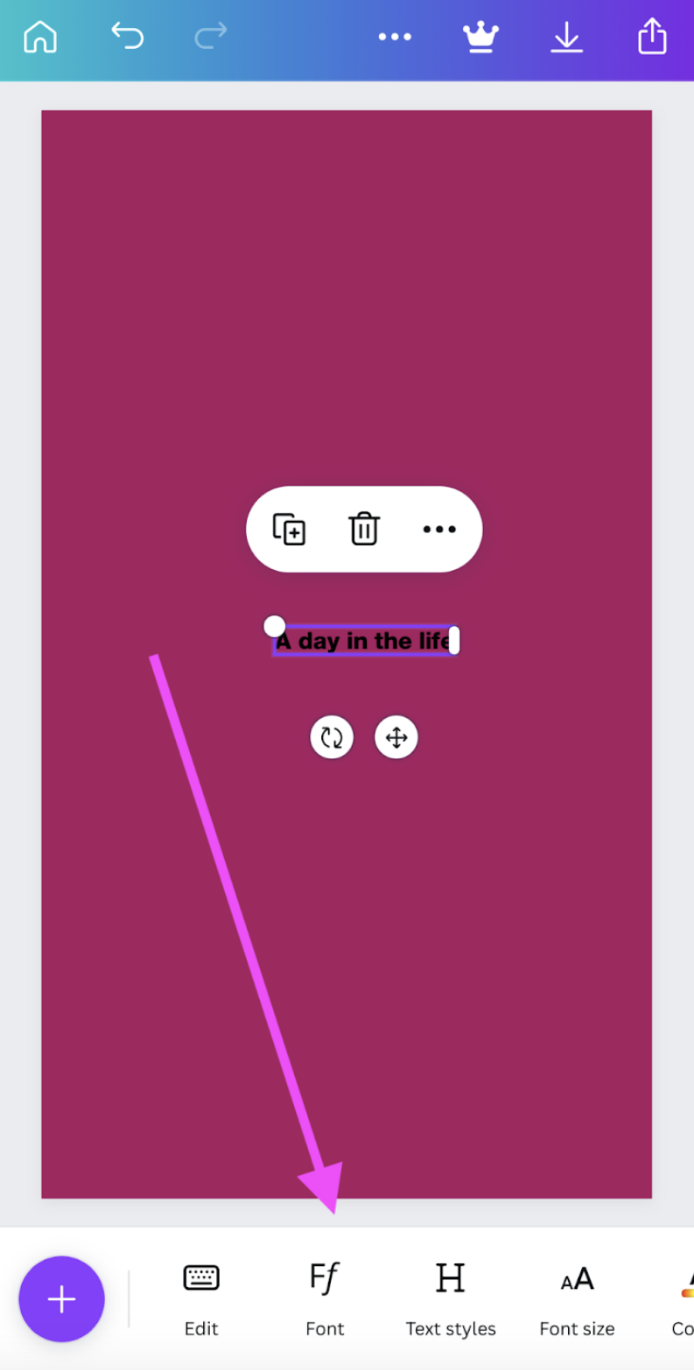
Now it's time to add > Text > Add a heading.
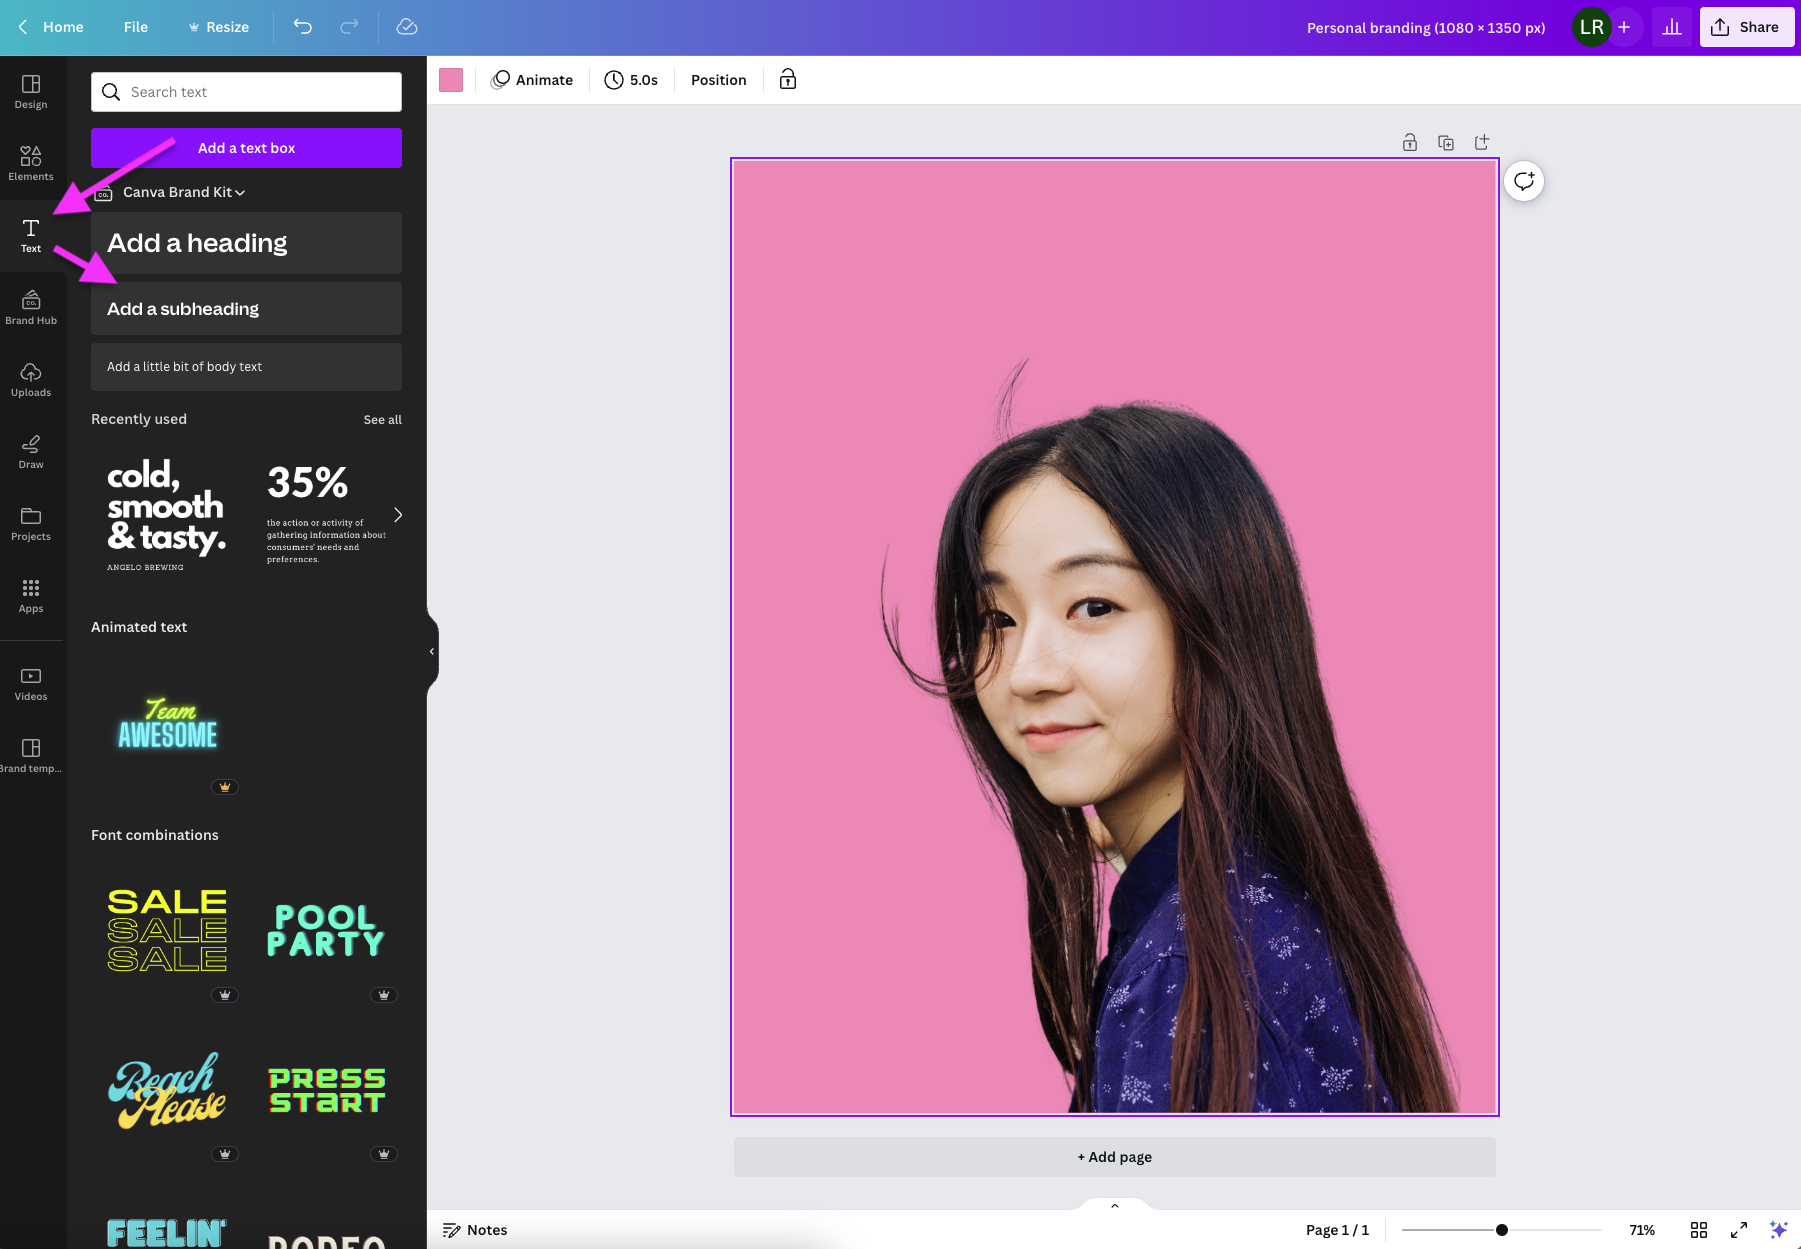
-
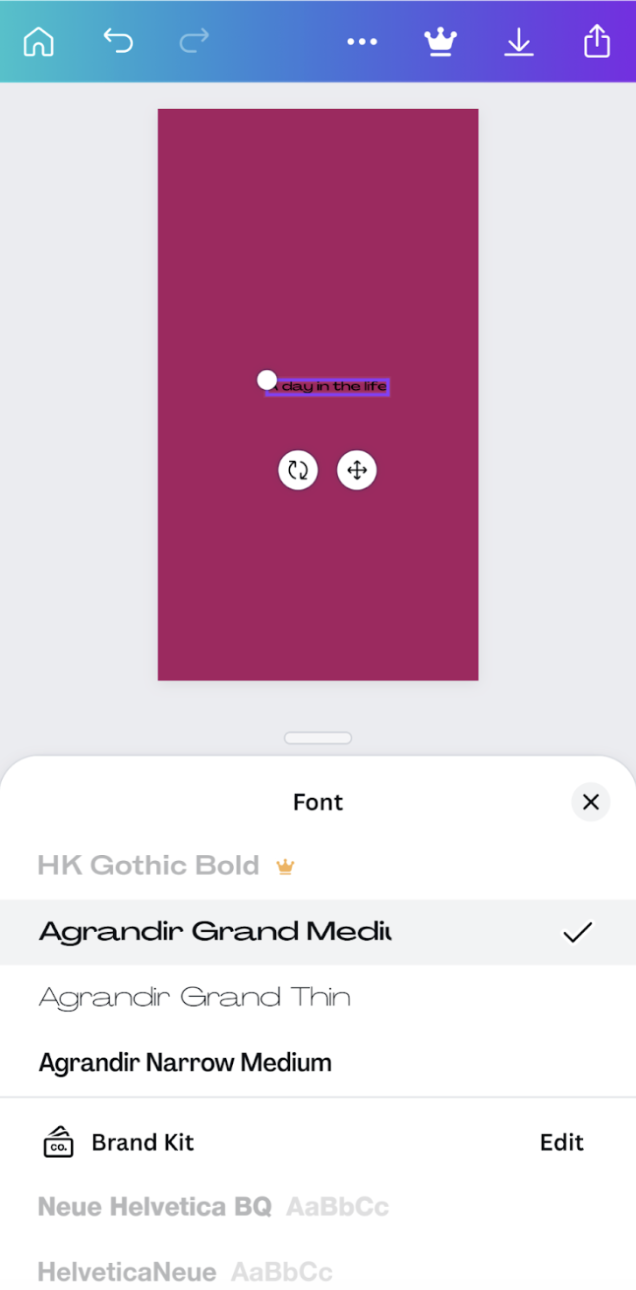
You can change the size, font, alignment of the text, and even colors just above the design canvas. As we talked about before, the perfect balance of visual hierarchy, colors, typography, and more — is really key here.
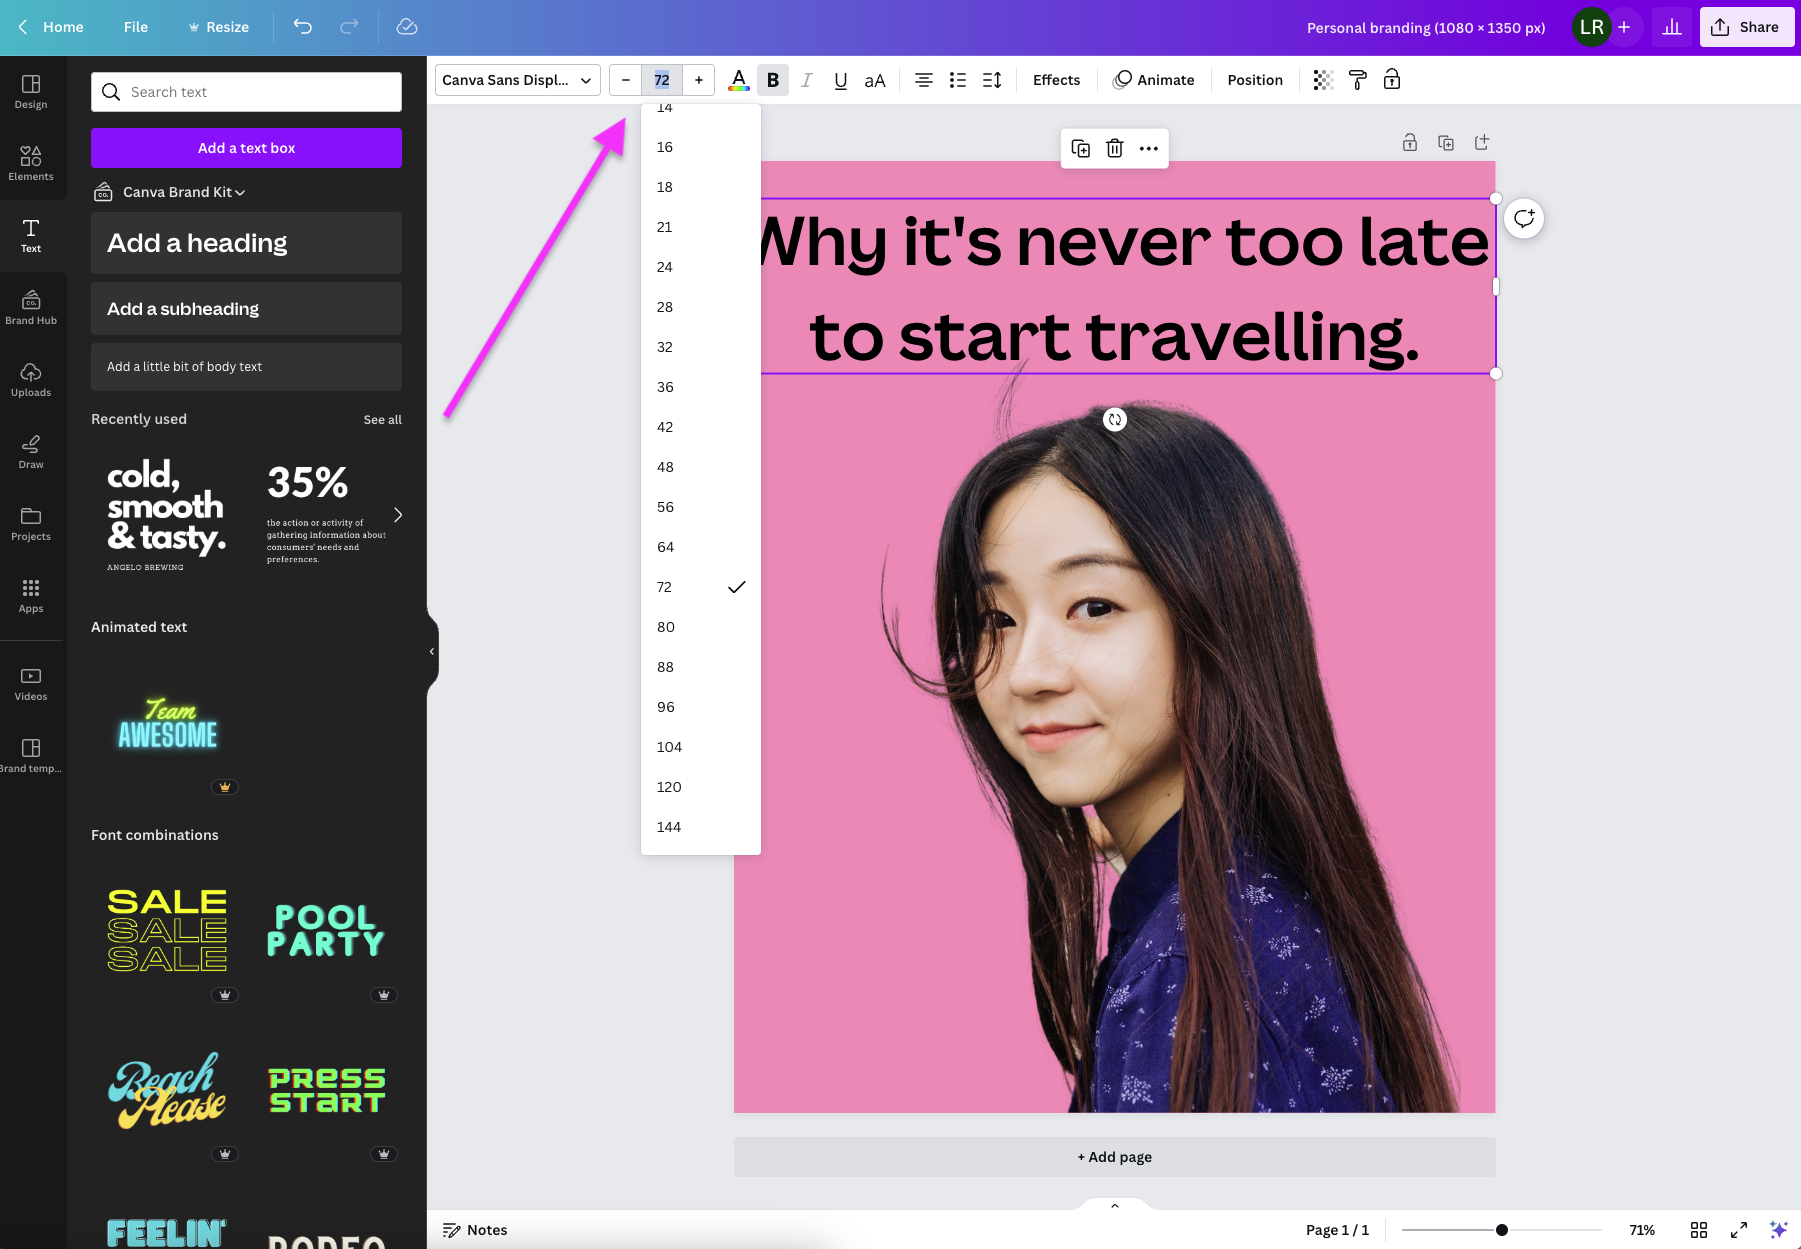
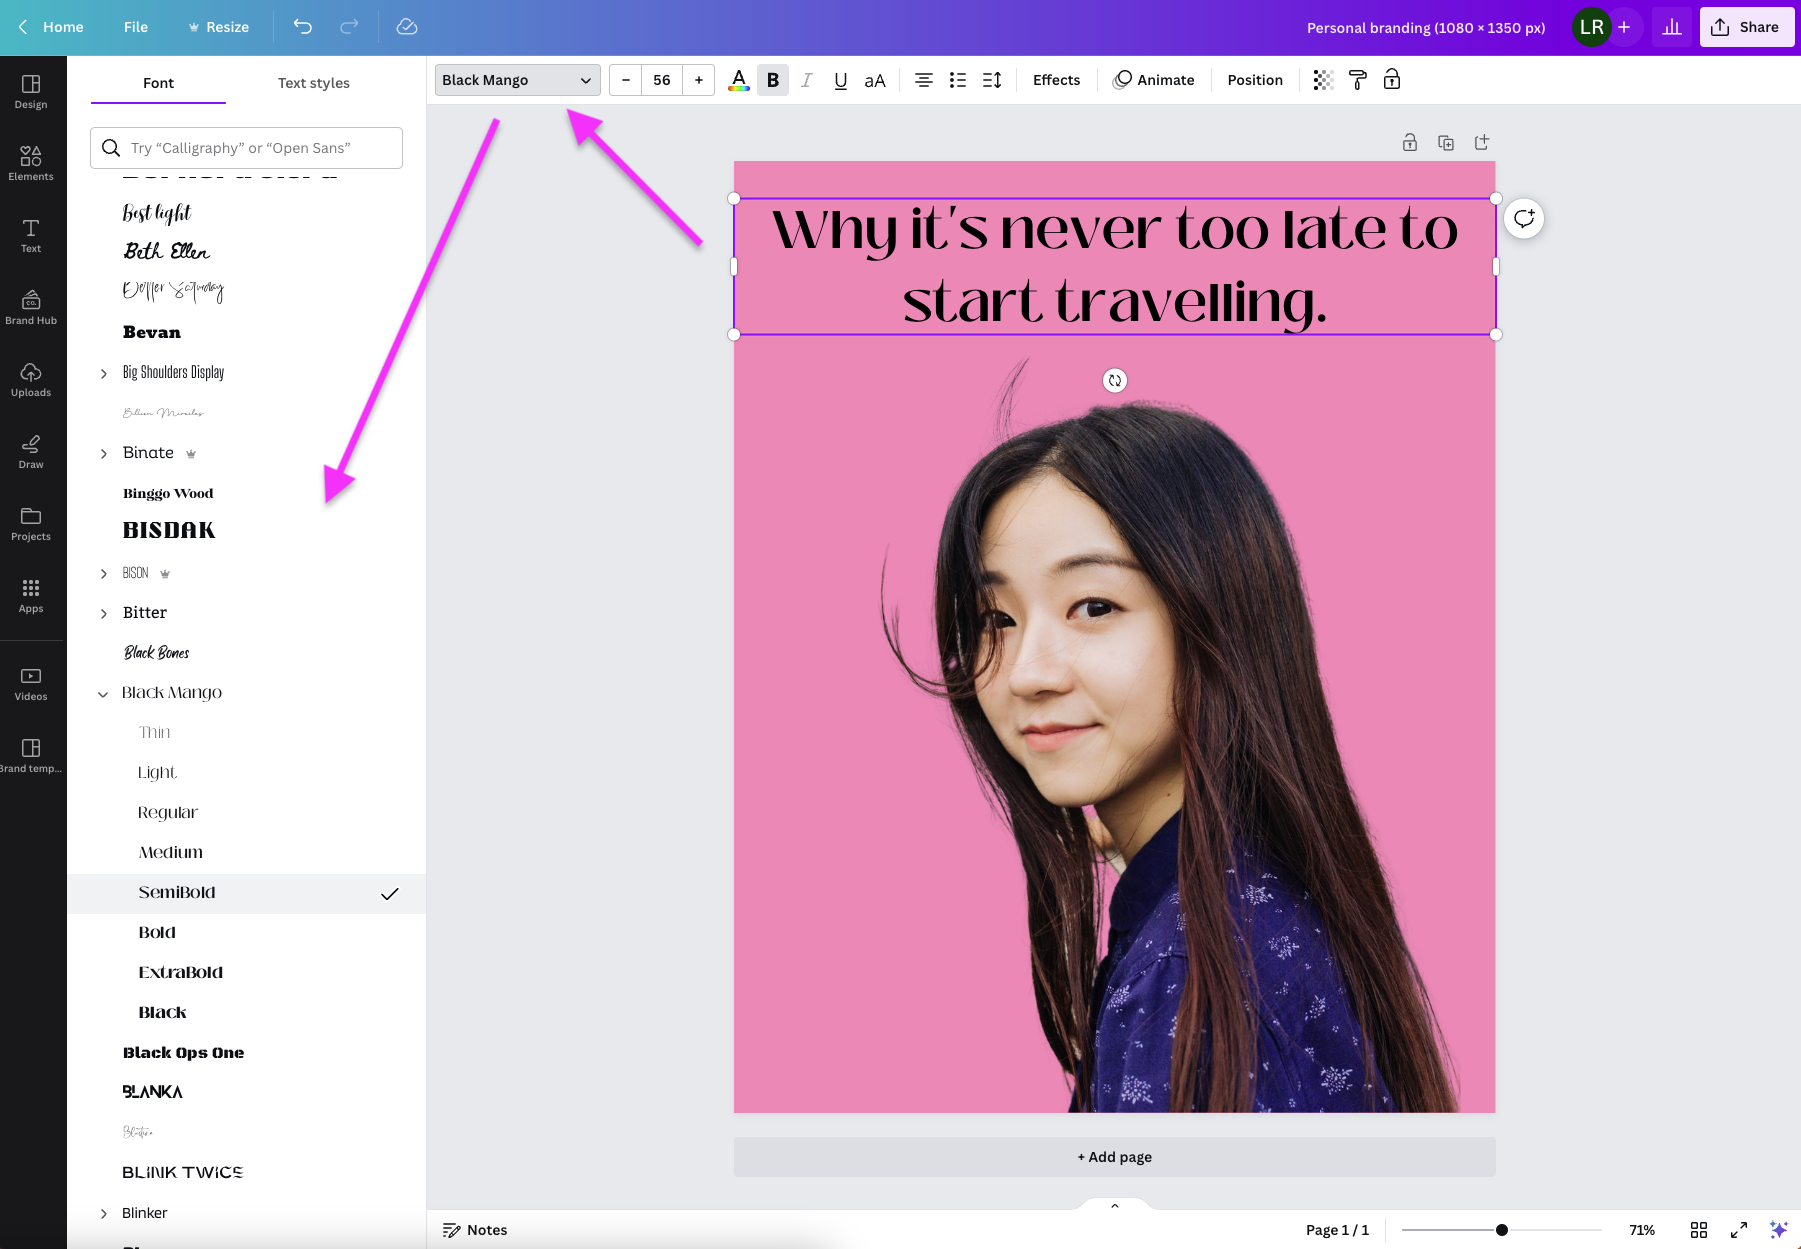
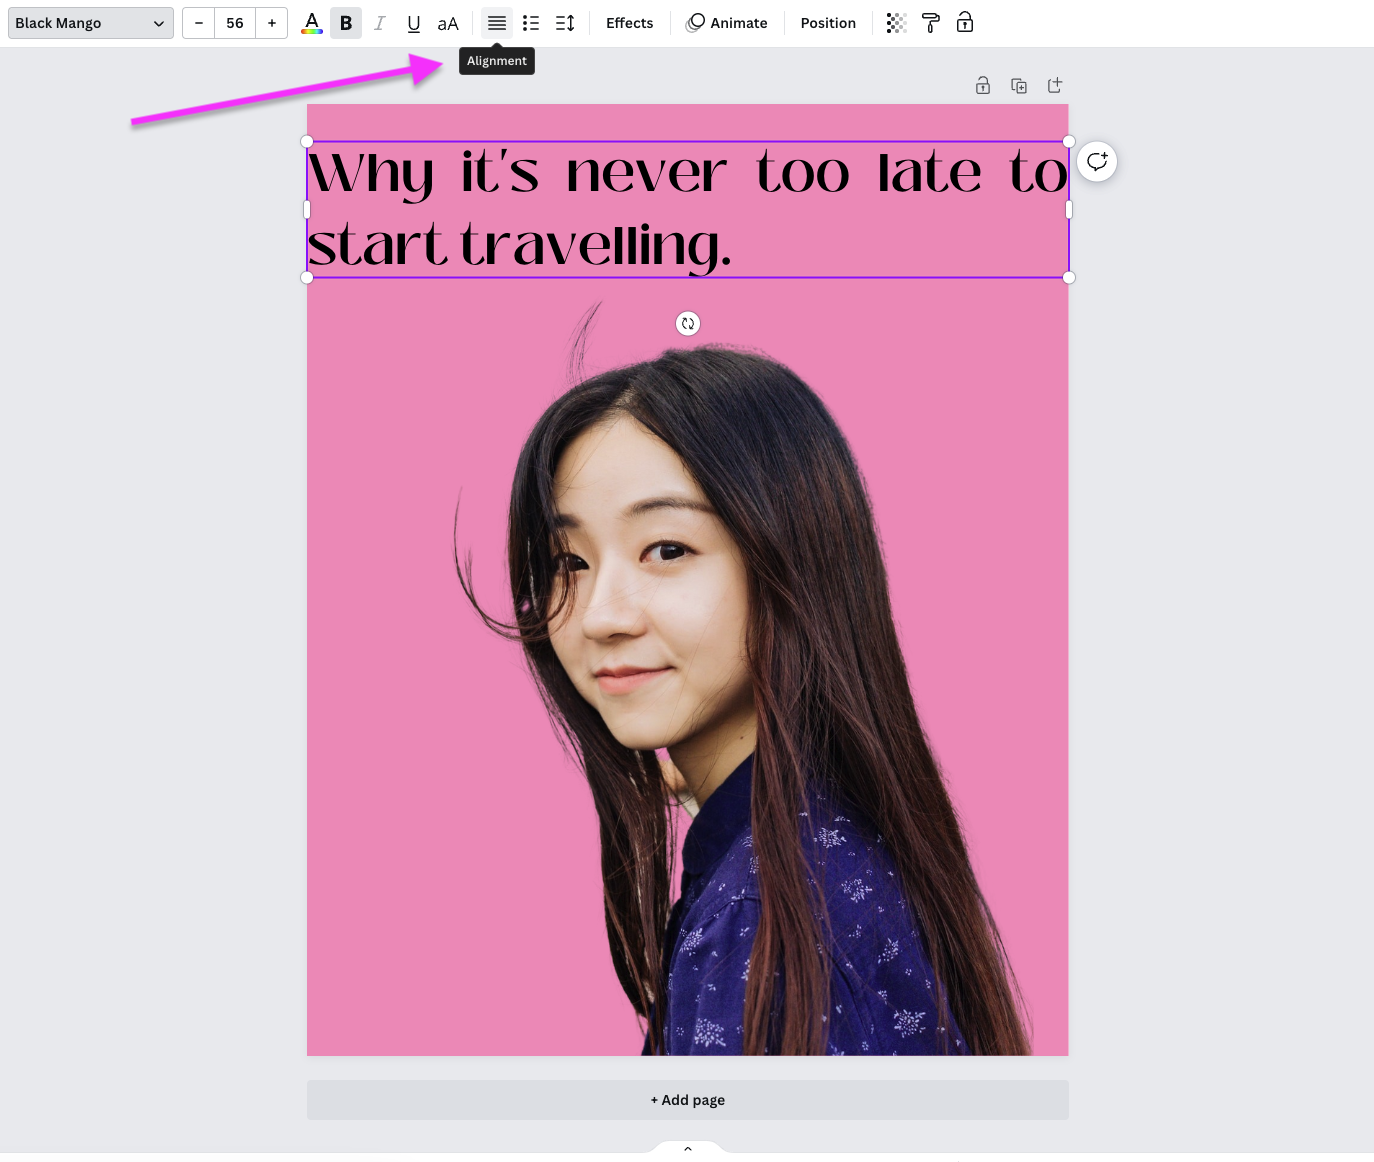
We recommend just playing around with the settings until you're happy.
-
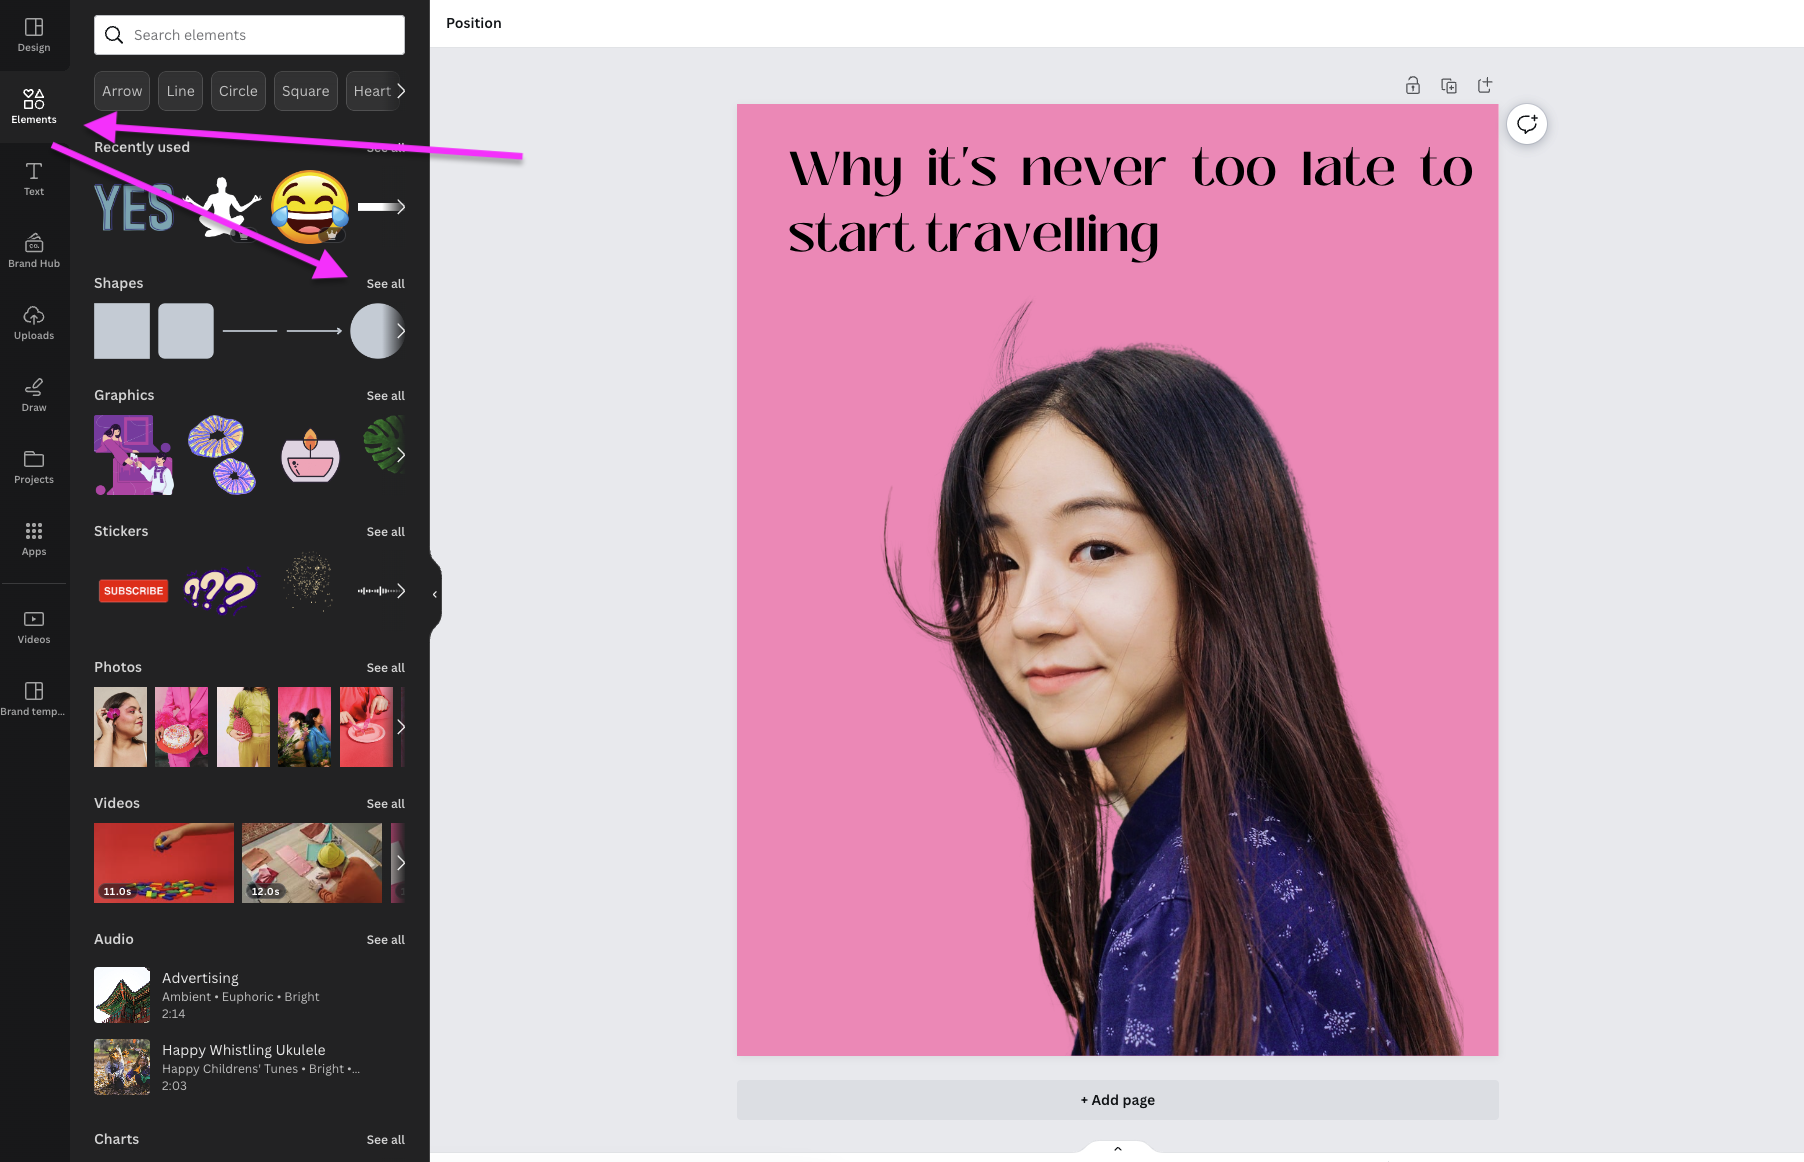
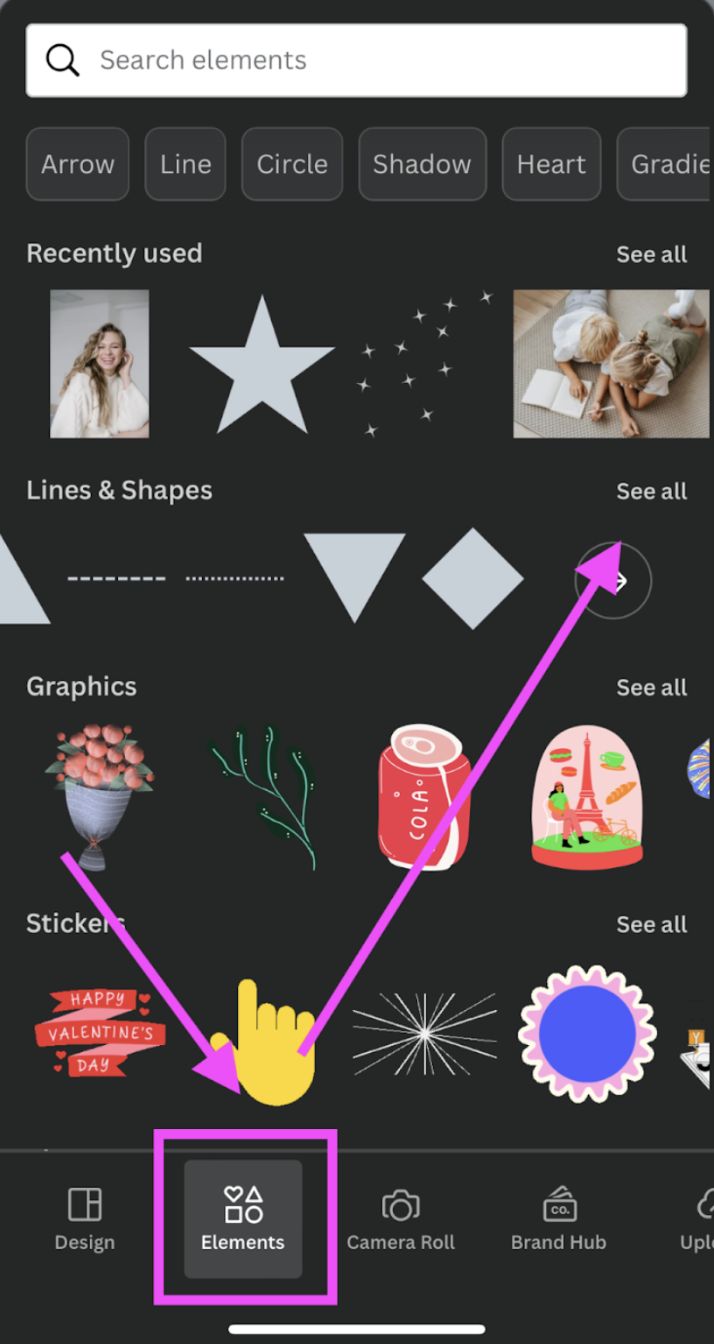
Now, we wanted to go ahead and add an arrow to the post that indicates swipe right. You can do this by going to > Elements and selecting an arrow.
-
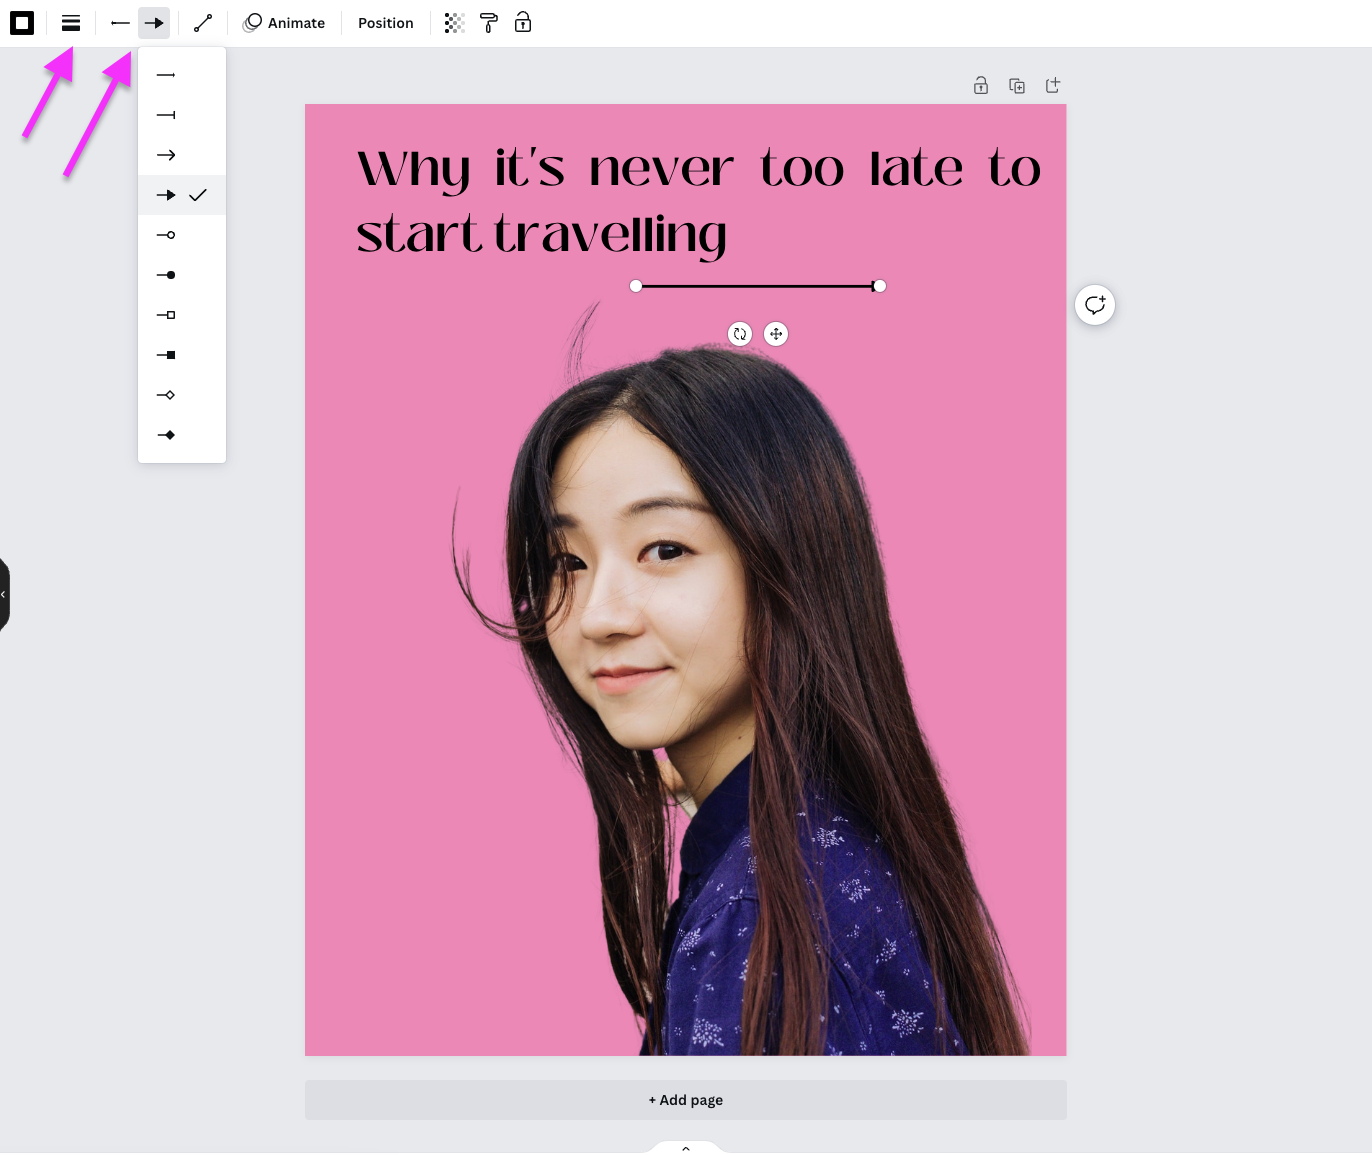
Here again, you can change a ton of settings simply by selecting the arrow and the arrow design you like, the width (right next to it), and more. You can move the arrow around the design by simply clicking and dragging, and dropping it.
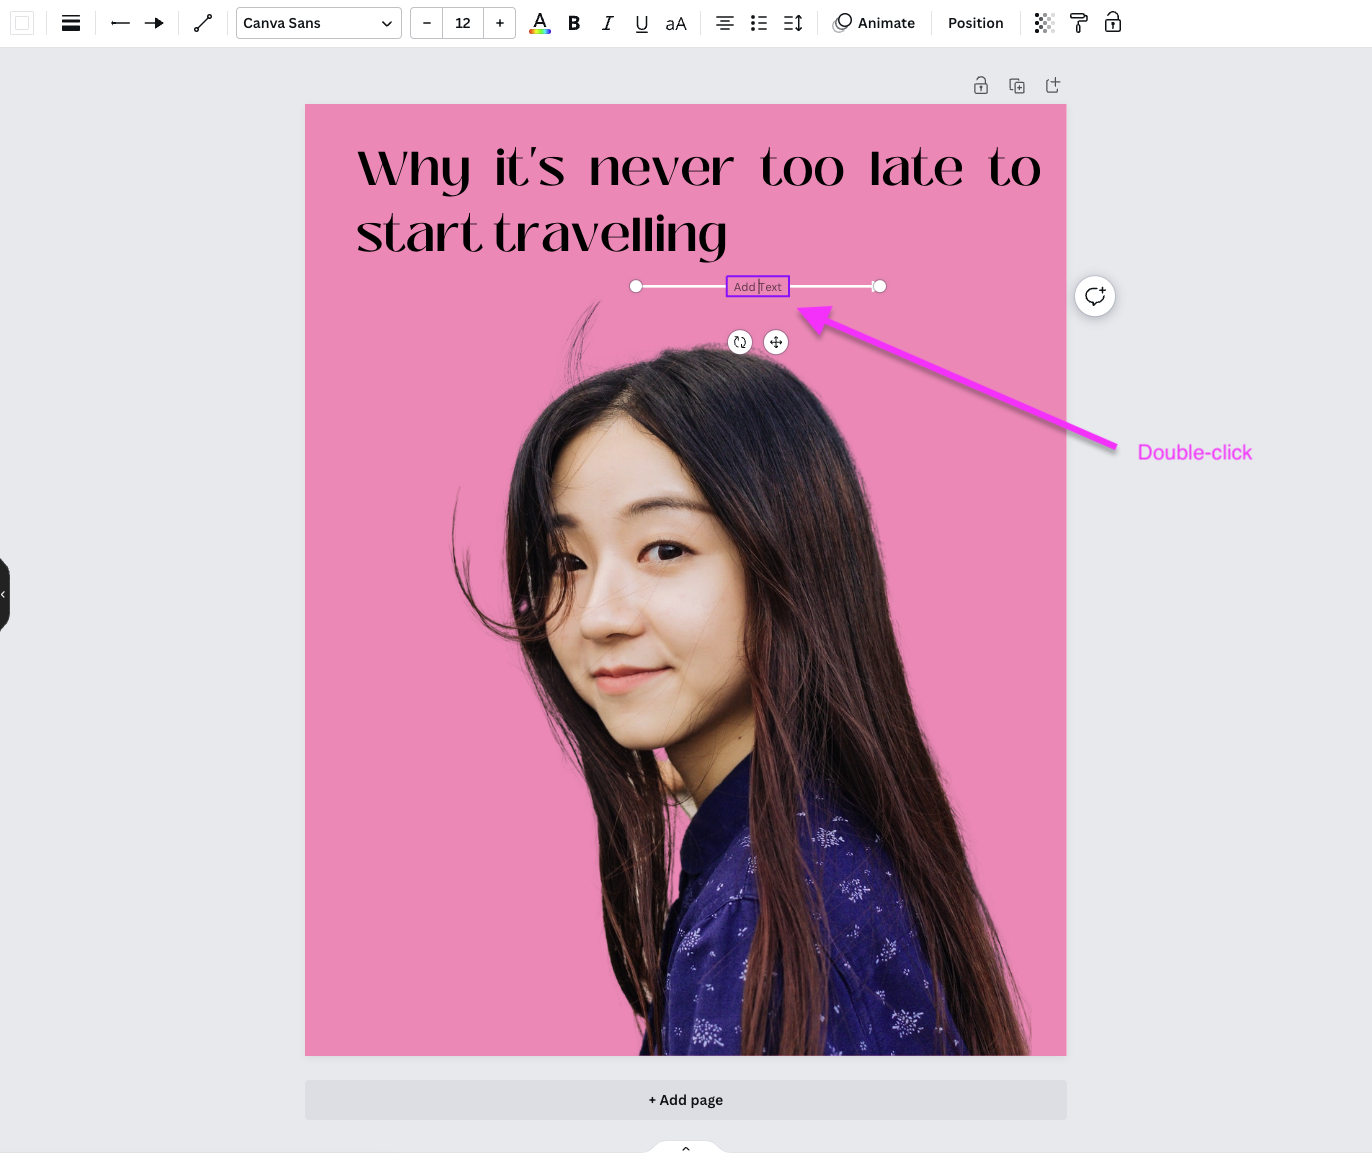
In the next screenshot, you'll see we ended up changing the color to black, and the best trick yet: double-click on the arrow to add your text. We added the word SWIPE in all caps and selected the font we liked most.
-
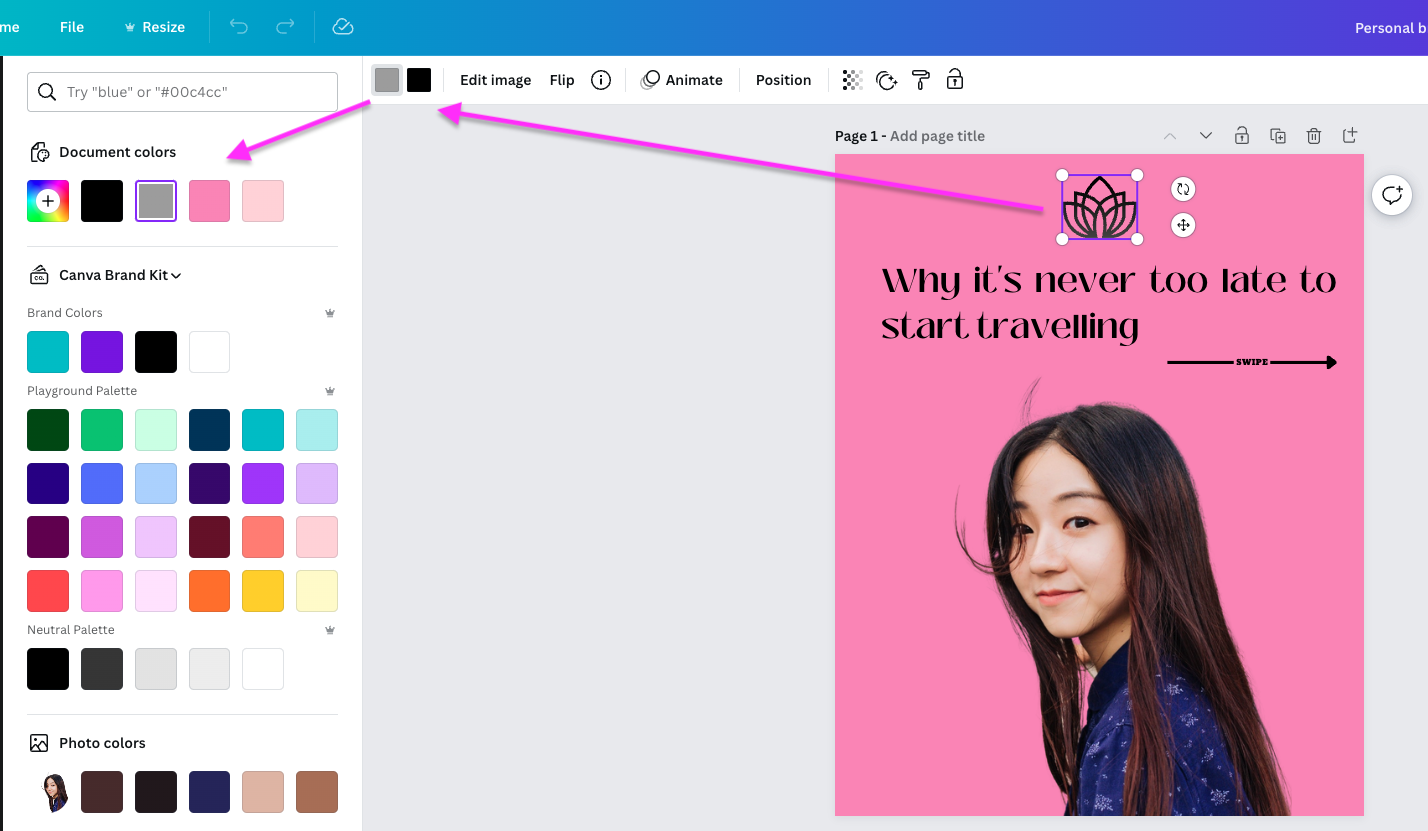
If you want to add your very own logo, you can simply drag and drop it into Canva. But you can also add > Elements that look like a logo or simply give your post that extra edge with a symbol.
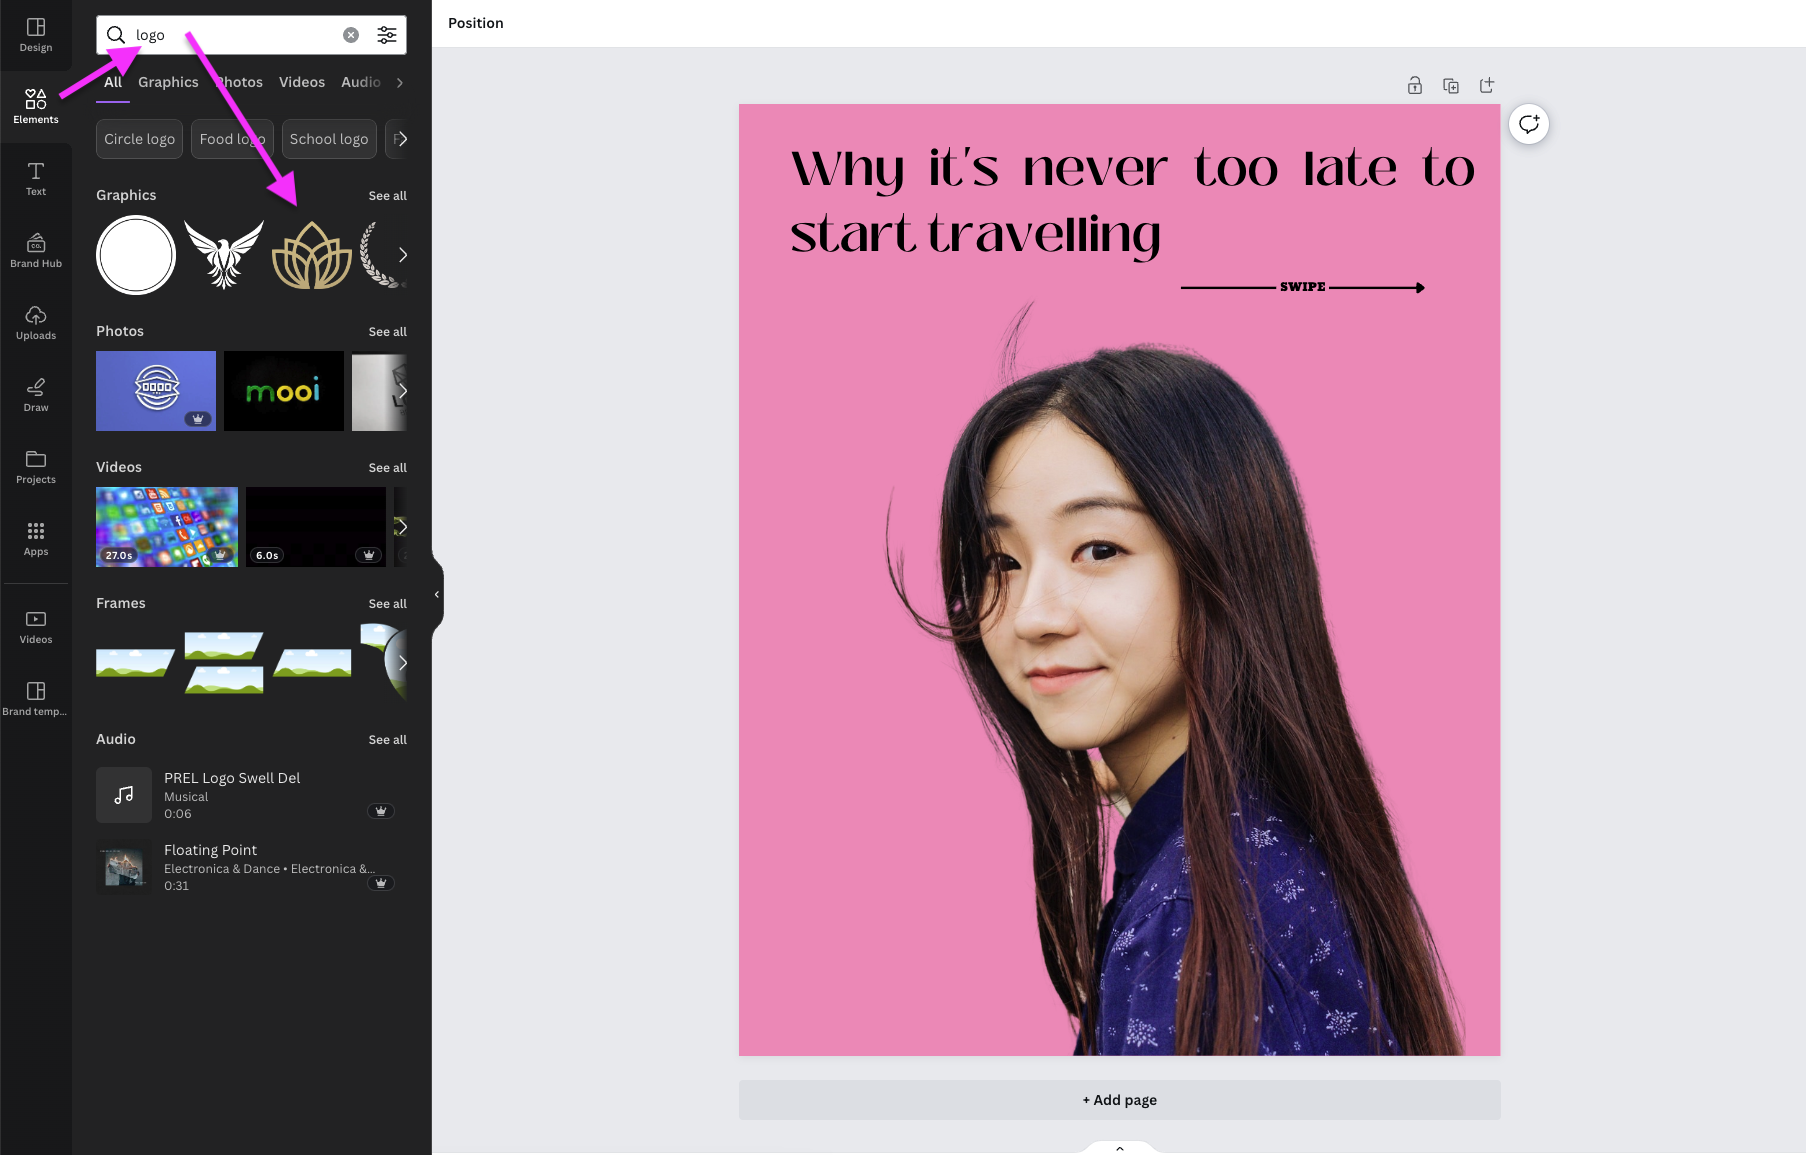
We opted for this lotus. Once you click on it, you can drag and drop to reposition it (Canva's super useful guidance lines will show up once you move it around so you know when it's centered). To resize it, simply drag its corners. This logo has two colors in it, you can change them by simply selecting the colors above the canvas and using the color wheel again.
-
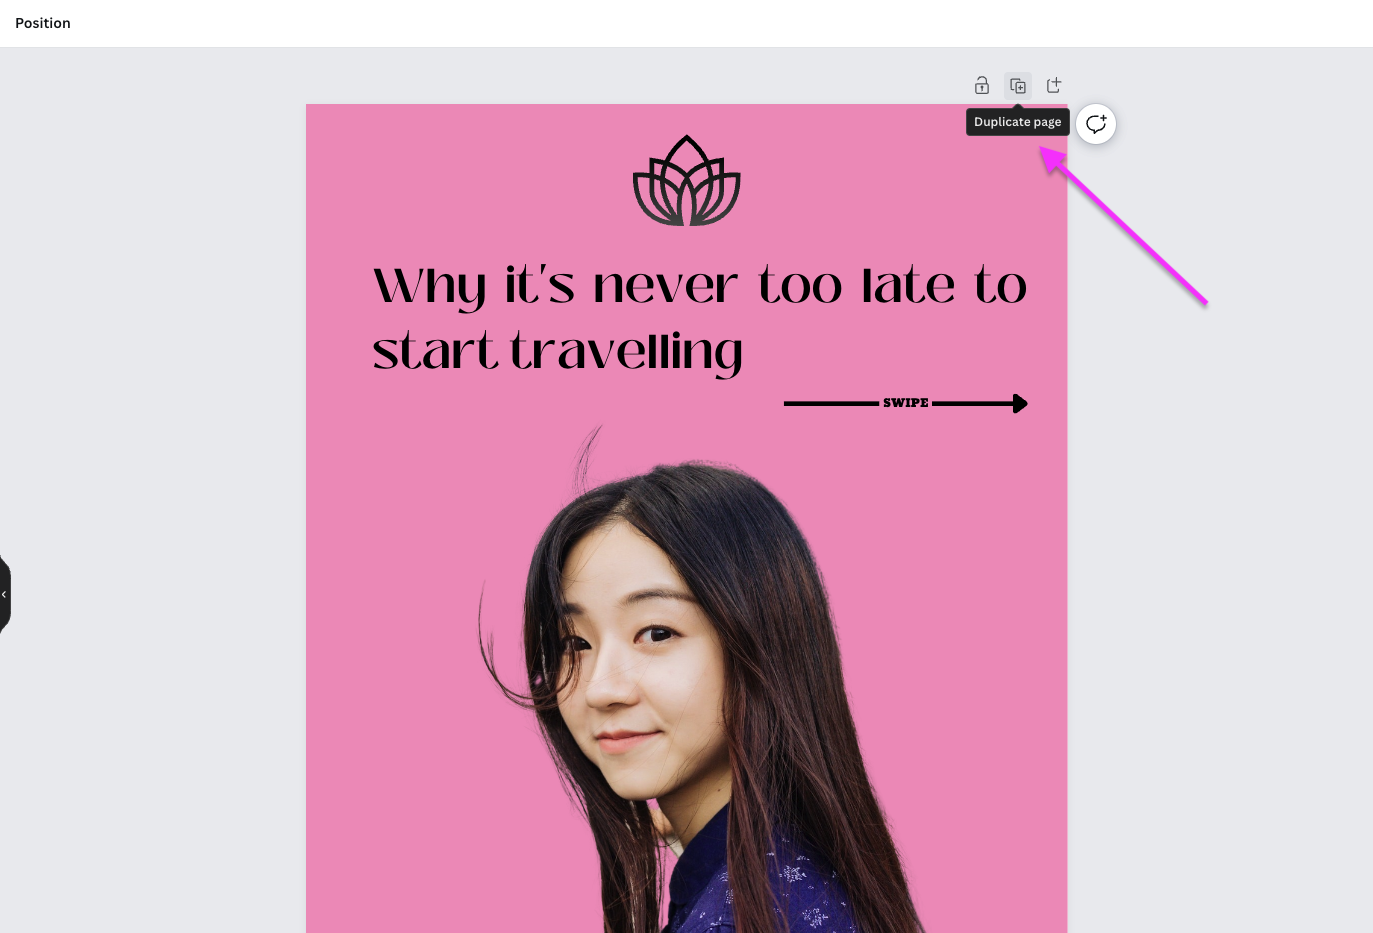
Because this post indicates you need to swipe for more info (also known as a carousel post), you will need more than one page. To create a new one in the same format, simply go to > Duplicate page.
-
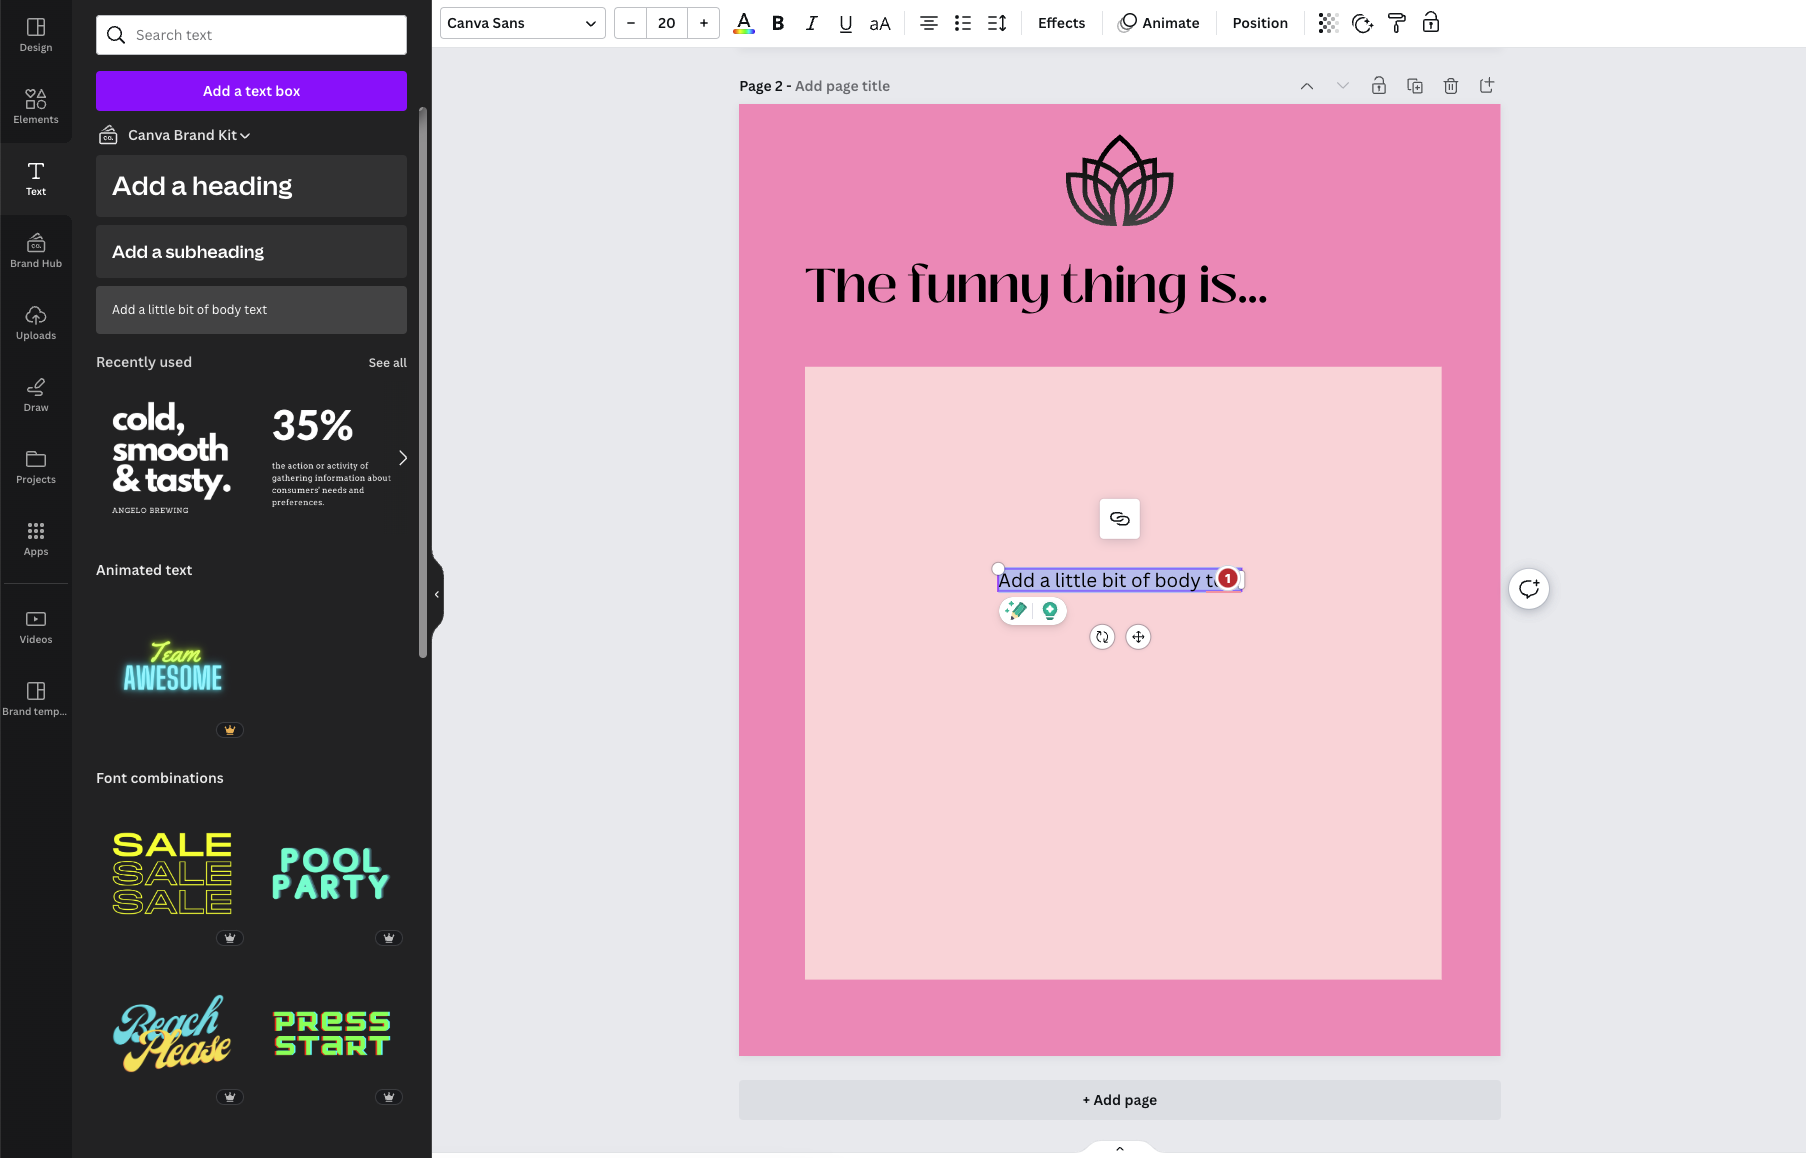
Remove all the elements except the logo and the headline. Then go ahead and select > Elements and the square. Adjust the square size to align with the borders of the design, like in the image below. Once you're done, go to > Text > Add a little bit of body text and fill in what you'd like to write. Here again, you can use the settings just above the canvas to bold your text, change the font, colors, and so on.
-
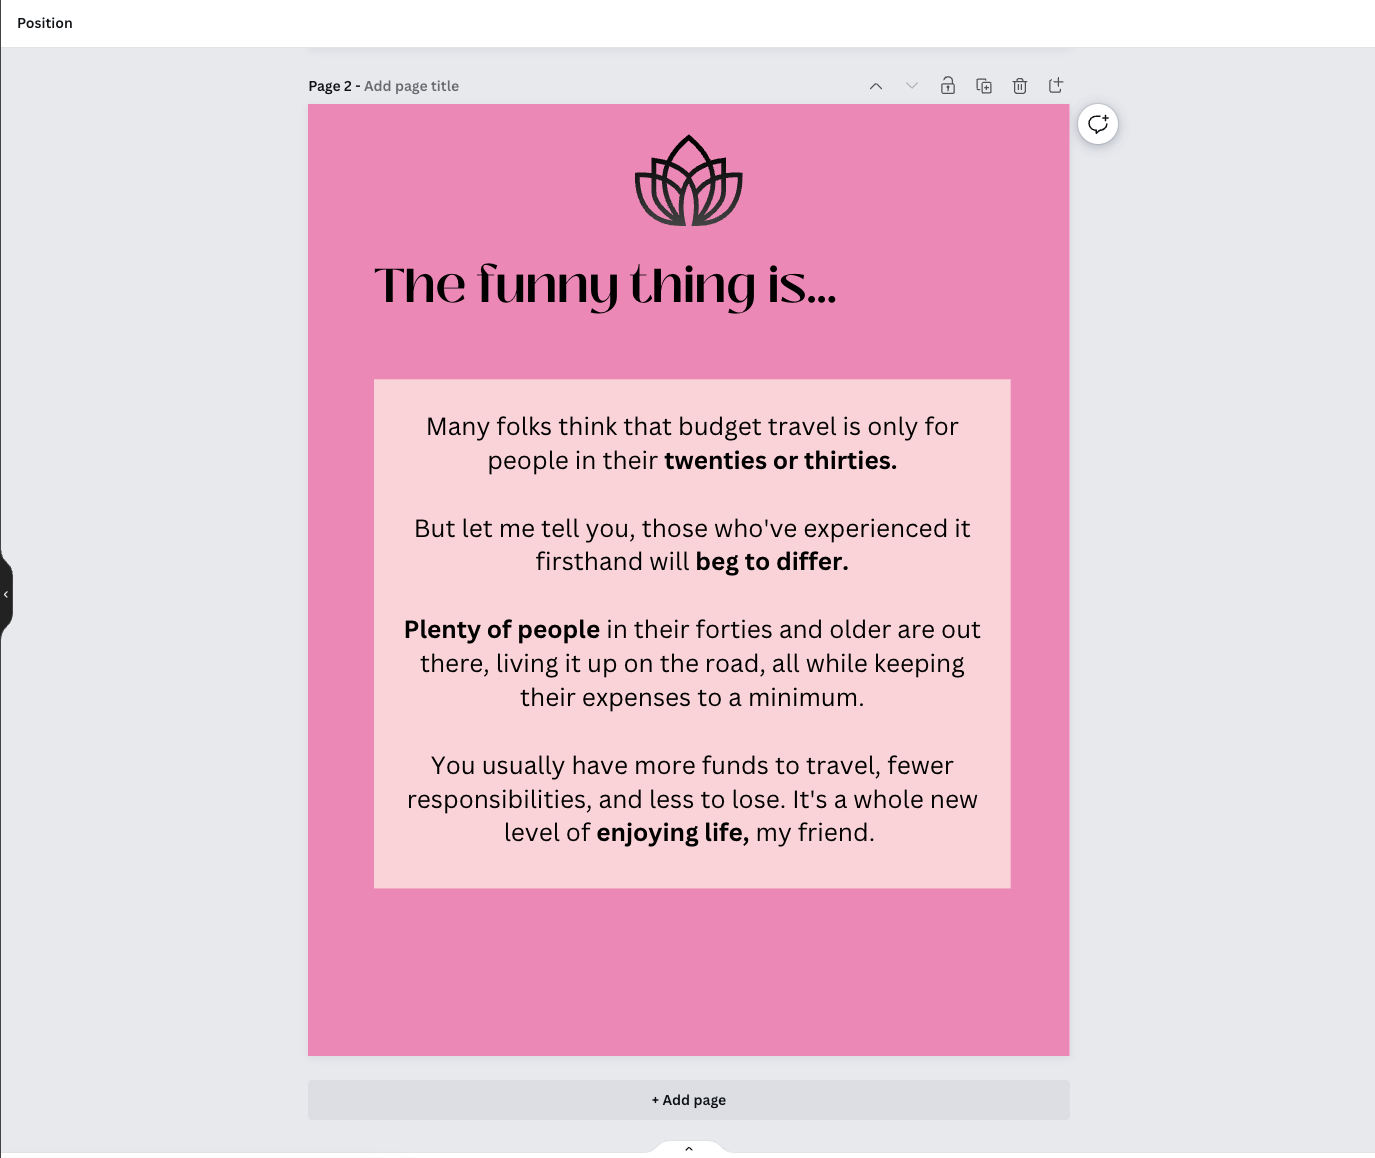
This is what we ended up with as slide 2 of our post.
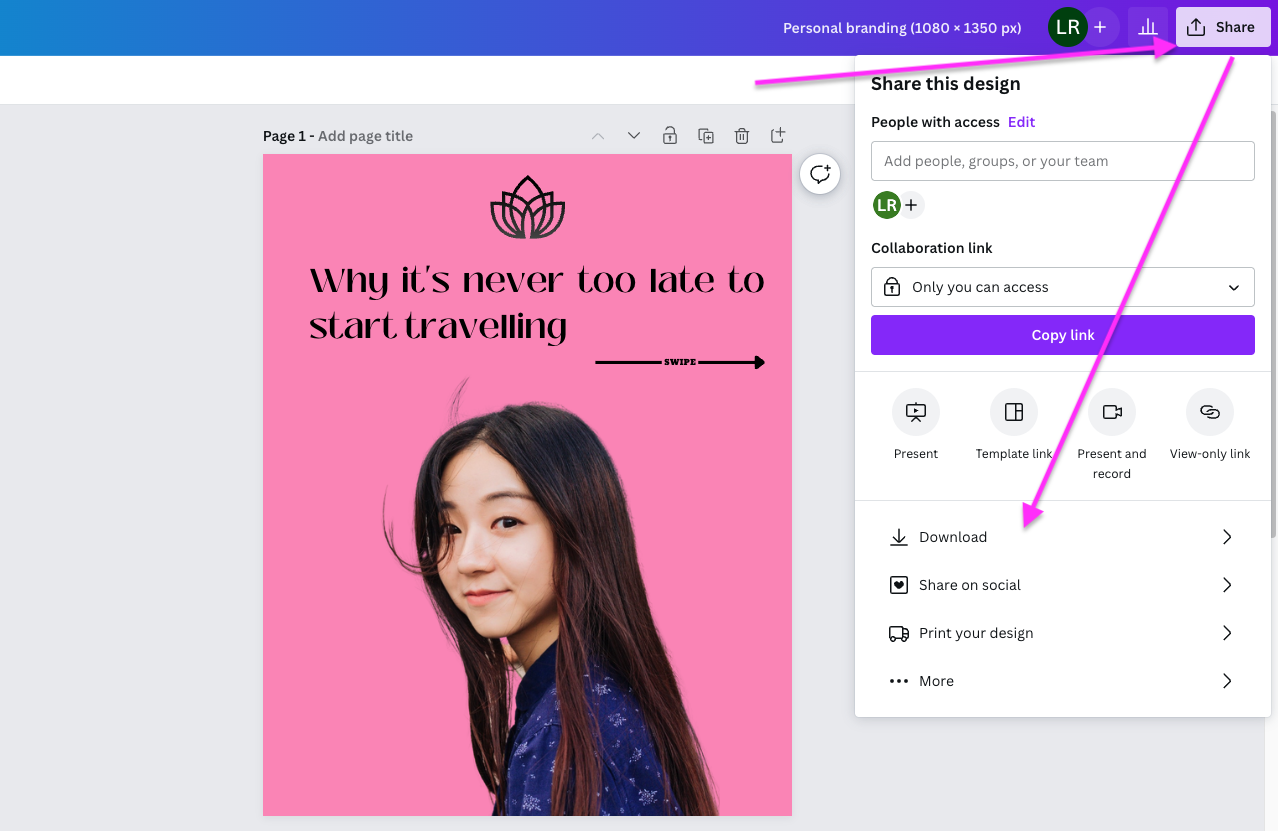
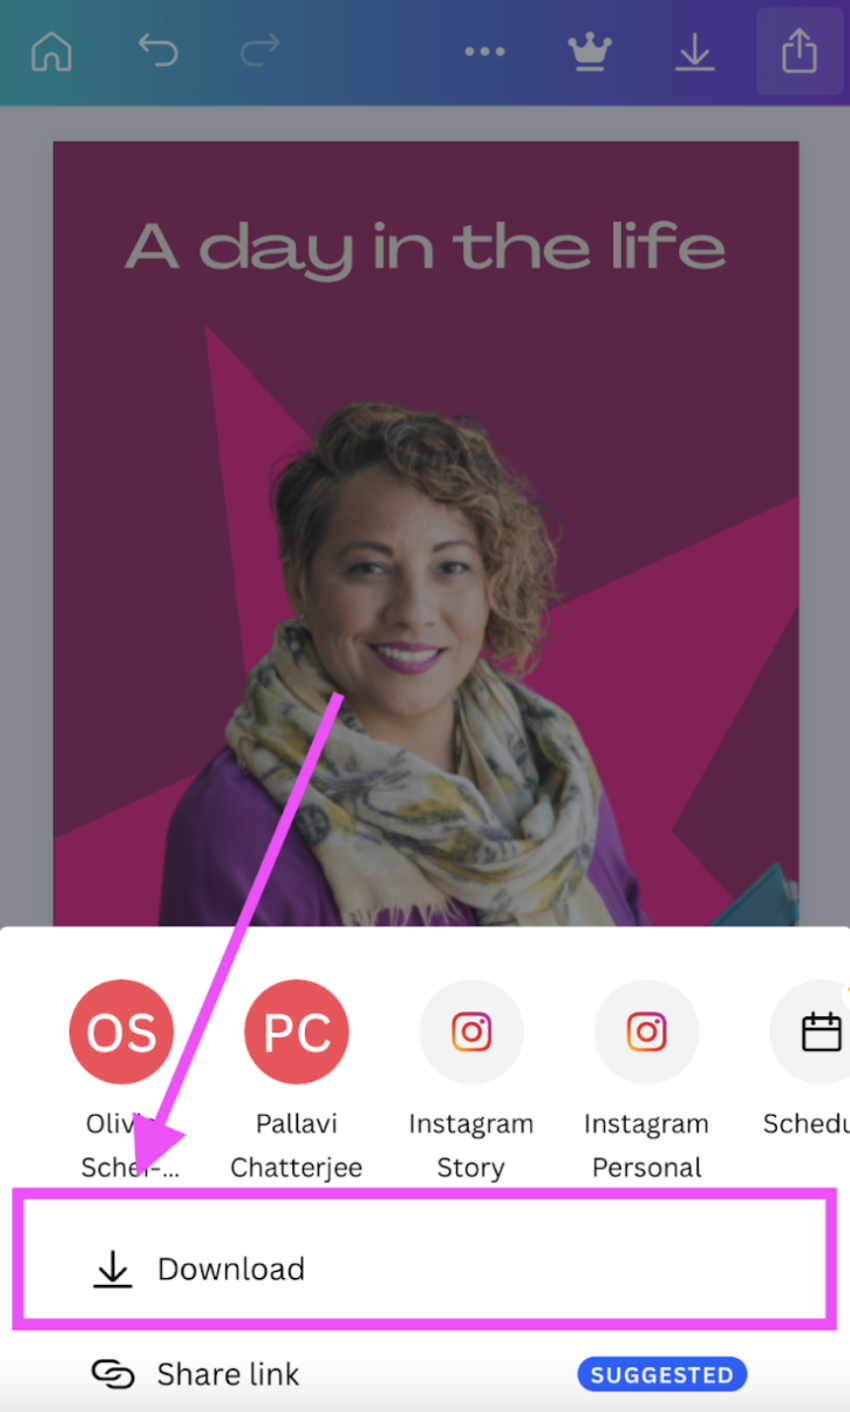
Once you're ready to post, go ahead and click on > Share in the top right-hand corner of Canva.
-
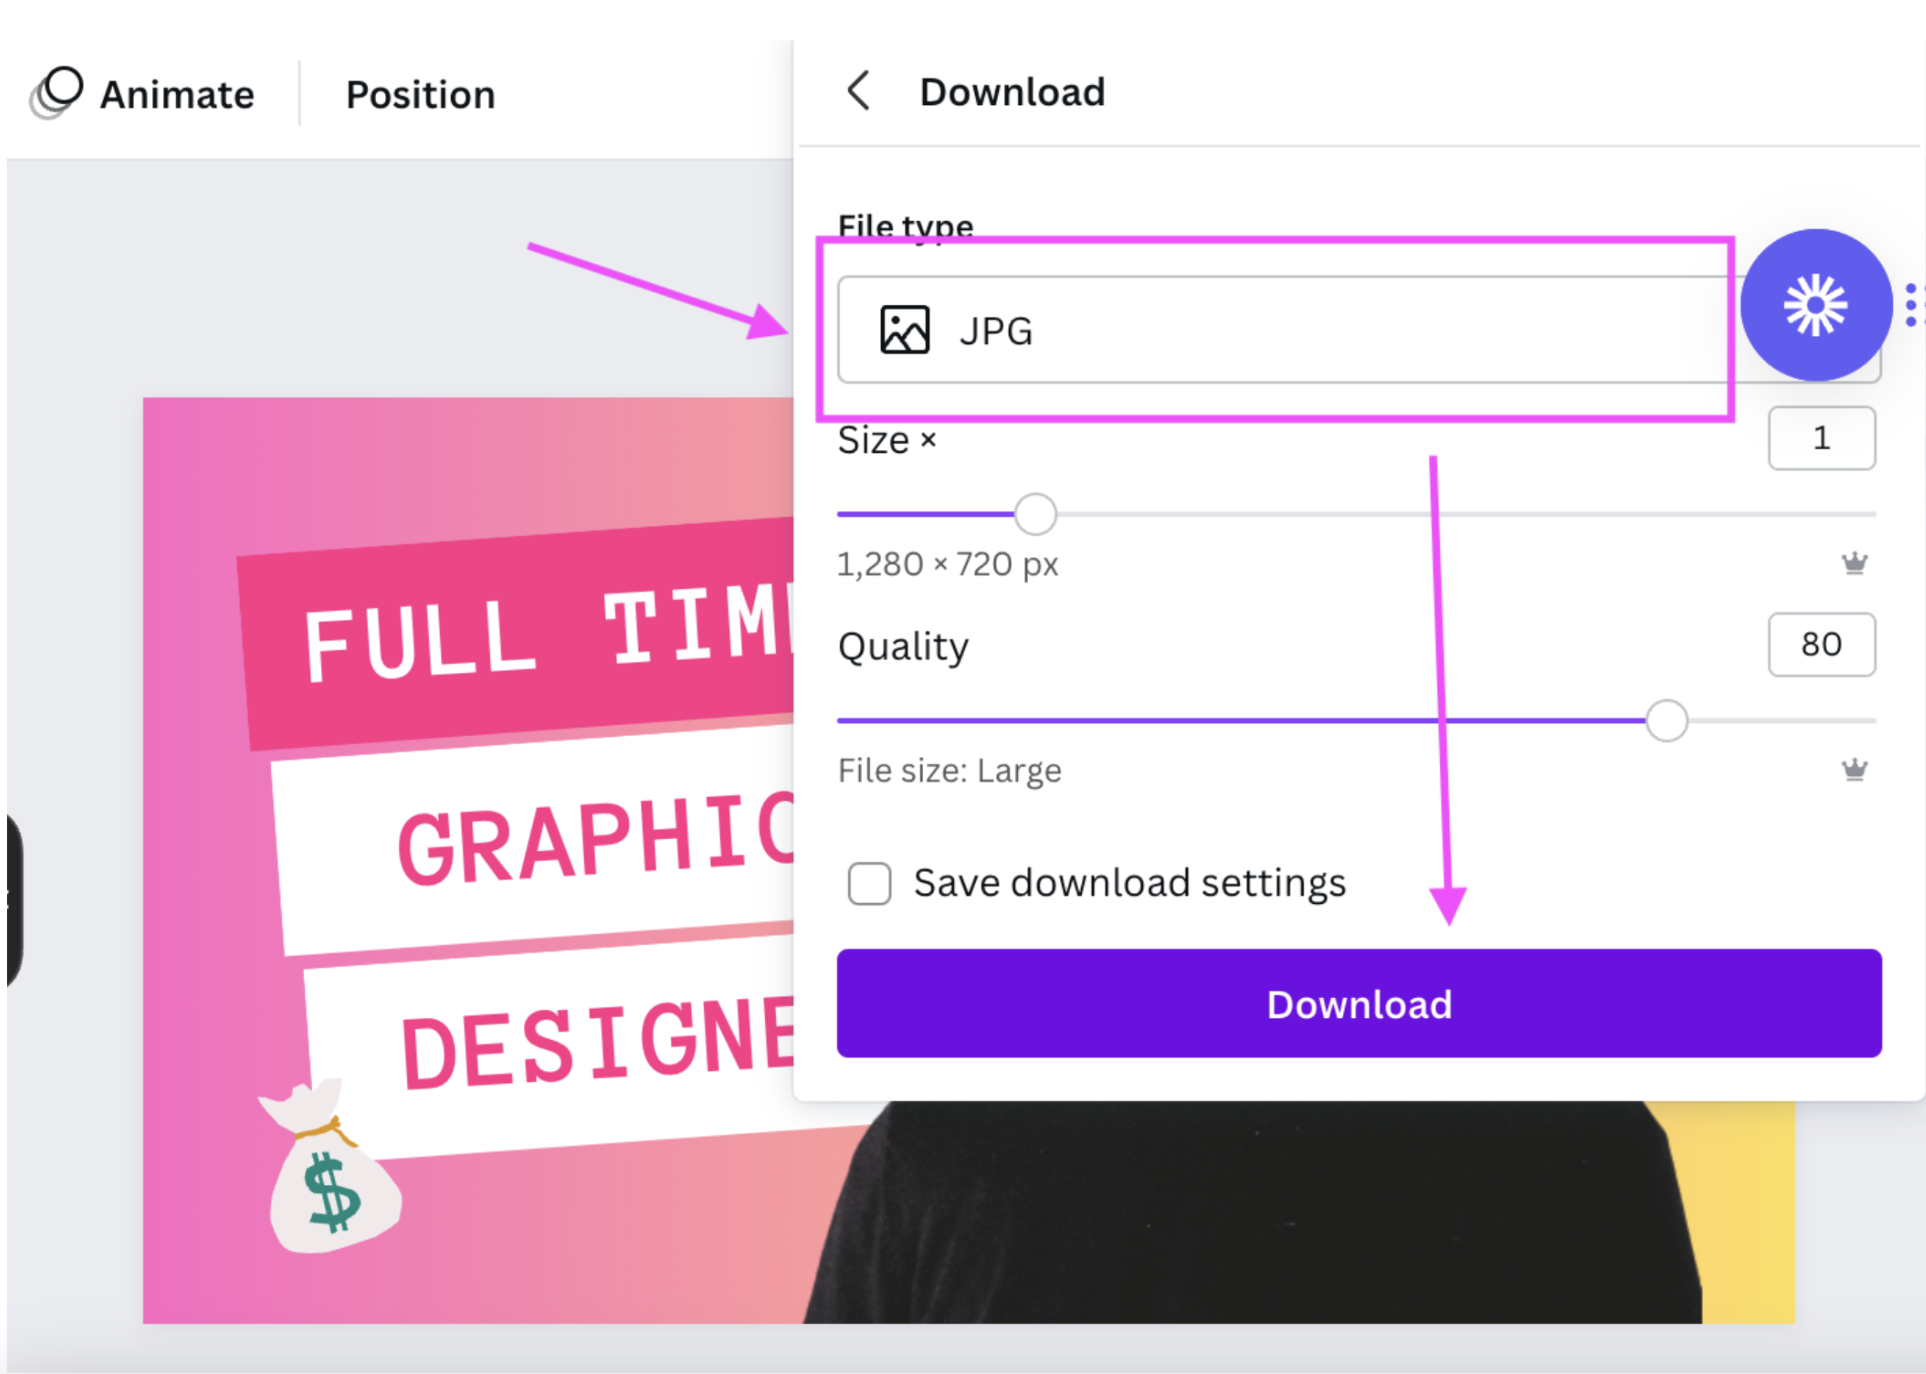
Then go ahead and select > Download and make sure to set it to download as a JPG in the next step. This is the best format for posting on socials.
Although we just covered Instagram graphic design tips the great thing about this post is that you can use it on many channels. It's a universal format that will work for most static feeds.
How to design YouTube thumbnails with remove.bg & Canva
The goal of a YouTube thumbnail is to get people to play your video. A common term people use is Click-Through Rate (CTR) — aka. how many of those who see your video end up clicking on it and watching it? This can be a great way to measure the success of a thumbnail.
Best practice:
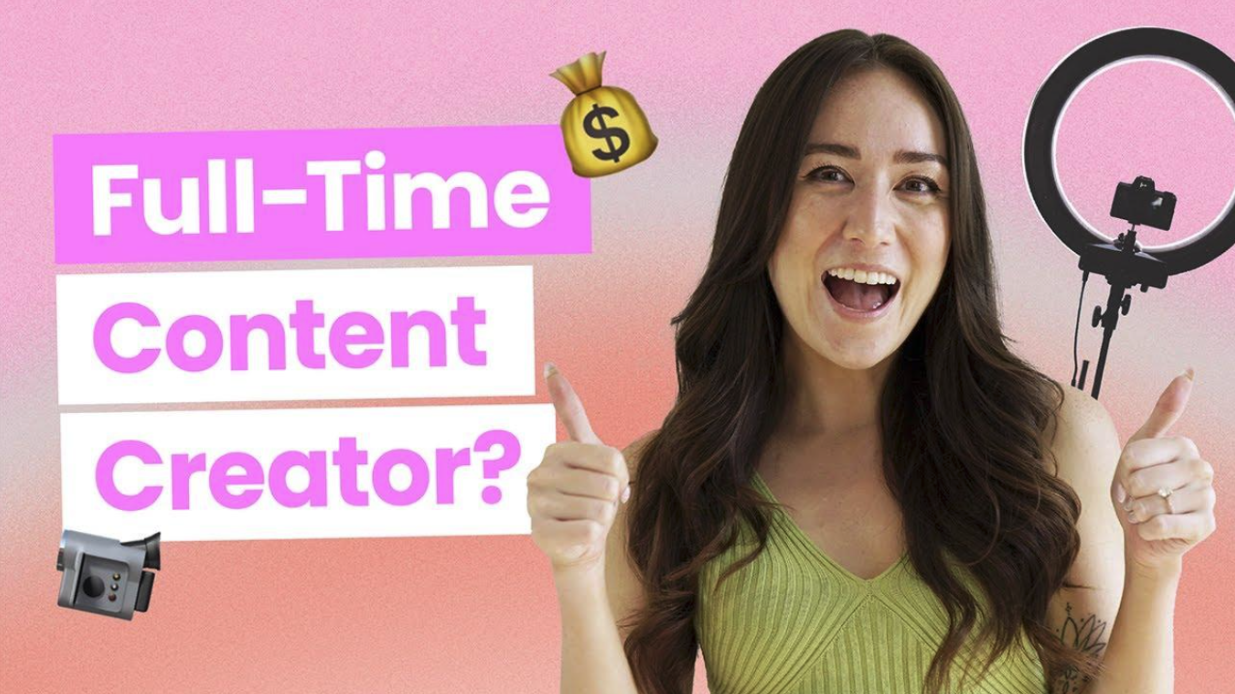
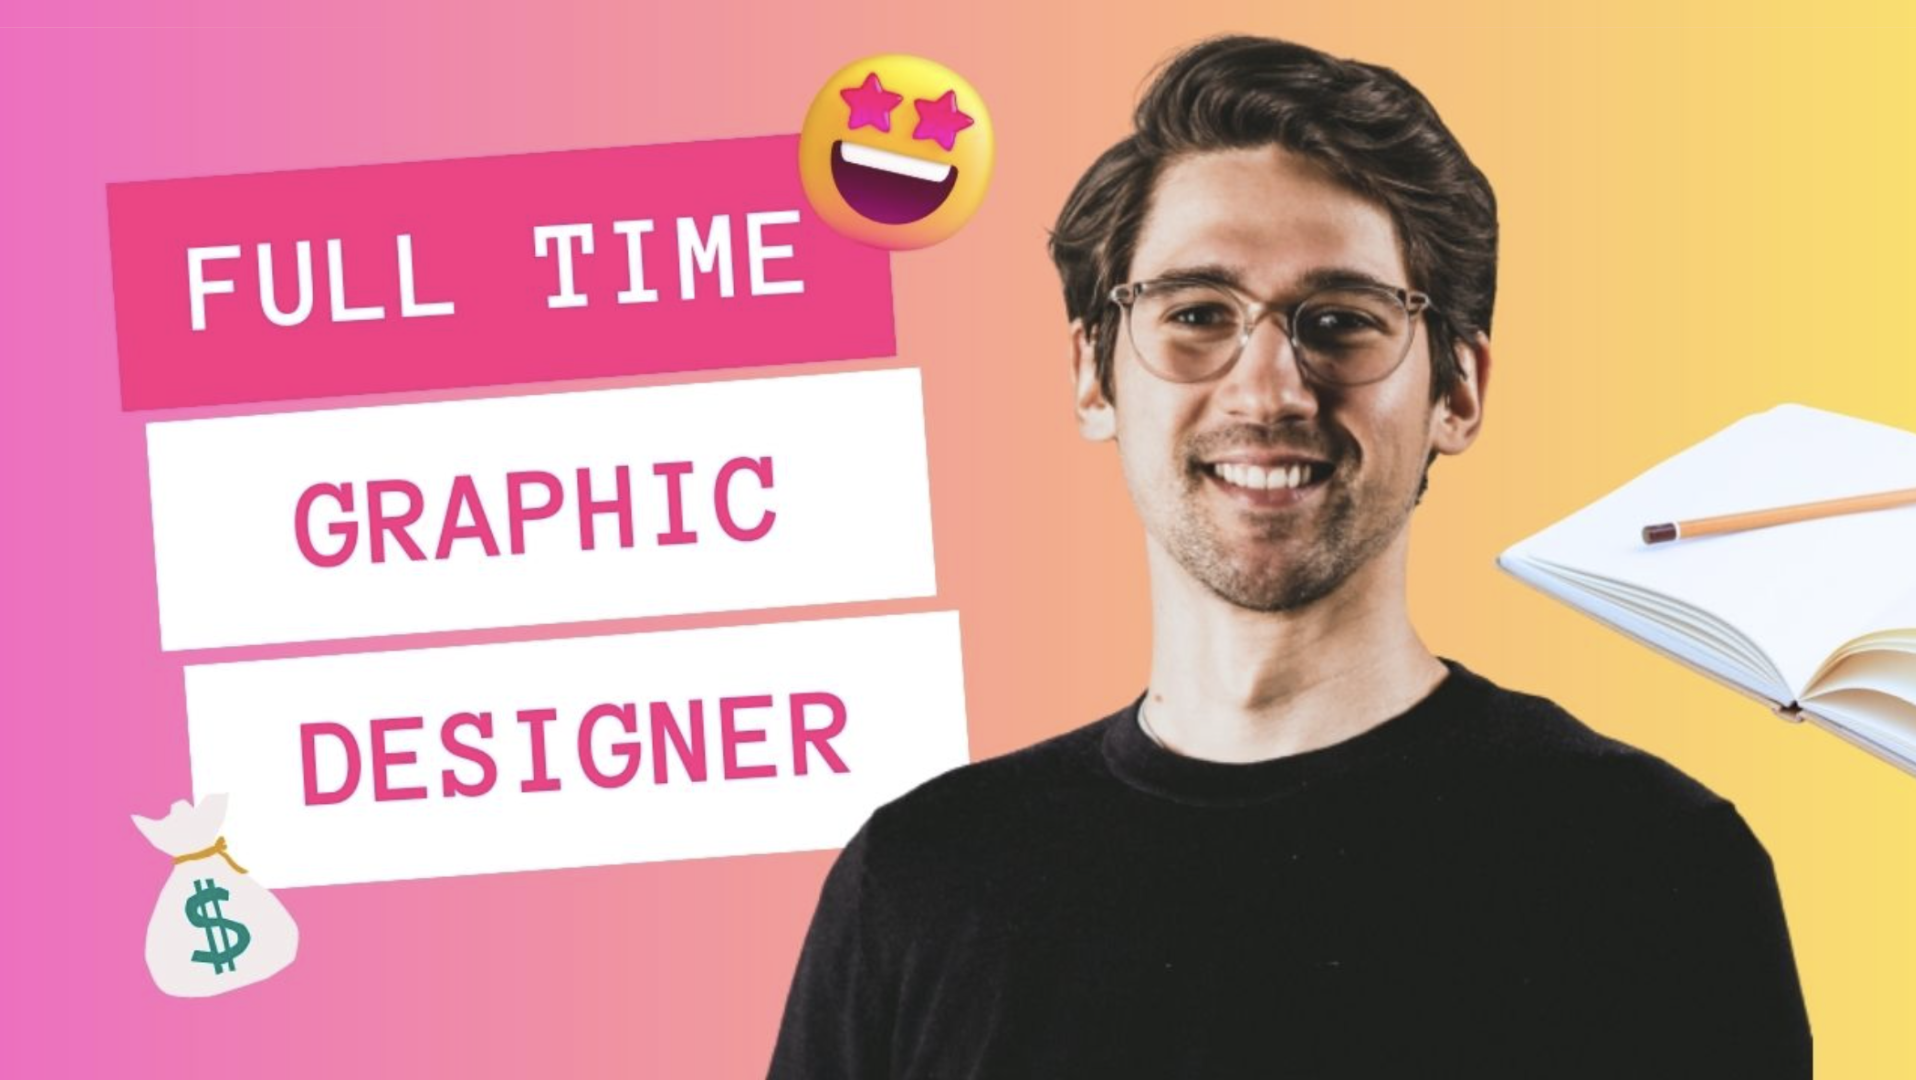
This YouTube thumbnail from LaterMedia is on message and has no distractions. It also has a personal branding element, aka shows the video creator in the thumbnail a great way to drive an emotional connection before it starts. The title is also clearly visual, so the viewer knows what main topic to expect. There is enough white space and visual hierarchy; the emojis and image in the background are also related to the overall topic while not distracting from the main message, and the pink color pops amongst other videos.
Want to create your own YouTube thumbnail like this one? Here's how:
-
Choose a photo/headshot of yourself, where you're looking straight at the camera and posing just like the woman in the thumbnail above — if you don't have one, go ahead and grab your phone and take one. We used this one:

-
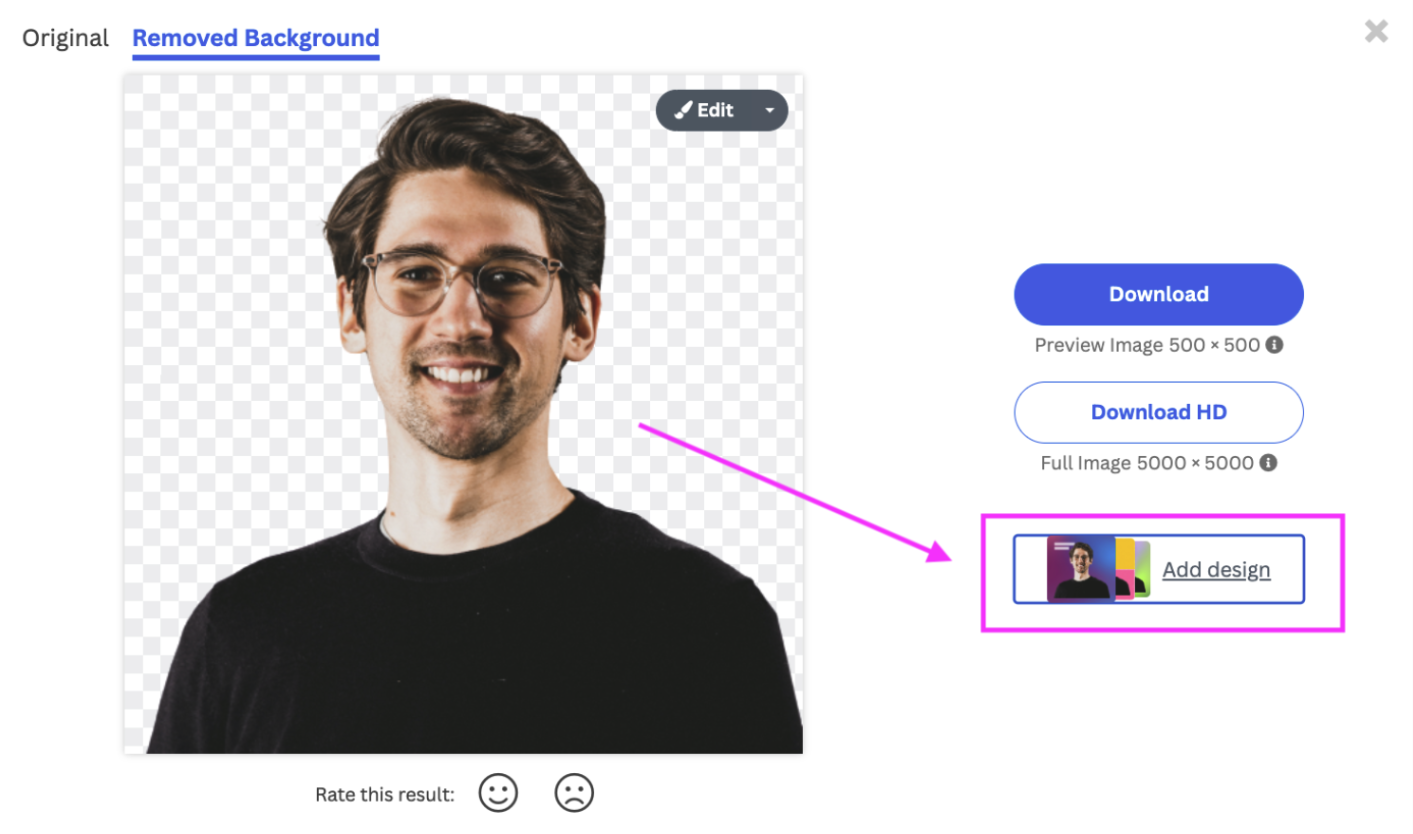
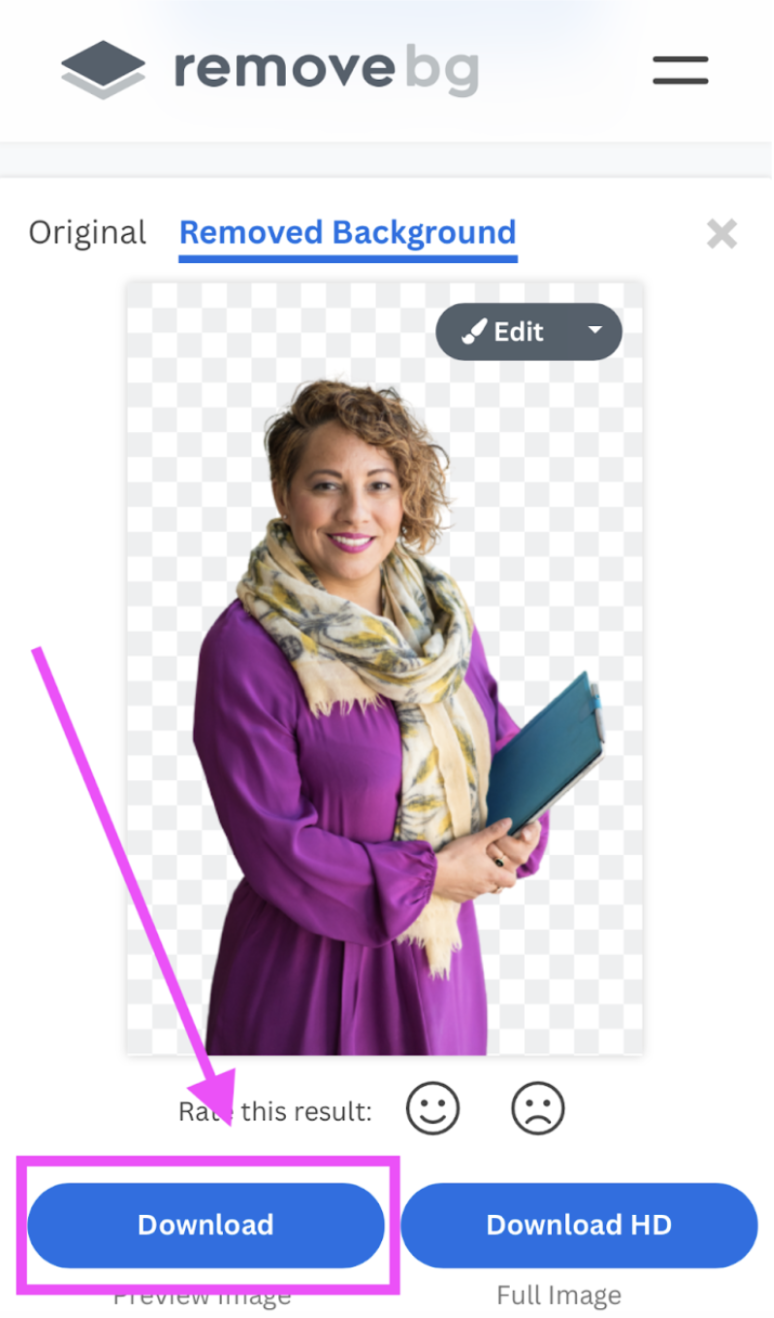
Hop on over to remove.bg and remove the background:
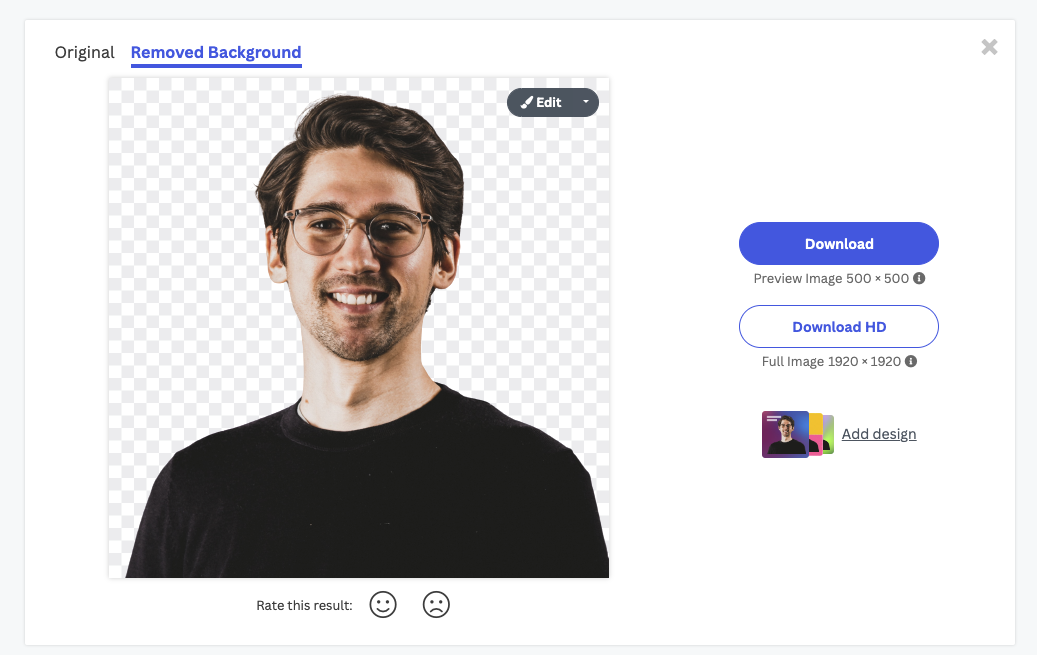
-
Then select > Add design.
-
Once your design is in Canva, you can use the > Change size feature and select YouTube thumbnail.
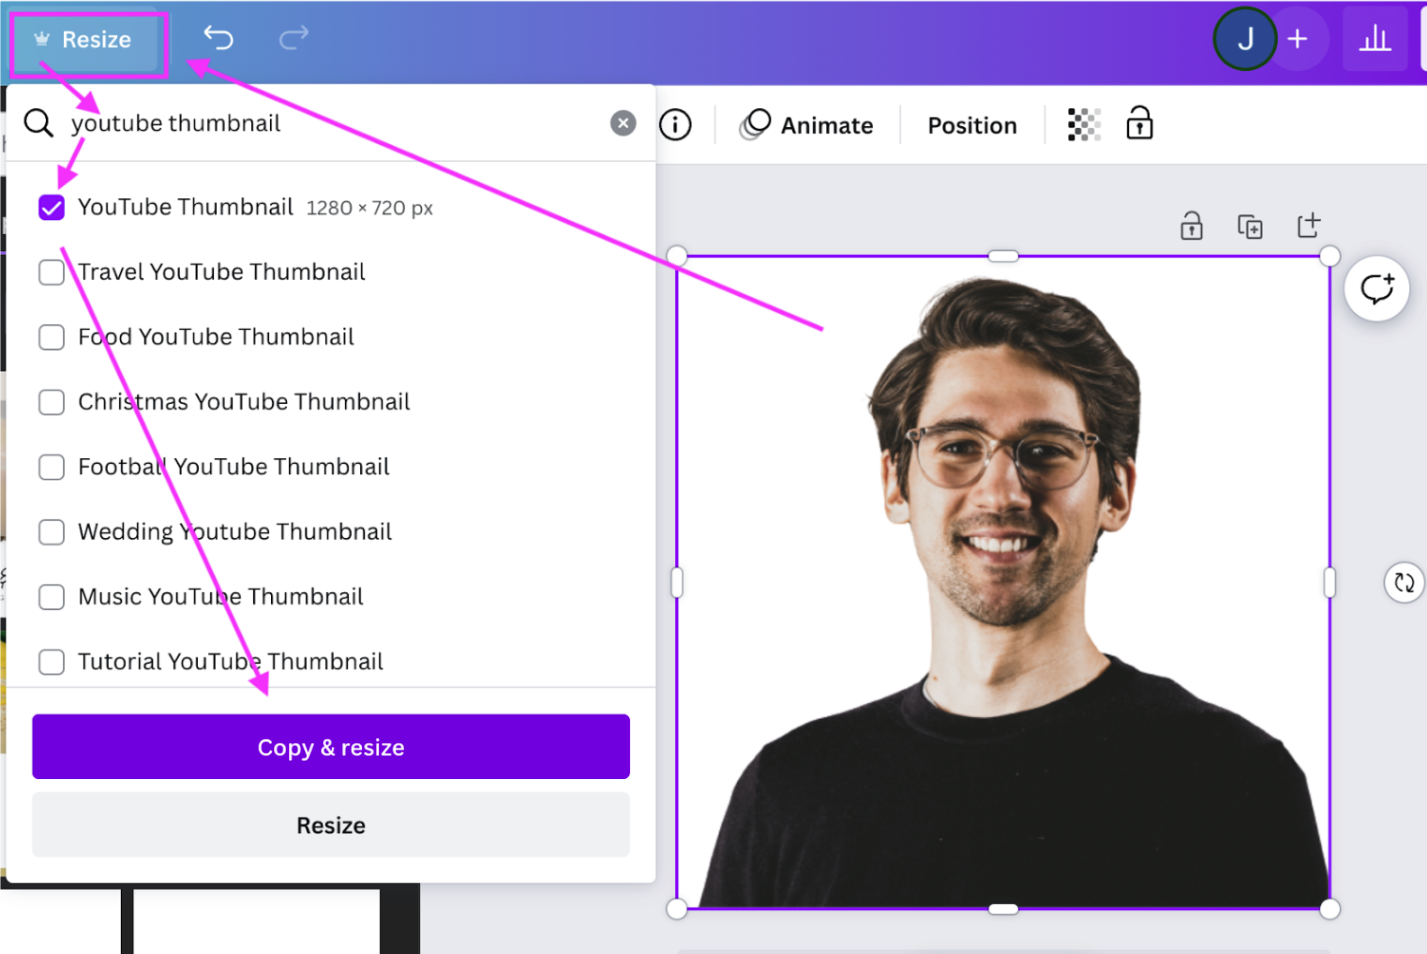
Side note: If you can't access Canva Premium, just create a completely new Canva design with the correct thumbnail sizing and manually download it from remove.bg, and upload it to Canva again.
The size of a YouTube thumbnail (stance TechSmith June 2023) is 1280 × 720 pixels with a minimum width of 640 pixels, and the ideal ratio for YouTube players and previews is 16:9.
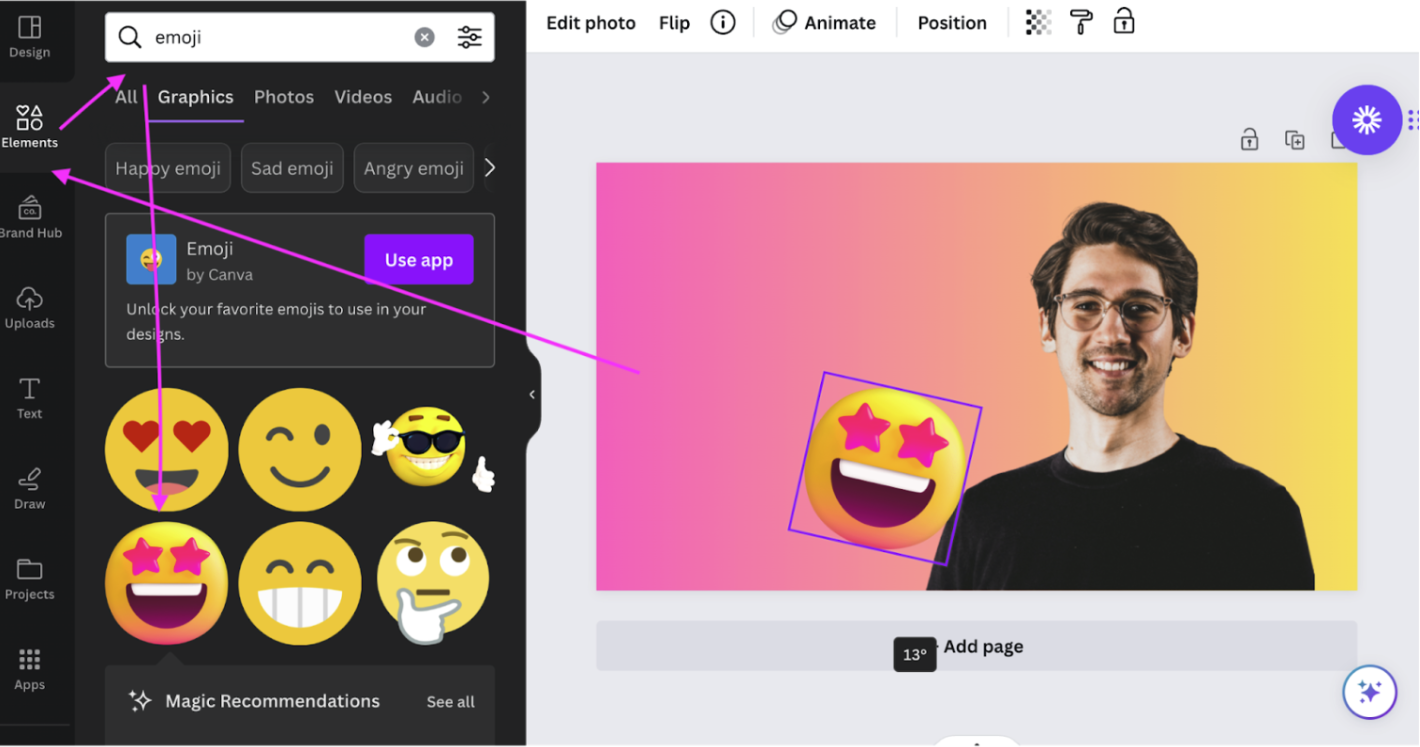
Now, you're going to want to change the color of the background. Select the background by clicking on it, then go to > Background color. If you want to create a similar gradient effect, like in our best practice — scroll to the bottom, where you'll find preset gradients. We decided to go for the pink and orange one; cute, right?
-
Then go ahead and add some emoji. You can do this by simply selecting > Elements > Emojis. We added this cute little star-eyed smiley, and later on also added a money bag.
-
Now it's time to add the text to the page and the boxes — just like in our best practice. To do this, simply go to > Elements and select the square. You can adjust its size to a rectangle by dragging the edges. Move it around the canvas by dragging and dropping it and rotate it by clicking and holding on the rotate symbol just below it.
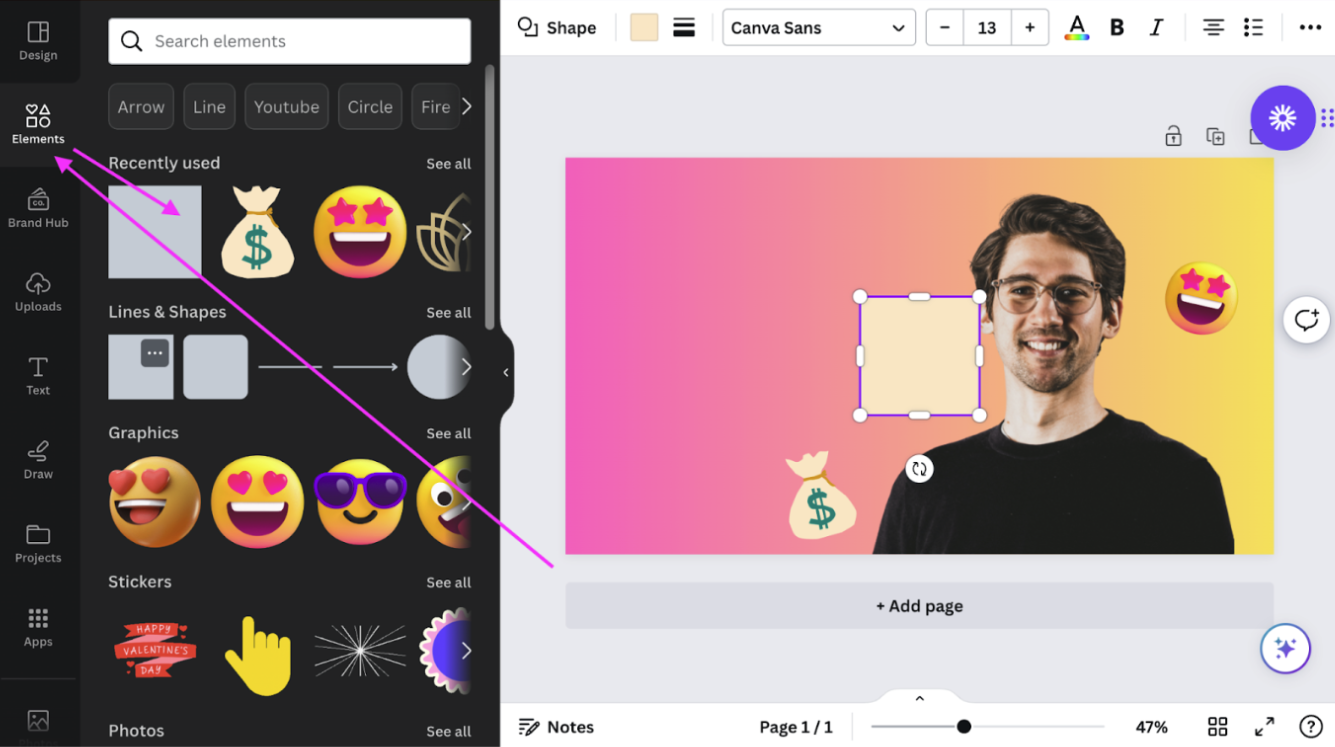
We also adjusted the color just like before by clicking on the colored box just above the canvas.
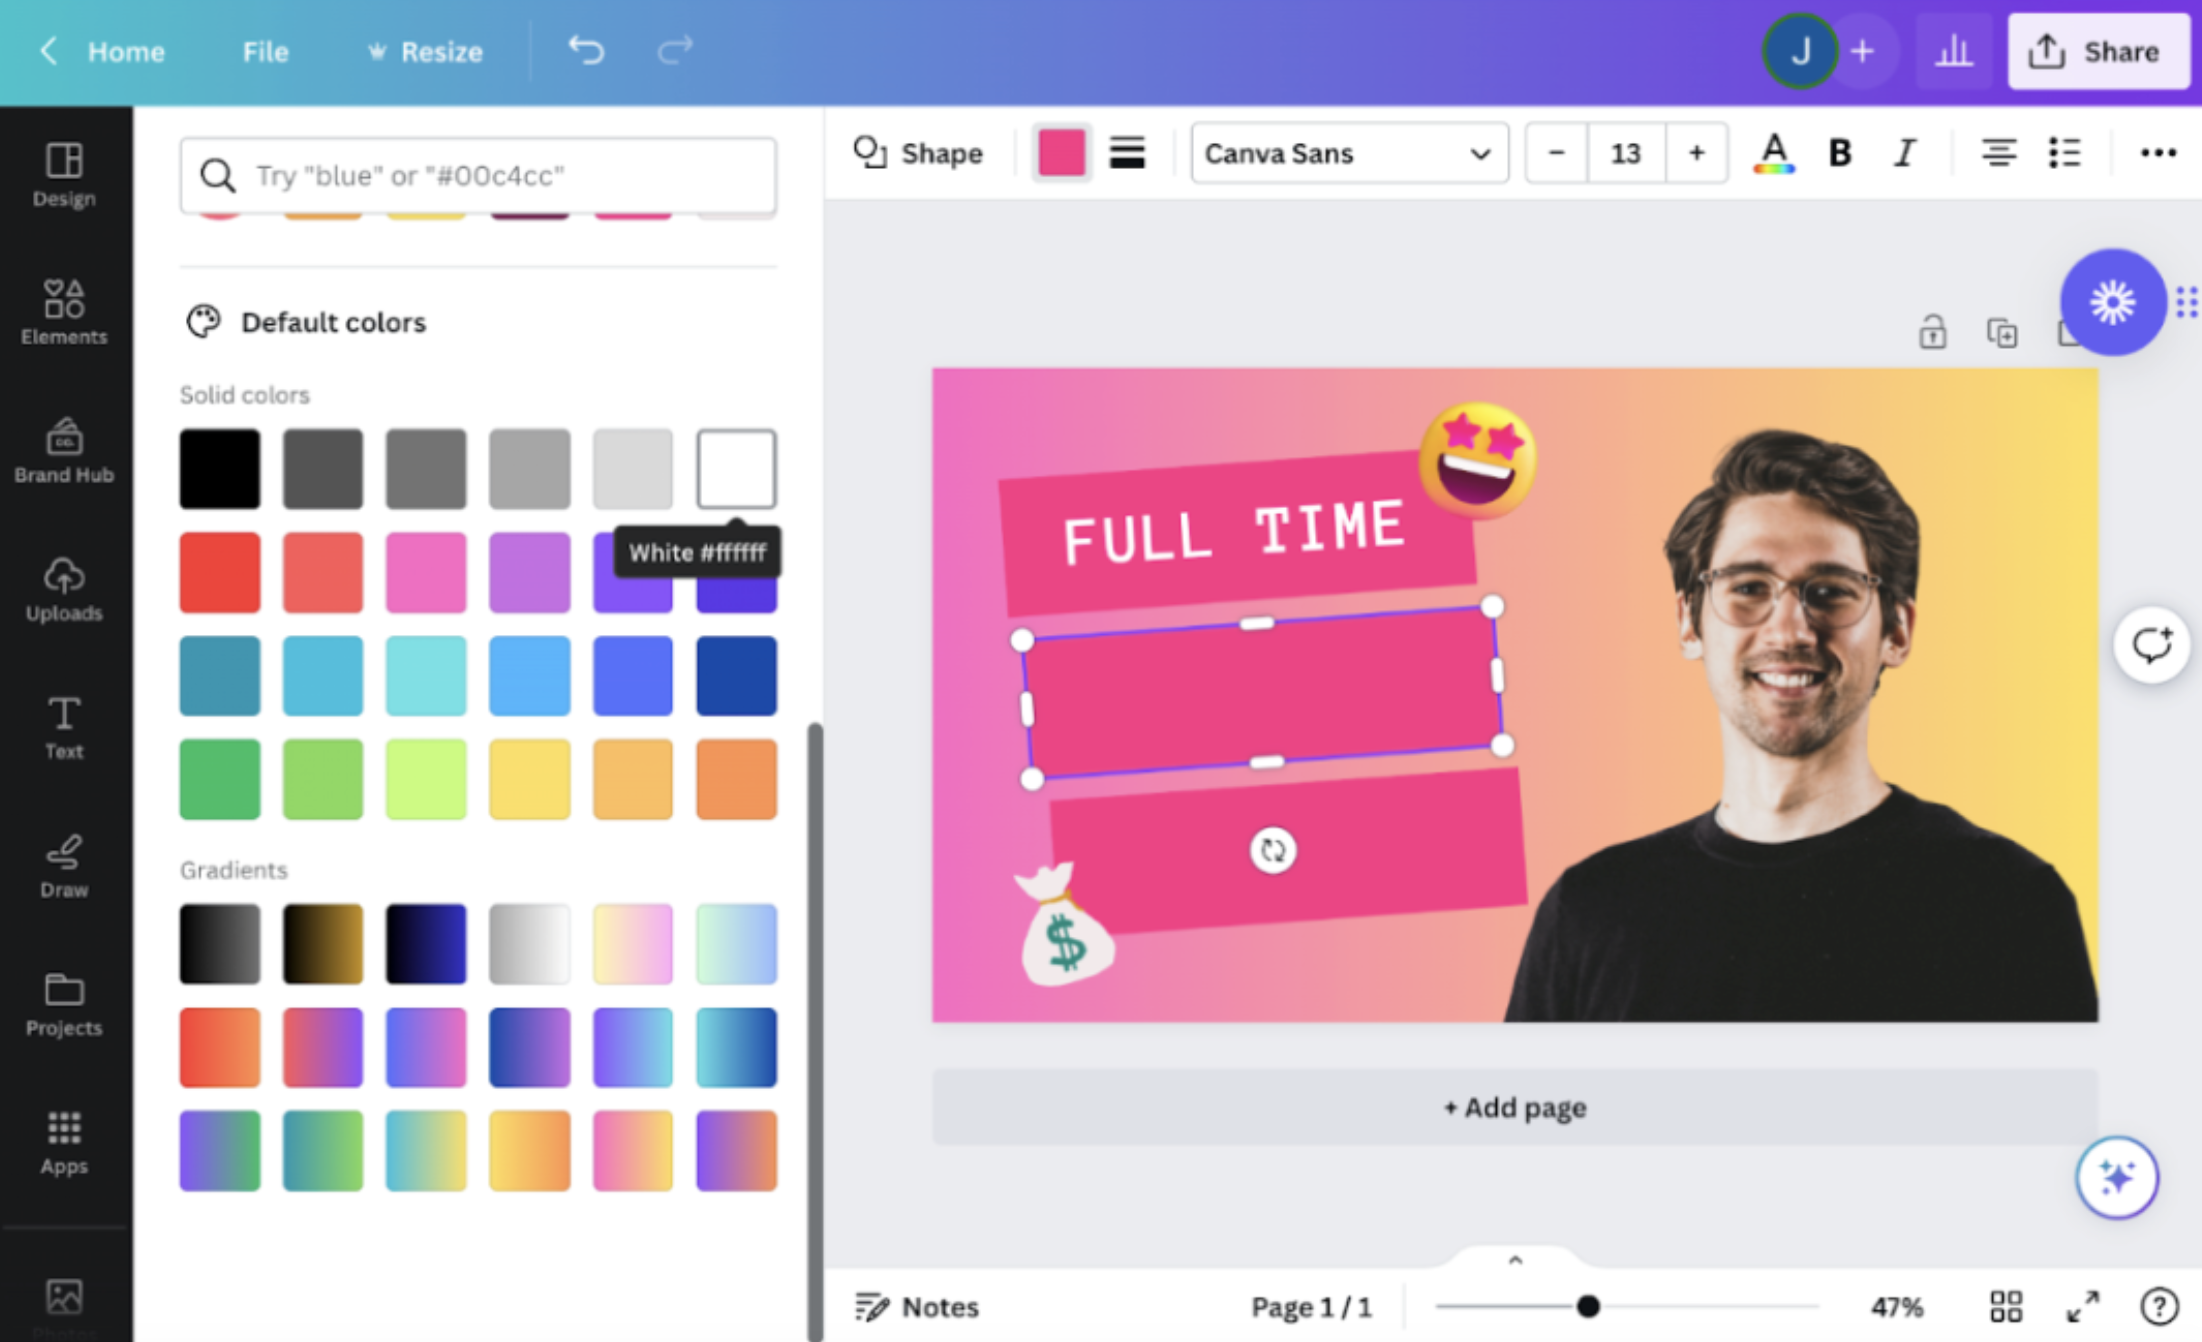
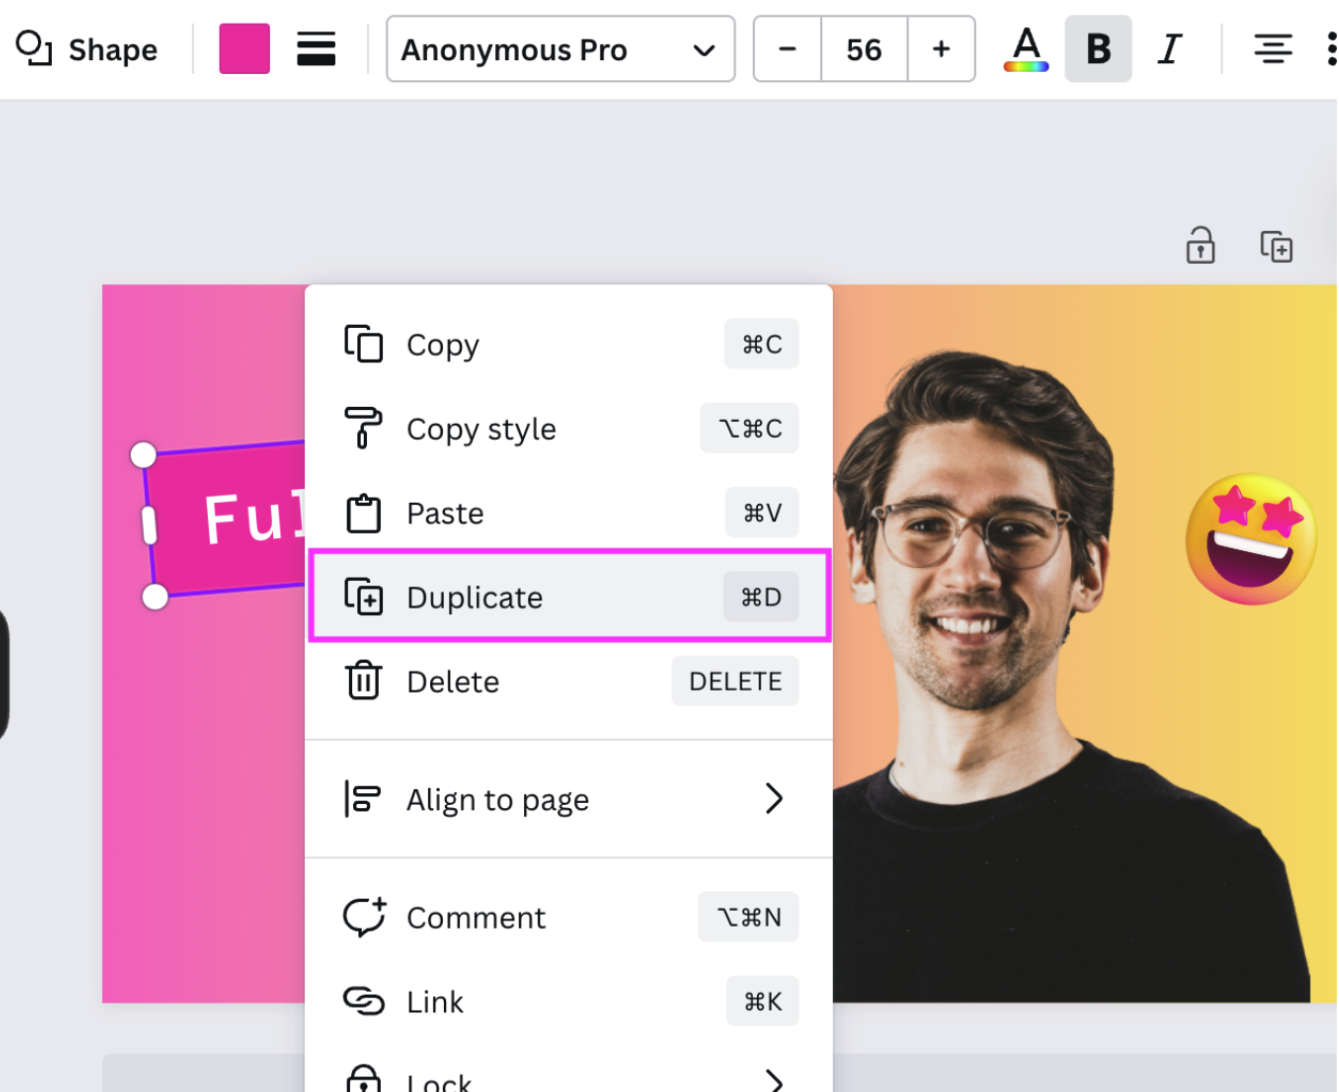
-
Once you're happy with the text box, duplicate it twice to create the other two in the same size. By right-clicking on the text box and selecting > Duplicate.
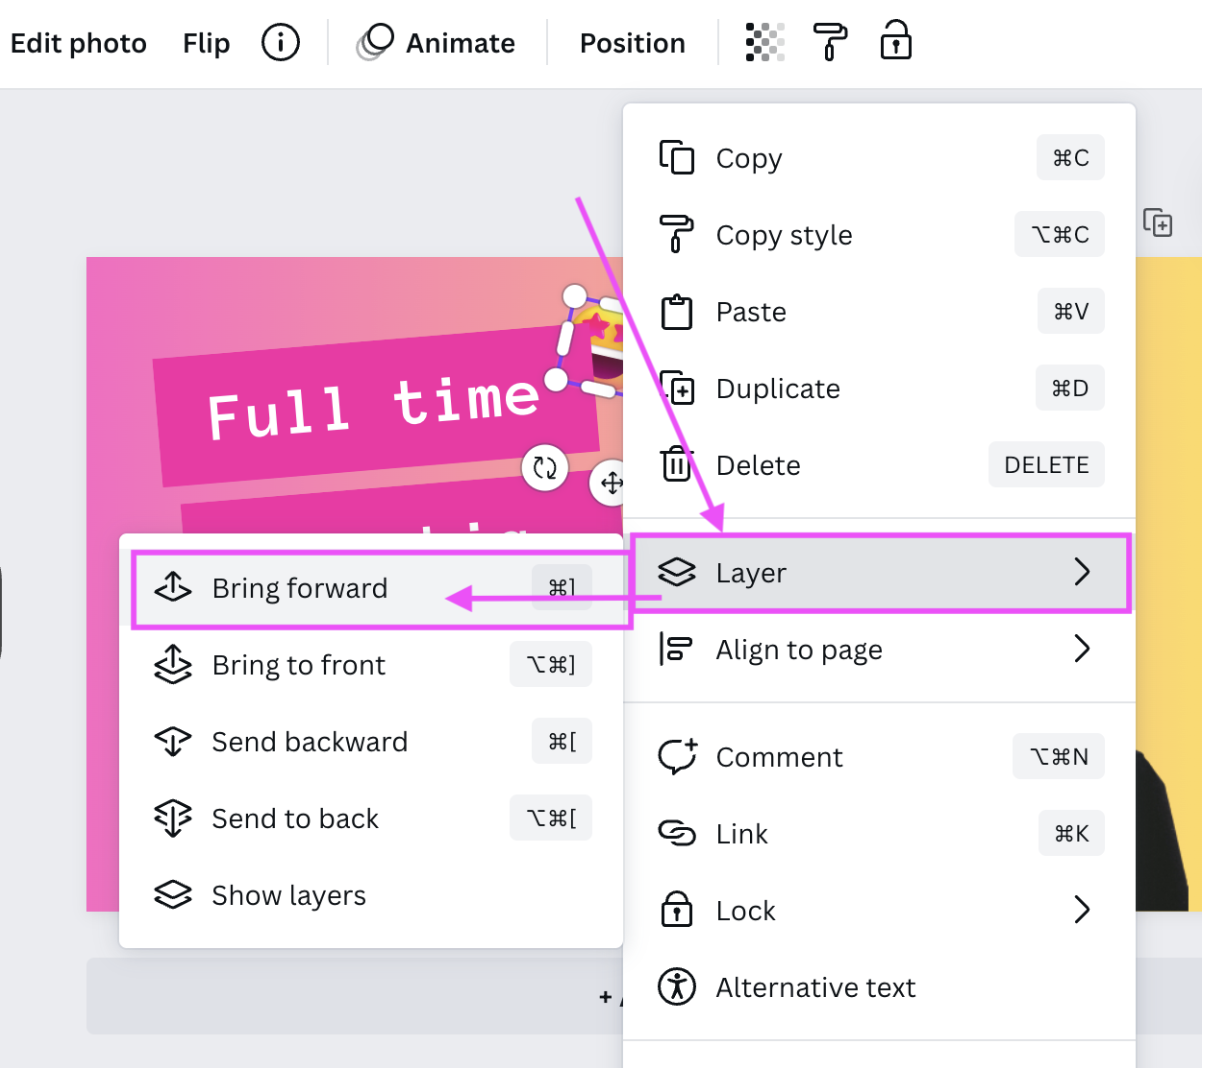
-
Now your design is a little busier, you can move the emojis to the corners of the text boxes, but you will need to bring them to the front so it doesn't cover the emoji. Do this by going to > Layer > Bring forward or Bring to front.
-
Play around with the alignment, and change the color of the last two blocks as well as the font by simply clicking on them and choosing your desired setting.
There's a lot of tweaking involved; you can also use the up and down arrows on your keyboard to align the boxes or drag your mouse over all of them while clicking to move all three at once.
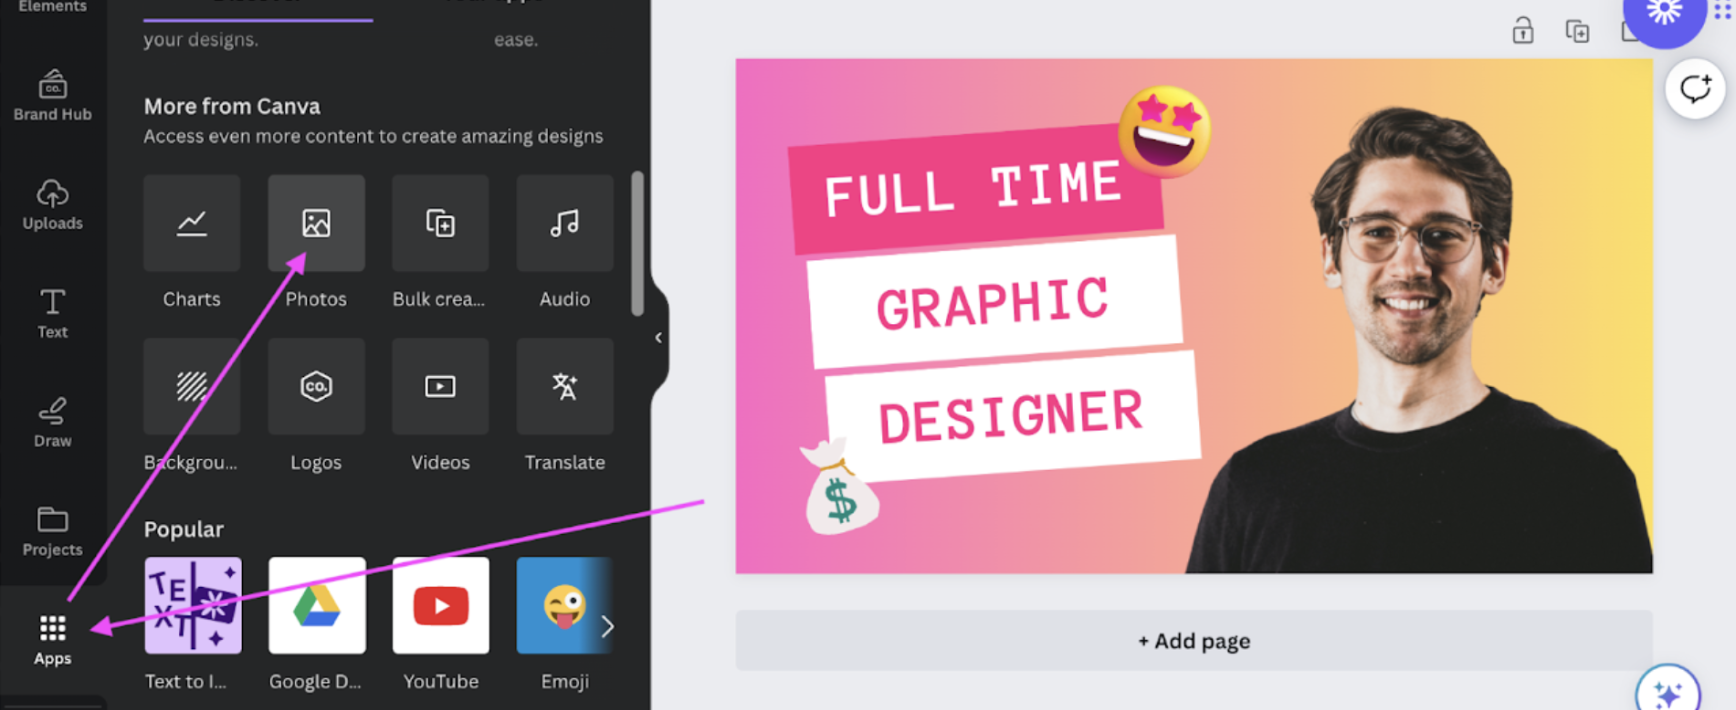
-
Now, for the final touch, we want to add a photo of something that represents graphic design and creativity — just like the ring light in our best practice example. Simply go to > Apps > Photos. We went ahead and selected a notebook. It should be standalone so you can remove the background easily in the next step.
-
If you have a Canva Pro account, to remove the photo's background go to > Edit photo in the top bar and then select > BG Remover.
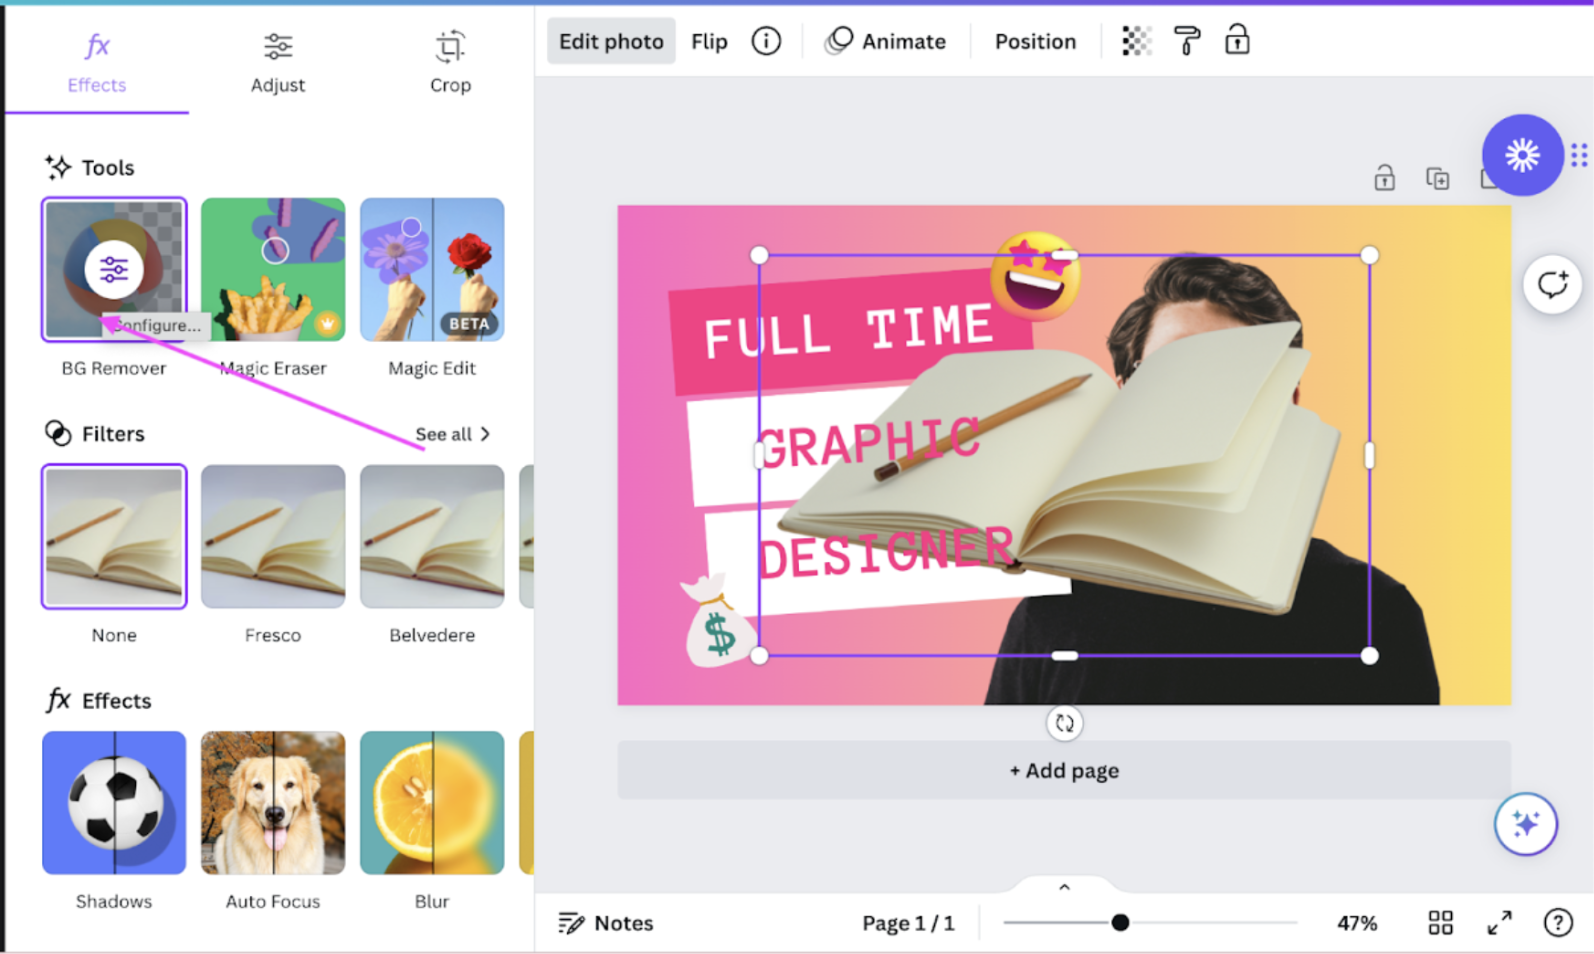
If you don't, you can use remove.bg to remove the photo's background and then upload it to your Canva project.
-
That's it! Now you're ready to download your brand-new thumbnail and add it to your latest YouTube video! Simply go to > Share at the top right-hand corner of Canva and then go to > Download. Select > JPG and > Download.
Et voilà, here is the slick end result:
Want to dive a little deeper into designing YouTube thumbnails and how to ensure they perform? Check out our blog post on how to make the best YouTube thumbnail to boost video views.
How to design Instagram stories with remove.bg & Canva
Last but not least, we’d like to cover how you can create super unique Instagram stories using remove.bg to add pretty much any photo you like from your camera roll. By removing its background you can also ensure your story backgrounds can be unique and on-brand color-wise.
If you are short on time, you can do this quickly by accessing remove.bg directly on your phone.
-
Head to remove.bg's website and upload the photo you want to remove the background of.
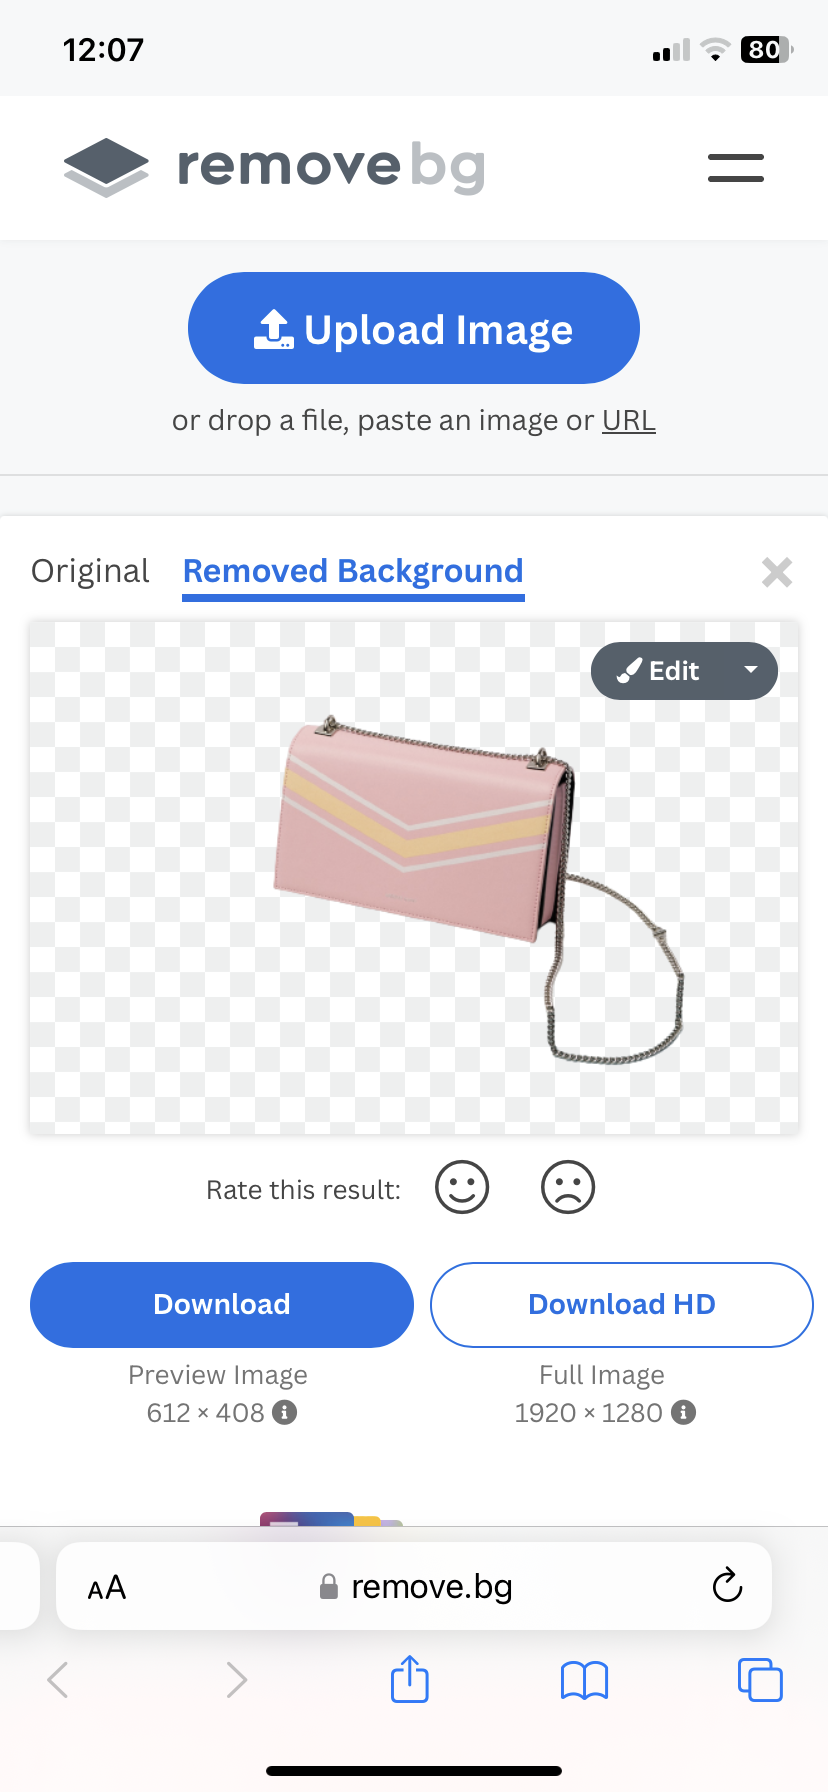
Once the background has been removed, download the image to your phone. To retrieve it, go to your phone's "downloads" folder and select the image, then click on > save image. It will now be in your camera roll.
-
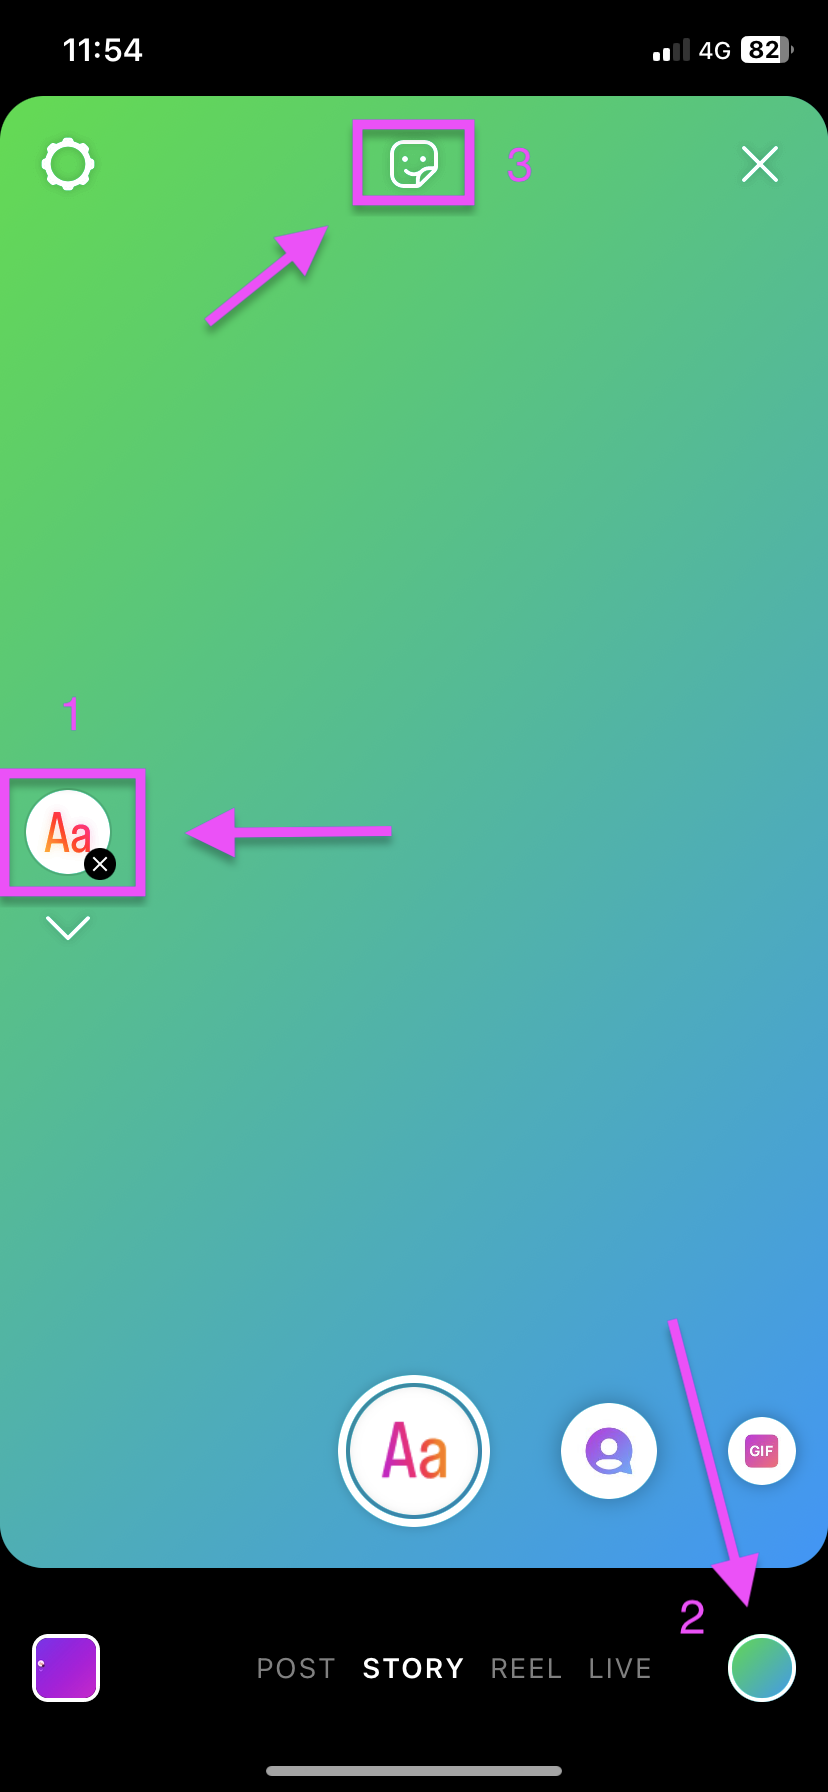
Then open up Instagram and click on > Add Story. Select the > Aa button ("Create"), and on the bottom-right corner, pick which color you'd like as background.
-
Then click on the post-it icon on the top of the screen and select the add image option.
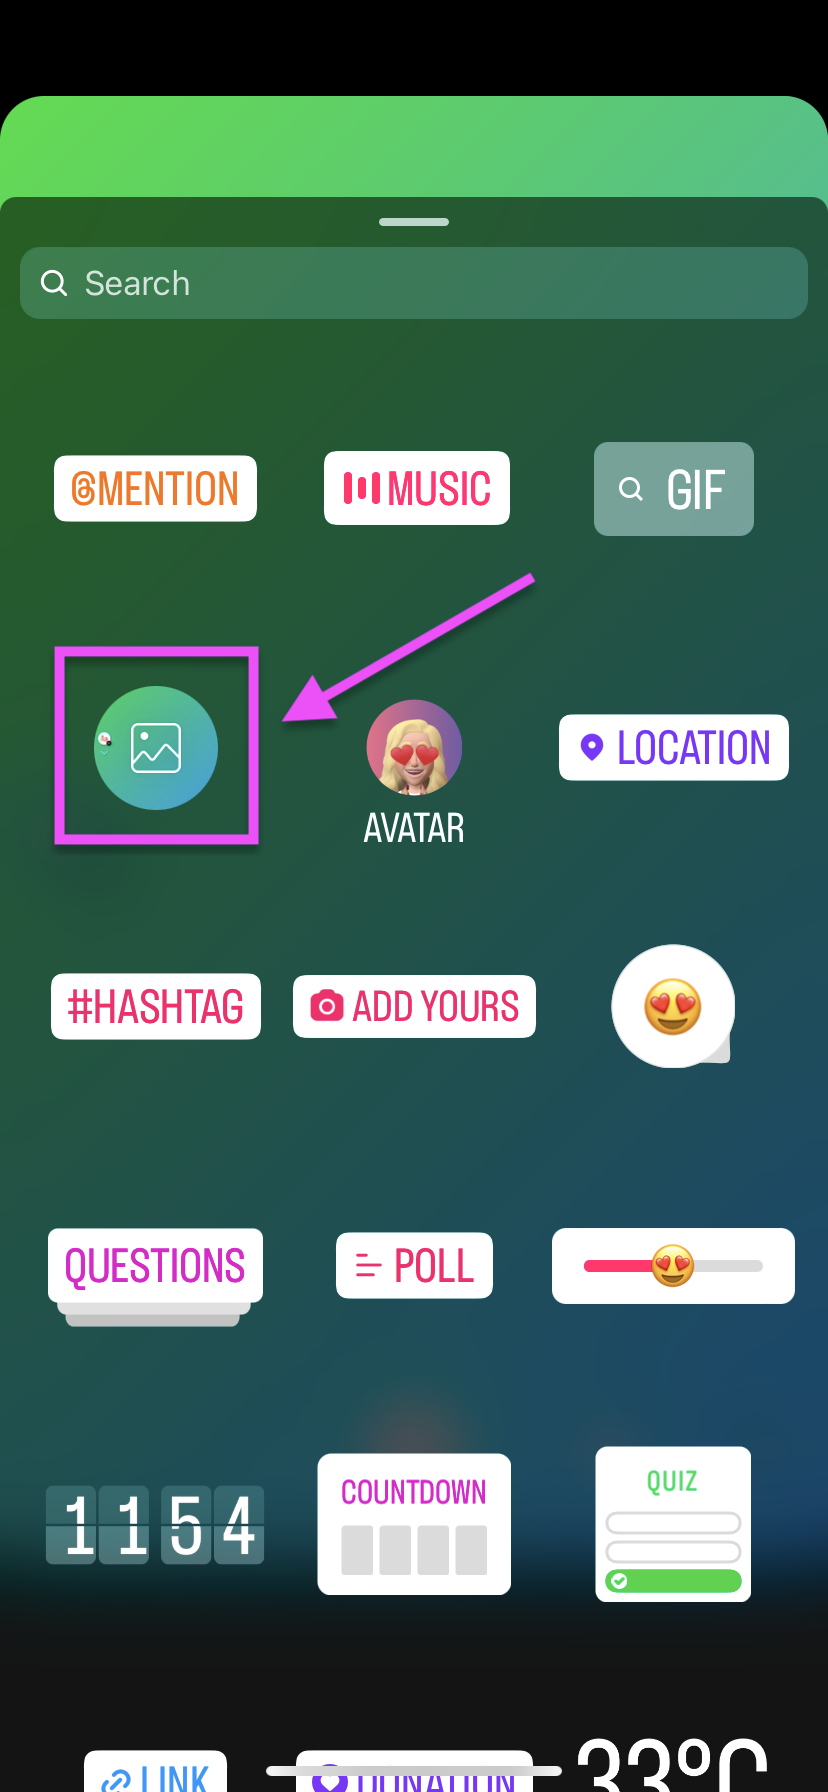
Select the image with the removed background from your camera roll and adjust its size to how you prefer it. Pro tip: if you tap on the image, Instagram will add different frames to it (star, circle, or heart-shaped frames).
-
Once you are done, add some text, elements, and even links to your image.
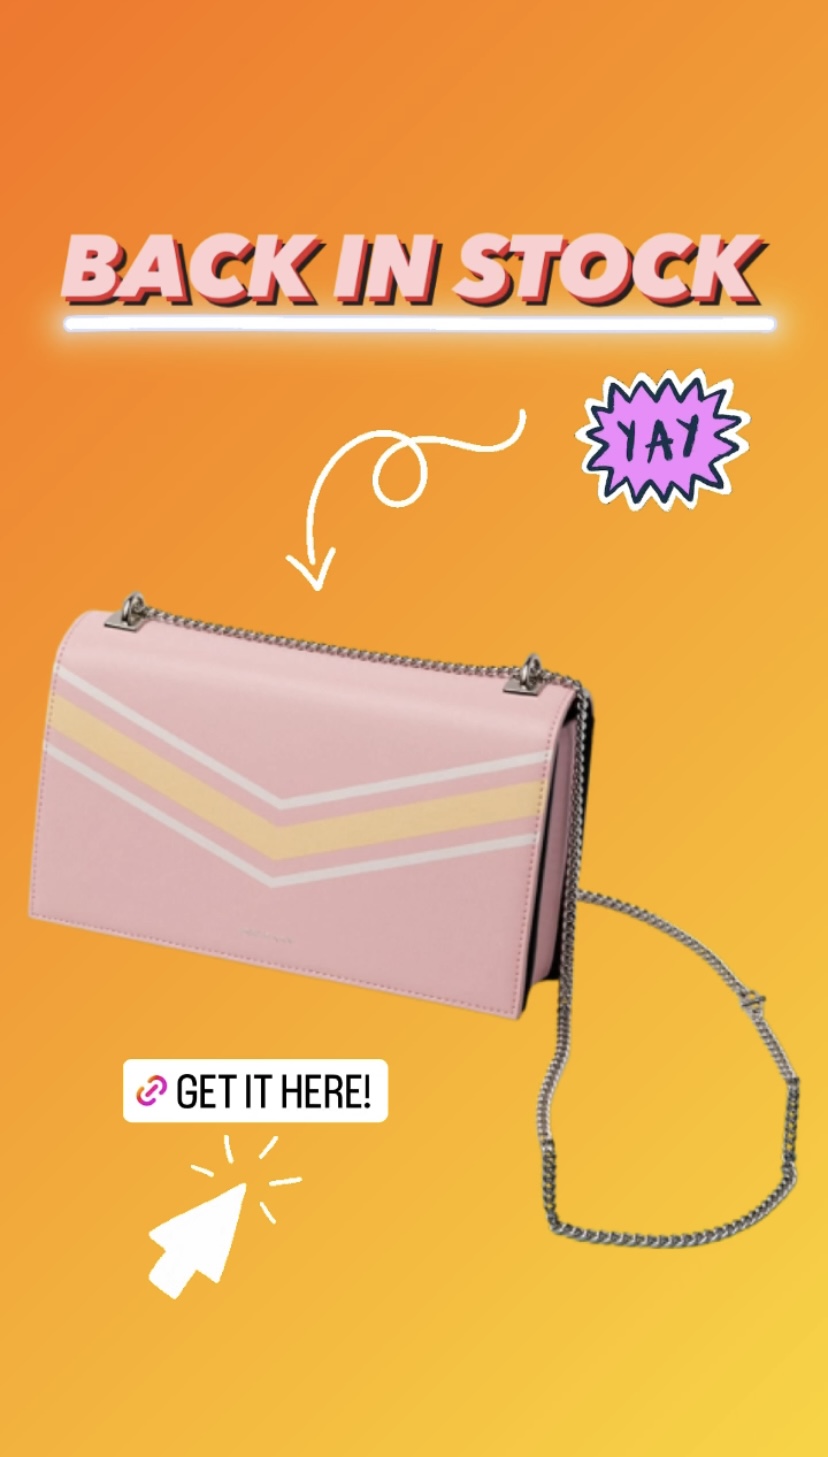
That's it! You will now have a very simple but effective Instagram story.
If you have more time at hand and want to create scroll-stopping content, then we've got a few extra tips for you.
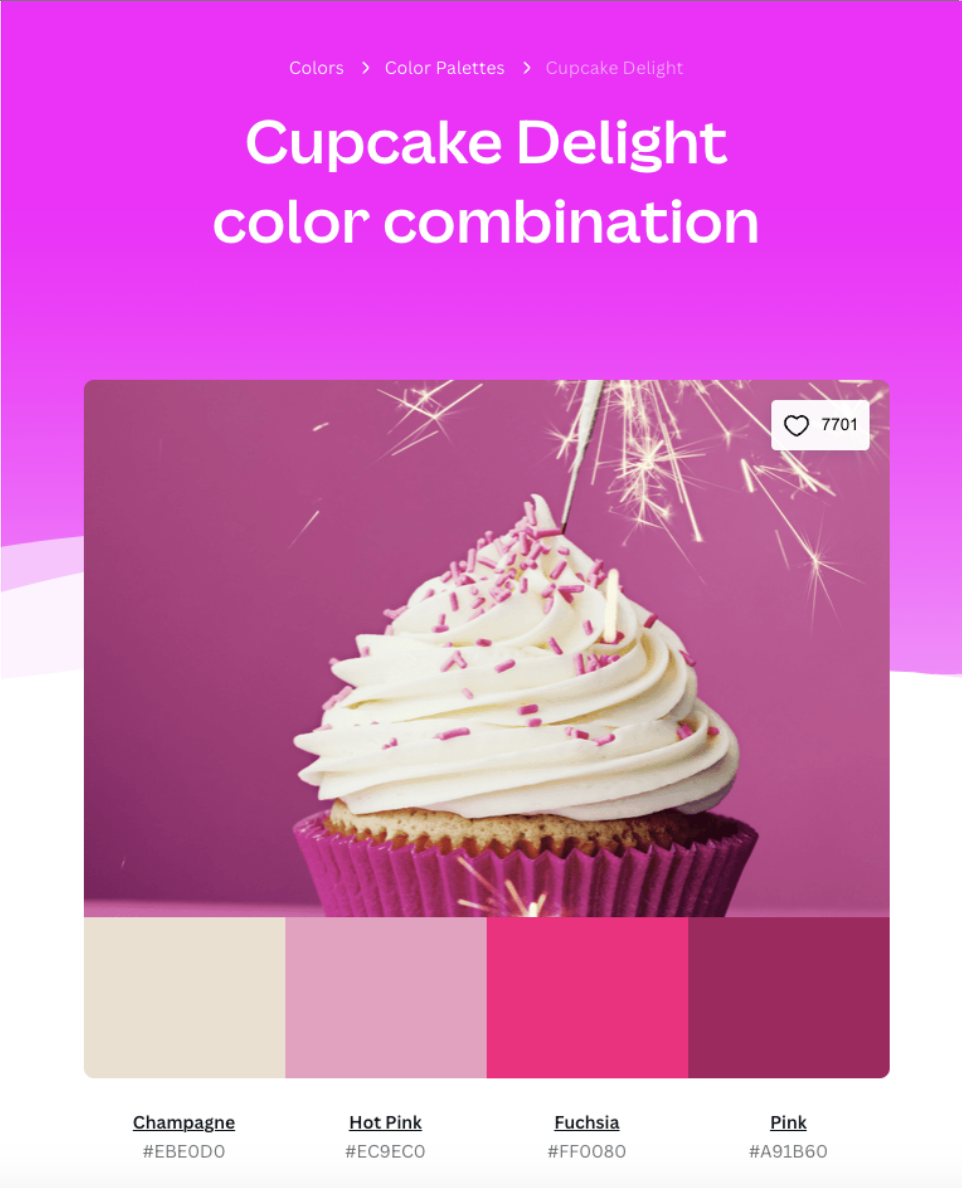
Start by picking a color palette. We chose this one.
We’re going to go ahead and show you how you could create unique stories, with personal branding elements that are bound to grab your customer’s attention.
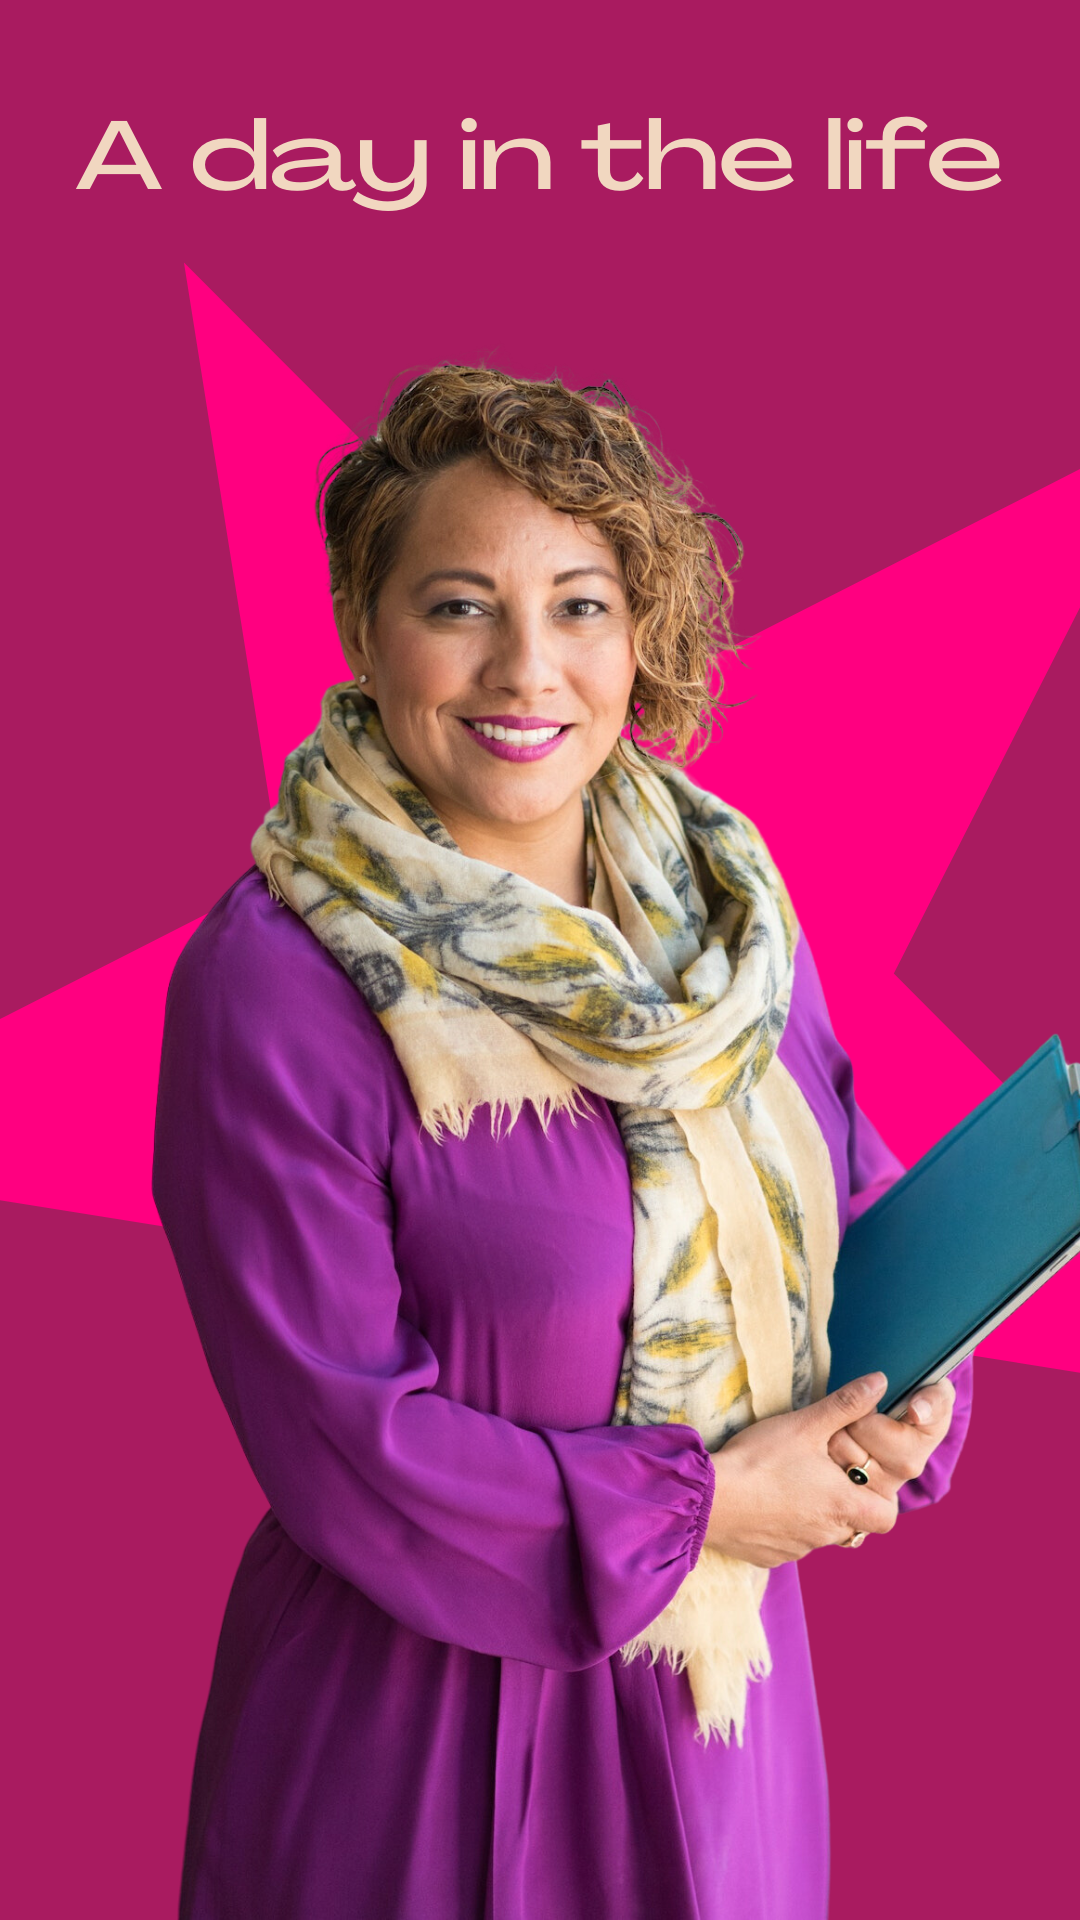
Here’s how to create a unique Instagram story like this one:
Open up Canva on your phone (in case you don’t have the app yet, go ahead and download it).
-
Type ‘Instagram story’ into the search bar and select > Create blank.

-
Then go ahead and select > Color at the very bottom and add the color you want the background of the story to be. You can do this by selecting the + sign and adding the HEX color. That’s the color with the hashtag in front of it that you can see in the screenshot with the cupcake above. We went ahead and chose dark pink.
-
Then it’s time to add text; you can do that by selecting > Text > Add a heading. You can play around with the font and change the color to match one of your brand colors by using the settings at the bottom of the screen.

-
Now we’re going to add an icon in the background to pimp it up. Let’s use a star by going to > Elements and selecting a star.
-
You can make it bigger by simply dragging the corners of the design and changing the color by tapping the star, selecting > Colour and the + sign to add your brand color.
-
Now it’s time to add your personal branding image. Go ahead and open up remove.bg on your phone.

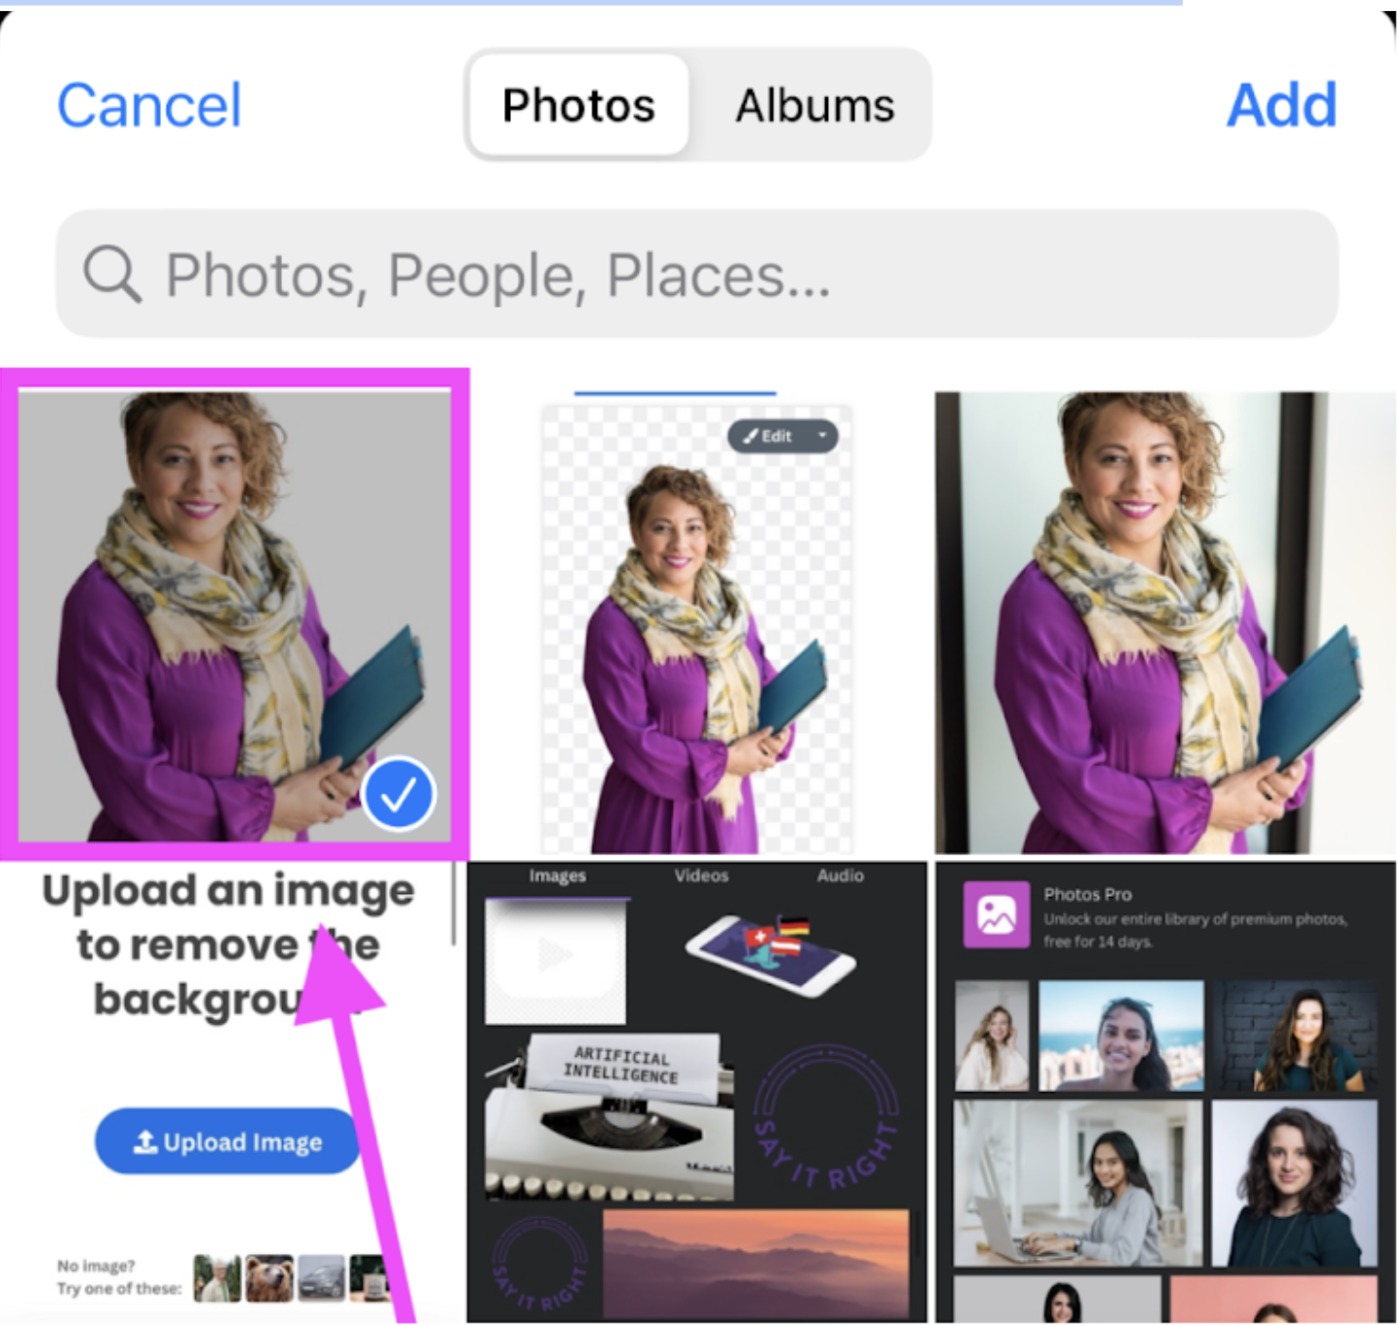
Then upload your image by selecting > Upload image to remove the background. It will only take a few seconds max.
-
Then go ahead and hit > Download, > (if you have an iPhone) Save to Files, open up your files, select the image, and select > save image.
-
Now open up the Canva app again. Go to > Upload at the bottom of the screen and select the image with the removed background.
Adjust the size by dragging the corners and press, hold and move your finger around to reposition the image.
-
Once you're happy, give yourself a pat on the back and hit > Download.
Et voilà! You have your ready-to-go Instagram story. All you have to do now is upload it to Instagram — amazing work, designer!
Creative design for your social media graphics
Feeling better equipped on how to design posts for social media? We certainly hope so! Especially considering how simple remove.bg makes removing backgrounds and how fun Canva is to use when developing your graphic further.
Just remember:
Social media design graphics are at their best when optimized for the platform and the algorithm behind it.
Leverage the basic rules of great design.
Make a decision on and double-check your platform's sizes, dimensions, and formats before you start designing.
Tools are your best friends: you can use remove.bg to remove backgrounds in 5 seconds.
Don’t be afraid to get creative! We love to see it.
-
Keep learning and researching; becoming a great social media designer won't come overnight. By the way, if you want to dive a little deeper, also check out our posts on:
If you follow the steps above, you are well on your way to creating show-stopping content for any one of many social media platforms! Want to get started right away? Hop on over to remove.bg and upload your first photo.
Comentários
Nenhum comentário até agora.