Have you ever wondered if you can get the background of your photo to blur without investing in a super expensive DSLR? Or perhaps you have a great photo already, and there’s an ugly background you’d just love to blur out? Then, we’ve got you covered.

With remove.bg, you can blur a photo's background in seconds — and it’s completely free.
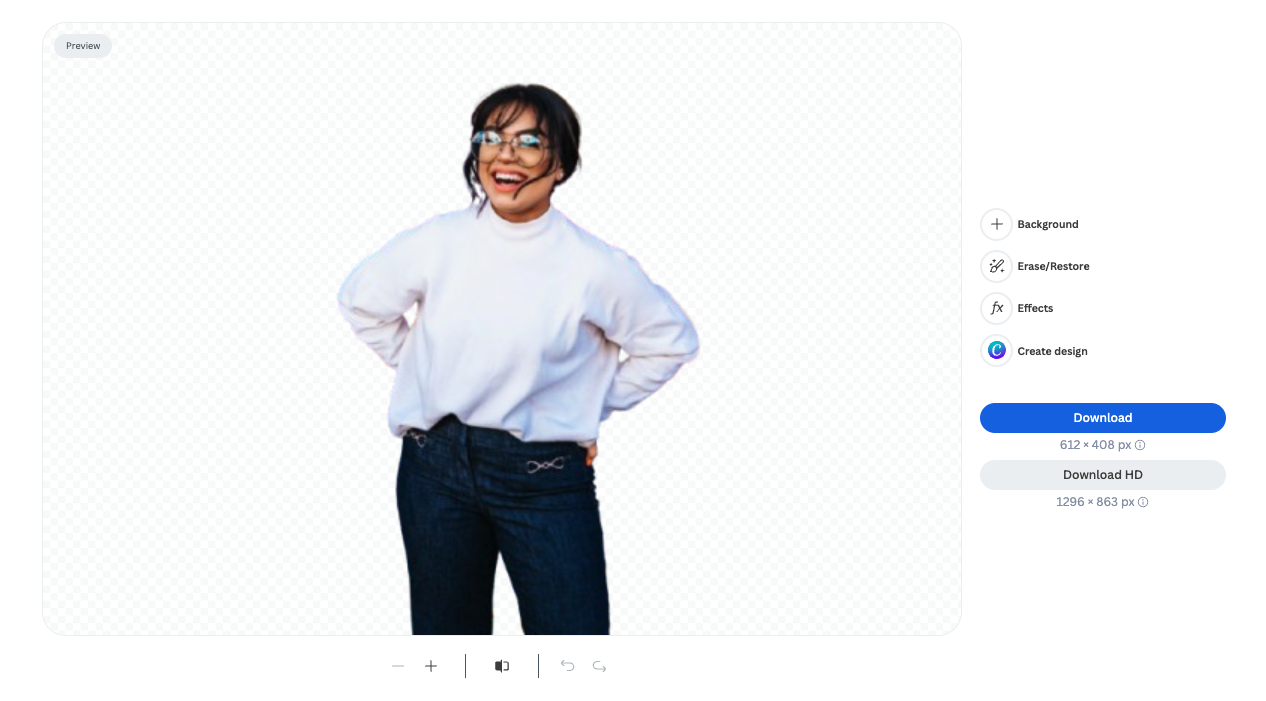
We’re going to walk you through the steps below and show you the four different blurring options you have, and how you can take your pics from this:

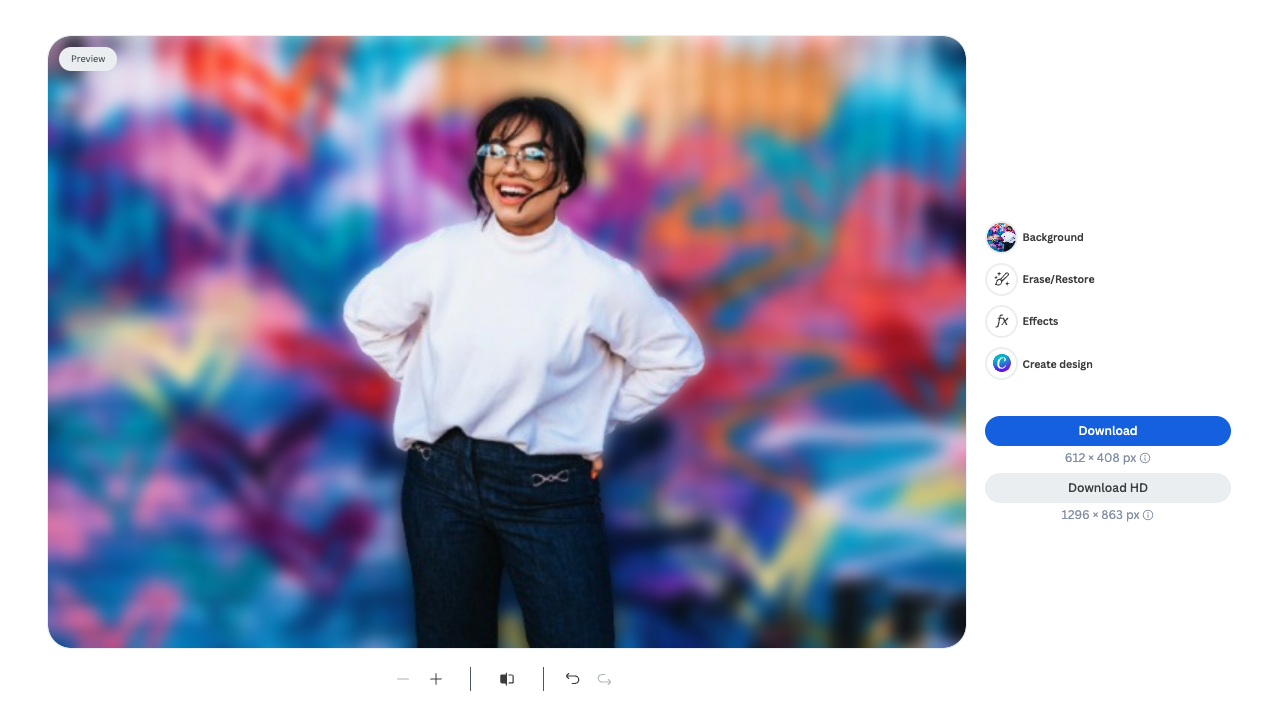
To these, in seconds:


Inhaltsübersicht
- Why blur the background of a photo?
- How to blur background of a photo already taken with remove.bg
- Choose among millions of backgrounds... and then blur them
- Blur photo background on your phone
- How to blur the background of a photo in Lightroom
- How to blur the background of a photo in Photoshop
- That’s it! How to blur a photo background
Why blur the background of a photo?
Blurring the background of a photo is helpful for many reasons; the main ones we’ve found are to:
put the focus on the main subject
eliminate any distracting elements in the background
give your photo a more professional look and feel
allow for more depth and texture — which makes it more exciting and intriguing to the viewer
It’s a fantastic technique — a simple edit you can try out on your photos in just a few seconds to take things to the next level.
How to blur background of a photo already taken with remove.bg
With remove.bg, you can blur the background of your photo in just a few clicks — both on your desktop and your phone giving you outstanding results. And all that without even touching a complicated tool like Photoshop, to get a really professional look. Let’s dive in:
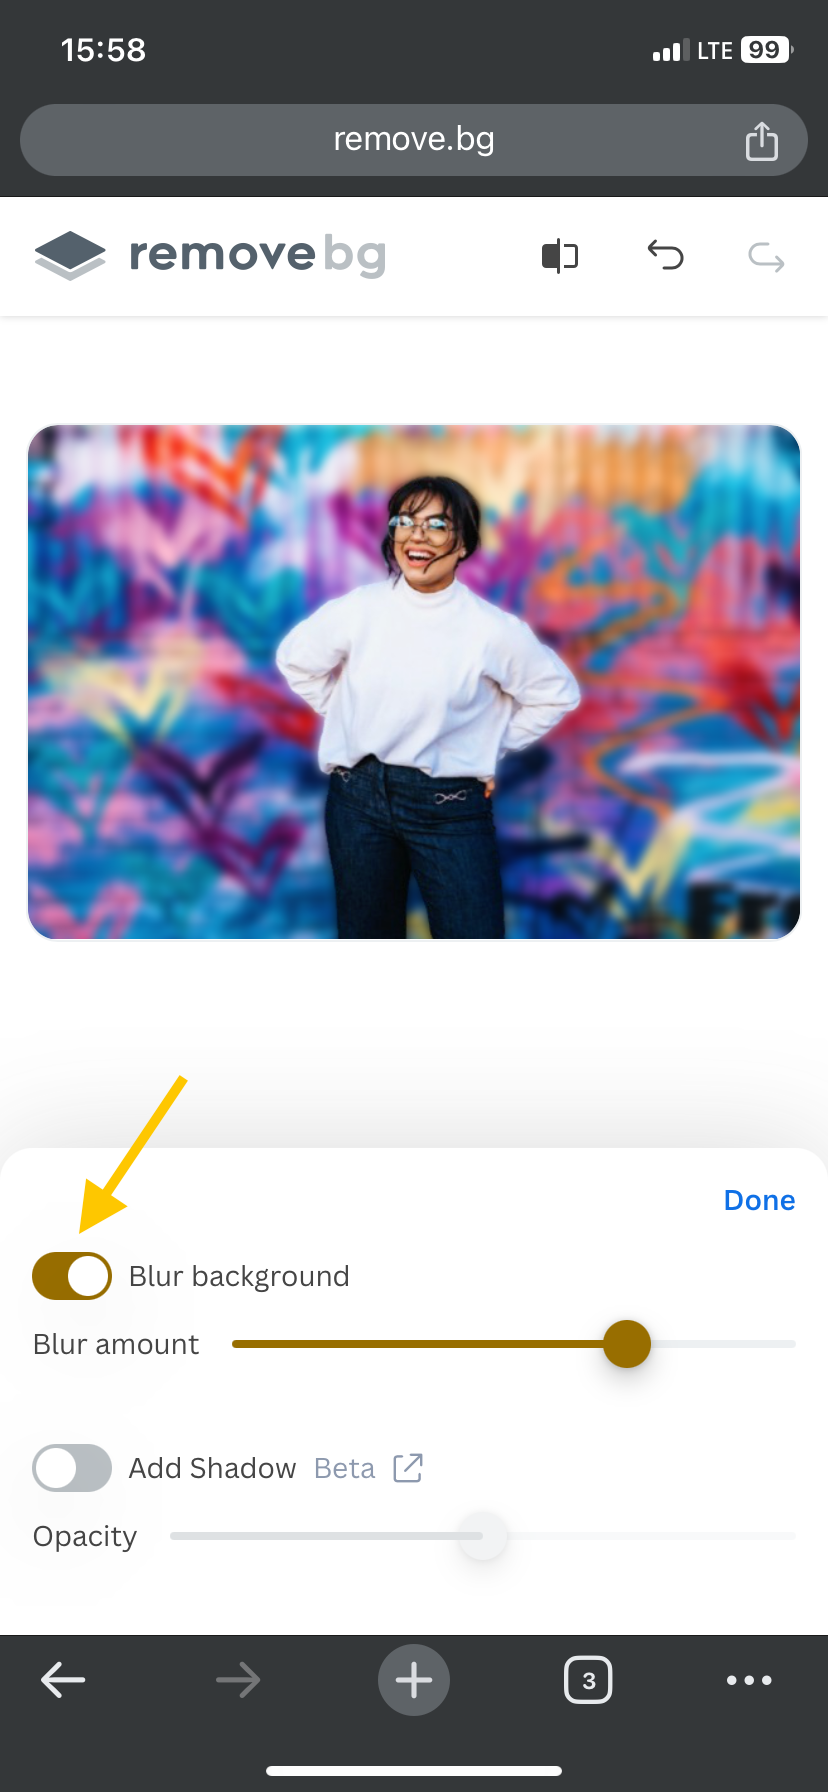
1. First, select a photo of your choice. We went ahead and used this stunning image:

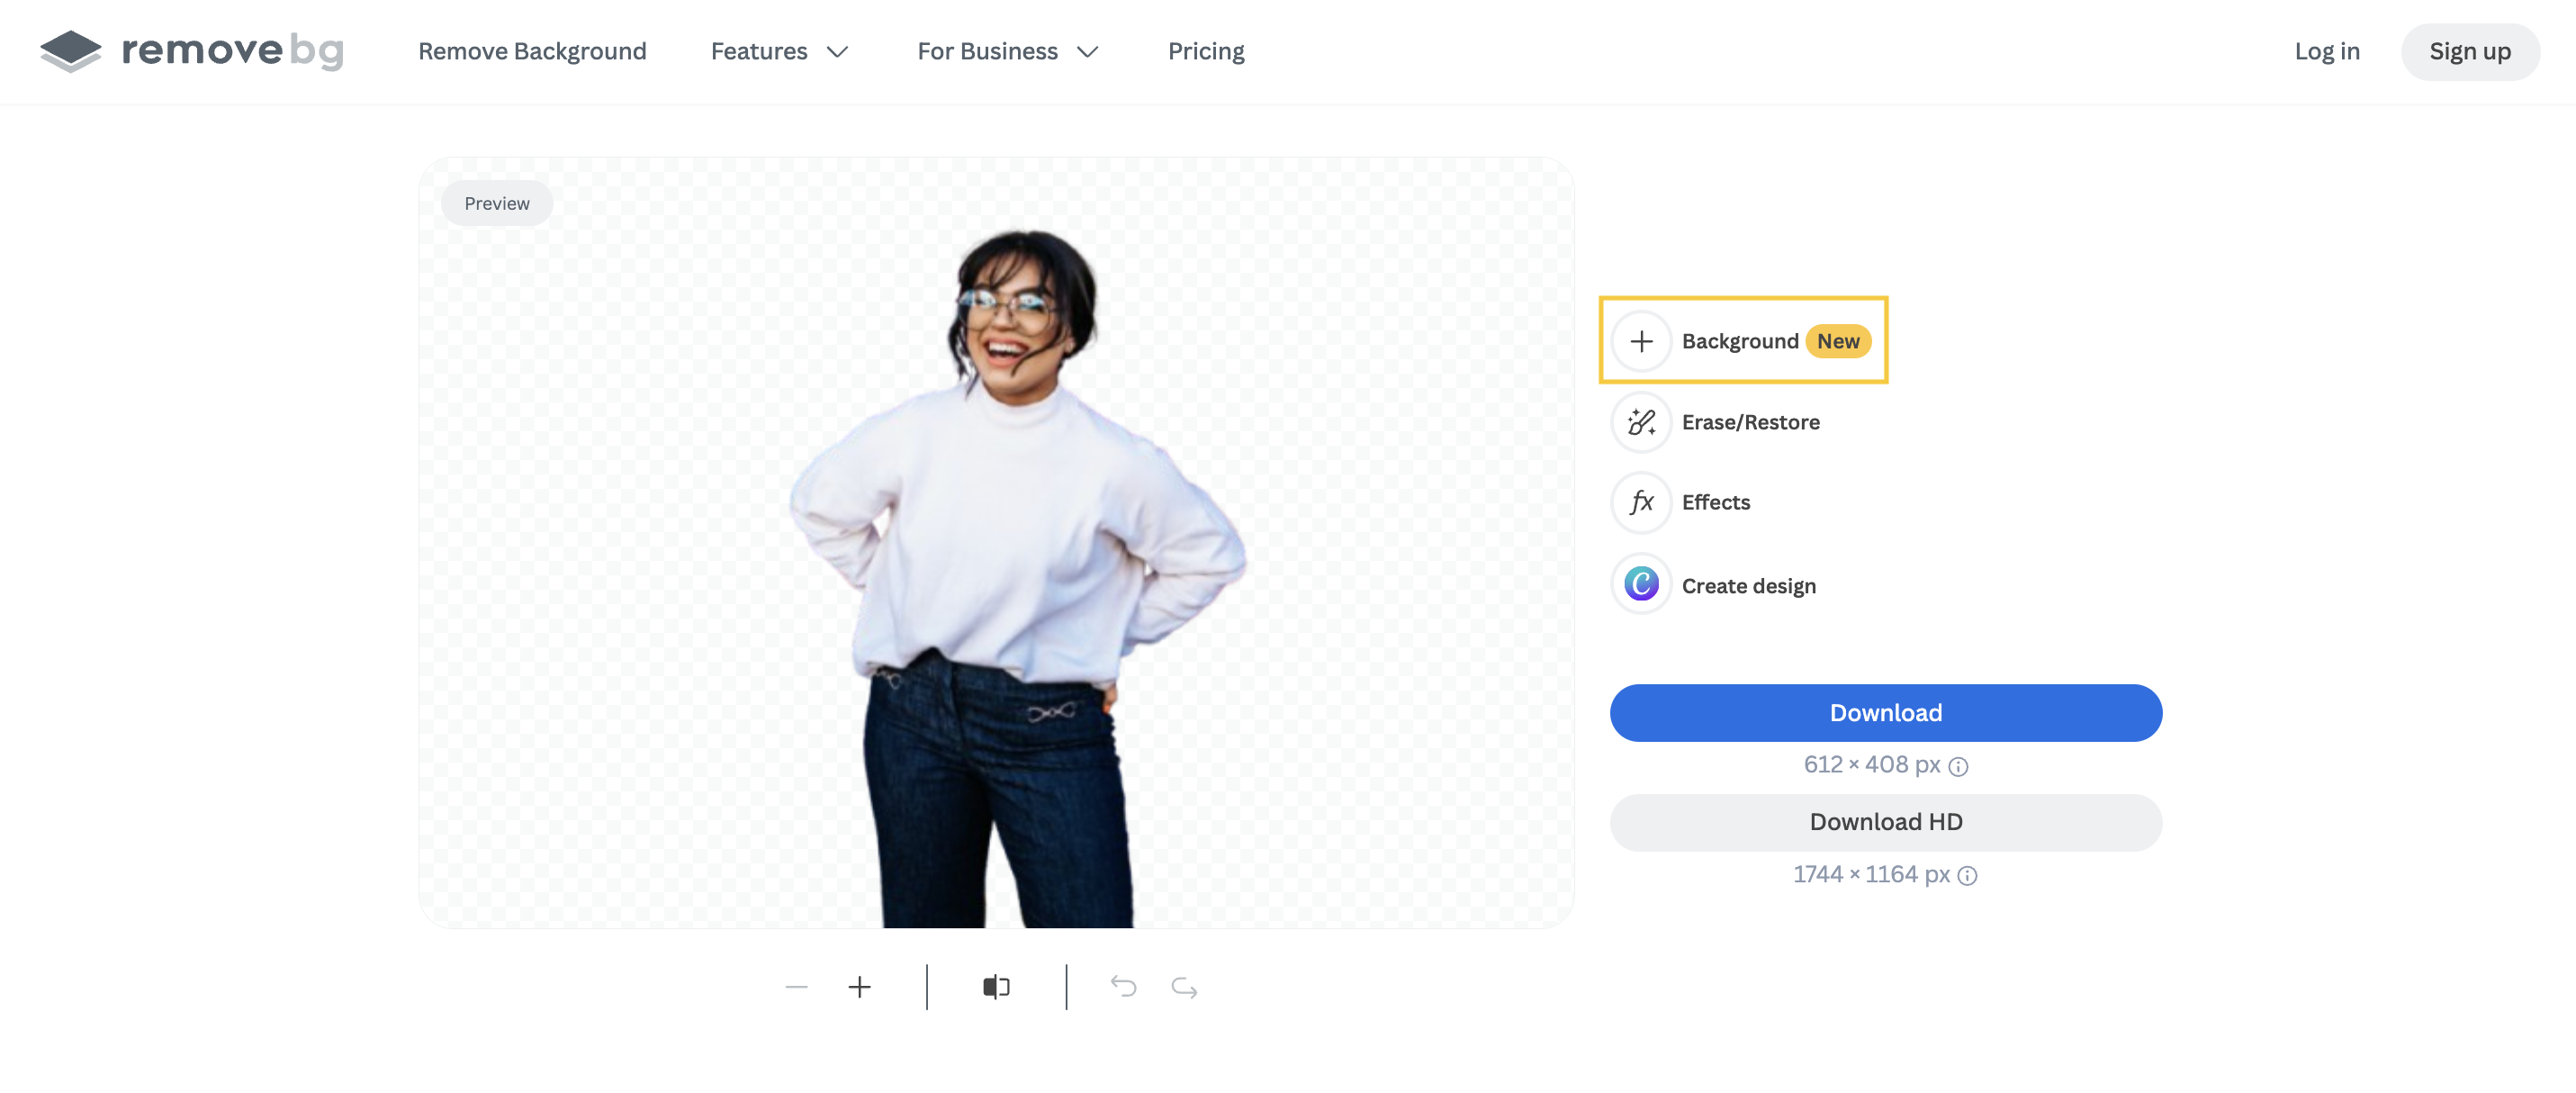
2. Open up remove.bg and simply drag and drop your image onto the platform; remove.bg will have removed your background in just a few seconds.
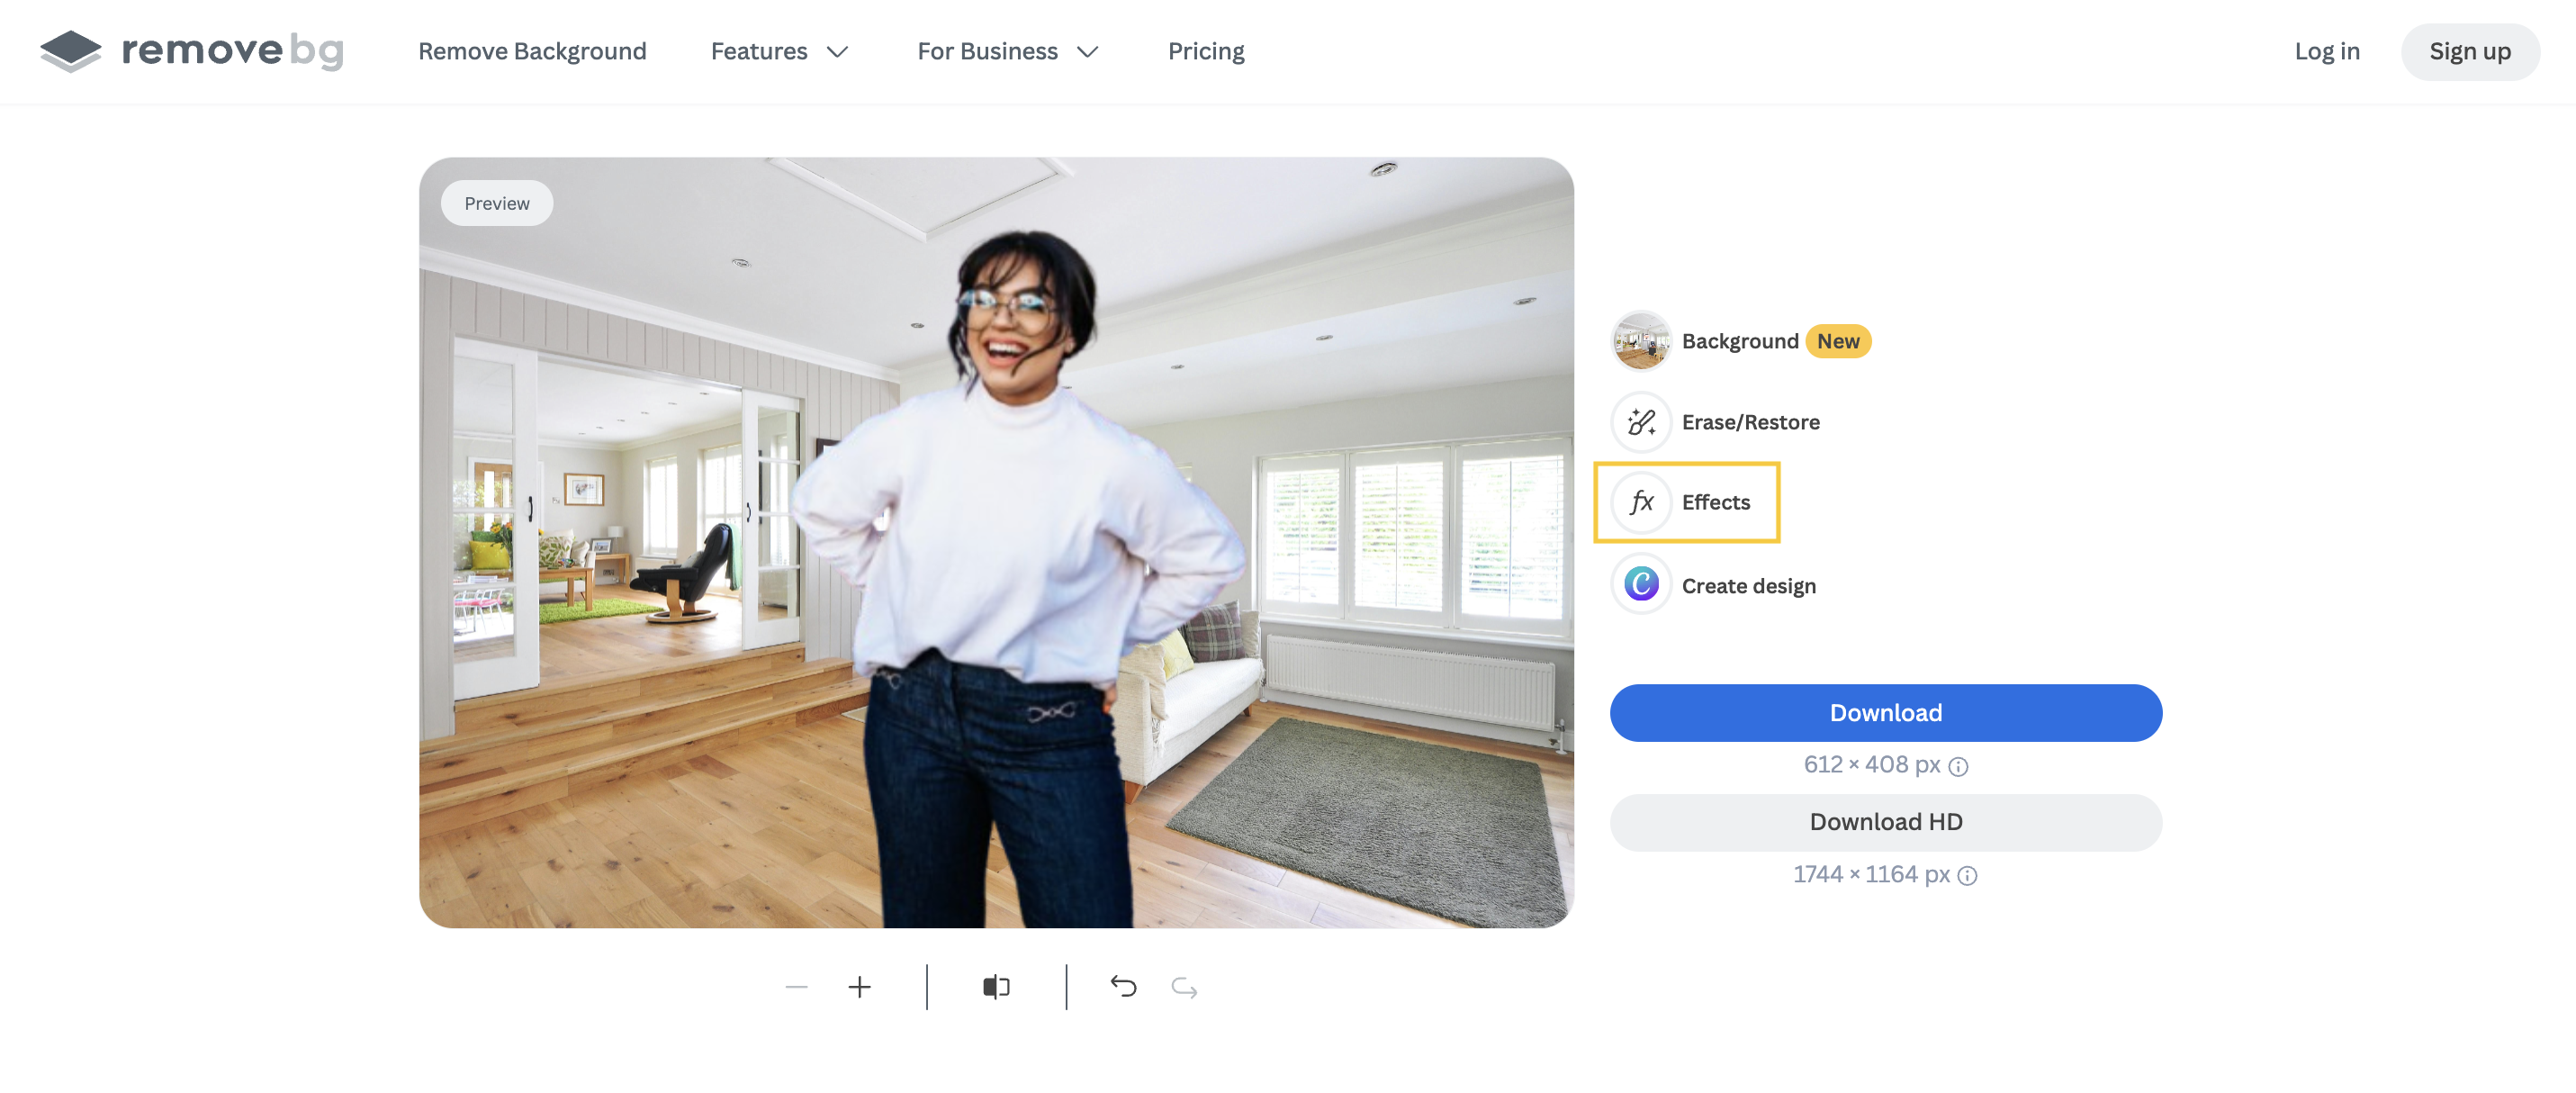
3. Go ahead and click on > Effects.

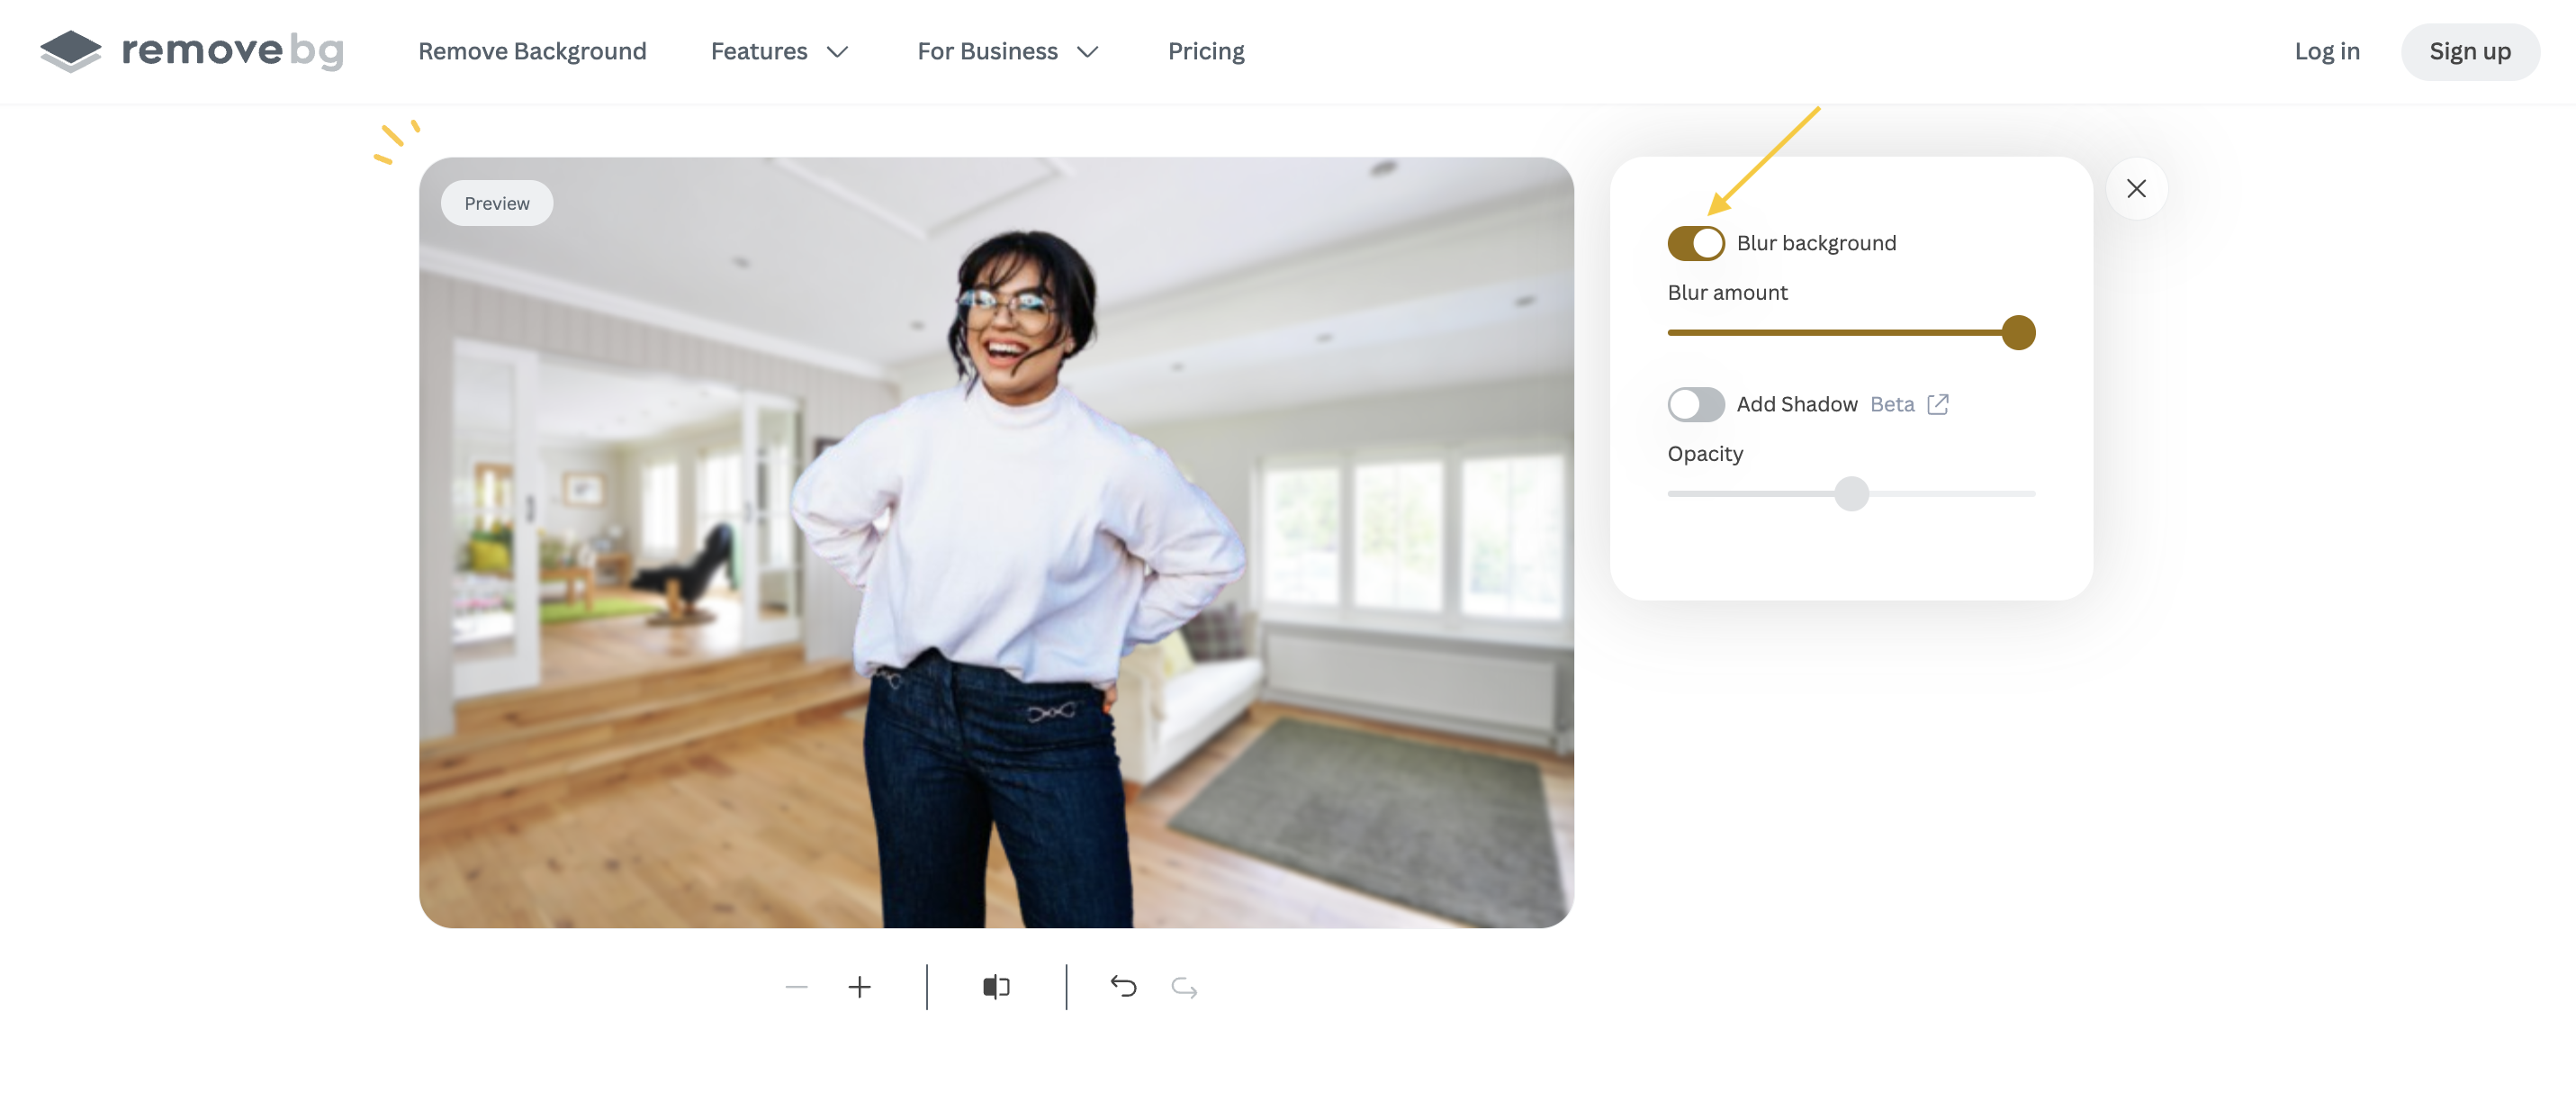
4. You can click on the "blur" toggle and select the amount of blur by adjusting the slider to the left or to the right.
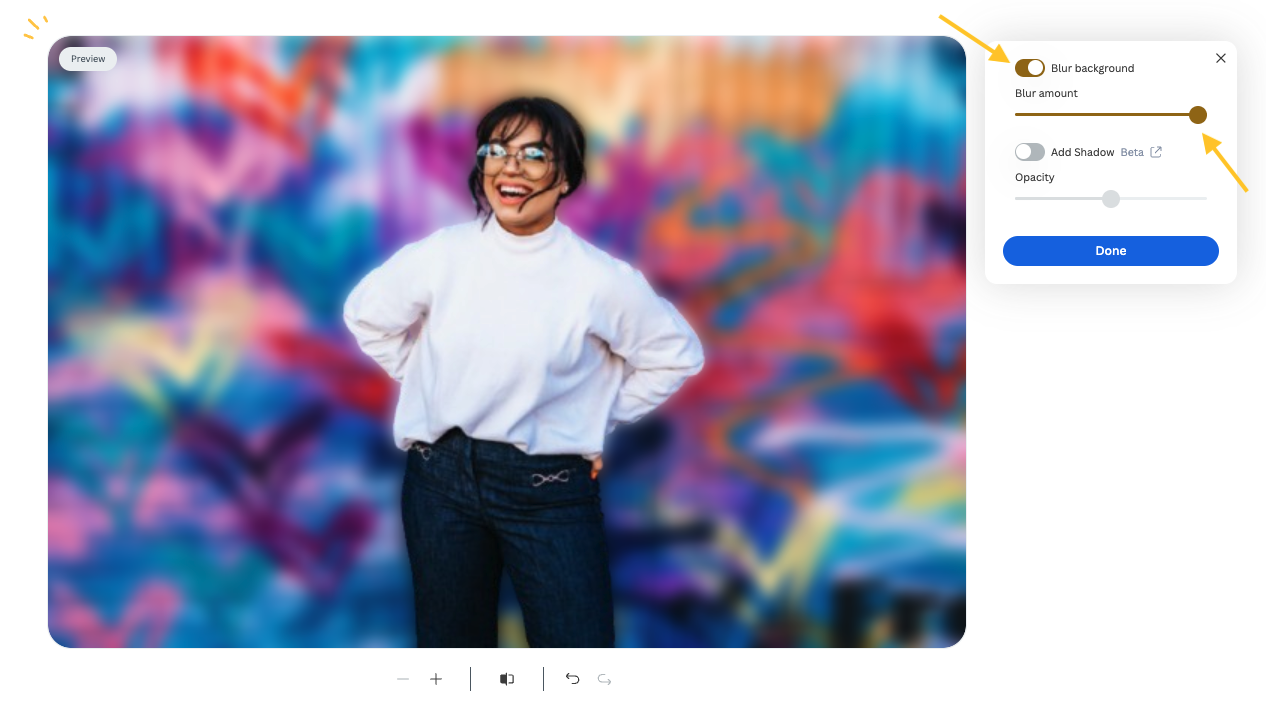
5. Once you’re done, you can click on > Done > Download or Download HD. The image will download and save to your device.
Choose among millions of backgrounds... and then blur them
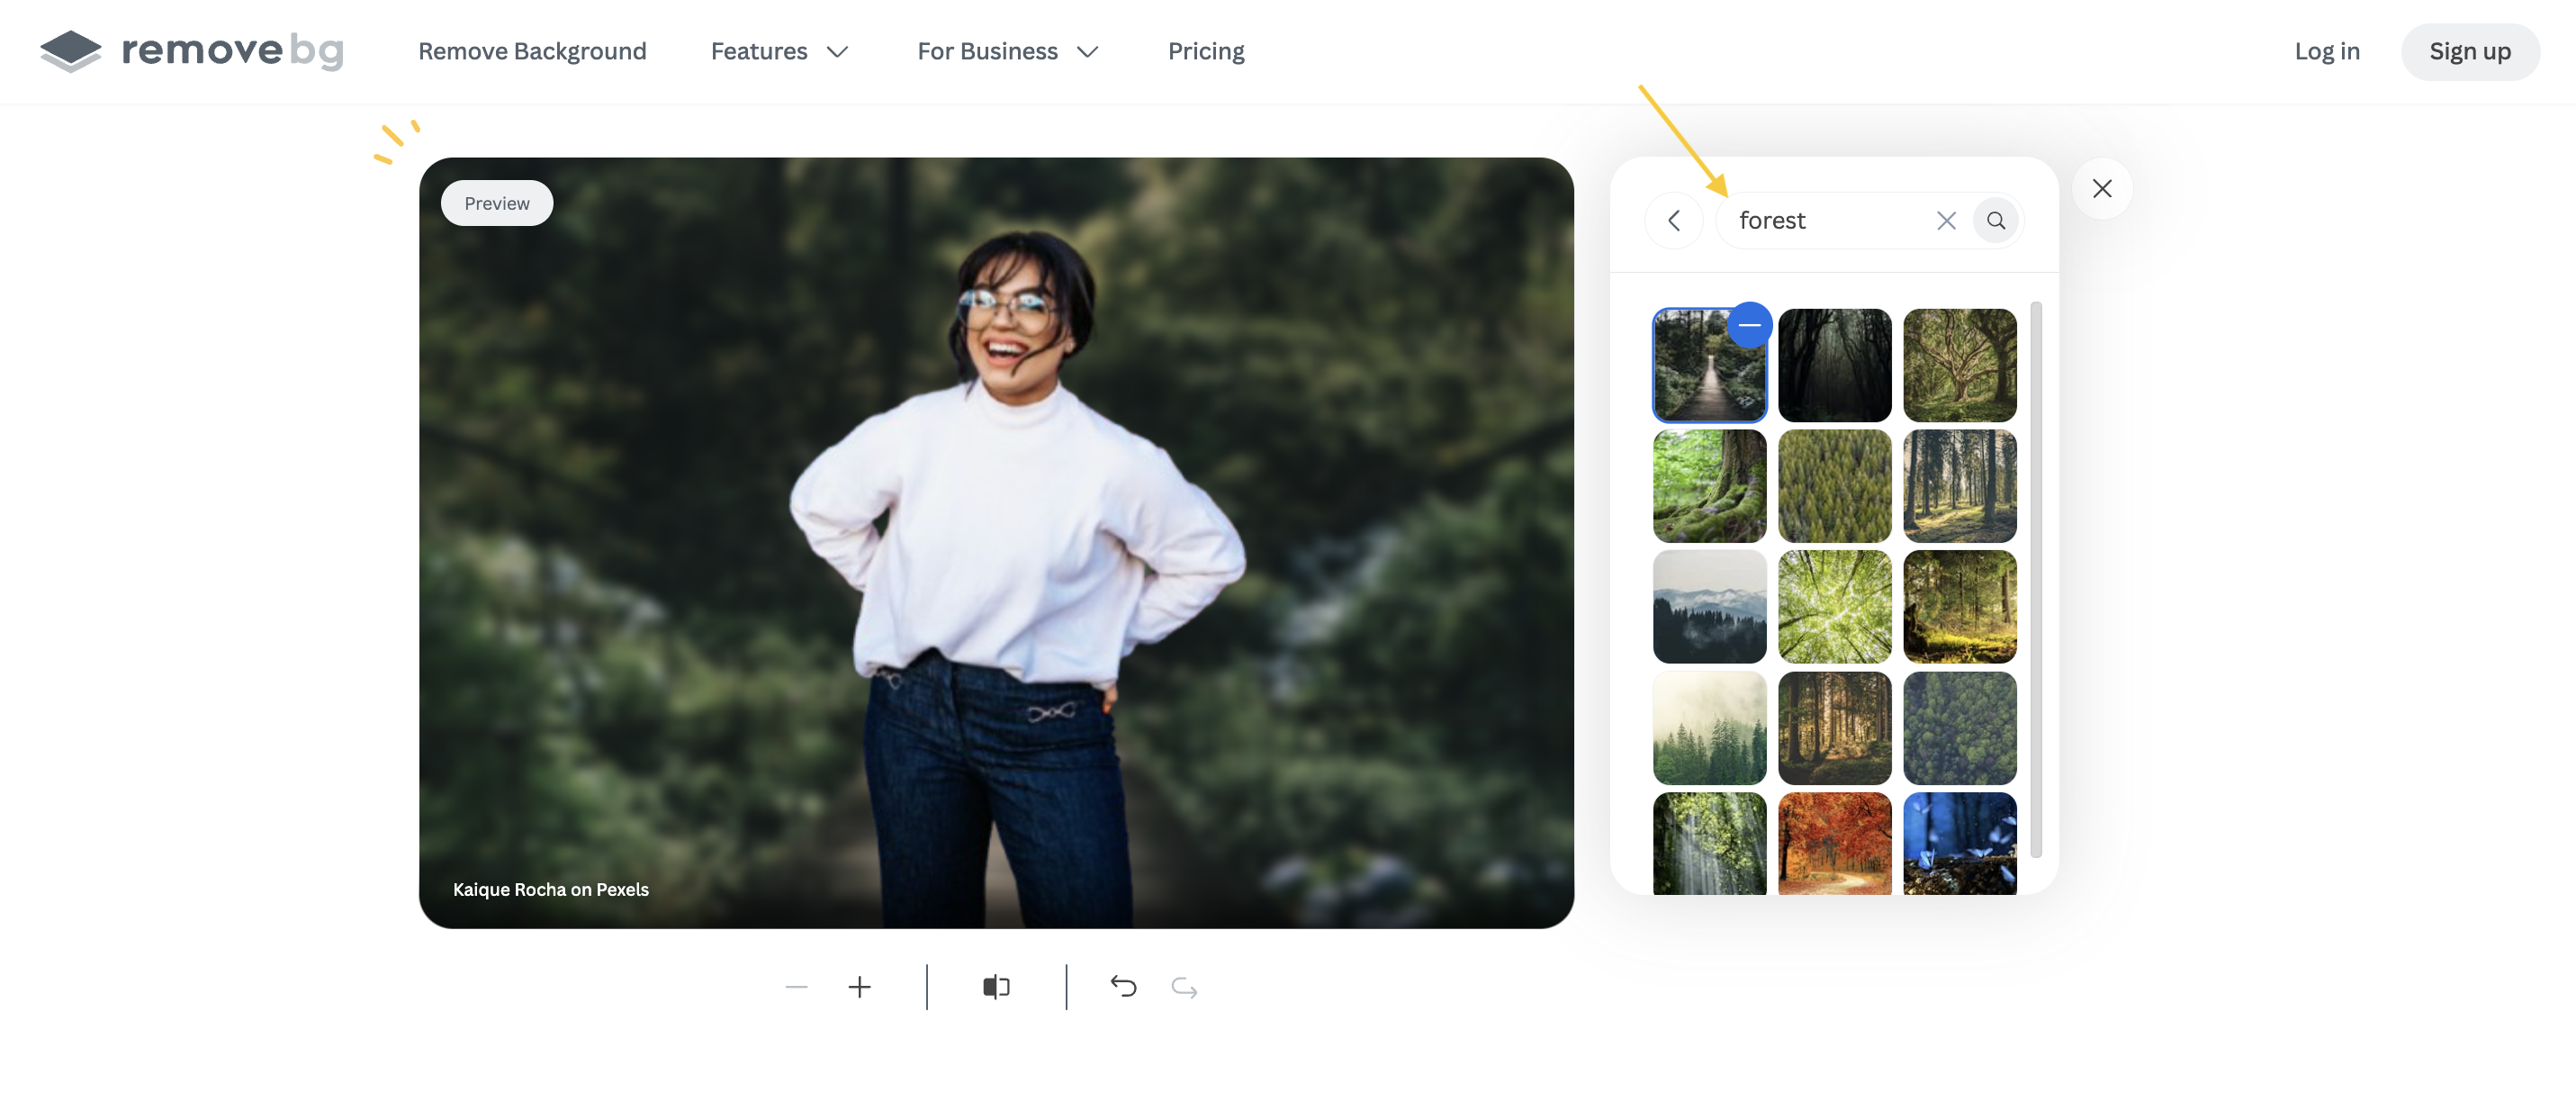
If you would like to change the background of your image and then blur it, you have millions of options.
remove.bg offers collections of pre-selected images to help you find the background that suits your needs the most. Alternatively, you can use the search bar and choose among millions of images from Pexels. Let us show you how:
-
Once you have uploaded your image, click on > Background.
-
Then click on the search bar. You will see the curated collections. We selected "home" as an example.

-
Pick the background you like the most and then go back and click on > Effects.
-
Select the "blur" toggle and that's it. You've got your image with a blurred background.
-
If you want to search for your own background, just go to > Background and then type in the search bar. remove.bg will give you all the relevant results.
Blur photo background on your phone
You can also blur the background of a photo using remove.bg on your phone:
1. Simply open up remove.bg in your browser.

2. Go ahead and upload your photo. Once the tool has removed the background, click on > Effects.
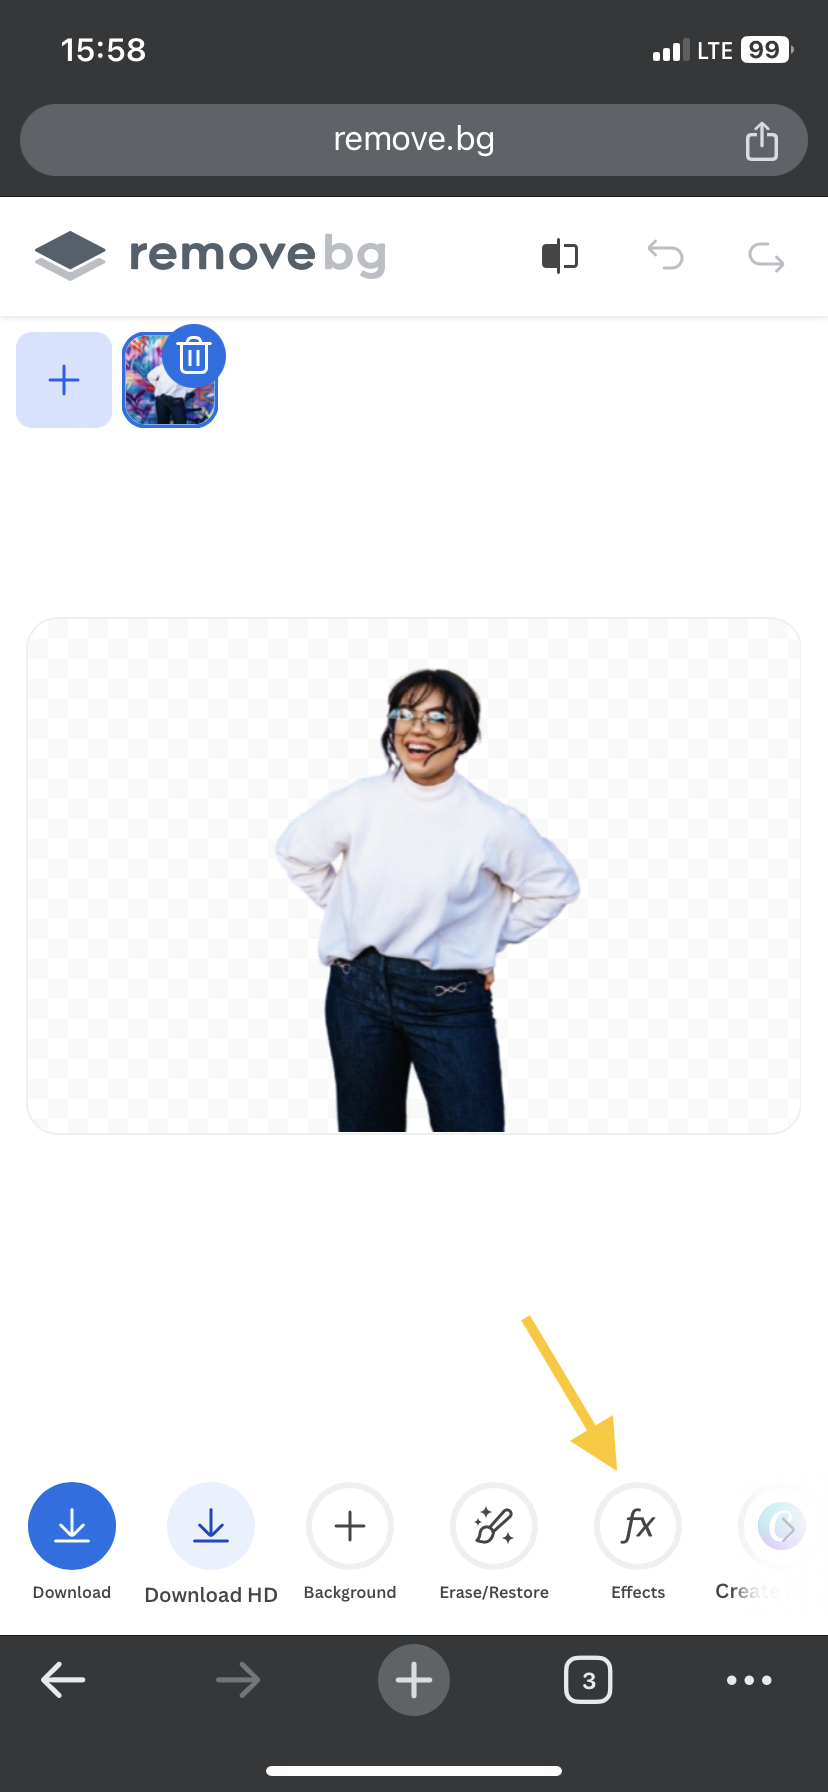
3. You can now select the "blur" toggle and adjust the slider to increase or decrease the blur effect.
Once you are happy with the results just download the photo and save it to your device.
How to blur the background of a photo in Lightroom
Blurring the background of a photo using a photo editing software like Lightroom is slightly more complicated than using remove.bg — but it definitely makes sense if you’re already using the tool or want to make exact adjustments. Here’s how you can blur the background of a photo in Lightroom:
Import your image into Lightroom.
Make sure you have activated the to-develop module.
Your next step is to create a mask.
Now go ahead and paint over the background part you would like to blur with the adjustment brush, such as the brush tool.
Next, click on the masks icon in the toolbar.
Now you can manually adjust the blur by dialing down the ‘Sharpness’ and ‘Clarity’; play around with these settings until you’re happy.
You can of course also blur the background using remove.bg and import it into Lightroom to speed up your workflow too.
How to blur the background of a photo in Photoshop
If you’re already using Photoshop, you might also want to use it to blur the background of your photo. Watch this step-by-step tutorial on how to do just that.
And here’s a summary:
Start by duplicating your background layer with > CTRL/CMD + J.
Rename your new layer to keep things organized (we named ours > Foreground.)
From the > Select menu on top, pick > Subject. Adobe’s AI automatically detects and selects it for you. (Don’t worry if it isn’t perfect — you can always fine-tune it later.)
Now we want a bit of space between the selection border and the rest of the background. Head to the > Select menu again, pick > Modify, and then > Expand.
We recommend keeping the expansion to around 5 pixels or so. Hit > OK once you’re done. (Just double-check that you have a bit of a gap between your photo subject and the selection line.)
Now let’s remove the subject from the photo. Head to the > Edit menu and > Content-Aware Fill. Make sure > Output To is set to > Duplicate Layer. Hit > OK once you’re done.
Click the > Eye icon next to your layers to disable or enable them. So go ahead and enable your > Foreground layer and disable the two > Background layers.
The selection around your main subject will still be active. So let’s apply it to our > Foreground layer with the > Layer Mask icon. (Just make sure you’ve selected your layer beforehand.)
You can remove fringing or edge halos by selecting your > Layer Mask and heading to > Filter, > Other, and then > Minimum.
Now we’d set our expansion to 5 pixels. So we recommend setting the > Radius to 6 pixels and setting > Roundness under > Preserve.
Hit > OK once you’re done.Now let’s blur that background — select your > Background copy layer, right-click on it, and > Convert to Smart Object.
-
Make sure you still have your > Background layer selected. Head to the > Filter menu and then > Blur Gallery.
We recommend picking > Tilt-Shift because it keeps the image’s center pixels intact while blurring the edges of the top and bottom. From the right-hand side, you can increase the > Blur by dragging the arrow to the right. You can adjust the blurred section by moving the dotted lines up and down over the image until you get the perfect image.
Background too blurry? Just reduce the number of pixels from > Blur under > Tilt-Shift on the right-hand side.
Hit > OK on the top menu once you’re happy with the results.
You can also fine-tune your mask by heading to > Layer Mask (in > Foreground) and painting them in black to get rid of any extra pixels. Just paint them in white if you remove a couple of pixels you want visible.
We also recommend checking out the > Camera Raw filter (under the > Filter menu on top). With it, you can make your image colors pop better and adjust shadows and other details. For example, under > Effects, you can increase the > Grain and reduce the > Vignetting of your photo to make it look more realistic and draw eyes automatically to your photo subject.
The same goes for Photoshop as for Lightroom: if you want to speed up the process, you can also integrate remove.bg into your workflow and import the photo with the blurred background into Photoshop — after following the steps above.
That’s it! How to blur a photo background
Getting that professional look and feel doesn’t have to be complicated. You can blur the background of a photo you’ve already taken on your computer, phone, or iPad — all you need is a browser and an internet connection, and it’s completely free. remove.bg is by far the quickest way to blur any photo and is bound to be the next tool you’re gonna integrate into your workflow.
Hop on over to remove.bg and try it for yourself right away.
Kommentare
Noch keine Kommentare.