Picture the scene: you’ve shot your shots, uploaded them, and they look like some hideous blur straight out of a 70s Polaroid. How to fix grainy photos like these? Unless you’re deliberately going for a vintage look or are auditioning for Season 5 of Stranger Things, you’re probably going to need some kind of image upscaling option.

Image grain really just refers to noise or how digital images can appear visually distorted. It’s a common problem in the world of digital photography, but it doesn’t need to be. Grainy photos usually occur as a result of a high ISO setting on your camera, but there are tons of factors that can lead to your photos turning out less than perfect. From the camera quality and settings you choose (ISO and shutter speed) to lighting and even the phone/camera itself, there's a lot we can't control — but also a lot that we can.
Lucky for you, there are plenty of options to upscale your images online, including Photoshop, Lightroom, your iPhone, and the wallet-friendly, uncomplicated option — Designify. By following our tips below, you'll be able to fix those grainy photos and upscale your images in no time.
Table of contents
How to fix grainy photos with Designify
Upscaling images online has never been easier, especially with intuitive options like Designify. It includes a bunch of editing features that can turn any image into the awesome real quick.
Here’s a step-by-step guide to how you can fix your grainy photos and upscale images online with Designify's fix pixelation feature:
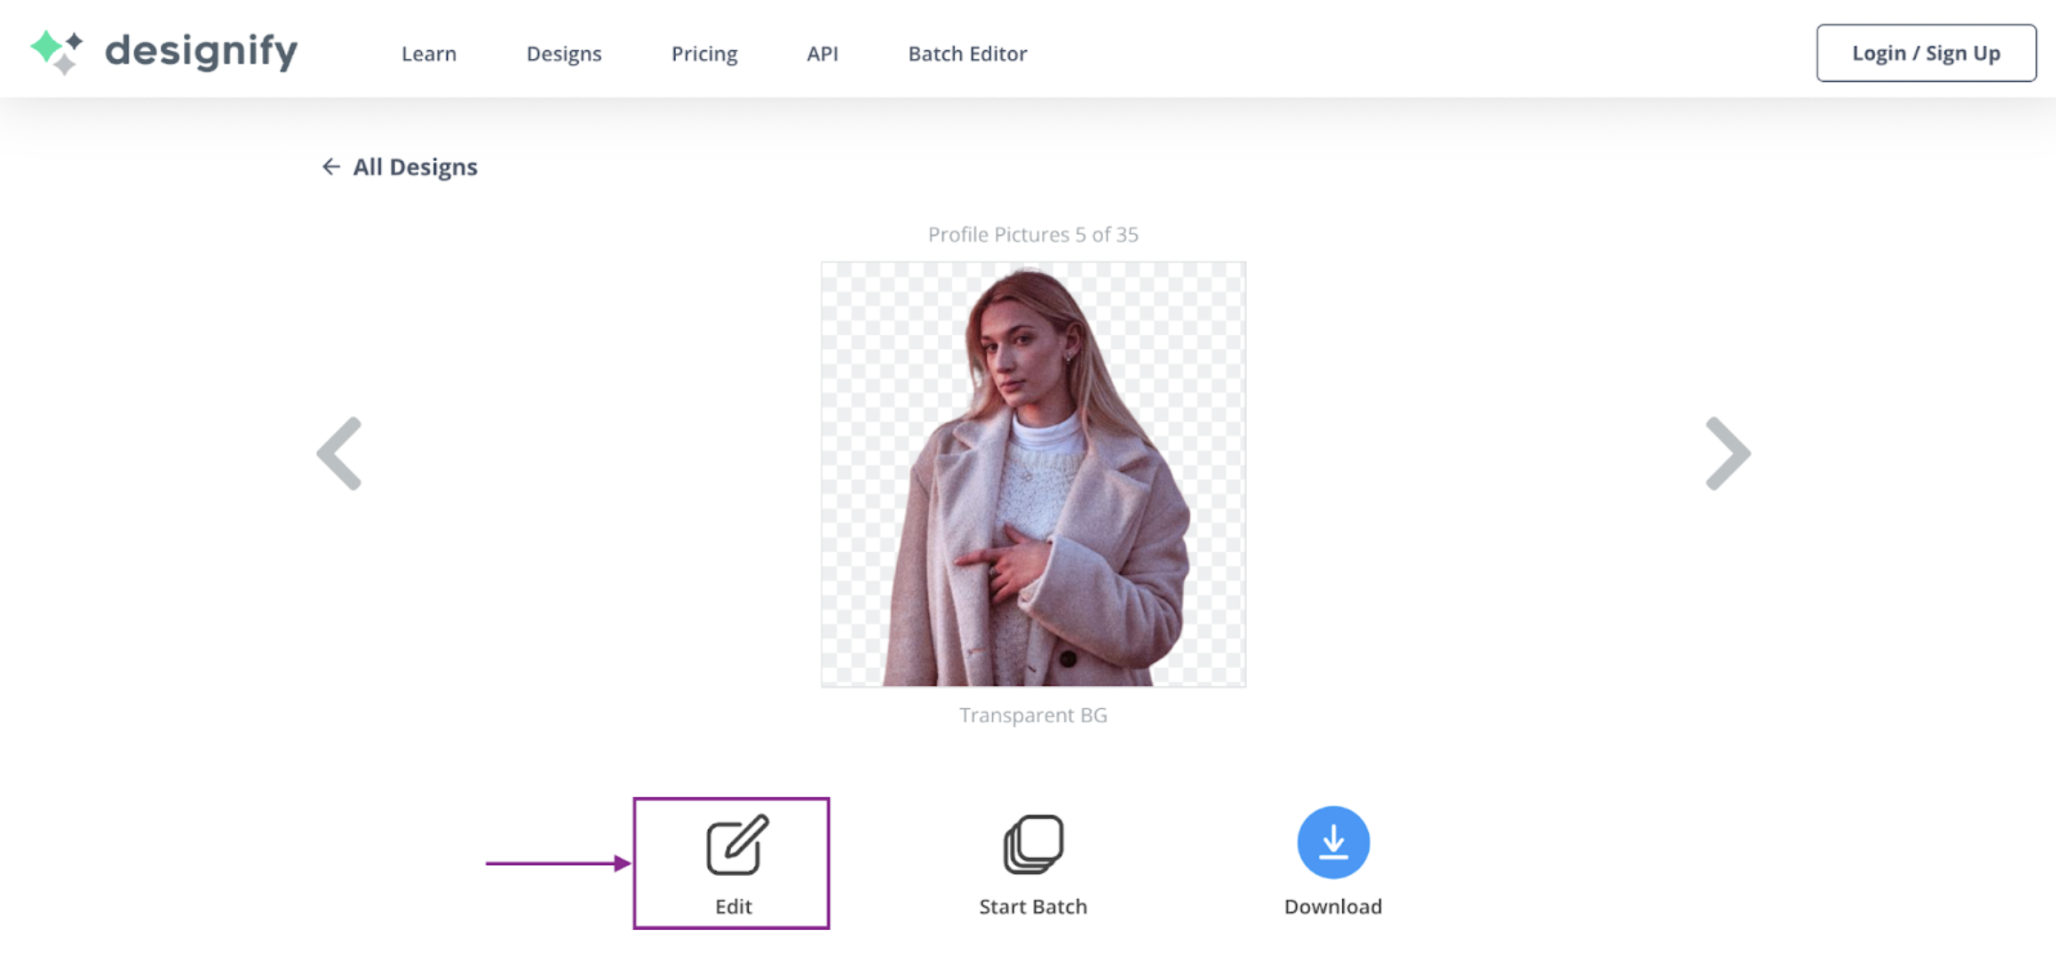
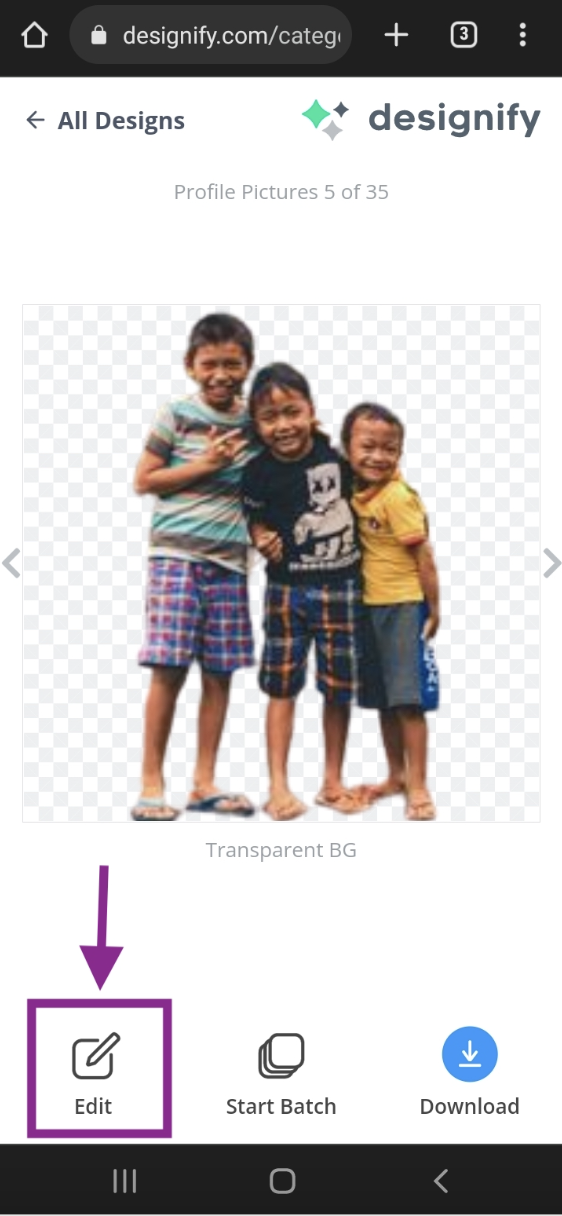
1. Upload your photos or drag and drop them:

2. Choose the > Edit option once you’ve picked a new image background:
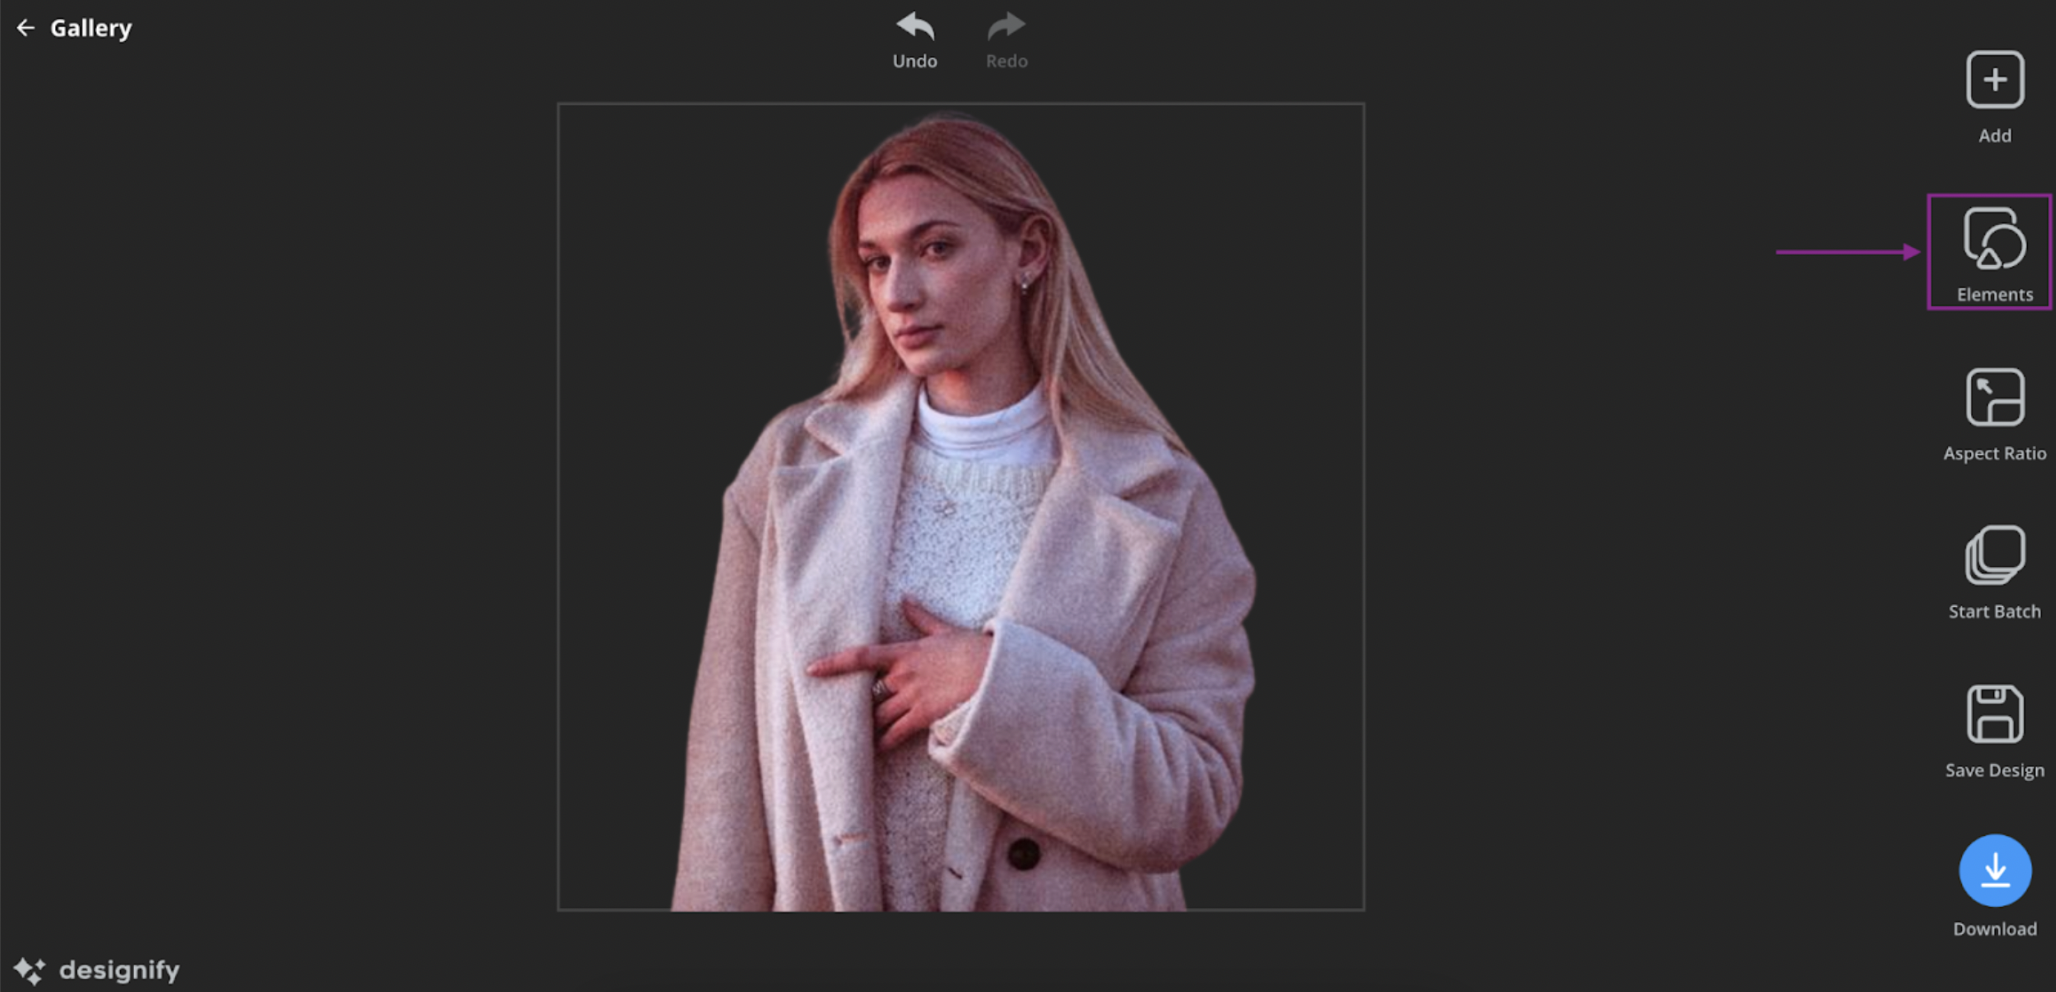
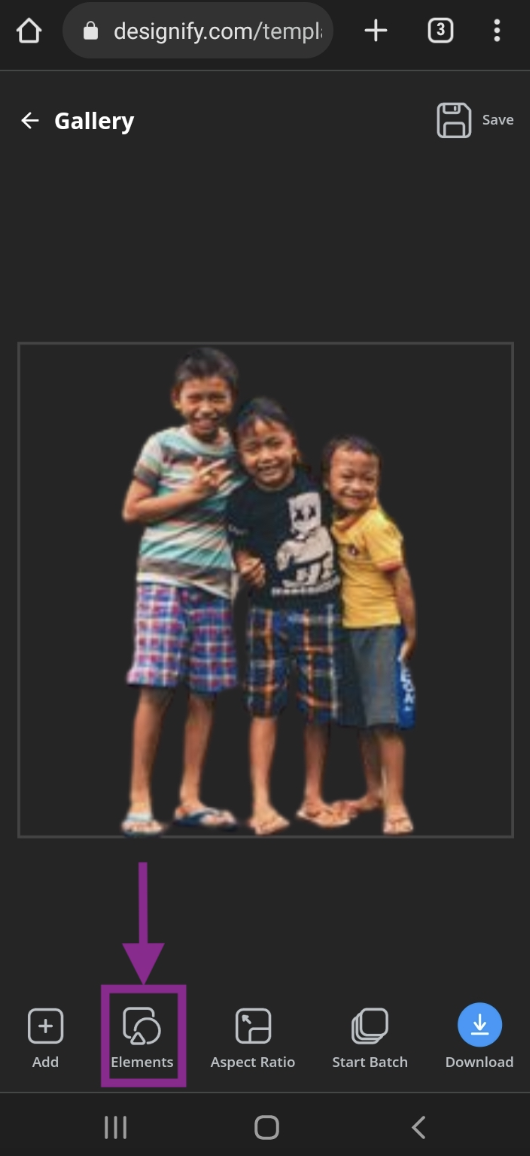
3. Next, choose the > Elements tab on the right-hand side.
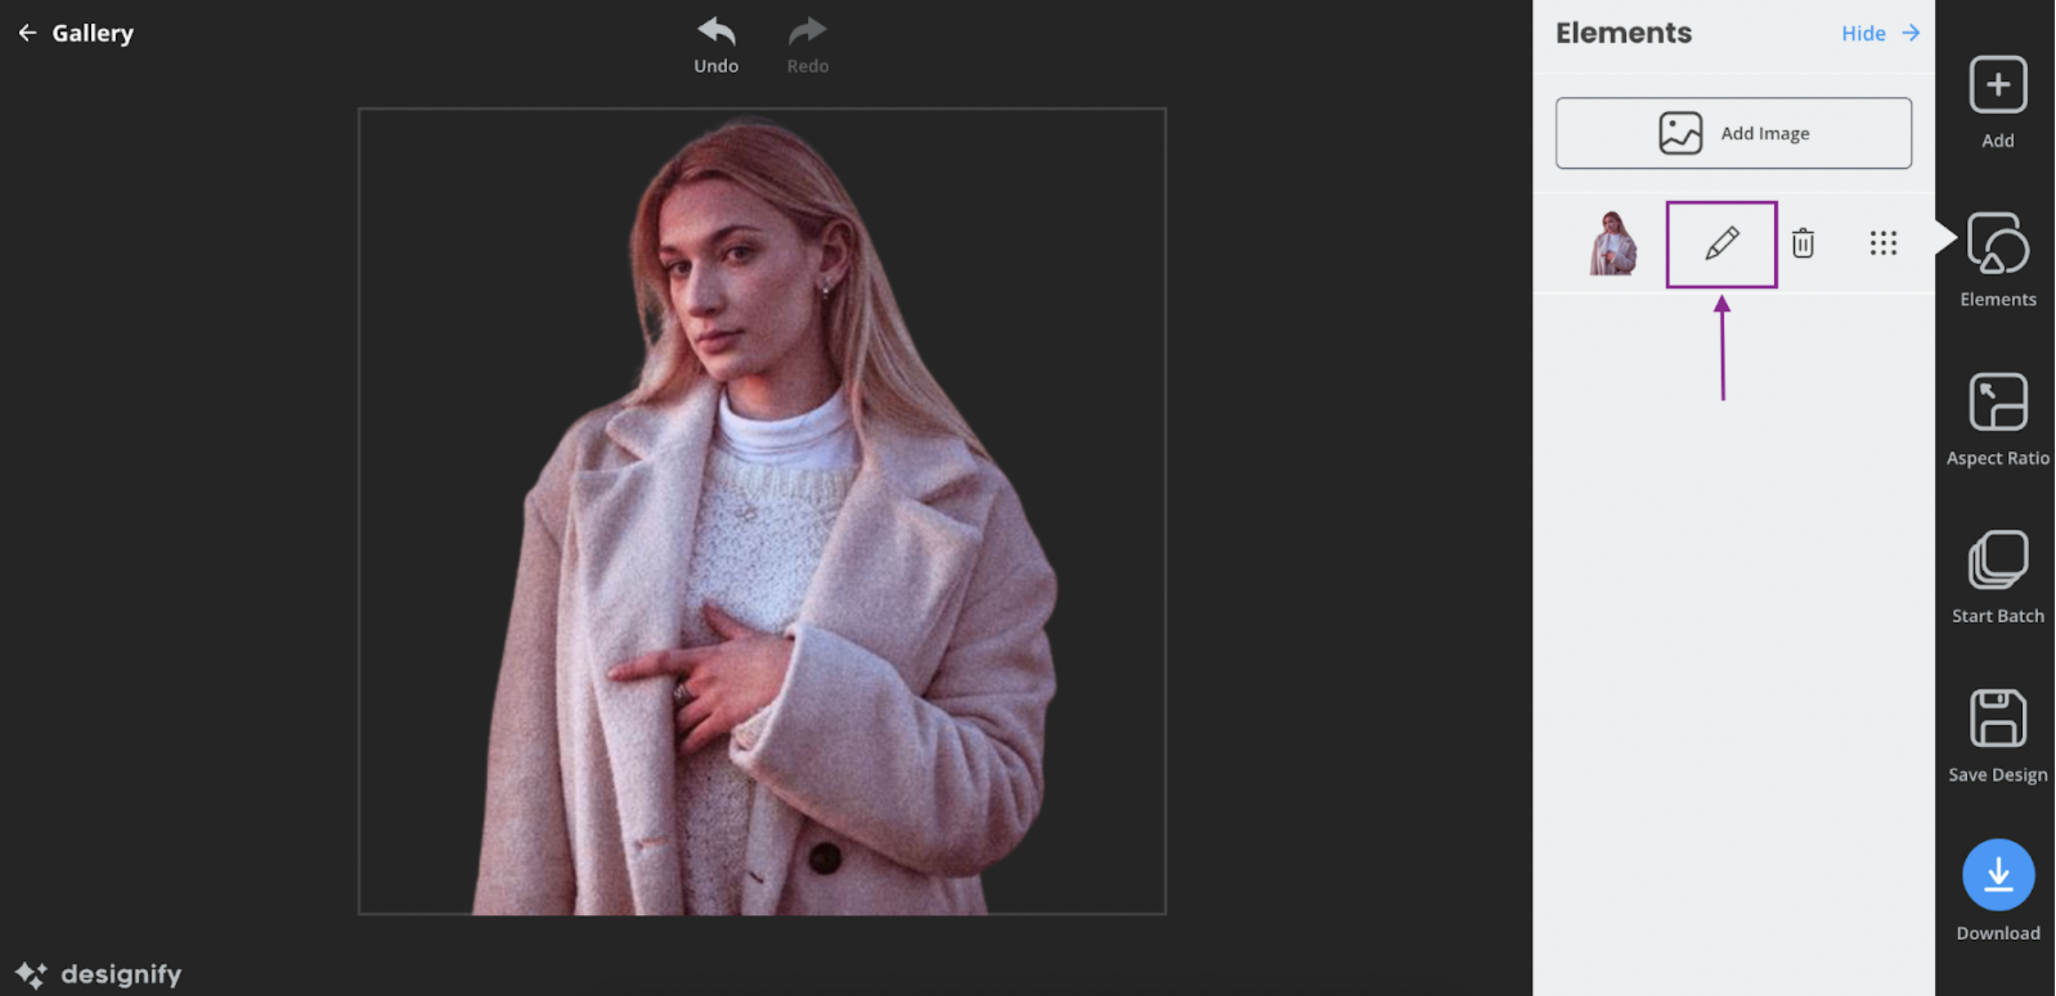
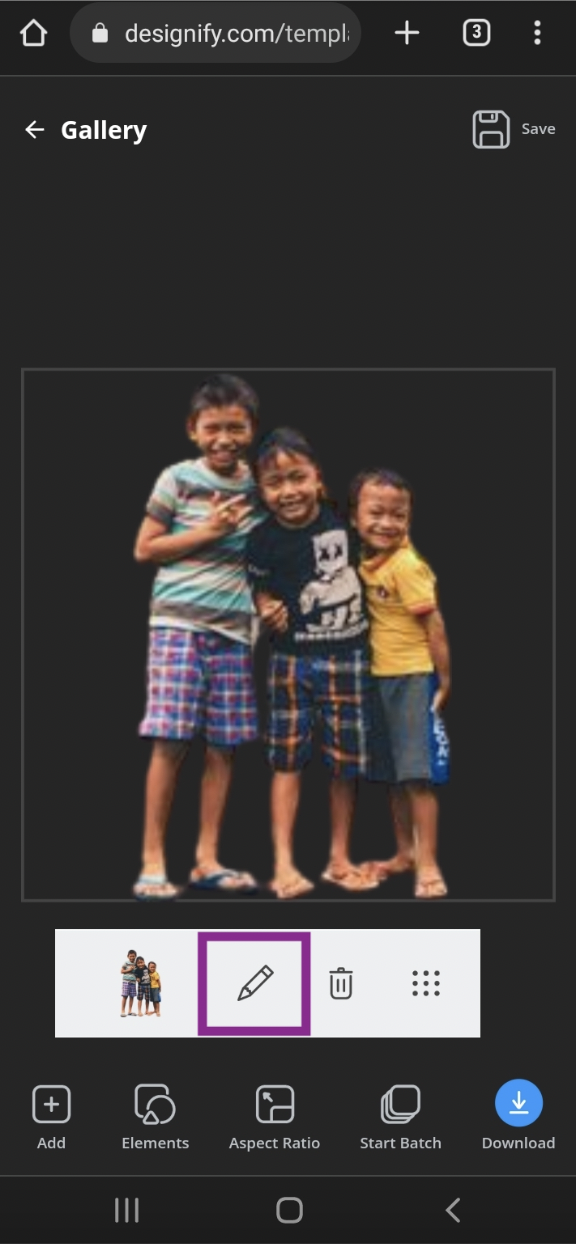
4. Choose the > Pencil icon beside the element you want to edit.
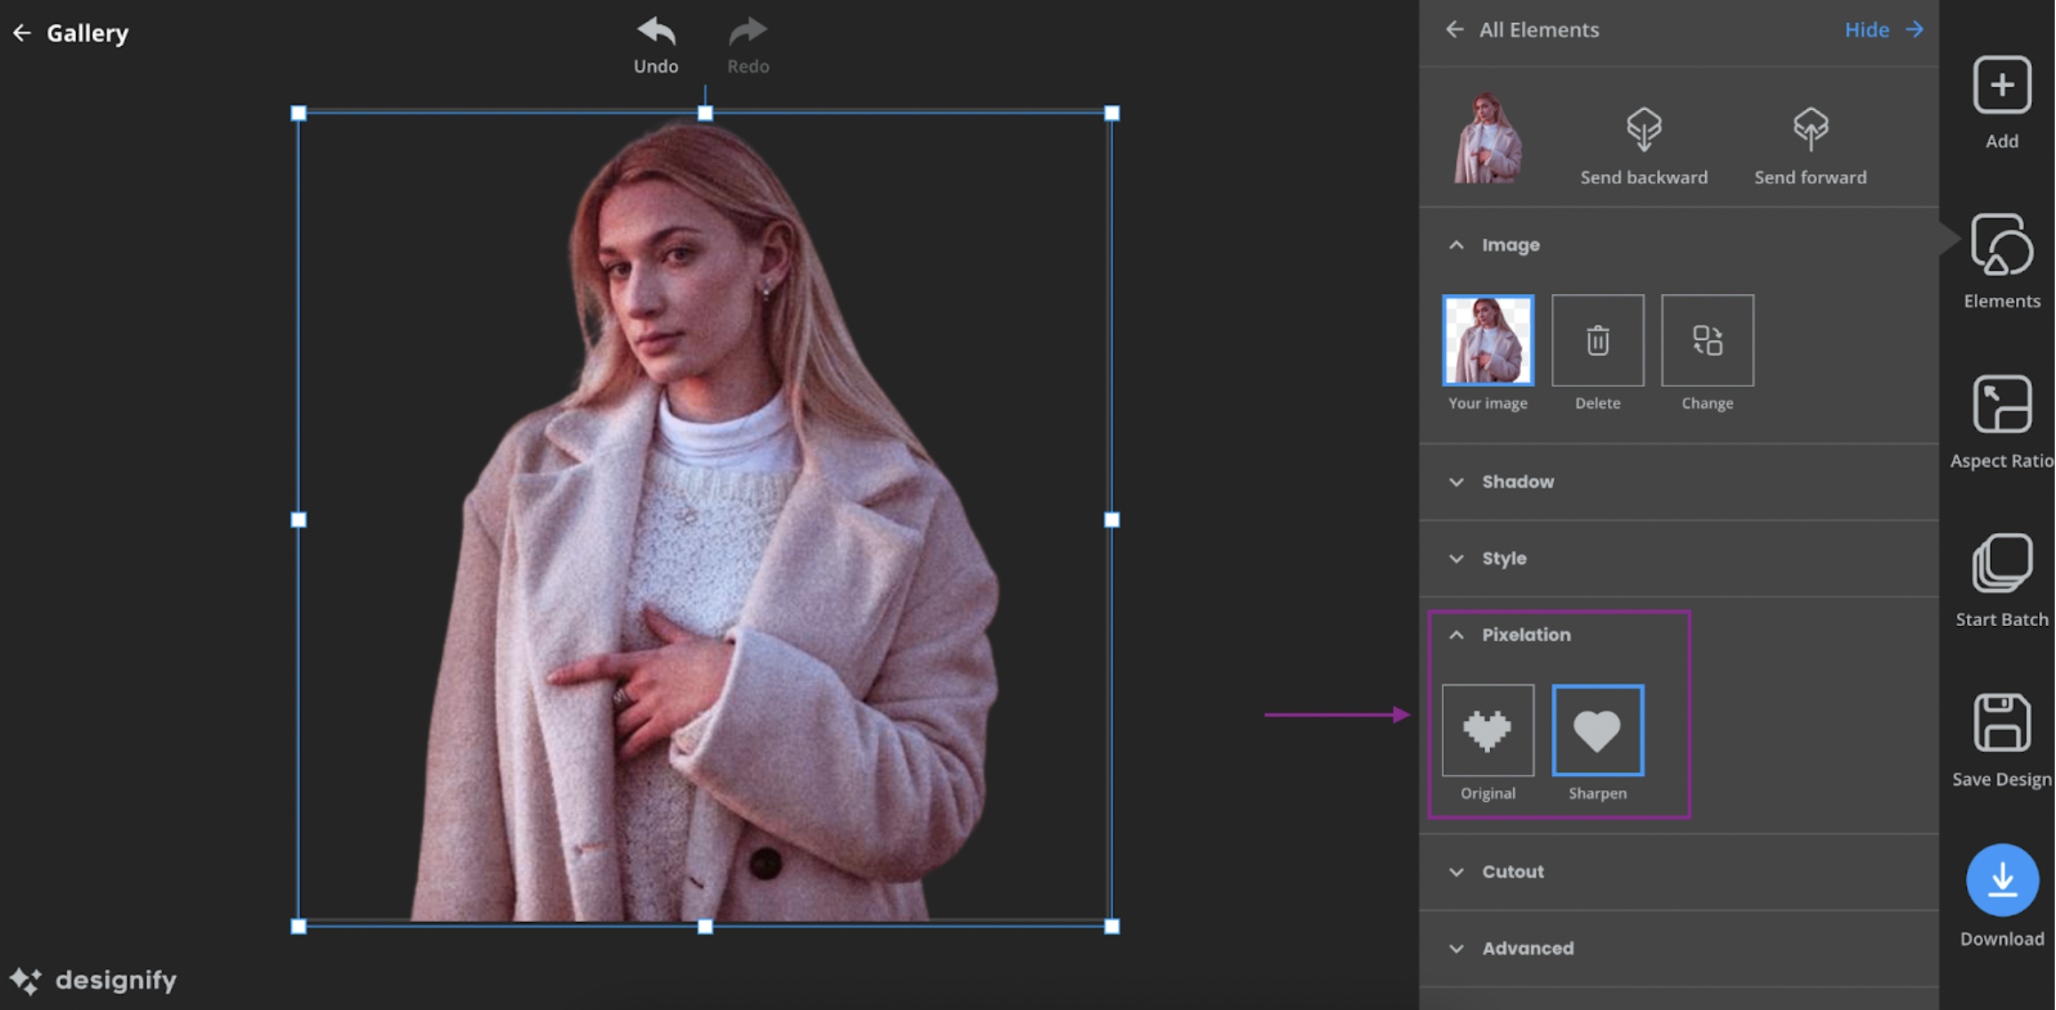
5. Under > Pixelation, choose "Sharpen."
6. And you're done! Click the blue > Download button to save your new, sharper image as a PNG file.
If you’re running short of time and need to fix your photos immediately, designify is your best option: it’s quick, easy to use, and image upscaling has no limit: you can enhance image colors and shadows, change image backgrounds, and edit multiple photos at once — 100% automatically and for free.
How to fix grainy photos with Designify on mobile
No desktop, no problem: you can easily upscale photos on the go with Designify’s mobile options as well. Here’s how you can do it:
1. Open Designify via your mobile browser and click > Upload Image.

2. Choose the > Edit option.
3. Select > Elements.
4. Click on the > Pencil icon.
5. Under the > Pixelation option, choose > Sharpen.

6. Hit > Save on the top-left corner to download your new image as a PNG file.
How to fix grainy photos on an iPhone

iPhones are another great option to fix grainy photos when you’re not near a desktop. Here are the steps for using an iPhone to upscale your images and make them sharper and clearer:
First, open the > Photos app on your image.
Next, click on the > Edit button in the top-right corner.
Scroll right to find the > Sharpness tool (the triangle-shaped one).
Drag the slider to the right to make your images sharper.
Next, click on the > Definition tool (the triangle-shaped one with a line through the middle).
Drag the Definition slider to the right to make your images clearer.
If all else fails, just try resetting your iPhone. Sometimes the grainy photos are a result of a technical glitch.
How to fix grainy photos on an Android

Android phones have some handy options for image upscaling as well. Much like iPhones, you could try restarting your Android phone to see if this affects your camera quality.
If not, try these options to fix grainy photos on an Android device:
On the photo you want to edit, tap the > Edit button at the bottom.
Swipe left to choose > Adjust.
Choose the > Sharpen option (the triangle icon with the line in the middle).
Drag the slider to the right for a sharper image.
You can also choose the > De-noise option under Adjust.
Drag the slider to the right to reduce noise in your image.
How to fix grainy photos with Adobe Lightroom
Got some time on your hands, an Adobe subscription, and a desktop around? Adobe Lightroom is an excellent option for image upscaling. It includes various features where you can adjust the details of specific images in your photos.
Here’s how you can fix your grainy photos with Adobe Lightroom:
Open the image in Adobe Lightroom.
Click the > Develop button in the top-right corner.
Click on the > Detail panel for the > Noise Reduction option.
Play around with the > Luminance, > Detail, and > Contrast options until your image looks as sharp and focused as possible.
How to fix grainy photos with Adobe Photoshop

It’d be weird recommending Adobe options for upscaling your images without mentioning good old Photoshop. Here’s how you can use Adobe Photoshop to upscale your images:
Open your image in Photoshop.
From the top-left corner, go to the > Filter option.
Choose the > Noise option.
From the drop-down menu, select > Reduce Noise.
You’ll see four sliders to play around with until you get a sharp, focused image: > Strength > Preserve Details > Reduce Color Noise and > Sharpen Details.
If you want to see the preview, make sure to press > Remove JPEG Artifact on the bottom.
Photoshop, Lightroom — not sure what to pick? Here’s a side-by-side comparison of the two.
How to avoid grainy photos altogether
While you’re learning your way around image editing tools and fixing the problem once it’s already come up, there are a few tips and tricks that can help you avoid taking grainy photos altogether:
Try to take photos in bright areas. Dimly-lit areas make for great romantic shots, but sometimes at the cost of image quality.
If you’re in a darker area, use artificial light (such as a strobe option or a reflector).
Set a low ISO. We recommend as close to around 100 as you can.
Use your camera’s built-in noise reduction before you take photos. You can usually set this to low, medium, or high, but we recommend only low or medium because high noise reduction might compromise photo quality.
Save your images as RAW files, not JPEGs. Because when you’re editing images and trying to reduce noise, RAW files are more easily customizable than JPEGs, especially if you’re using Adobe Lightroom or Photoshop.
What if you’re using an iPhone? We’ve got you covered:
Turn off Auto Focus. When taking your photos, tap on the element you want to focus on until the Yellow Focus Box appears. Then, hold and press on the element inside the yellow focus box until you get the text “AE-AF Lock.”
Adjust the exposure of your iPhone camera. If too low, your images will appear grainy. You can do this by tapping on the element on your camera and swiping up or down on the sun icon to make the image brighter or darker.
Change your camera settings. From your iPhone settings, you can go to the Camera option and switch off Auto HDR.
Change the format in which your iPhone saves images. From the Camera option on your iPhone settings, make sure photos are saved under “Most Compatible.”
We haven’t forgotten about Android phones: just firmly tap on the camera viewfinder to make it focus on the element you want to get a clear picture of. Shaking your phone gently can help it focus better if this doesn't work.
Ready to upscale your images?
Let's face it; no one wants a grainy image on their website. The good news is that fixing grainy images is actually relatively easy with free, simple image upscaling options such as designify and more traditional ones such as Adobe Lightroom and Photoshop. Just upload your image and get editing!
All these options work great for fixing grainy photos of landscapes and other large images so that you have a crystal clear image ready for your client or print. If you’ve got time on your hands and an Adobe subscription, Lightroom and Photoshop are excellent options for playing around with multiple features to get the perfect image with the sharp focus you want.
If you’ve got an iPhone or an Android, adjusting a few camera settings and using a few photography hacks can ensure clear, well-focused images. If you’re on a budget or running short on time and that Instagram update just needs to be shared, give Designify a try for an easy image upscaling fix that’s 100% automatic and completely free.
Comments
No comments so far.