Хотите удалить часть фона изображения? Удалить фон с помощью инструмента вроде remove.bg — это одно дело.
Но иногда на фото есть люди, продукты или объекты, от которых тоже нужно избавиться, или, наоборот, которые хочется сохранить.
Работаете ли вы с портретами, фотографиями товаров, концептами интерьерного дизайна или созданием контента — мы покажем вам различные сценарии использования того, как молниеносно удалить (или восстановить) части вашего фона.
Приступим.
Содержание
- Как убрать нежелательных людей с фона
- Удаление нежелательных объектов с фотографий
- Как привести в порядок фотографии товаров и убрать лишние продукты с фона
- Частичное удаление фона: визуализация в интерьерном дизайне
- Частичное удаление фона для создателей контента и инфлюенсеров
- Удаление выбранных фонов или объектов с изображения — самым простым способом
Как убрать нежелательных людей с фона
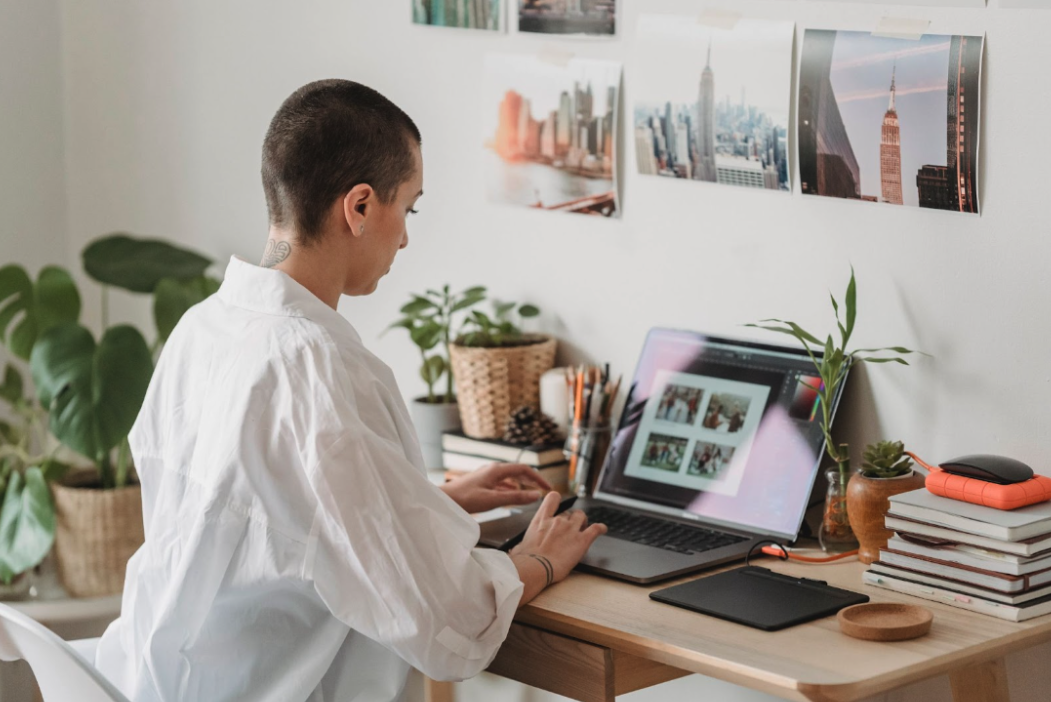
Иногда у вас может быть фото, на котором нужно убрать не только фон, но и одного человека. Как на этом:

Мы хотим убрать девушку слева — исключительно в маркетинговых целях. После этого можно добавить уникальный фон — и создать совершенно новое изображение. Для этого:
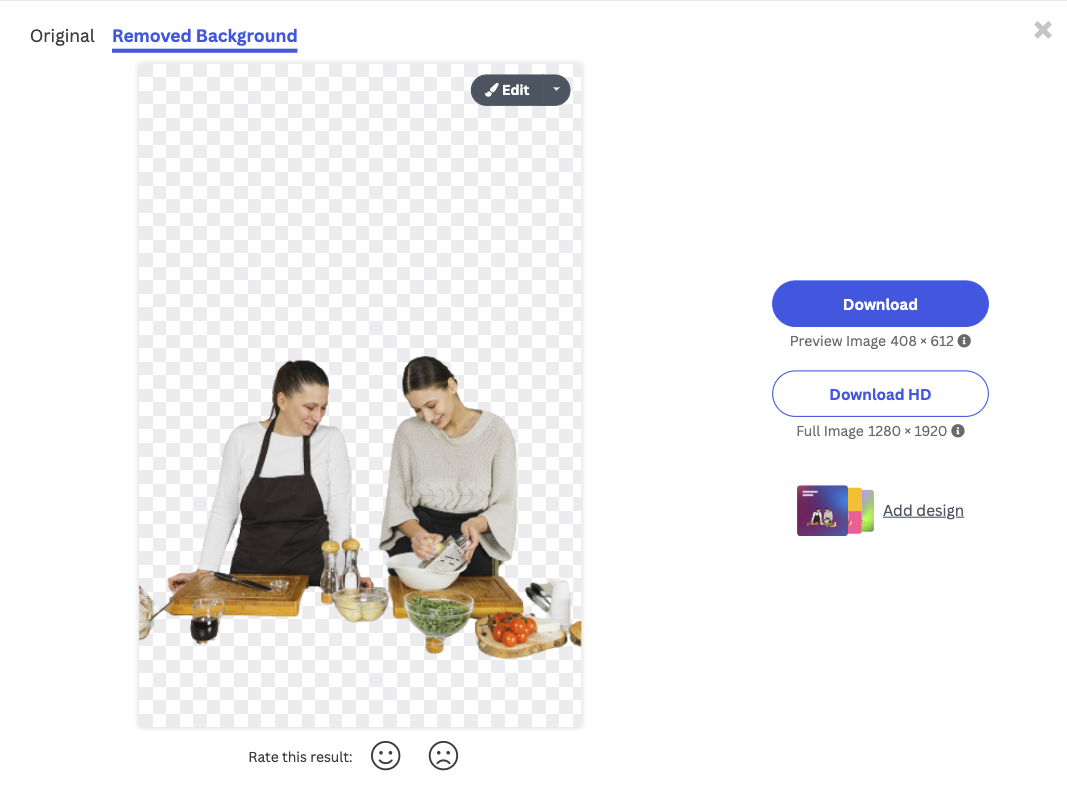
1. Откройте remove.bg и перетащите изображение на платформу. Фон будет удалён мгновенно:
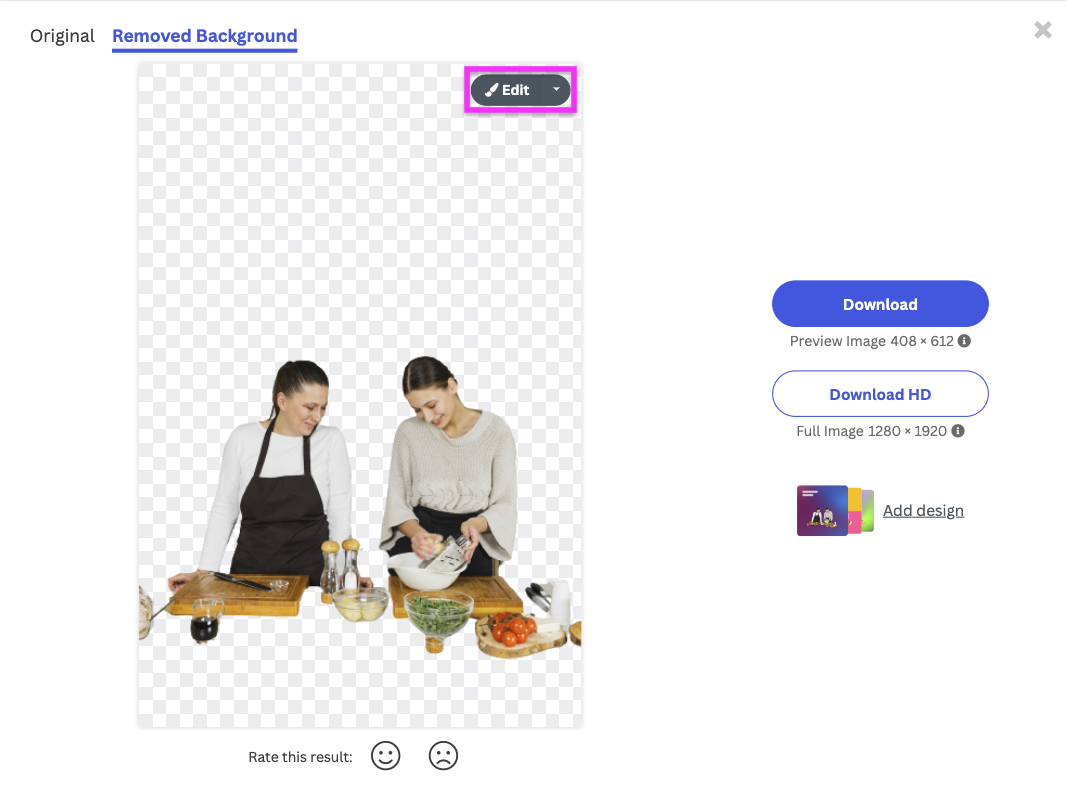
2. Затем перейдите в Редактировать > Стереть/Восстановить.
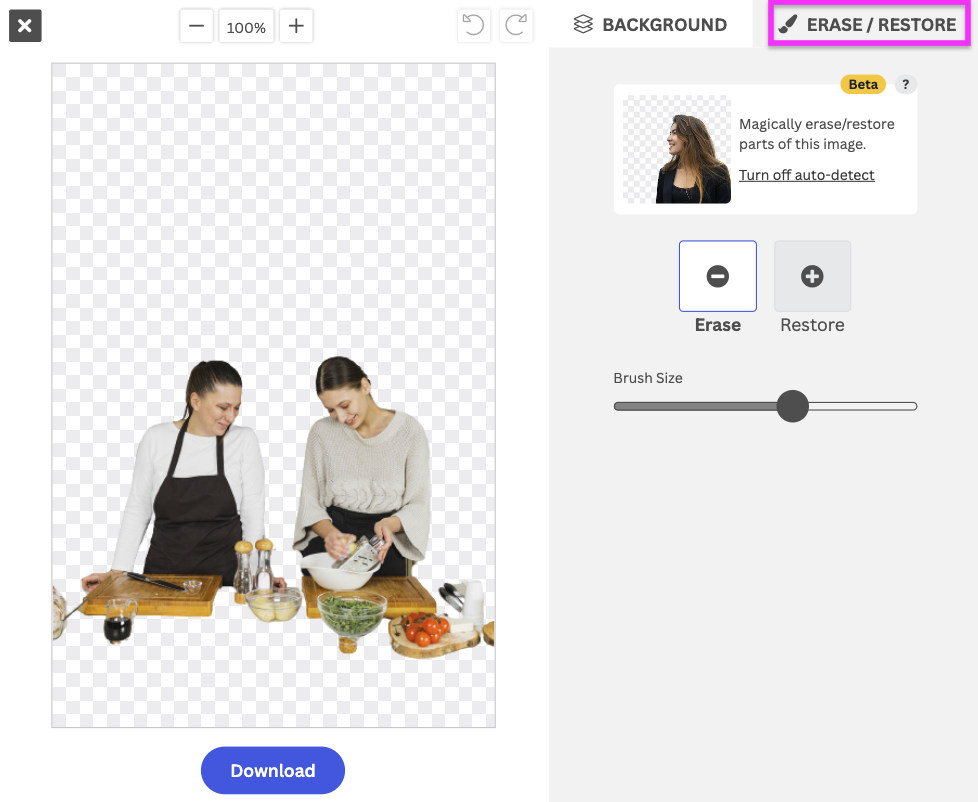
3. Убедитесь, что выбран режим > Стереть, и уменьшите > Размер кисти — при наведении на изображение вы увидите текущий размер.
Кисть должна быть достаточно маленькой, чтобы точно обвести контур человека.
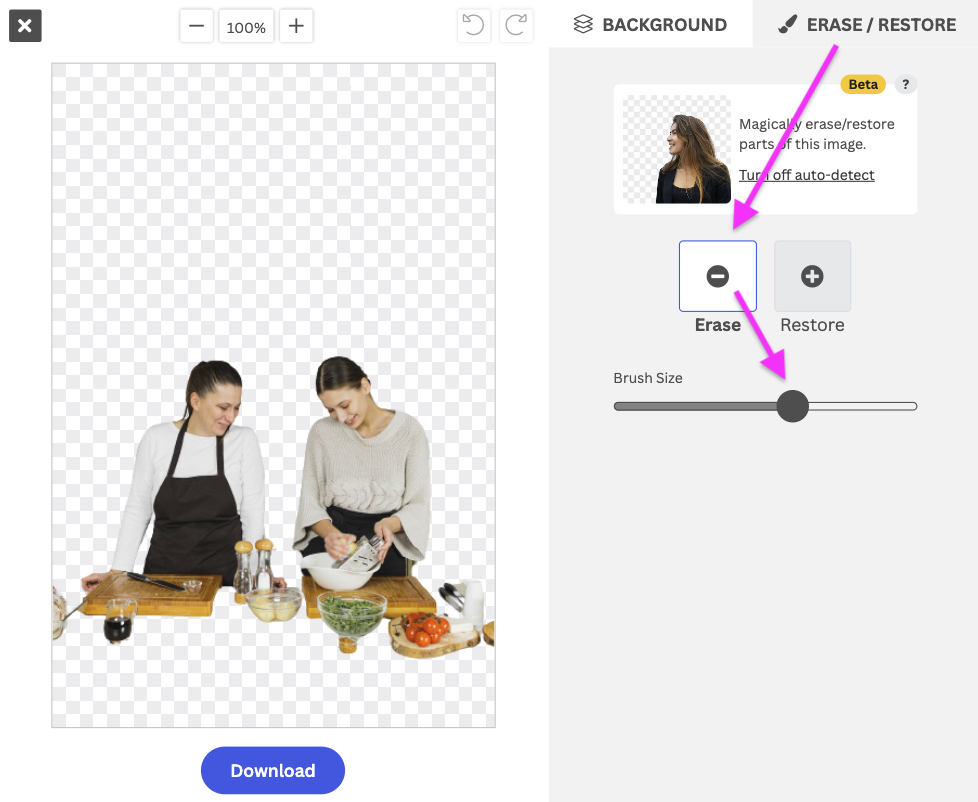
Теперь закрасьте человека, которого хотите убрать. Также можно восстановить части изображения, случайно удалённые ИИ, — например, стол в данном примере.
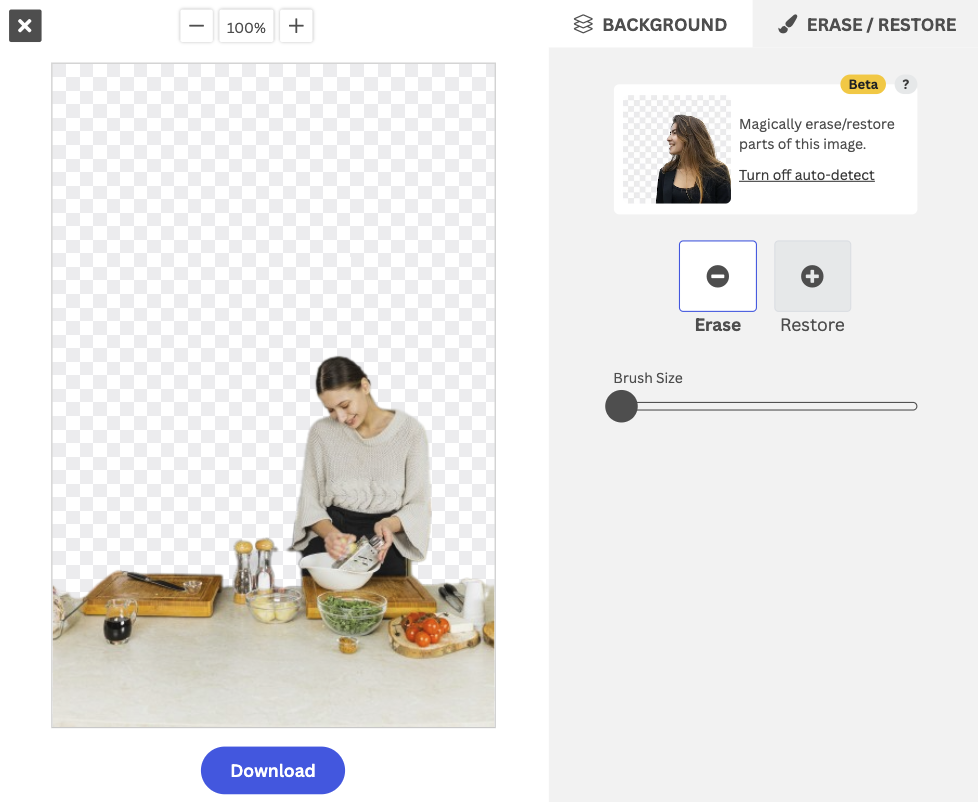
4. Когда всё готово, Magic Brush remove.bg сделает своё дело. Вот так:
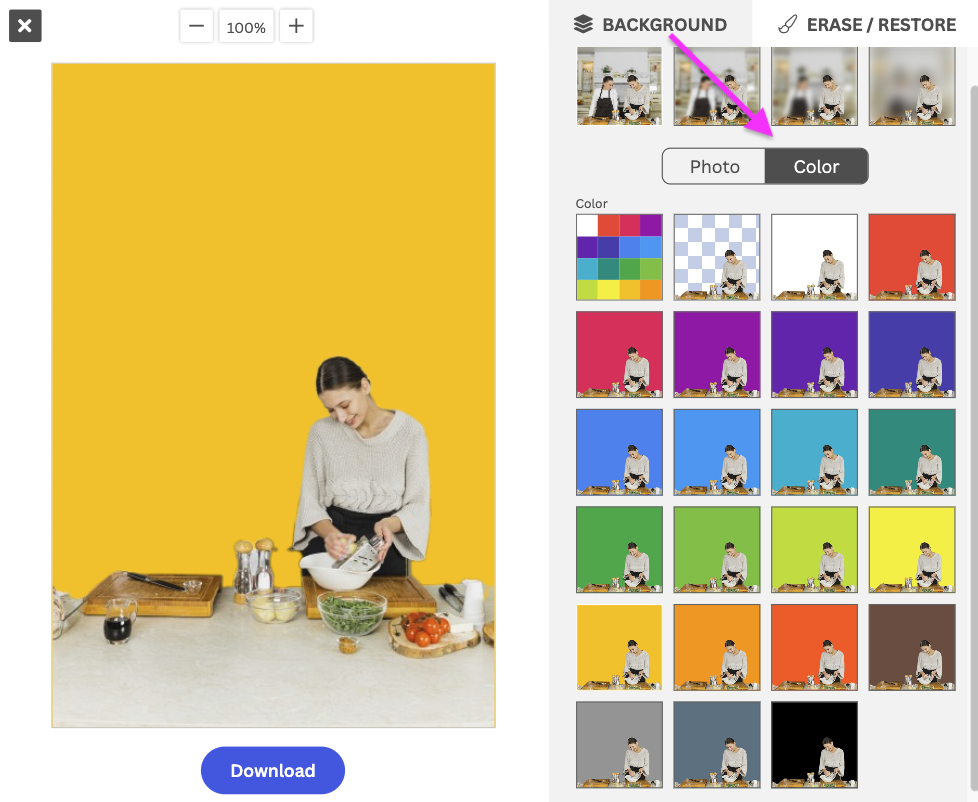
5. Теперь можно добавить новый уникальный фон — перейдите в > Фон и выберите понравившийся. Мы выбрали этот:
6. Как только будете готовы, нажмите > Скачать.

В зависимости от того, для чего нужна фотография, вы всегда можете обрезать изображение под свои нужды, например вот так:

Вот и всё — простая пошаговая инструкция по удалению нежелательных людей или посторонних с фона фотографии.
Удаление нежелательных объектов с фотографий
Далее мы покажем, как удалить нежелательные объекты с фотографии.
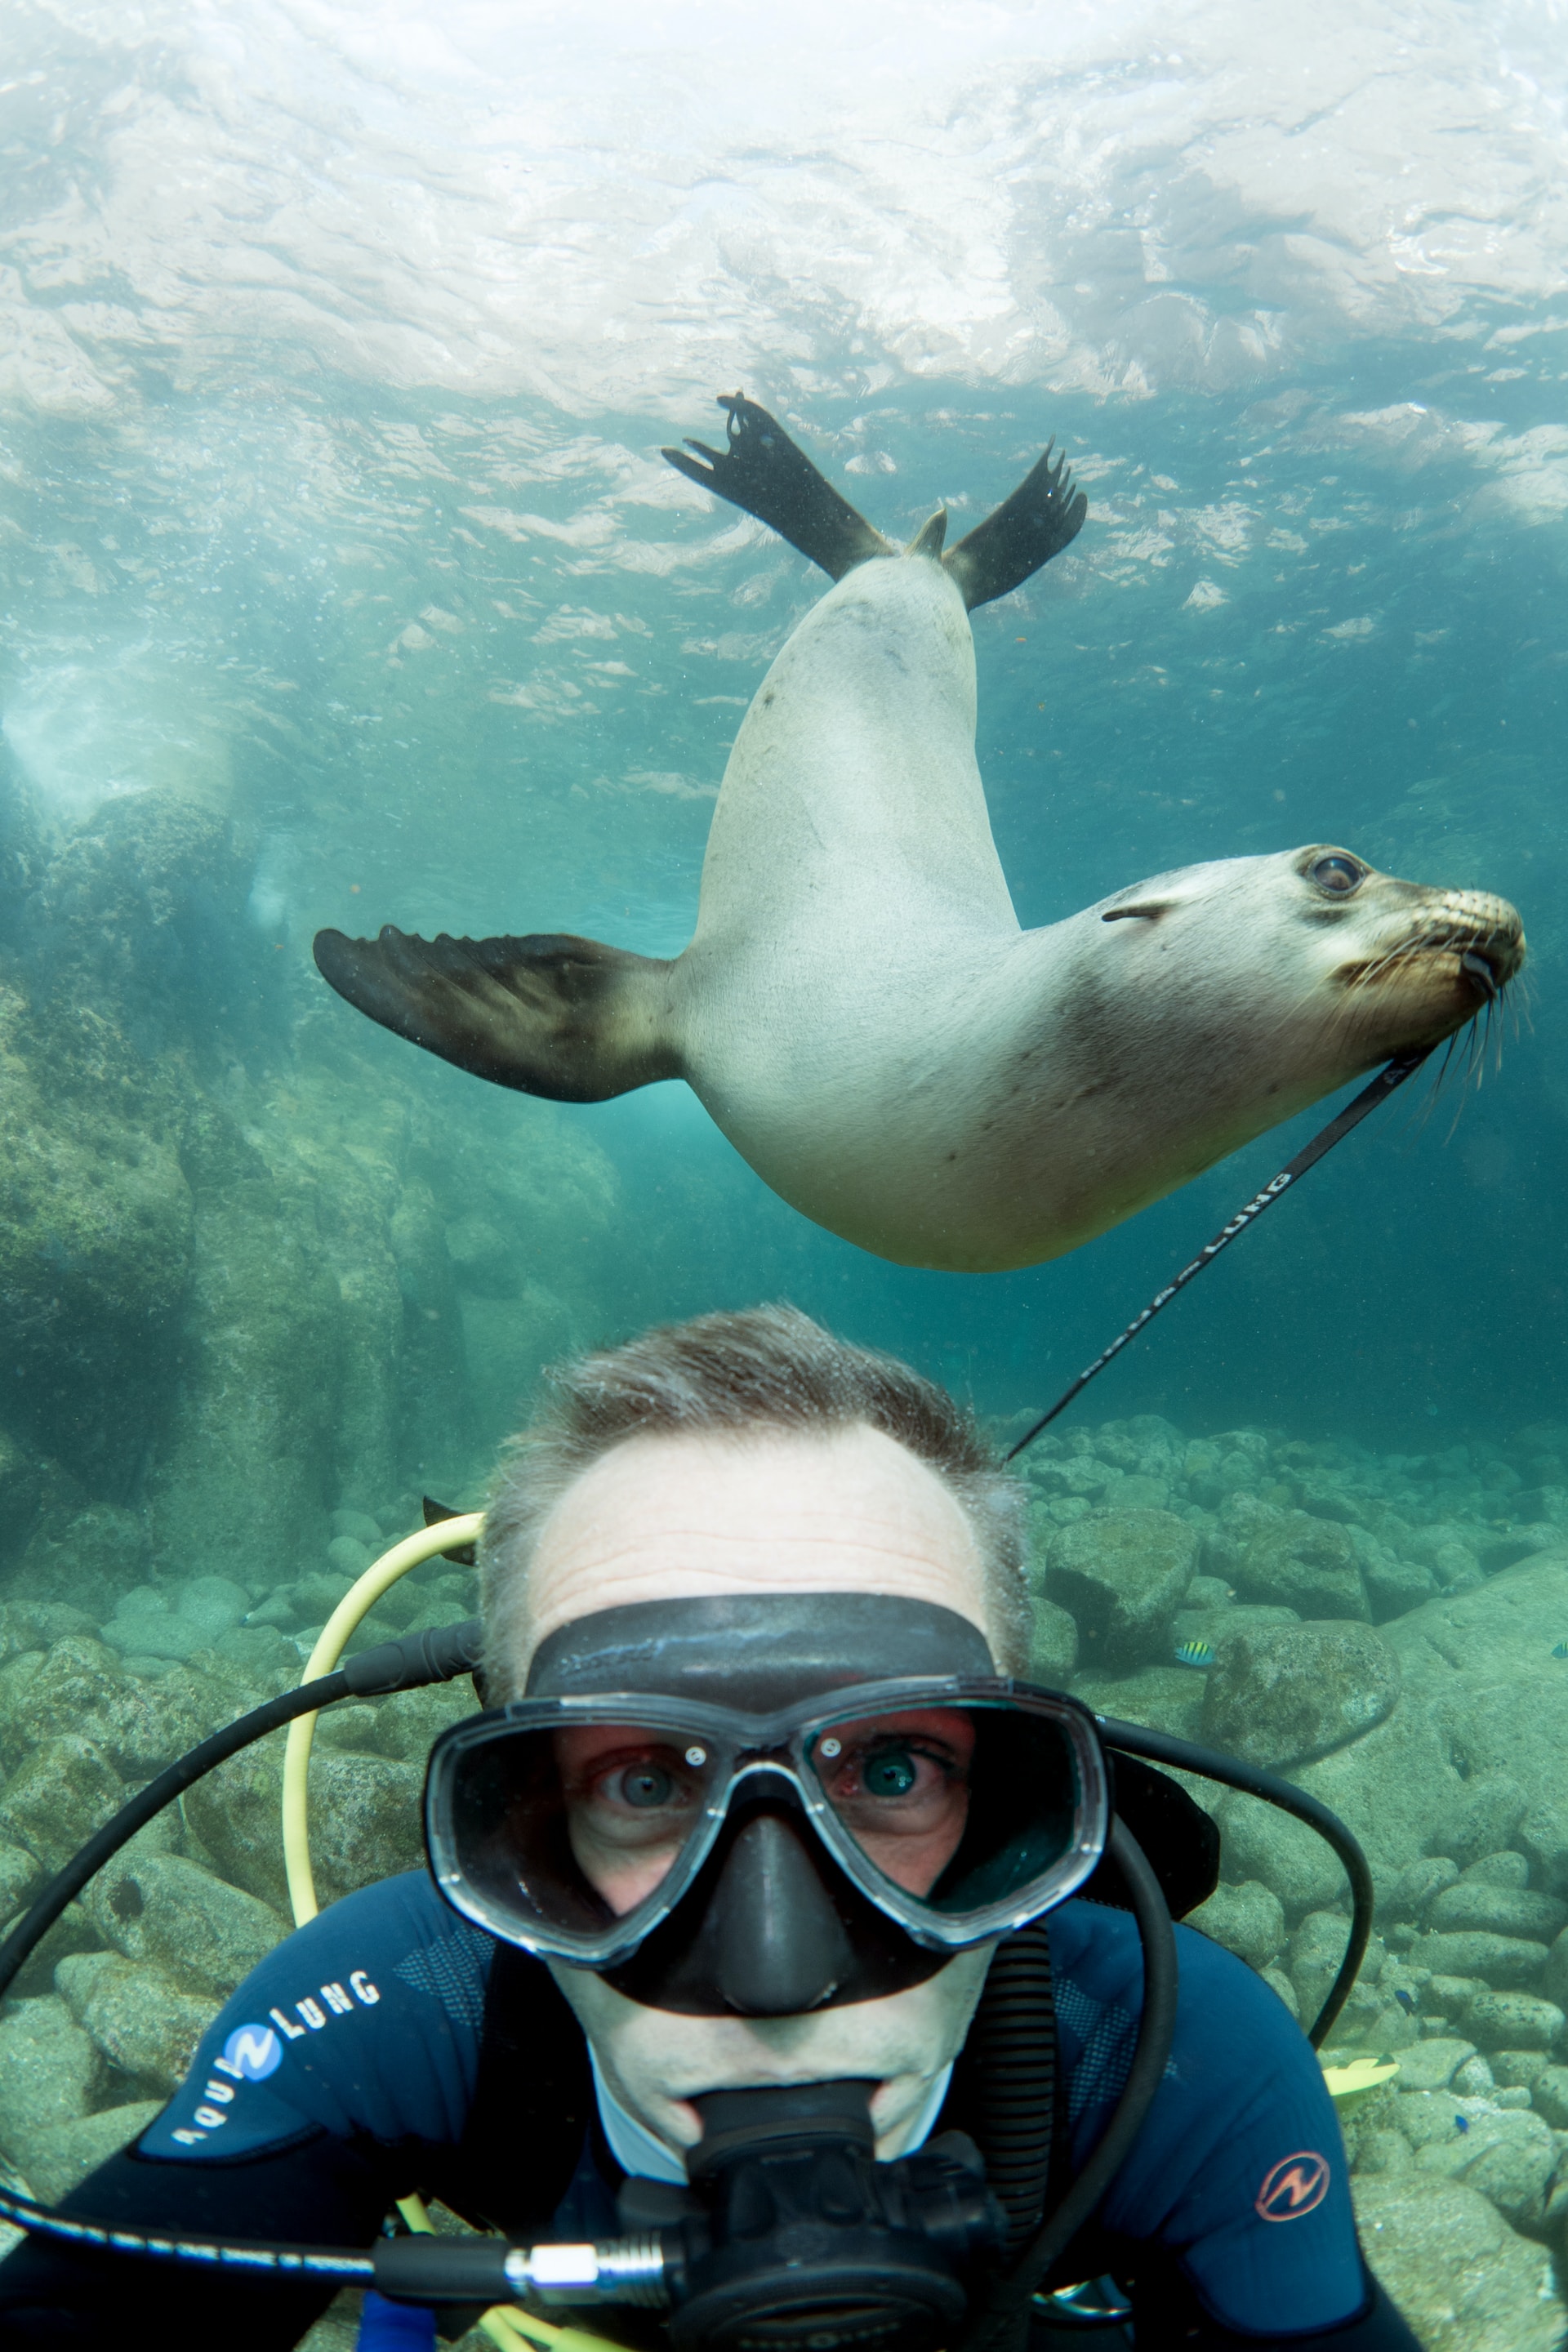
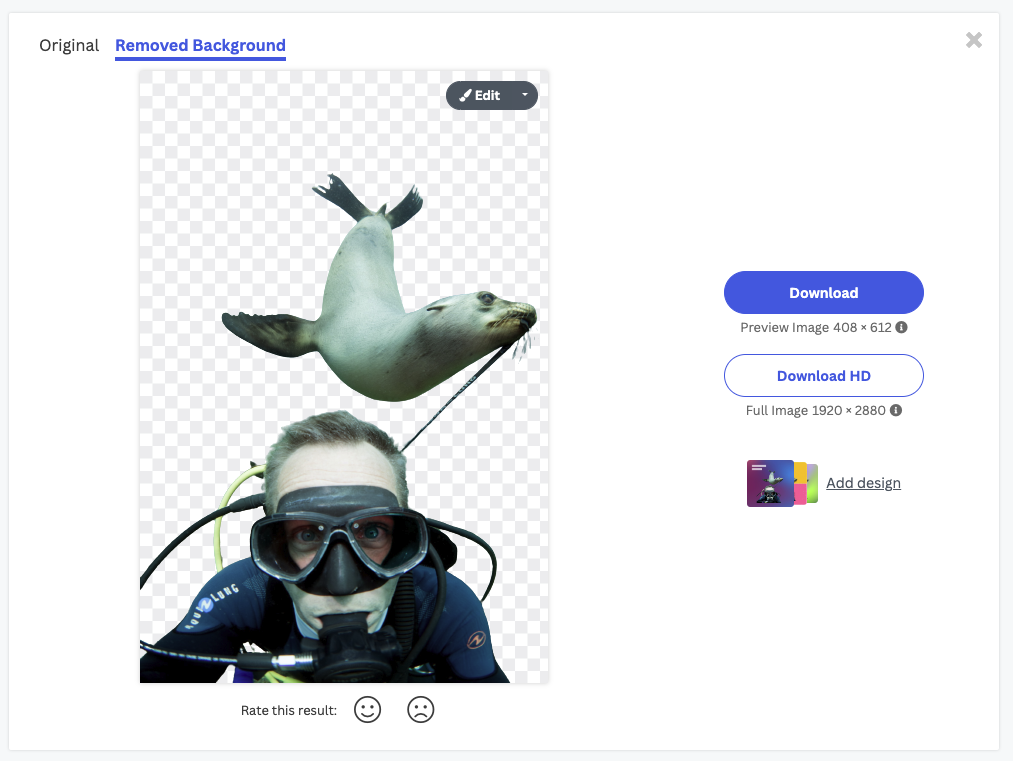
В нашем примере это тюлень — да, мы понимаем, что вы, возможно, не считаете тюленя объектом, но в фотографии это именно так. Это может быть яблоко, лампа — любой объект по вашему выбору. Если на переднем плане несколько объектов и нужно сохранить только некоторые из них, вот как это сделать:
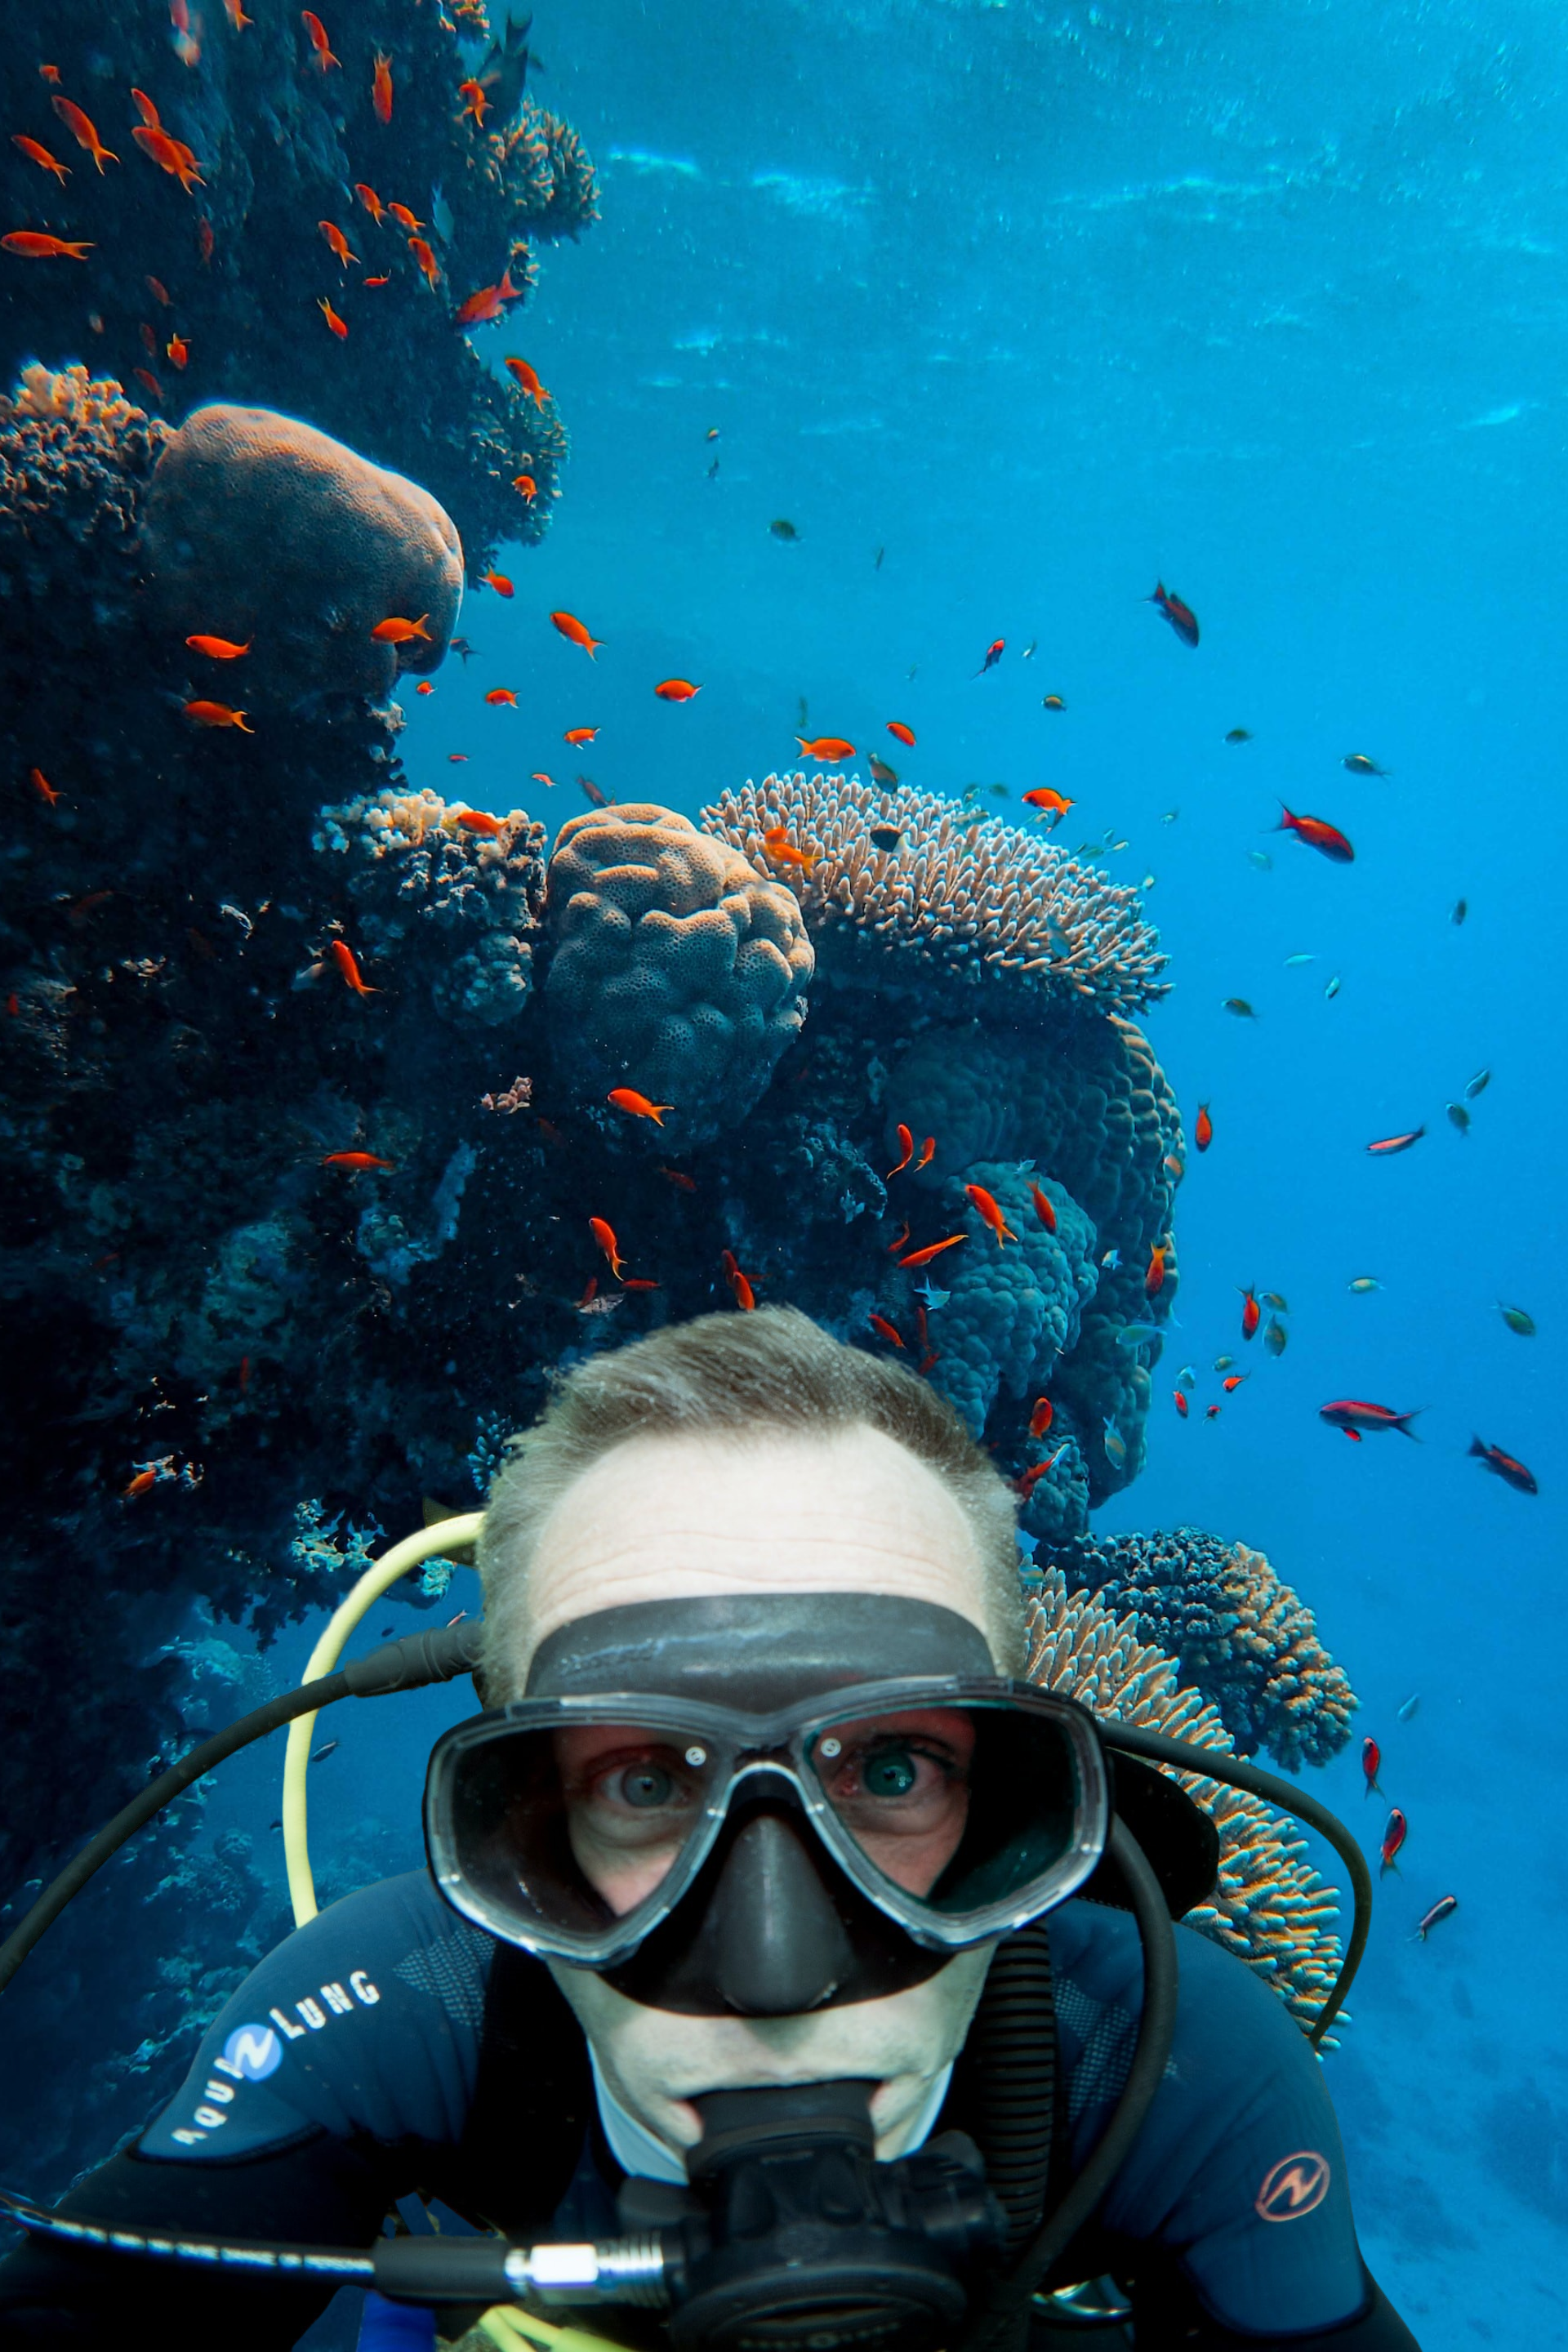
1. Сначала используйте remove.bg для удаления фона. Для этого возьмите изображение и перетащите его на remove.bg. Мы используем это забавное фото с дайвингом. Наша цель — заменить фон и убрать тюленя.
Через несколько секунд фон будет удалён, вот так.
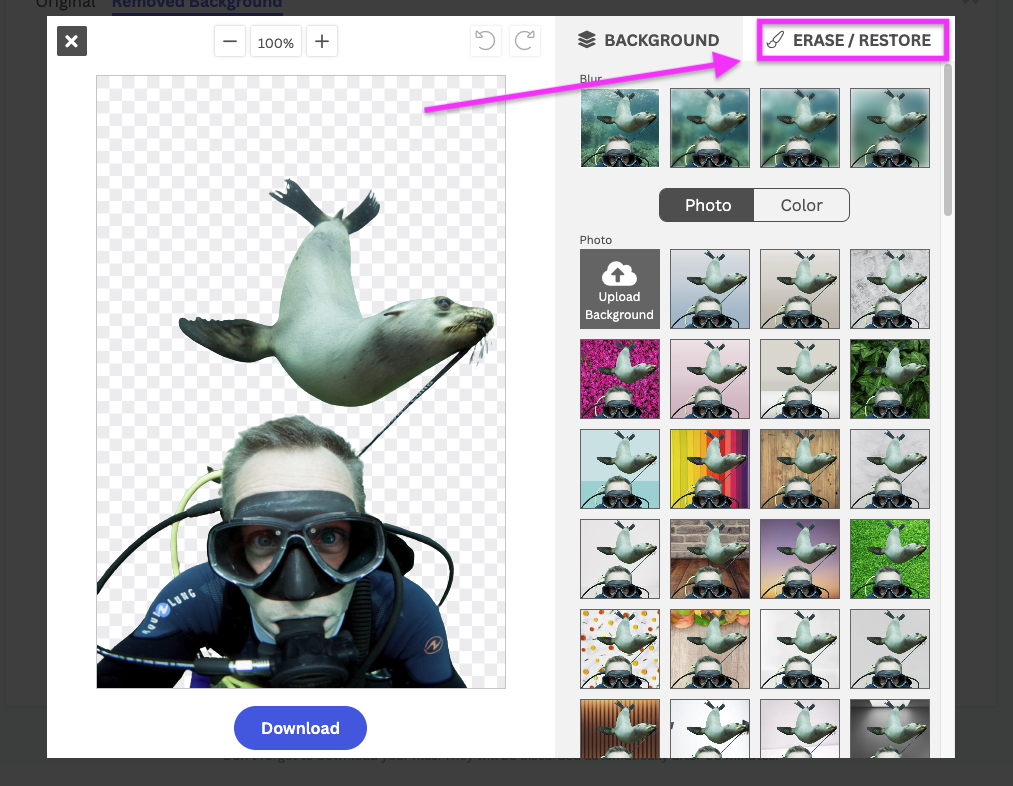
2. Нажмите > Редактировать. Здесь можно внести несколько корректировок и стереть большую особь сверху буквально за пару кликов.

3. Затем перейдите в > Стереть/Восстановить.
4. Убедитесь, что выбрана функция Стереть, и отрегулируйте Размер кисти под объект, который нужно удалить.
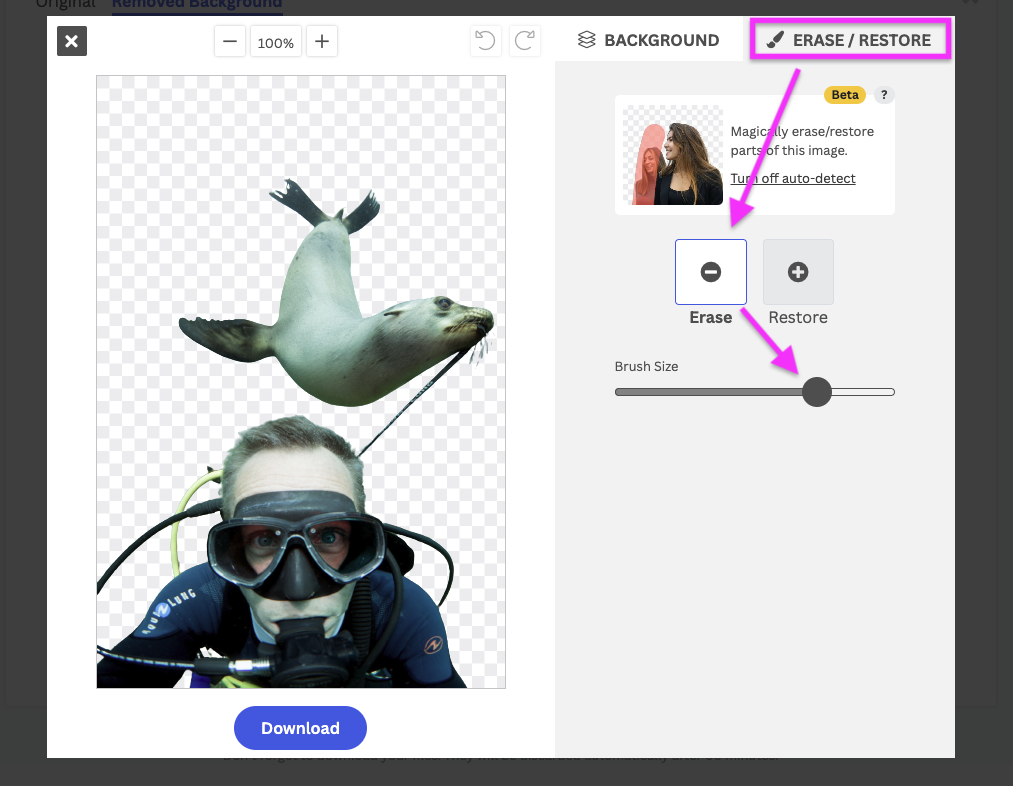
5. Теперь закрасьте весь объект, который хотите стереть. Вот так:
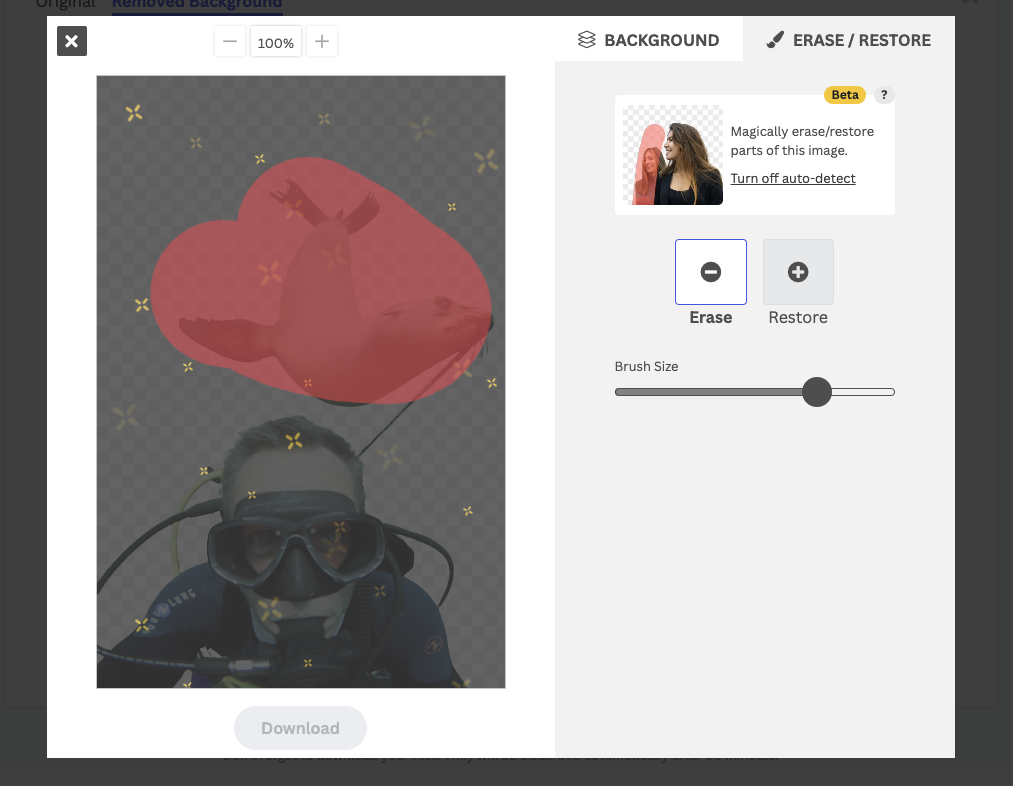
Это не обязательно делать идеально ровно по контуру: ИИ remove.bg отлично справляется с распознаванием объектов.
Это изображение с прозрачным фоном уже можно использовать, но если хотите довести его до совершенства — смените фон. Выберите фото из библиотеки или загрузите своё. Мы решили загрузить собственное изображение кораллового рифа.
7. Нажмите > Фон, затем > Загрузить фон.
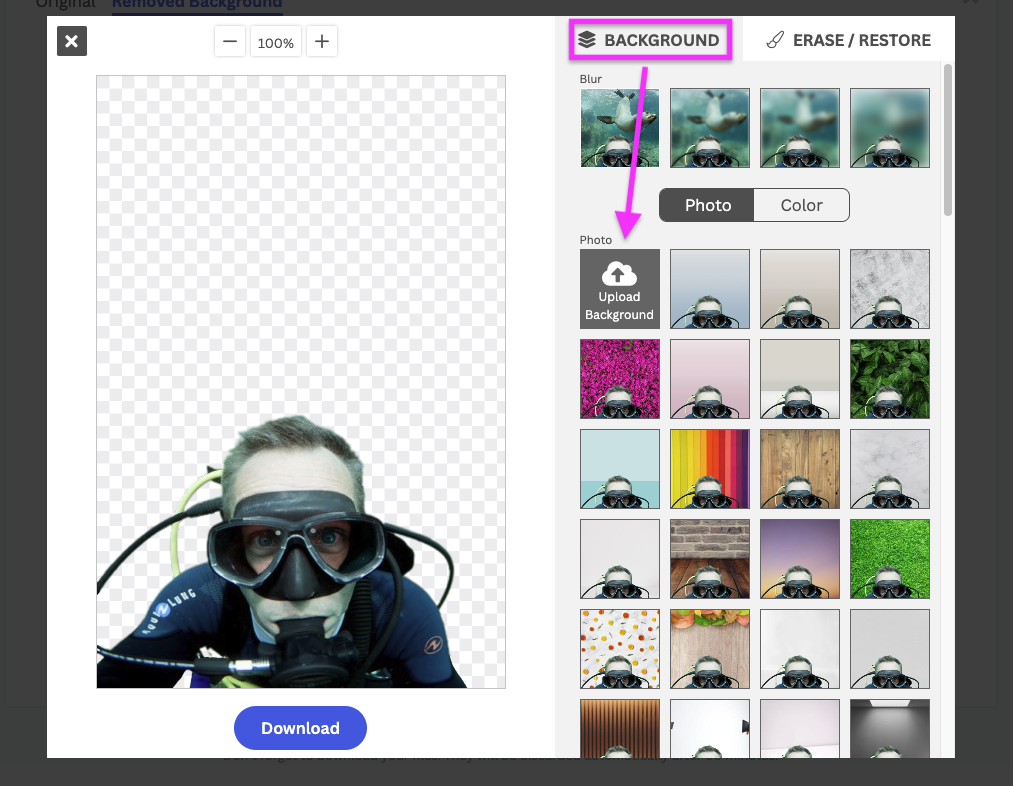
8. Готово! Когда результат вас устроит, выберите > Скачать или Скачать в HD, если нужно высокое разрешение.
Вот и всё! Простой приём для удаления части фона или выбранных элементов.
Хотите узнать, как снимать фотографии, чтобы потом легко удалять фон? Читайте Обработка фотографий товаров: как снимать & редактировать для ускорения рабочего процесса.
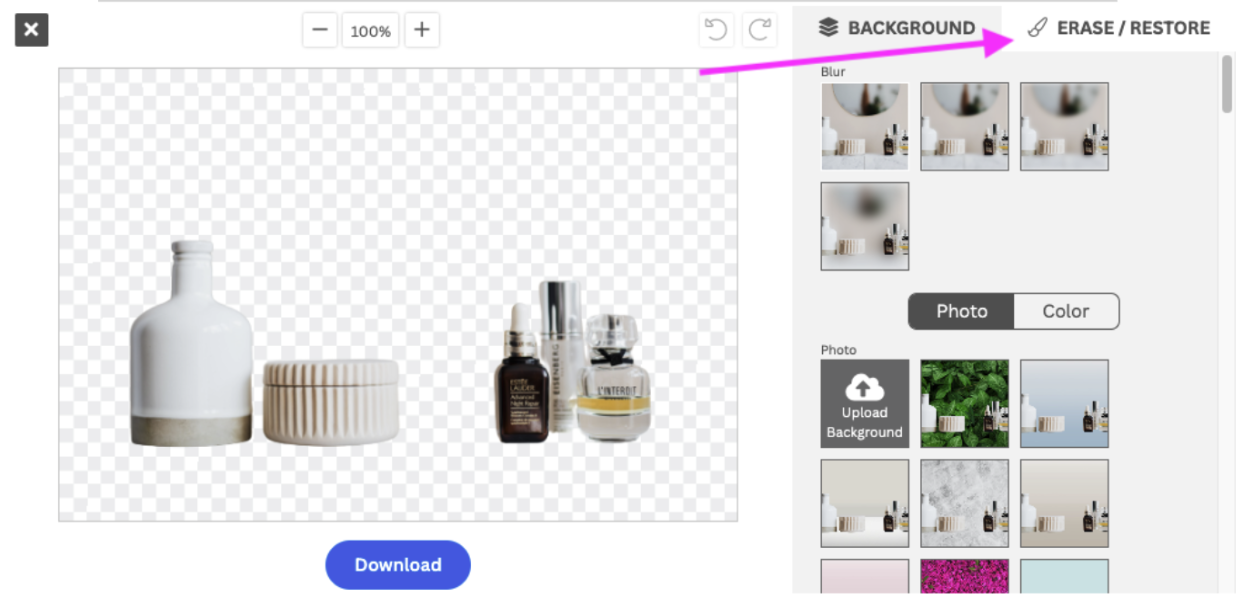
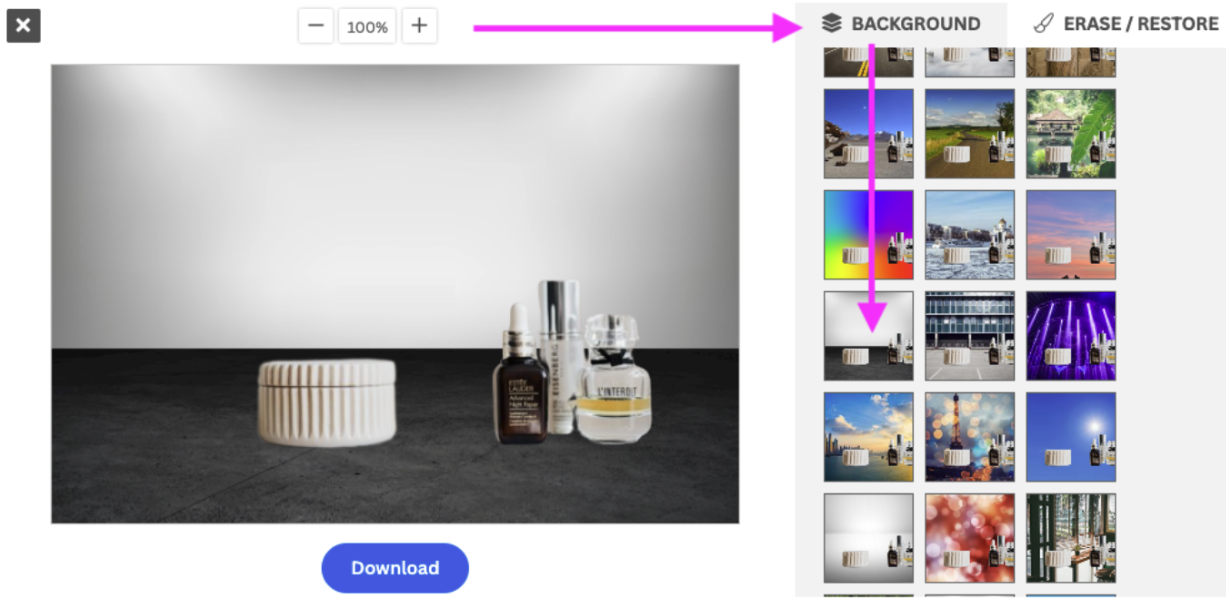
Как привести в порядок фотографии товаров и убрать лишние продукты с фона
Ещё один сценарий использования Magic Brush — работа с фотографиями товаров, когда на одном снимке несколько продуктов, но вы хотите убрать некоторые из них. Например, вот так:
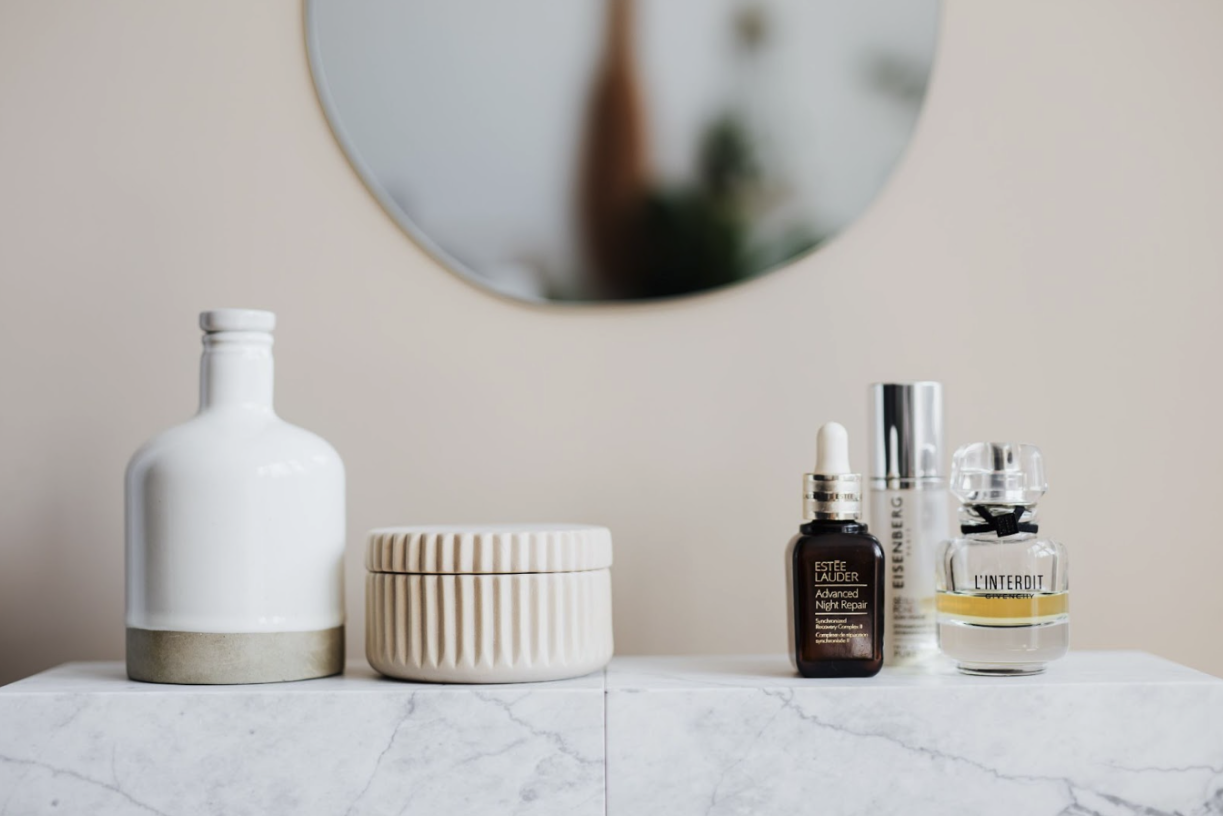
Допустим, мы хотим удалить фон, а также вазу и шкатулку слева — косметика справа должна остаться.
1. Откройте remove.bg и перетащите изображение сюда. Фон будет удалён буквально за несколько секунд:
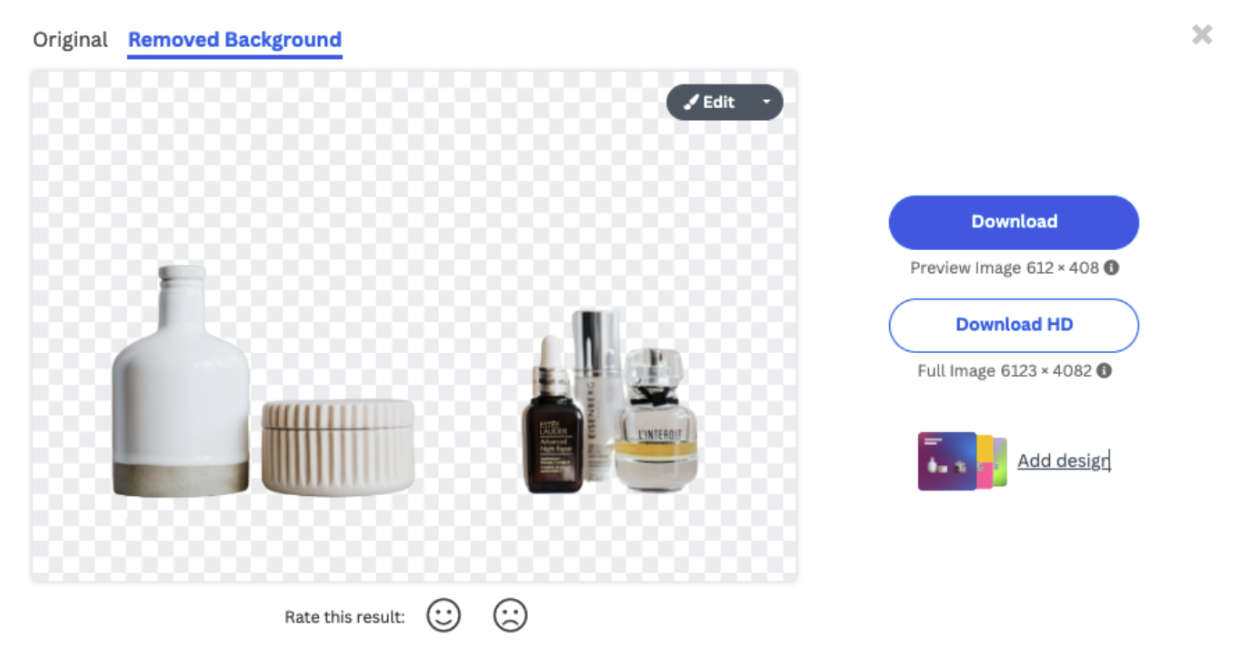
2. Теперь удалим элементы слева, перейдя в > Редактировать > Стереть/Восстановить.
3. Теперь закрасьте элементы, которые хотите удалить. Закрасьте все нужные элементы красным. Вот так:
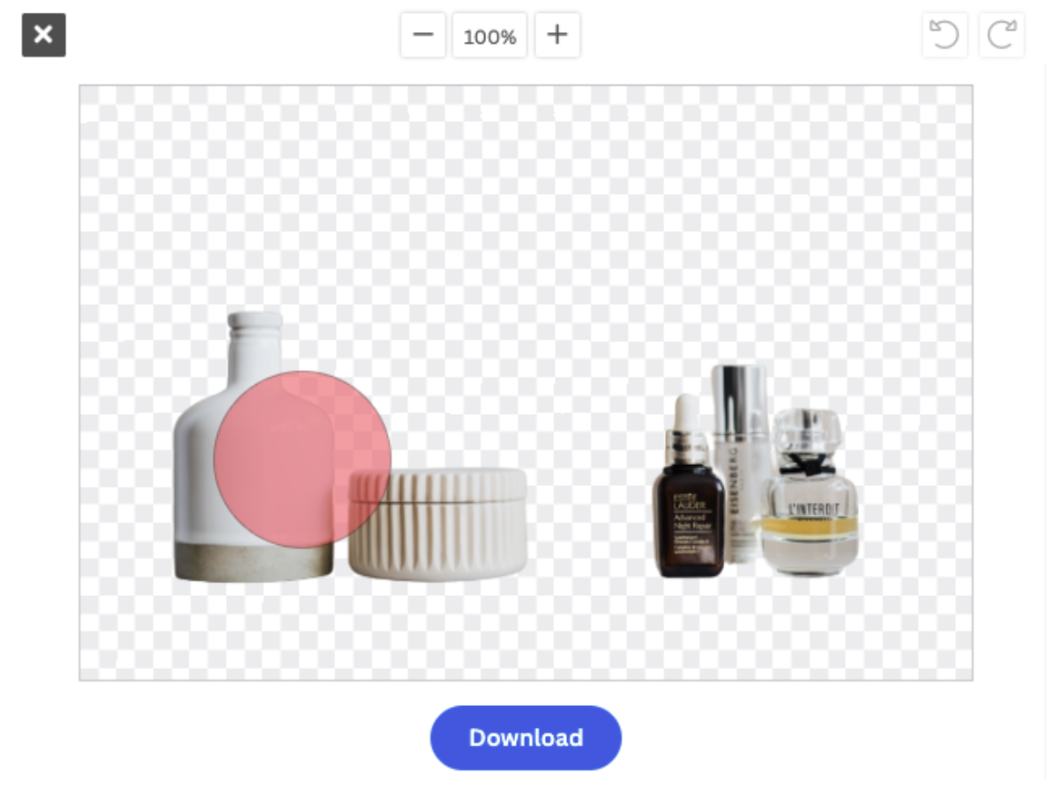
Через несколько секунд все закрашенные продукты будут удалены. Вот так:
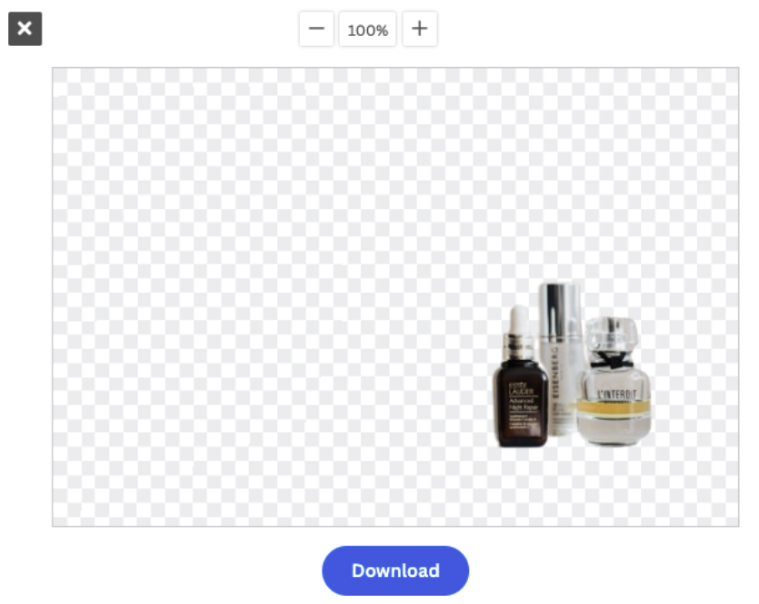
4. Передумали и хотите вернуть какой-то товар? Перейдите в > Стереть/Восстановить и выберите > Восстановить. Всё, что вы уже удалили, появится в затемнённом виде на фоне — так вы легко найдёте то, что нужно восстановить.
Чтобы восстановить шкатулку, уменьшите размер кисти и закрасьте её вот так:

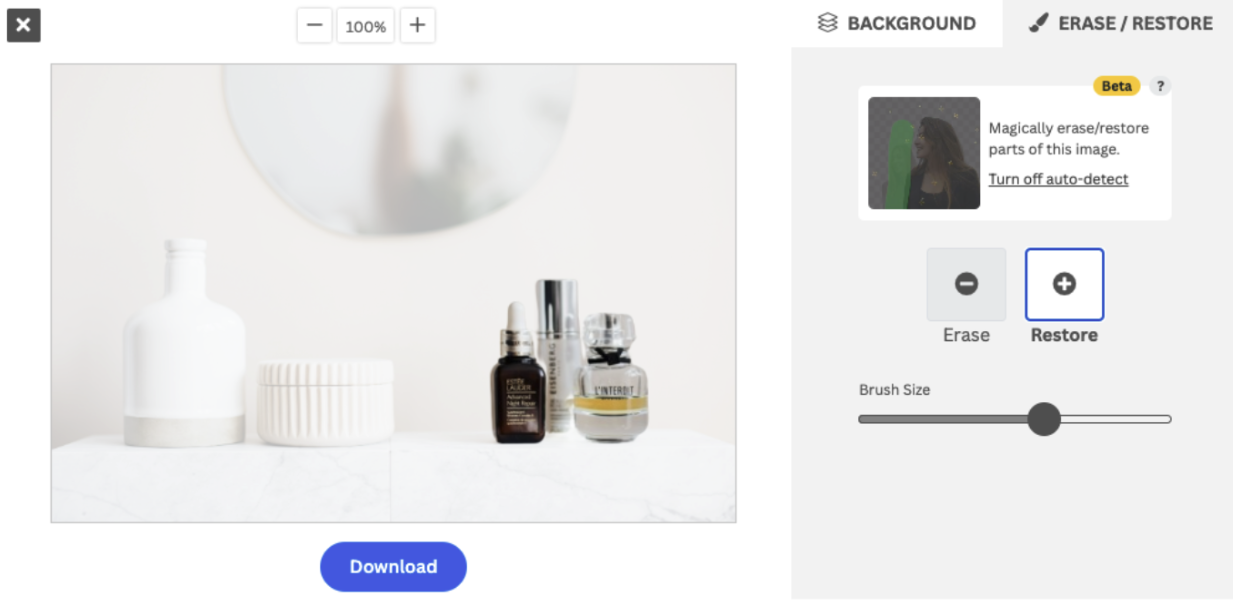
5. Теперь добавим новый фон — перейдите в > Фон и выберите понравившийся.
Конечно, можно выбрать и прозрачный фон, скачать файл и продолжить работу с ним в редакторе графики, например в Canva.
6. Довольны результатом? Нажмите > Скачать > Скачать изображение.
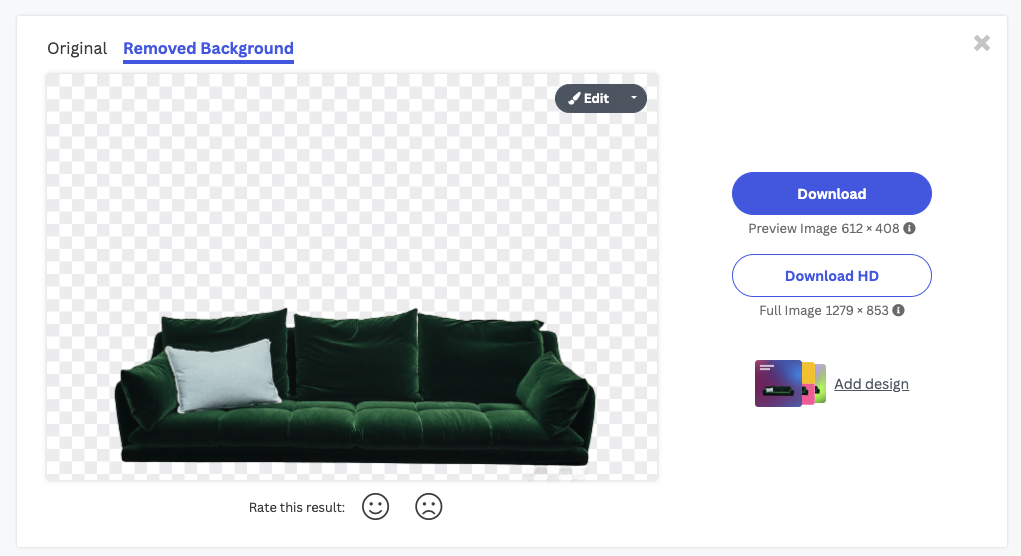
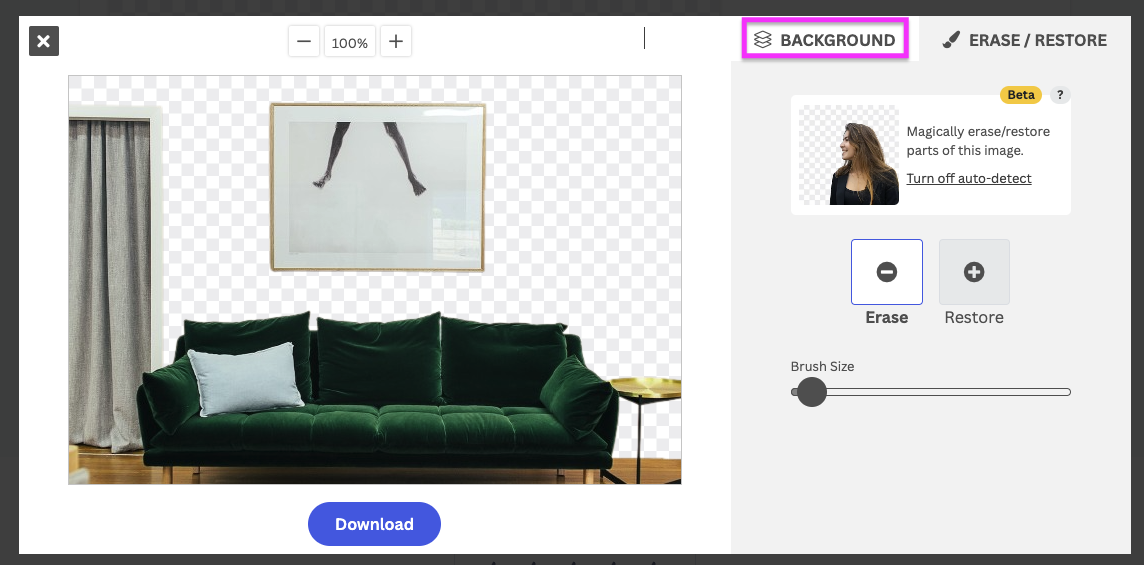
Частичное удаление фона: визуализация в интерьерном дизайне
Ещё один сценарий частичного удаления фона — когда нужно выделить, например, предмет мебели. Причины могут быть разными; в нашем случае мы хотим визуализировать, как будет выглядеть гостиная с другими обоями.
1. Чтобы удалить фон, перетащите изображение на remove.bg. ИИ удалит фон за несколько секунд.
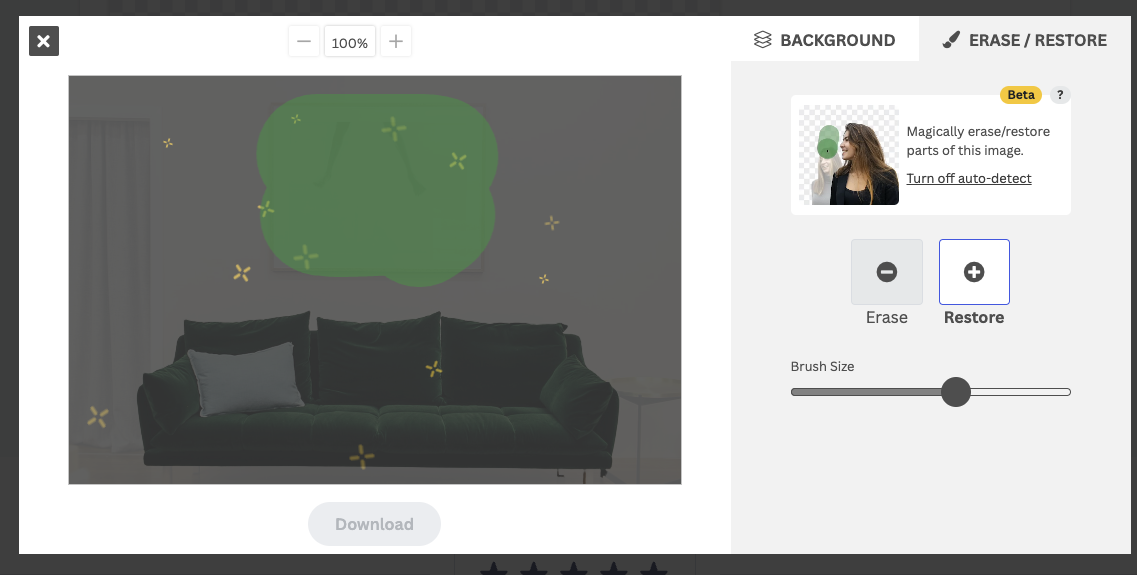
ИИ убрал картину на стене, тумбочку, дверь и пол — но не волнуйтесь, с помощью Magic Brush всё можно исправить.
2. Перейдите в > Стереть/Восстановить и убедитесь, что выбран режим > Восстановить.
3. Затем закрасьте всё, что нужно восстановить.
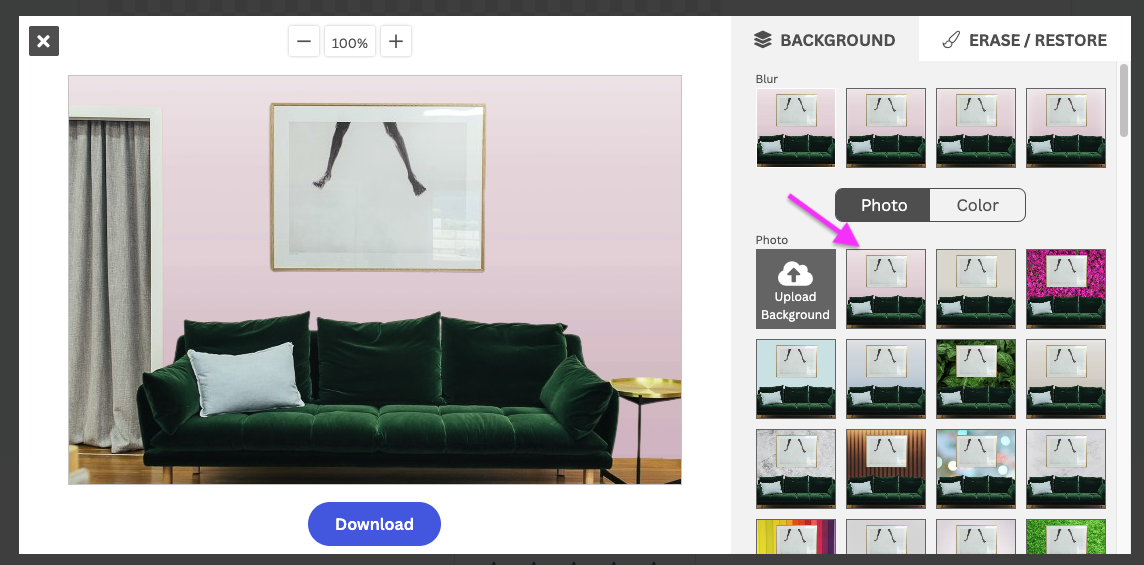
4. Теперь нажмите > Фон и выберите одно из изображений в библиотеке или загрузите своё.
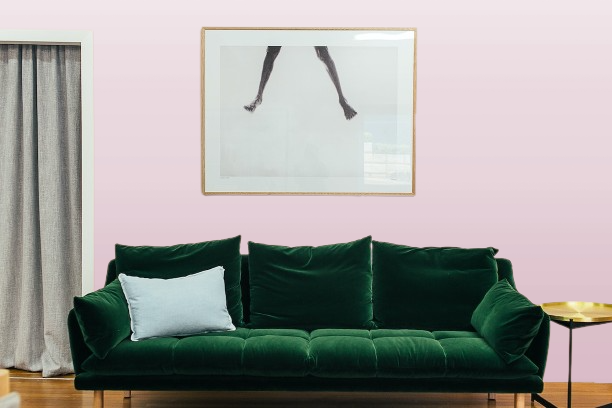
Например, если вы хотите посмотреть, как будет выглядеть розовая стена в гостиной, выберите первый фон и оцените результат.
5. Довольны? Нажмите > Скачать > Скачать изображение, и файл сохранится на вашем компьютере.
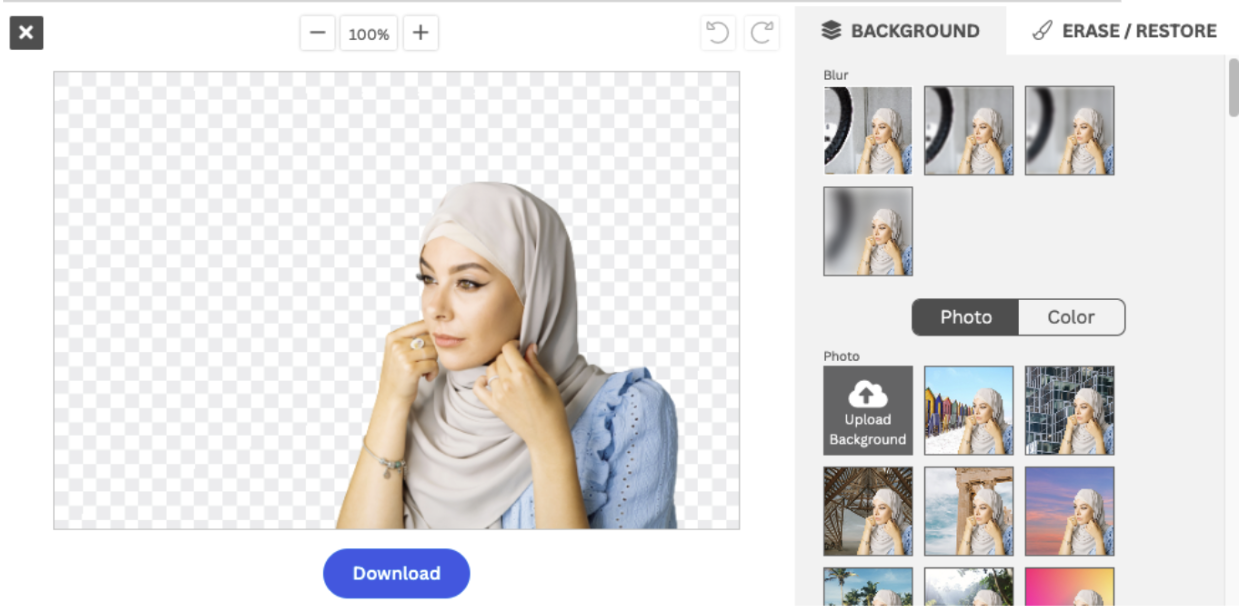
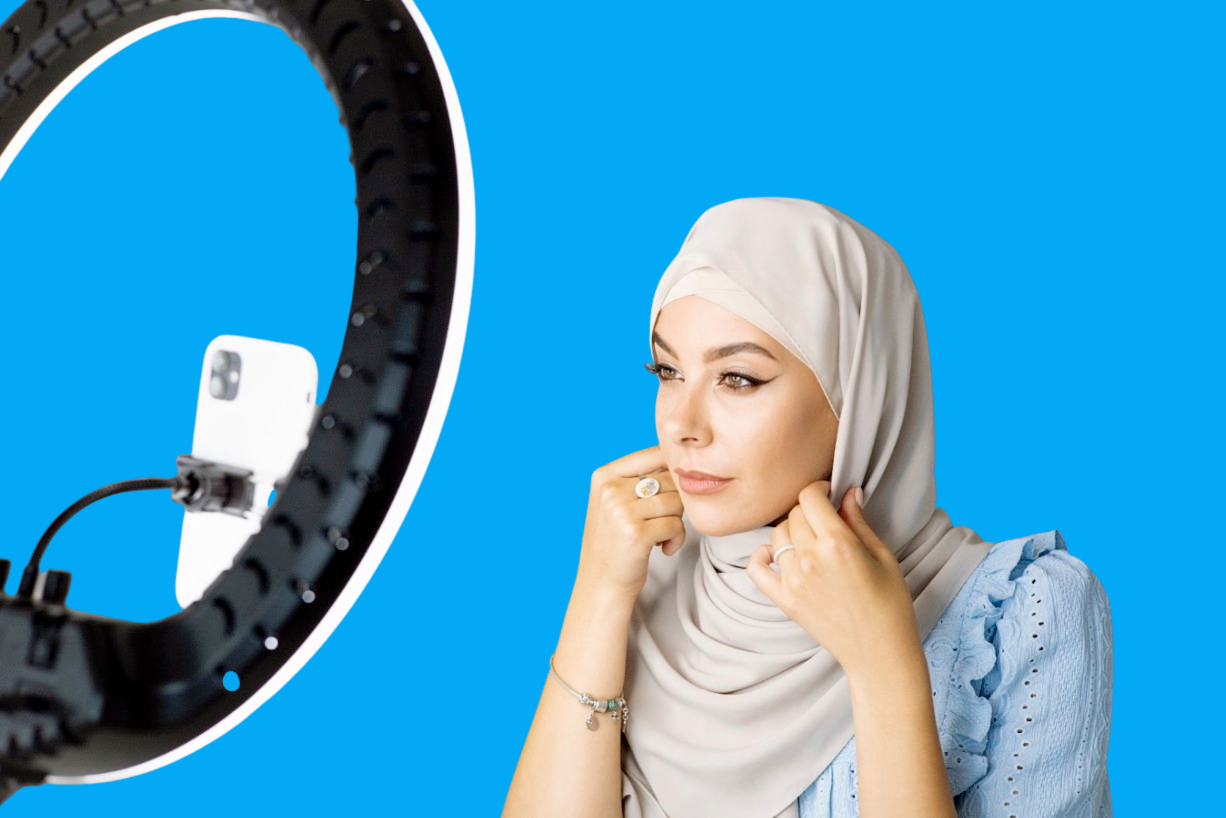
Частичное удаление фона для создателей контента и инфлюенсеров
Хотите создать идеальную обложку для YouTube-канала или Instagram Story — или использовать своё фото, но при этом убрать весь остальной фон?
Быть создателем контента не всегда так просто, как кажется, но мы покажем вам, как частично удалить фон изображения, чтобы создавать отличные материалы для социальных сетей.
Вот изображение, которое мы используем в качестве примера:
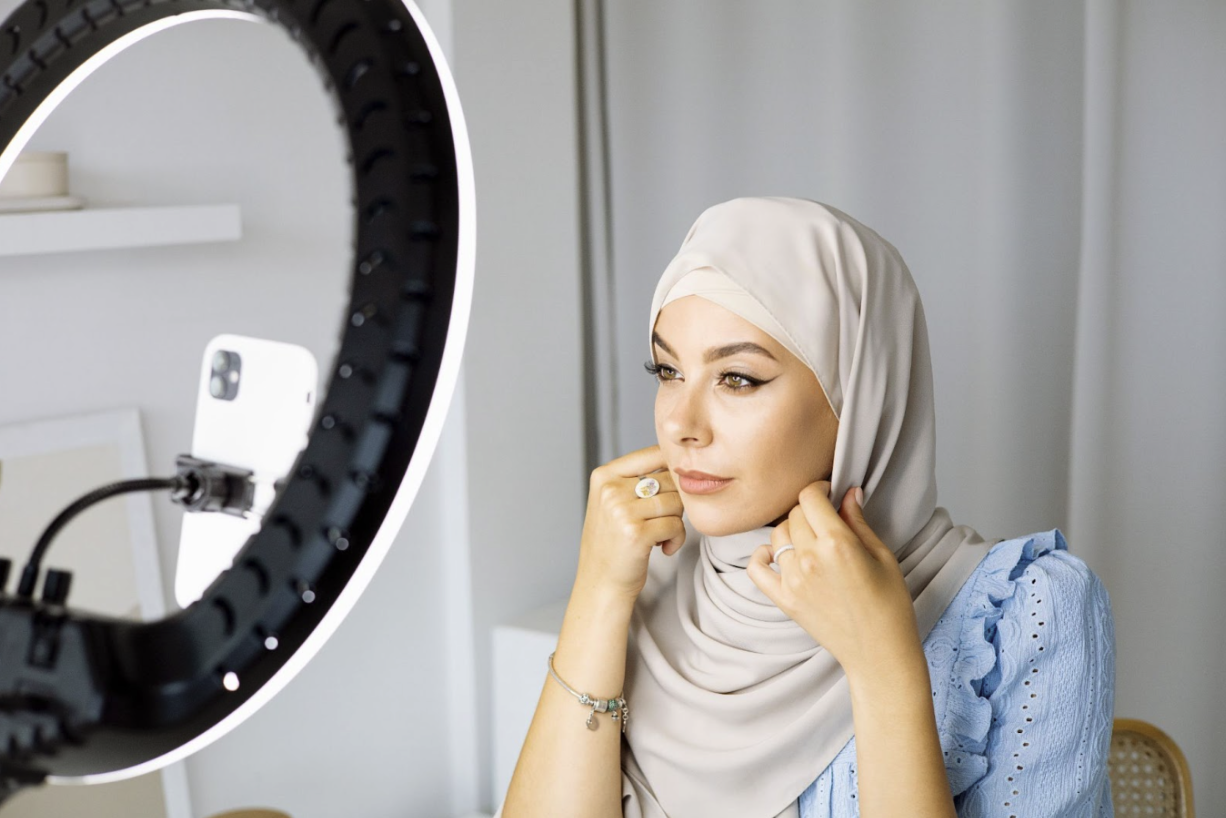
1. Откройте remove.bg, чтобы удалить фон. Просто перетащите изображение на платформу.
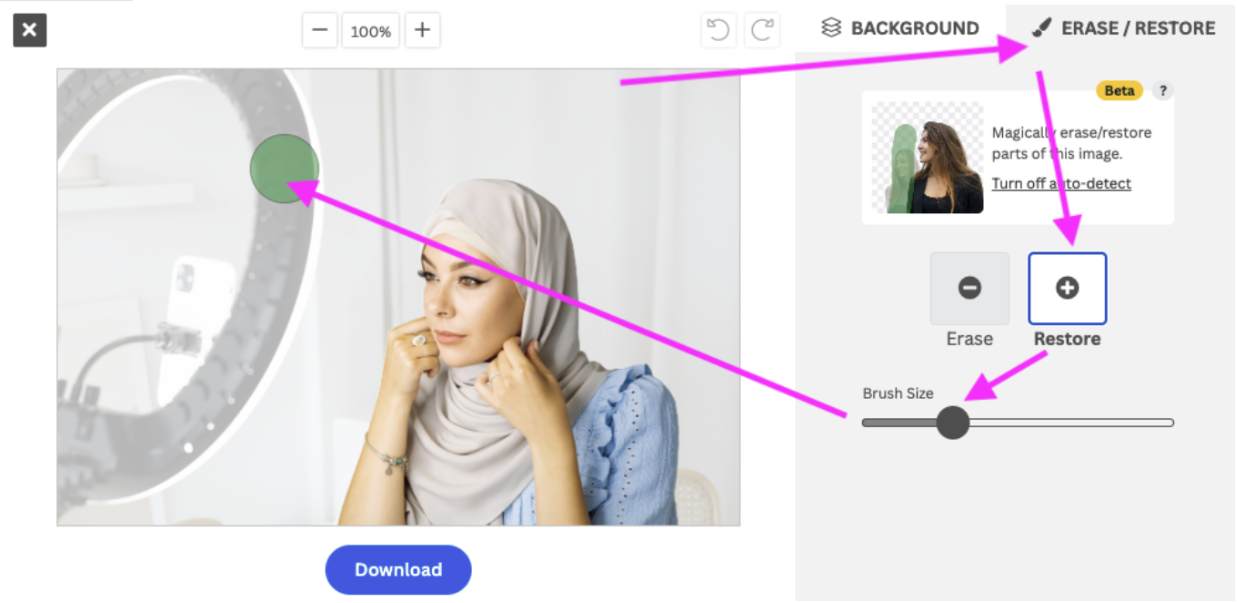
2. Вы увидите, что большая часть фона удалена, но объект, который вы, возможно, хотели сохранить, тоже исчез. Как штатив в нашем примере:
3. Чтобы вернуть штатив, перейдите в > Стереть/Восстановить и выберите > Восстановить. Затем отрегулируйте размер кисти под толщину ноги штатива.
4. Ширину инструмента восстановления можно проверить, просто наведя курсор на изображение. Подобрав нужную ширину, закрасьте объект (в нашем случае — кольцевой свет).
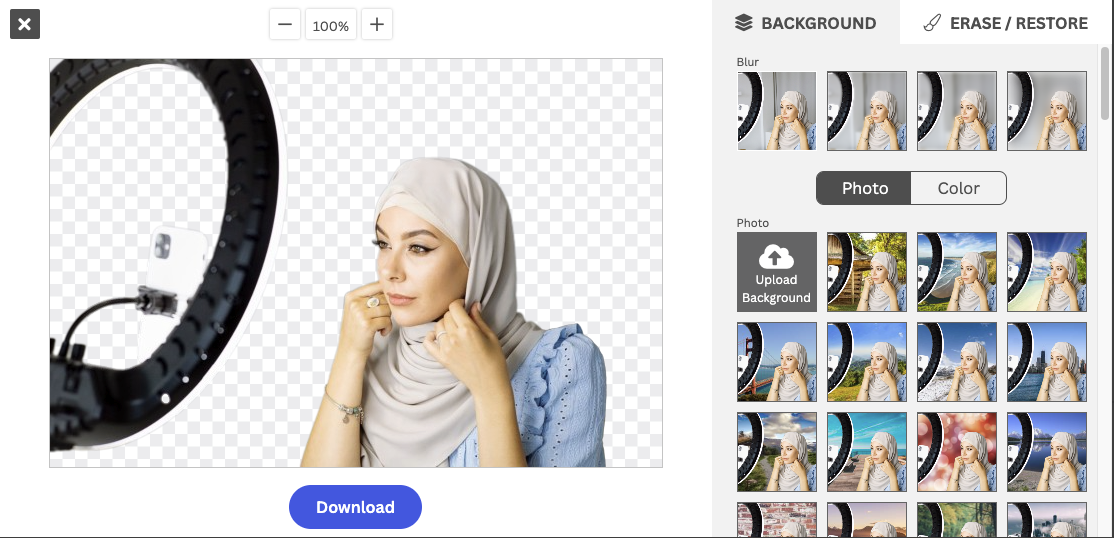
Вот как это будет выглядеть:
5. Хотите добавить цветной фон? Перейдите в > Фон > Цвет и выберите понравившийся. Вы даже можете добавить фирменные цвета своего бренда, перейдя в > Цвет и введя HEX-код.
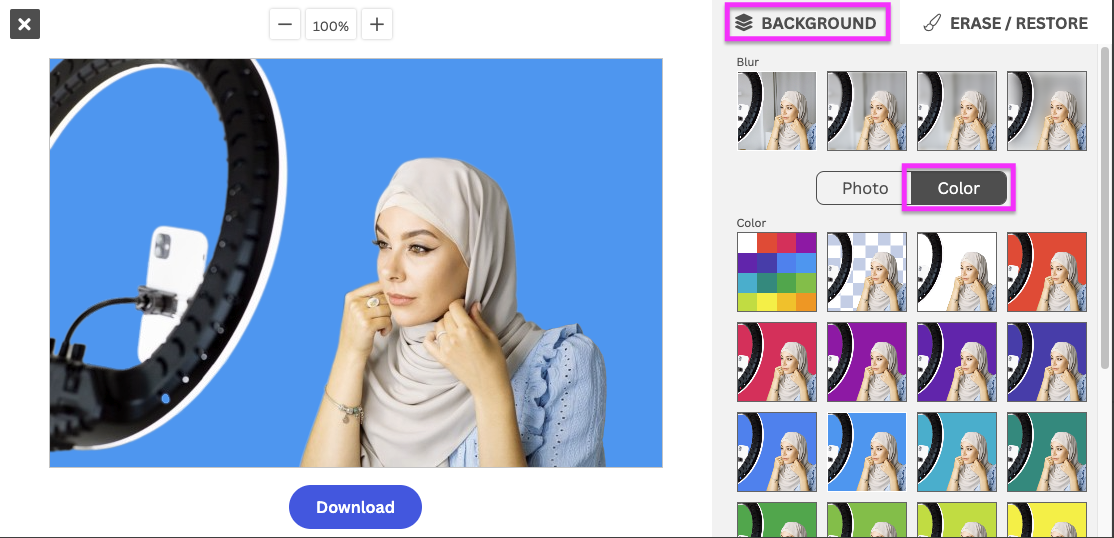
6. Et voilà! У вас готов идеальный контент-материал — он может стать основой для обложки YouTube или поста в Instagram. Просто нажмите > Скачать, чтобы сохранить на ноутбук.
Хотите узнать больше о создании обложек для YouTube? Читайте Как создать лучшую обложку для YouTube, чтобы увеличить просмотры видео.
Удаление выбранных фонов или объектов с изображения — самым простым способом
На этом наш обзор частичного или избирательного удаления фона с изображений завершён. От портретов до фотографий товаров, от мебели для концептов интерьерного дизайна до селфи для контента — с нужным инструментом всё это делается молниеносно.

Хотите попробовать Magic Brush? Переходите на remove.bg и удаляйте частичный фон прямо сейчас.
Комментарии
Пока нет комментариев.