We’ve all been in the situation where we’d like to save a photo without a background — but how to go about it? Maybe you want to create a collage, remove a pesky photobomber, or replace it with a different, more Instagram-worthy backdrop. Some images, such as logos, need transparent backgrounds to render properly.

If your mind jumps to Photoshop immediately, that's an excellent choice. With its multiple editing features, it’s a great go-to for designers, photographers, and creatives. You can save images with transparent backgrounds for videos, logos, posters, games, and more. However, you do have several options besides Photoshop, especially if you're on a budget.
Here's a step-by-step guide for creating and saving photos without backgrounds using Photoshop and an easier, quicker, more e-Bay friendly alternative you'll thank us for later: remove.bg.
Índice
How to create images with transparent backgrounds in Photoshop
Got your Adobe license ready? Let's get started. Here are the steps and tools you'll need to create photos without backgrounds with Photoshop. In case you need some extra steps, check out our latest post on how to make backgrounds transparent with Photoshop with a neat plugin.
Use the magic wand tool for simple backgrounds

Photoshop's magic wand tool is one of the easiest ways of creating a transparent background by converting images into layers. Once you've imported your image:
Click on the lock button on the right side of the photo thumbnail to unlock the image.
Your background is now Layer 0.
Click on the > Selection tool on the left-hand toolbar.
Select the > Magic Wand tool.
Click on the photo background.
Delete the background.
Tada! You’ve got your image with a new transparent background. Keep in mind though, the magic wand tool works best for images that have simple backgrounds without a ton of detail.
Use the quick selection tool for detailed backgrounds

You might have an image with many details in the background, such as this little guy pictured above. These can be difficult to remove completely without looking messy. For this, try the quick selection tool on Photoshop. Here's how you can do it:
Import your image into Photoshop.
Click on the lock button on the right side of the photo thumbnail to unlock the image.
Your background is again Layer 0.
On the left-side toolbar, click on the > Selection tool.
Select the > Quick Selection tool.
Use your mouse to move the tool around the image dimensions.
Click on the > Select option on the top toolbar.
Select the > Inverse option. This will select only the background.
Delete the background.
And there you go, a beautiful new image without the background details. The quick selection tool is a great option because of how easily the software captures the edges of the image you want, even if you don't make a super detailed selection around it.
Use the quick removal method for highly detailed backgrounds

Some images can be so detailed that it's difficult to select the elements you want accurately, even with the quick selection tool. But have no fear — here's another easy option for creating transparent backgrounds out of highly detailed images. Here are the steps for using the quick removal tool:
Import your image into Photoshop.
Click on the lock button on the right side of the photo thumbnail to unlock the image.
Your background is again Layer 0.
On the top toolbar, click on the > Window menu.
Select the > Properties option.
Click on > Quick Actions.
Click on > Remove Background.
How to save photos with transparent backgrounds with Photoshop
Once you're done editing, you need to ensure you've selected the right format in which to save your image. If you want to save your new image with its transparent background, choose either TIFF, PNG, or GIF formats. These formats support image transparency.
Should you save your beautiful new image as a JPEG file? Bad idea. JPEG formats don't support transparent backgrounds and will save your new image with a white background instead. If you did save your image as a JPEG by mistake, don't worry — here's a helpful article by remove.bg on how to remove a white background in Photoshop.
Here are the steps to save images with transparent backgrounds with Photoshop:
On the top toolbar, select the > File menu.
Select the > Save As option.
From the Format options, choose either TIFF, PNG, or GIF.
If you've picked the GIF or TIFF format, make sure to check the > Save Transparency box on the bottom left.
If you've picked the popular PNG format, make sure to choose the right image size.
Hit the > Save button to download your new image.
Having fun Photoshopping? Or are you pressed for time and finding the many steps difficult? As promised, here's the quick, easy, and 100% intuitive alternative to Photoshop which can save photos without backgrounds with minimal steps: remove.bg.
How to save images with transparent backgrounds with remove.bg
Remove.bg is one of the most cost-effective and efficient add-ons to your workflow. Read on further to figure out how to use it to create and save photos with transparent backgrounds, easy peasy:
Head on over to remove.bg.
-
Drag and drop (or upload) your image onto the site. Here's an example, in case you don't believe how easy it is:

-
Let remove.bg work its magic and create a transparent background for you in around 5 seconds and 100% automatically.
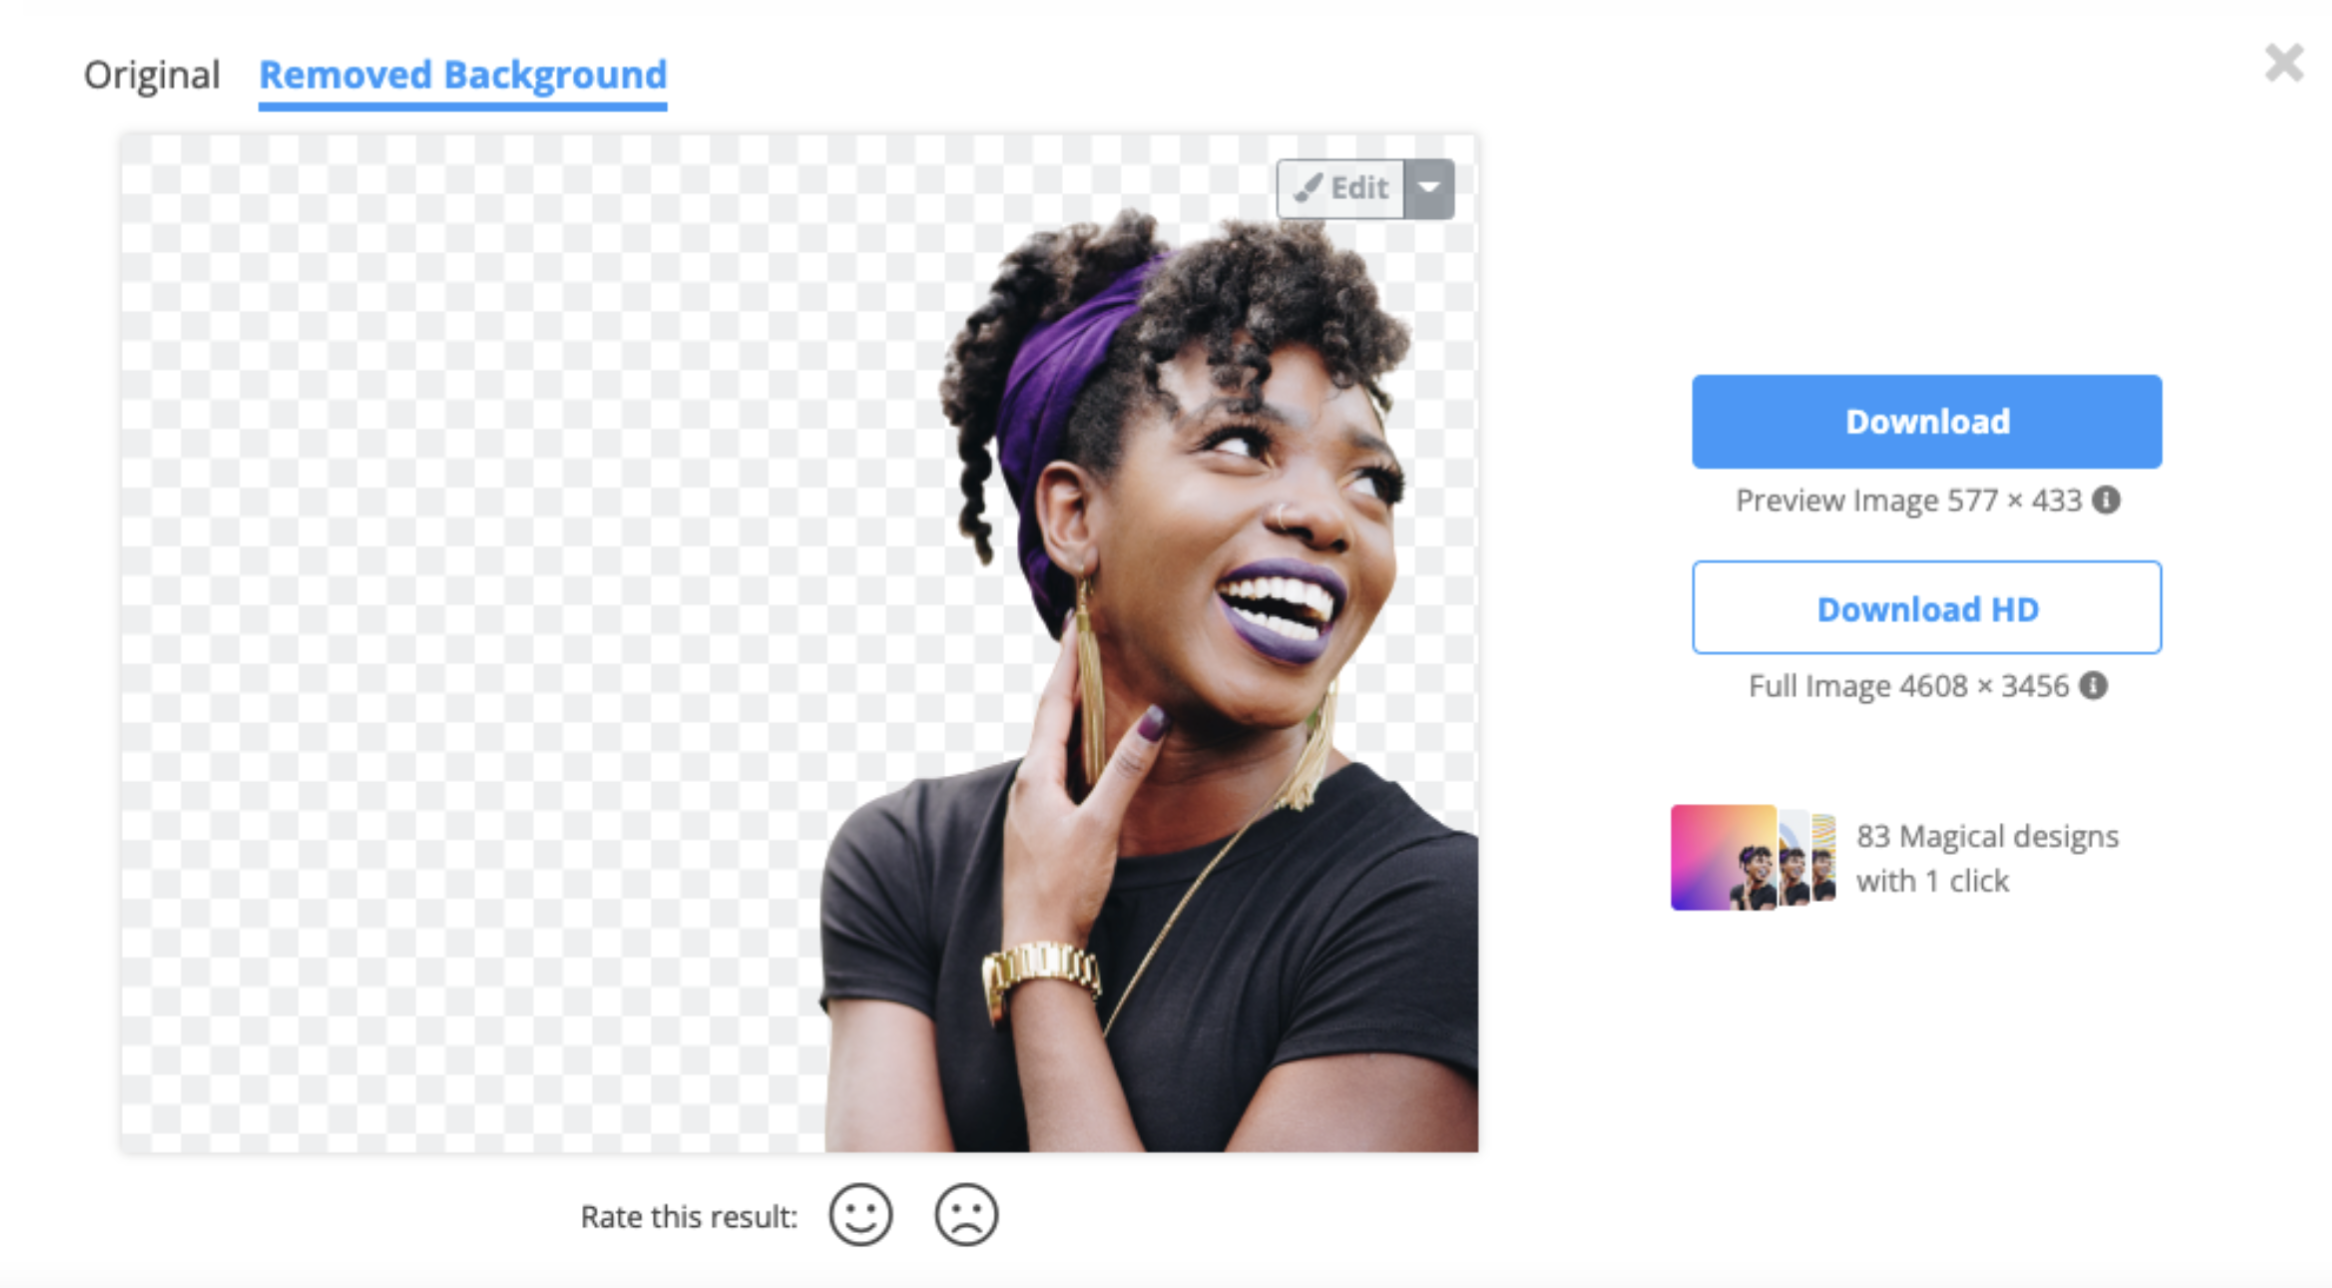
Simply click > Download to save the image to your device.
Enjoy your beautiful new image and transparent background!
remove.bg saves your images as PNG files by default, so you don't need any extra steps to select the correct format. Customizing your images, removing backgrounds without a hair out of place, and saving your photos has never been easier.
Create and save images with transparent backgrounds
Creating and saving an image with transparent background doesn't need to be a complicated process! Here's a recap on how to do that easily:
Use Photoshop's Magic Wand, Quick Selection, or Quick Removal tools, depending on whether you have a simple background or a more detailed one.
To save your images, remember to pick the TIFF, PNG, or GIF options.
If you are short on time, you can use remove.bg - just upload a photo and its background will be automatically removed.
You then need to click on Download, and your image will be saved as a PNG file.
Ready to get innovative, create transparent image backgrounds, and save your images properly for future use?
Comentários