Removing the background of an image is one of the most fundamental skills in photo editing. It allows you to isolate a subject from a busy background, create branded visuals like logos and graphics, or simply improve your profile pictures.

Whether you’re a marketer, designer, or content creator, mastering this skill opens the door to endless creative possibilities. If you prefer a hands-on approach, consider using photo editing software like GIMP. But if you’re short on time and want instant results, an AI-powered tool like remove.bg can do the job for you automatically.
Inhaltsübersicht
How to delete the background of an image in GIMP
There are five different methods to cut out an image in GIMP. We will briefly show you all of them. If you prefer to watch a video tutorial, check out this video.
Before we begin:
-
Open your image (File → Open).
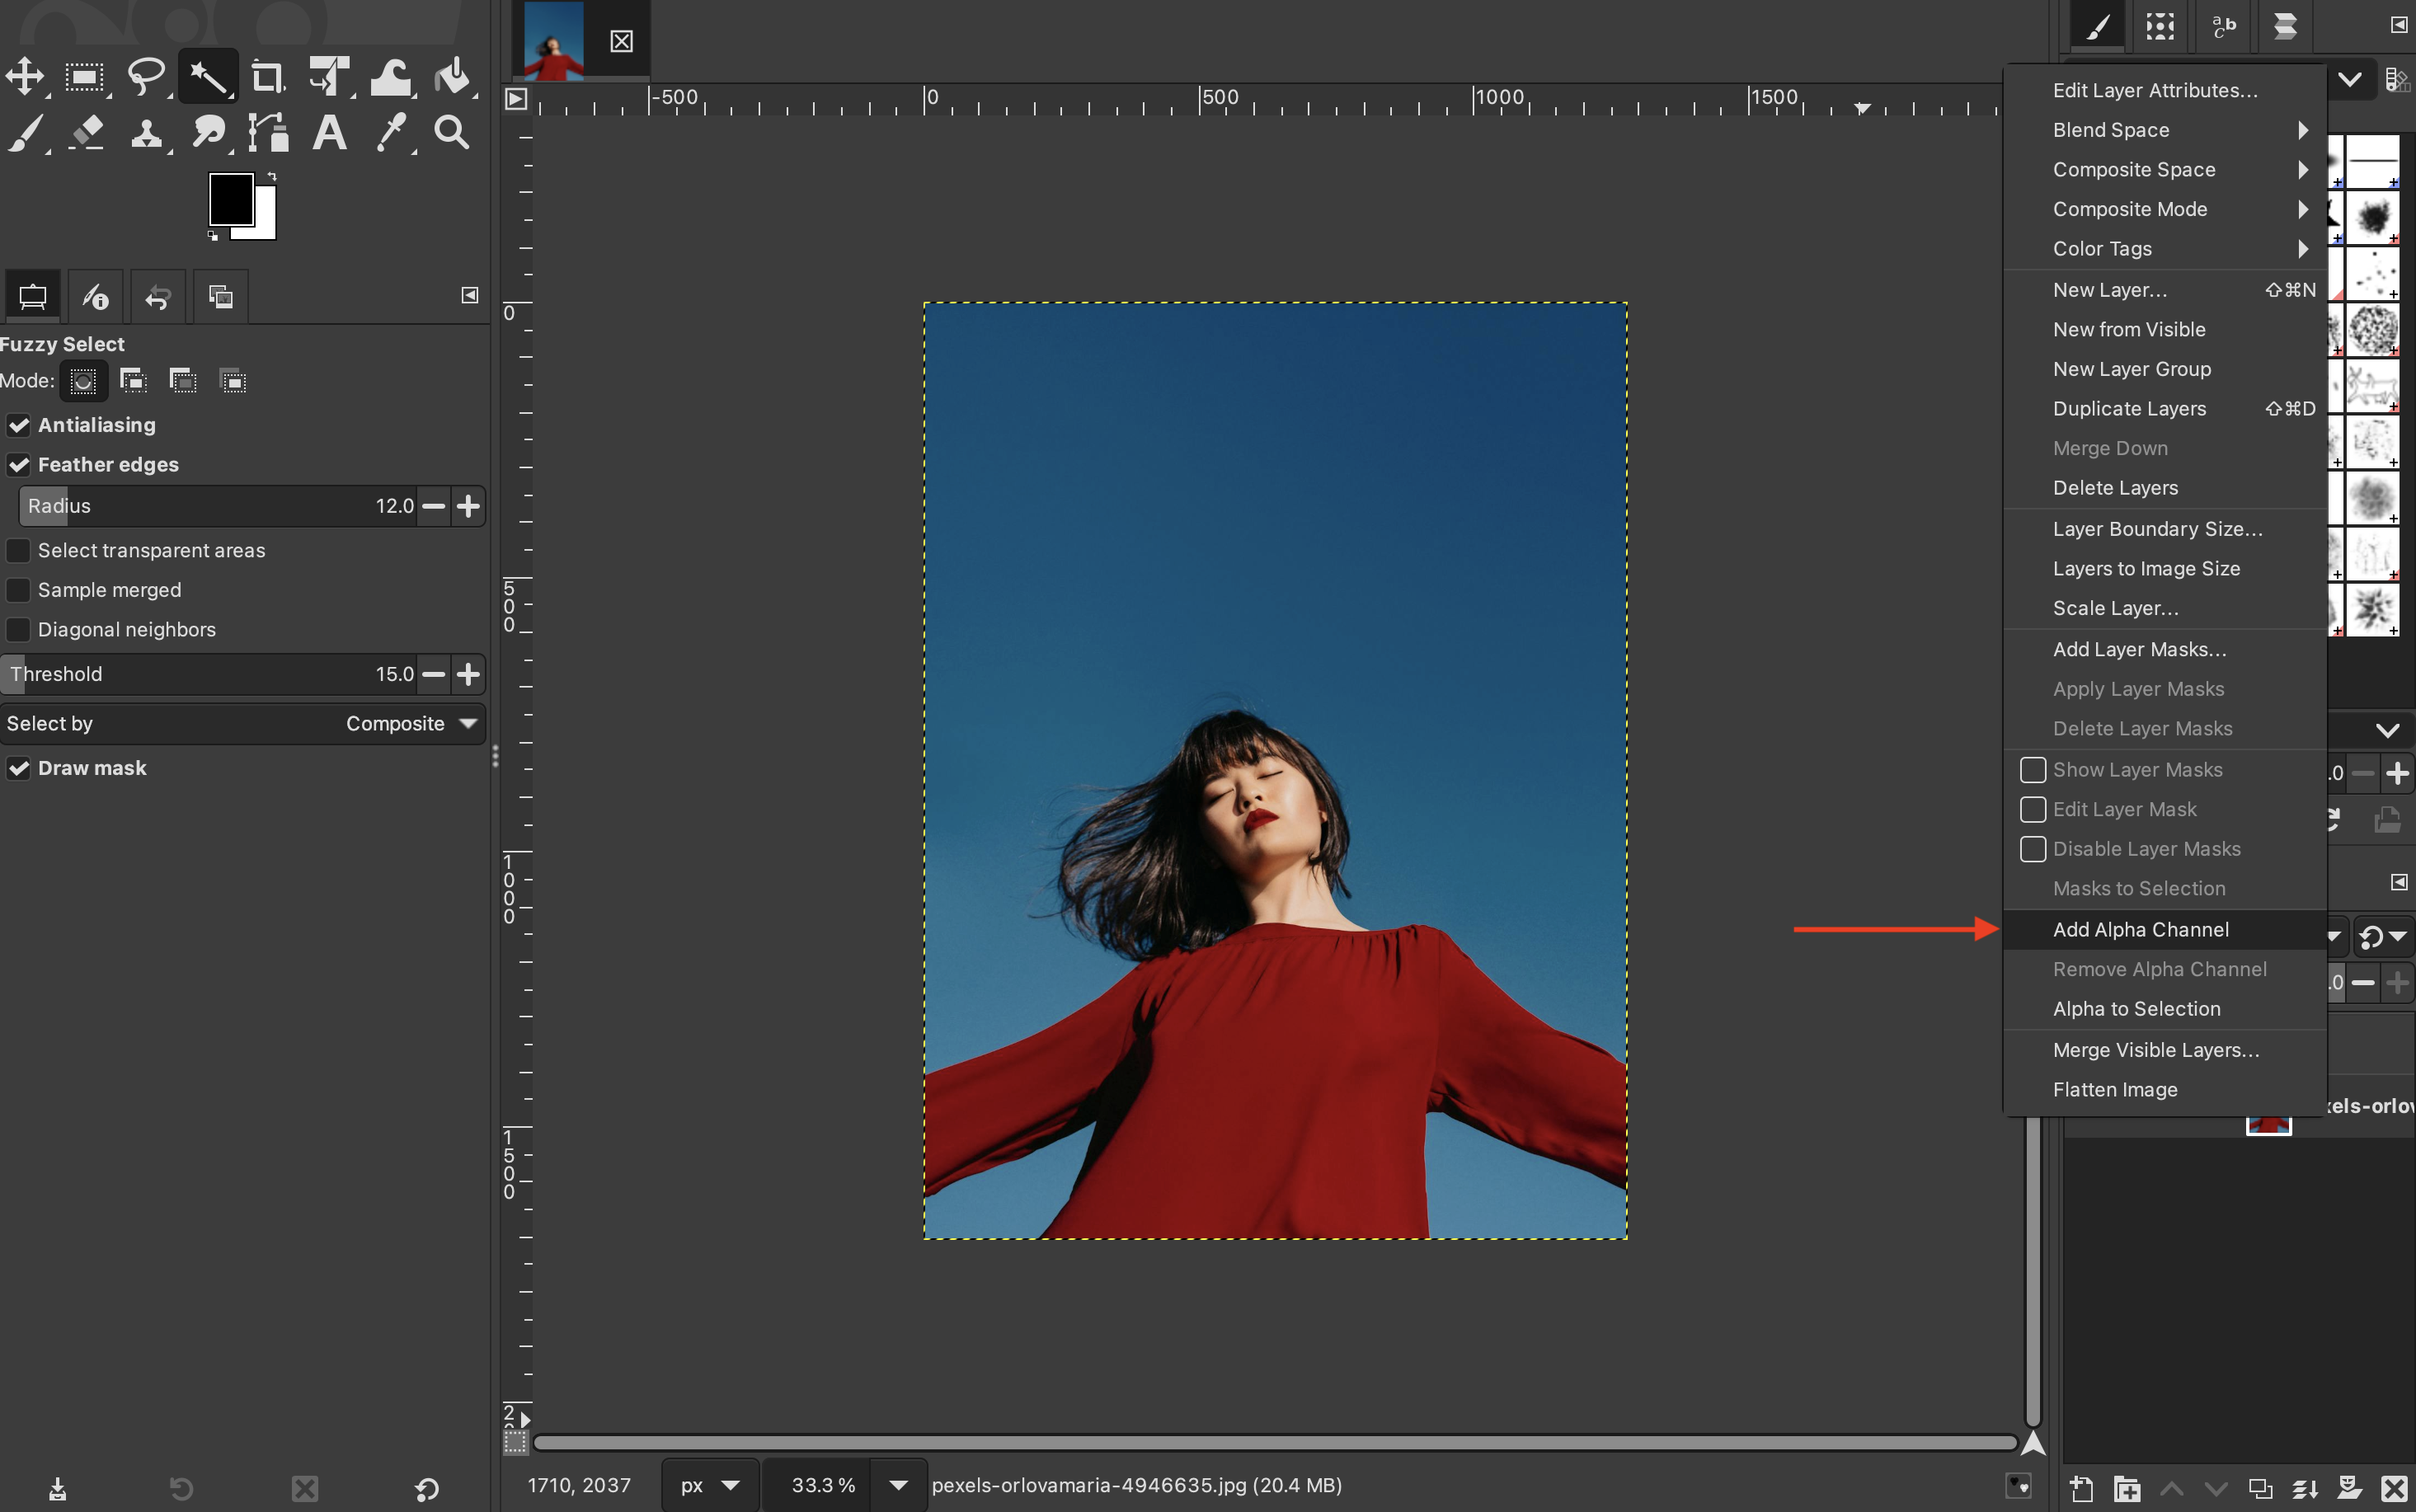
-
In the “Layers” panel, right-click your layer and select “Add Alpha Channel” (required for transparency).
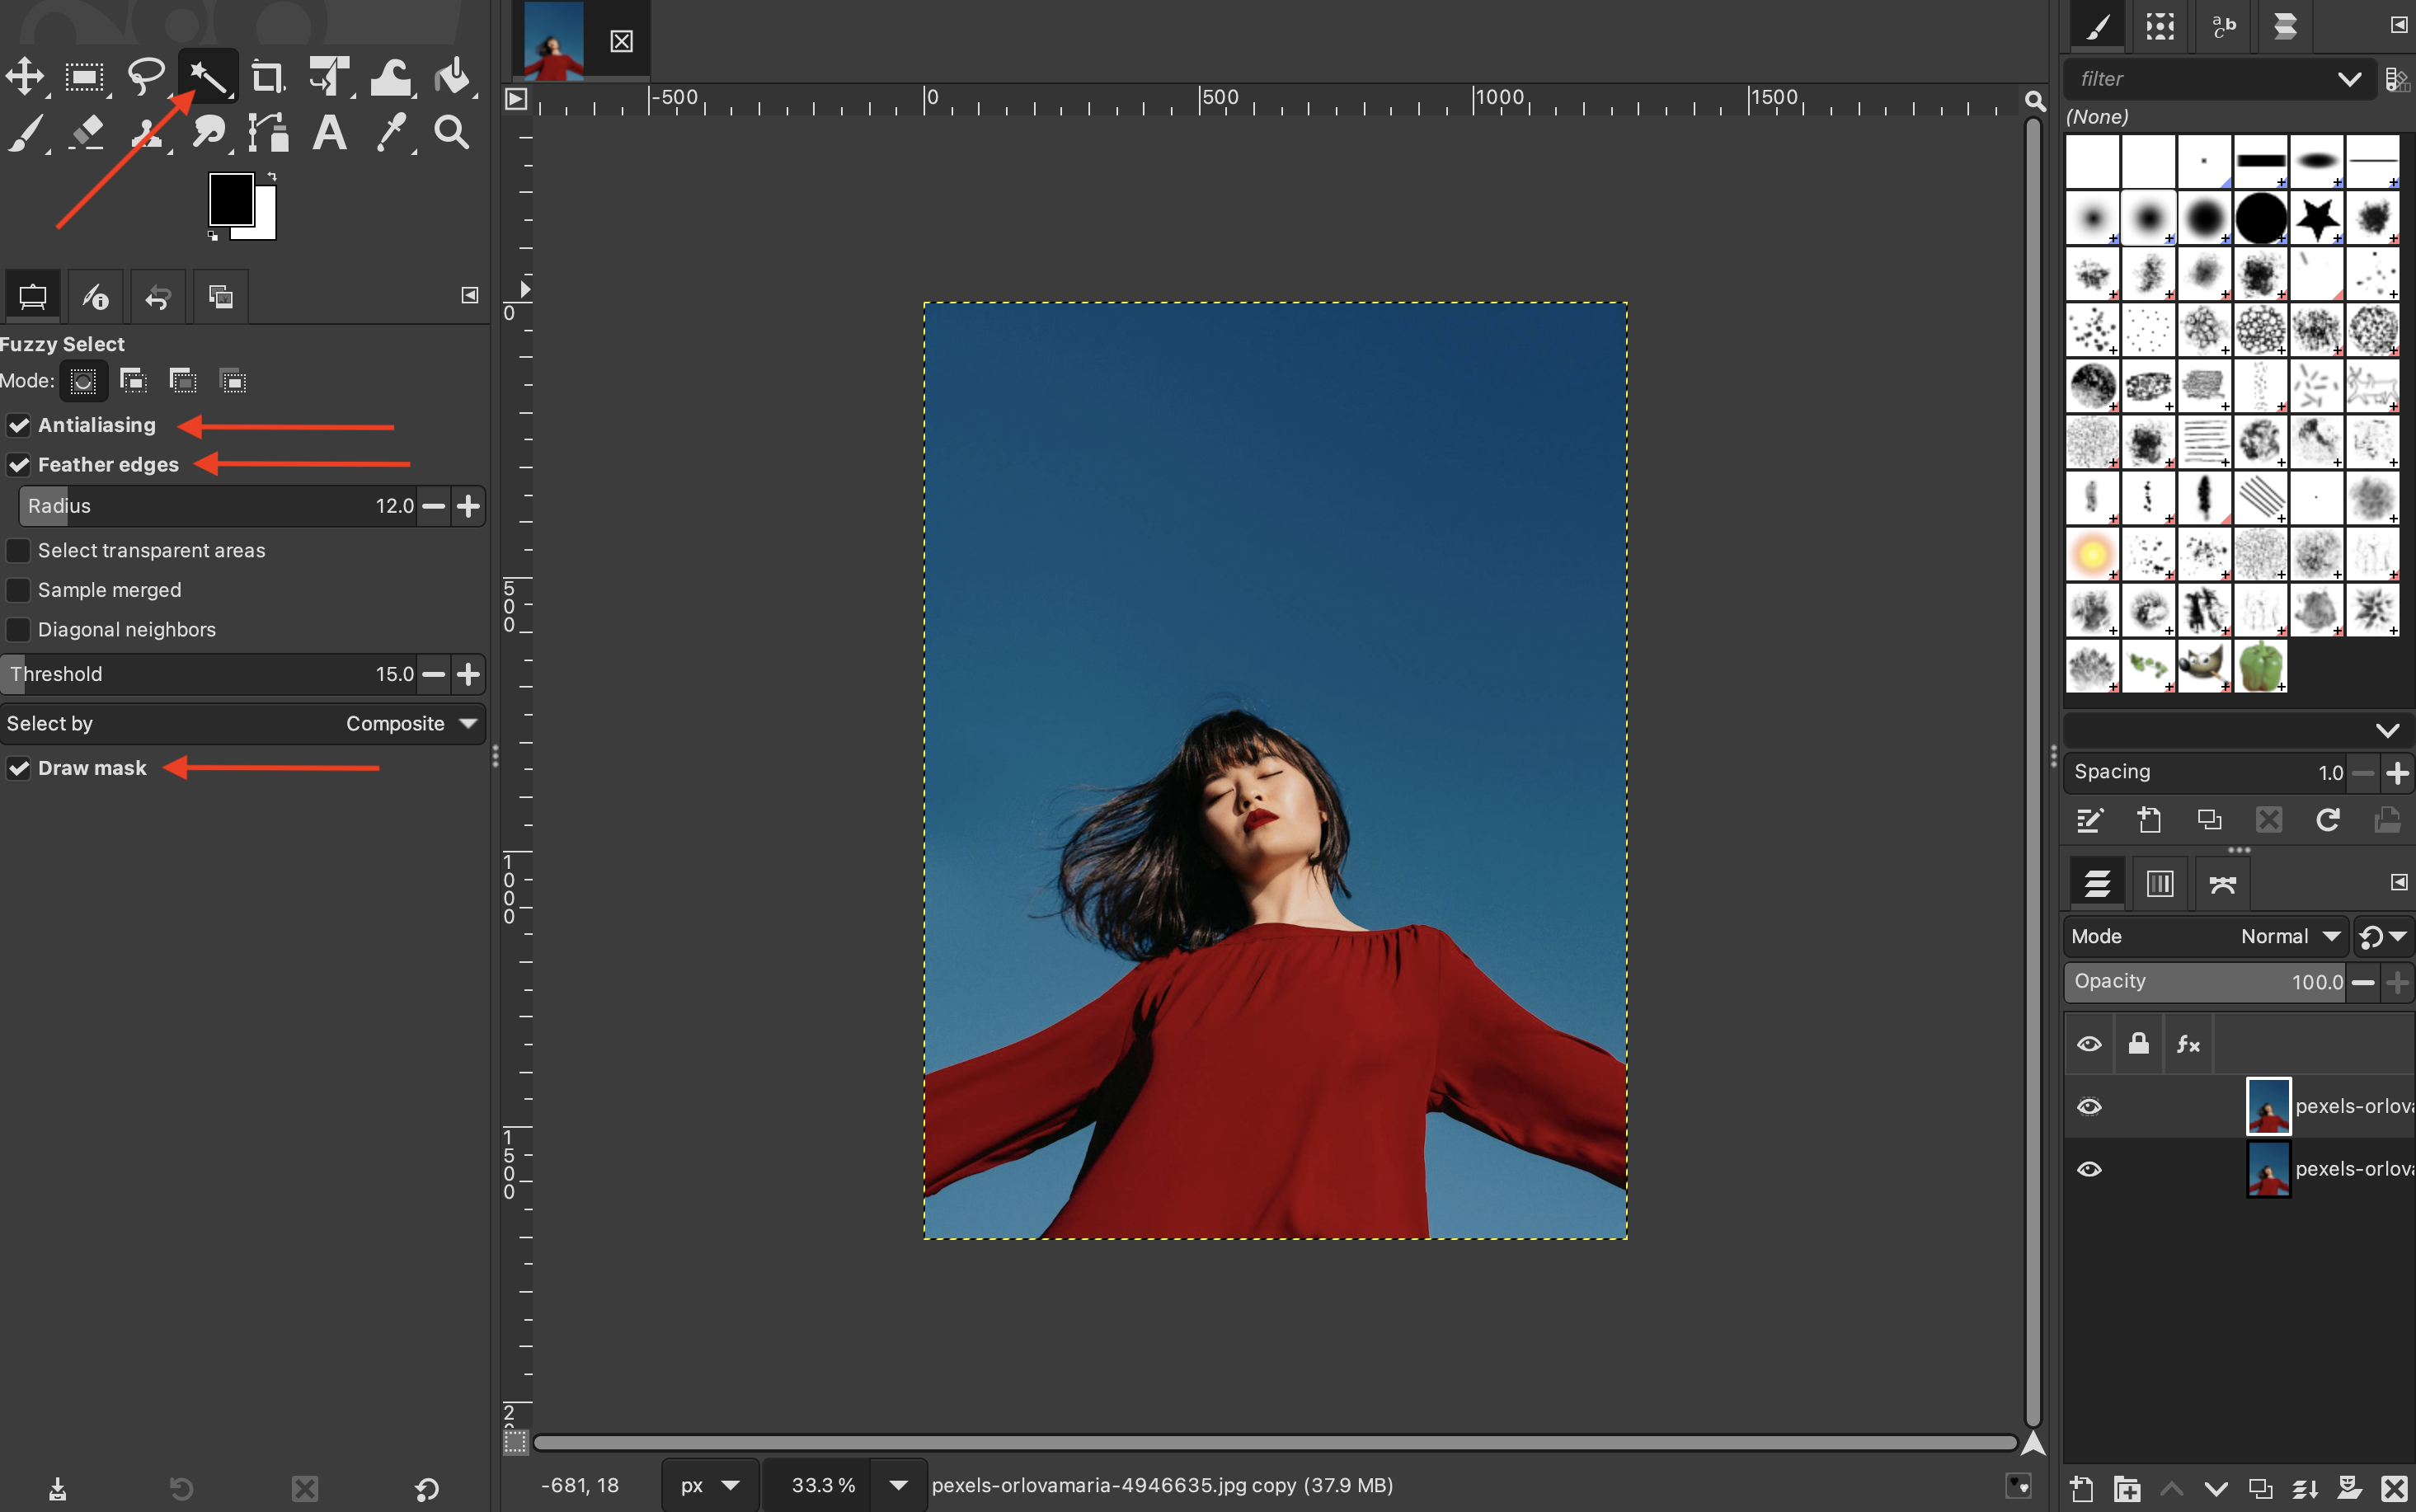
-
Duplicate the layer so you can always revert to it.

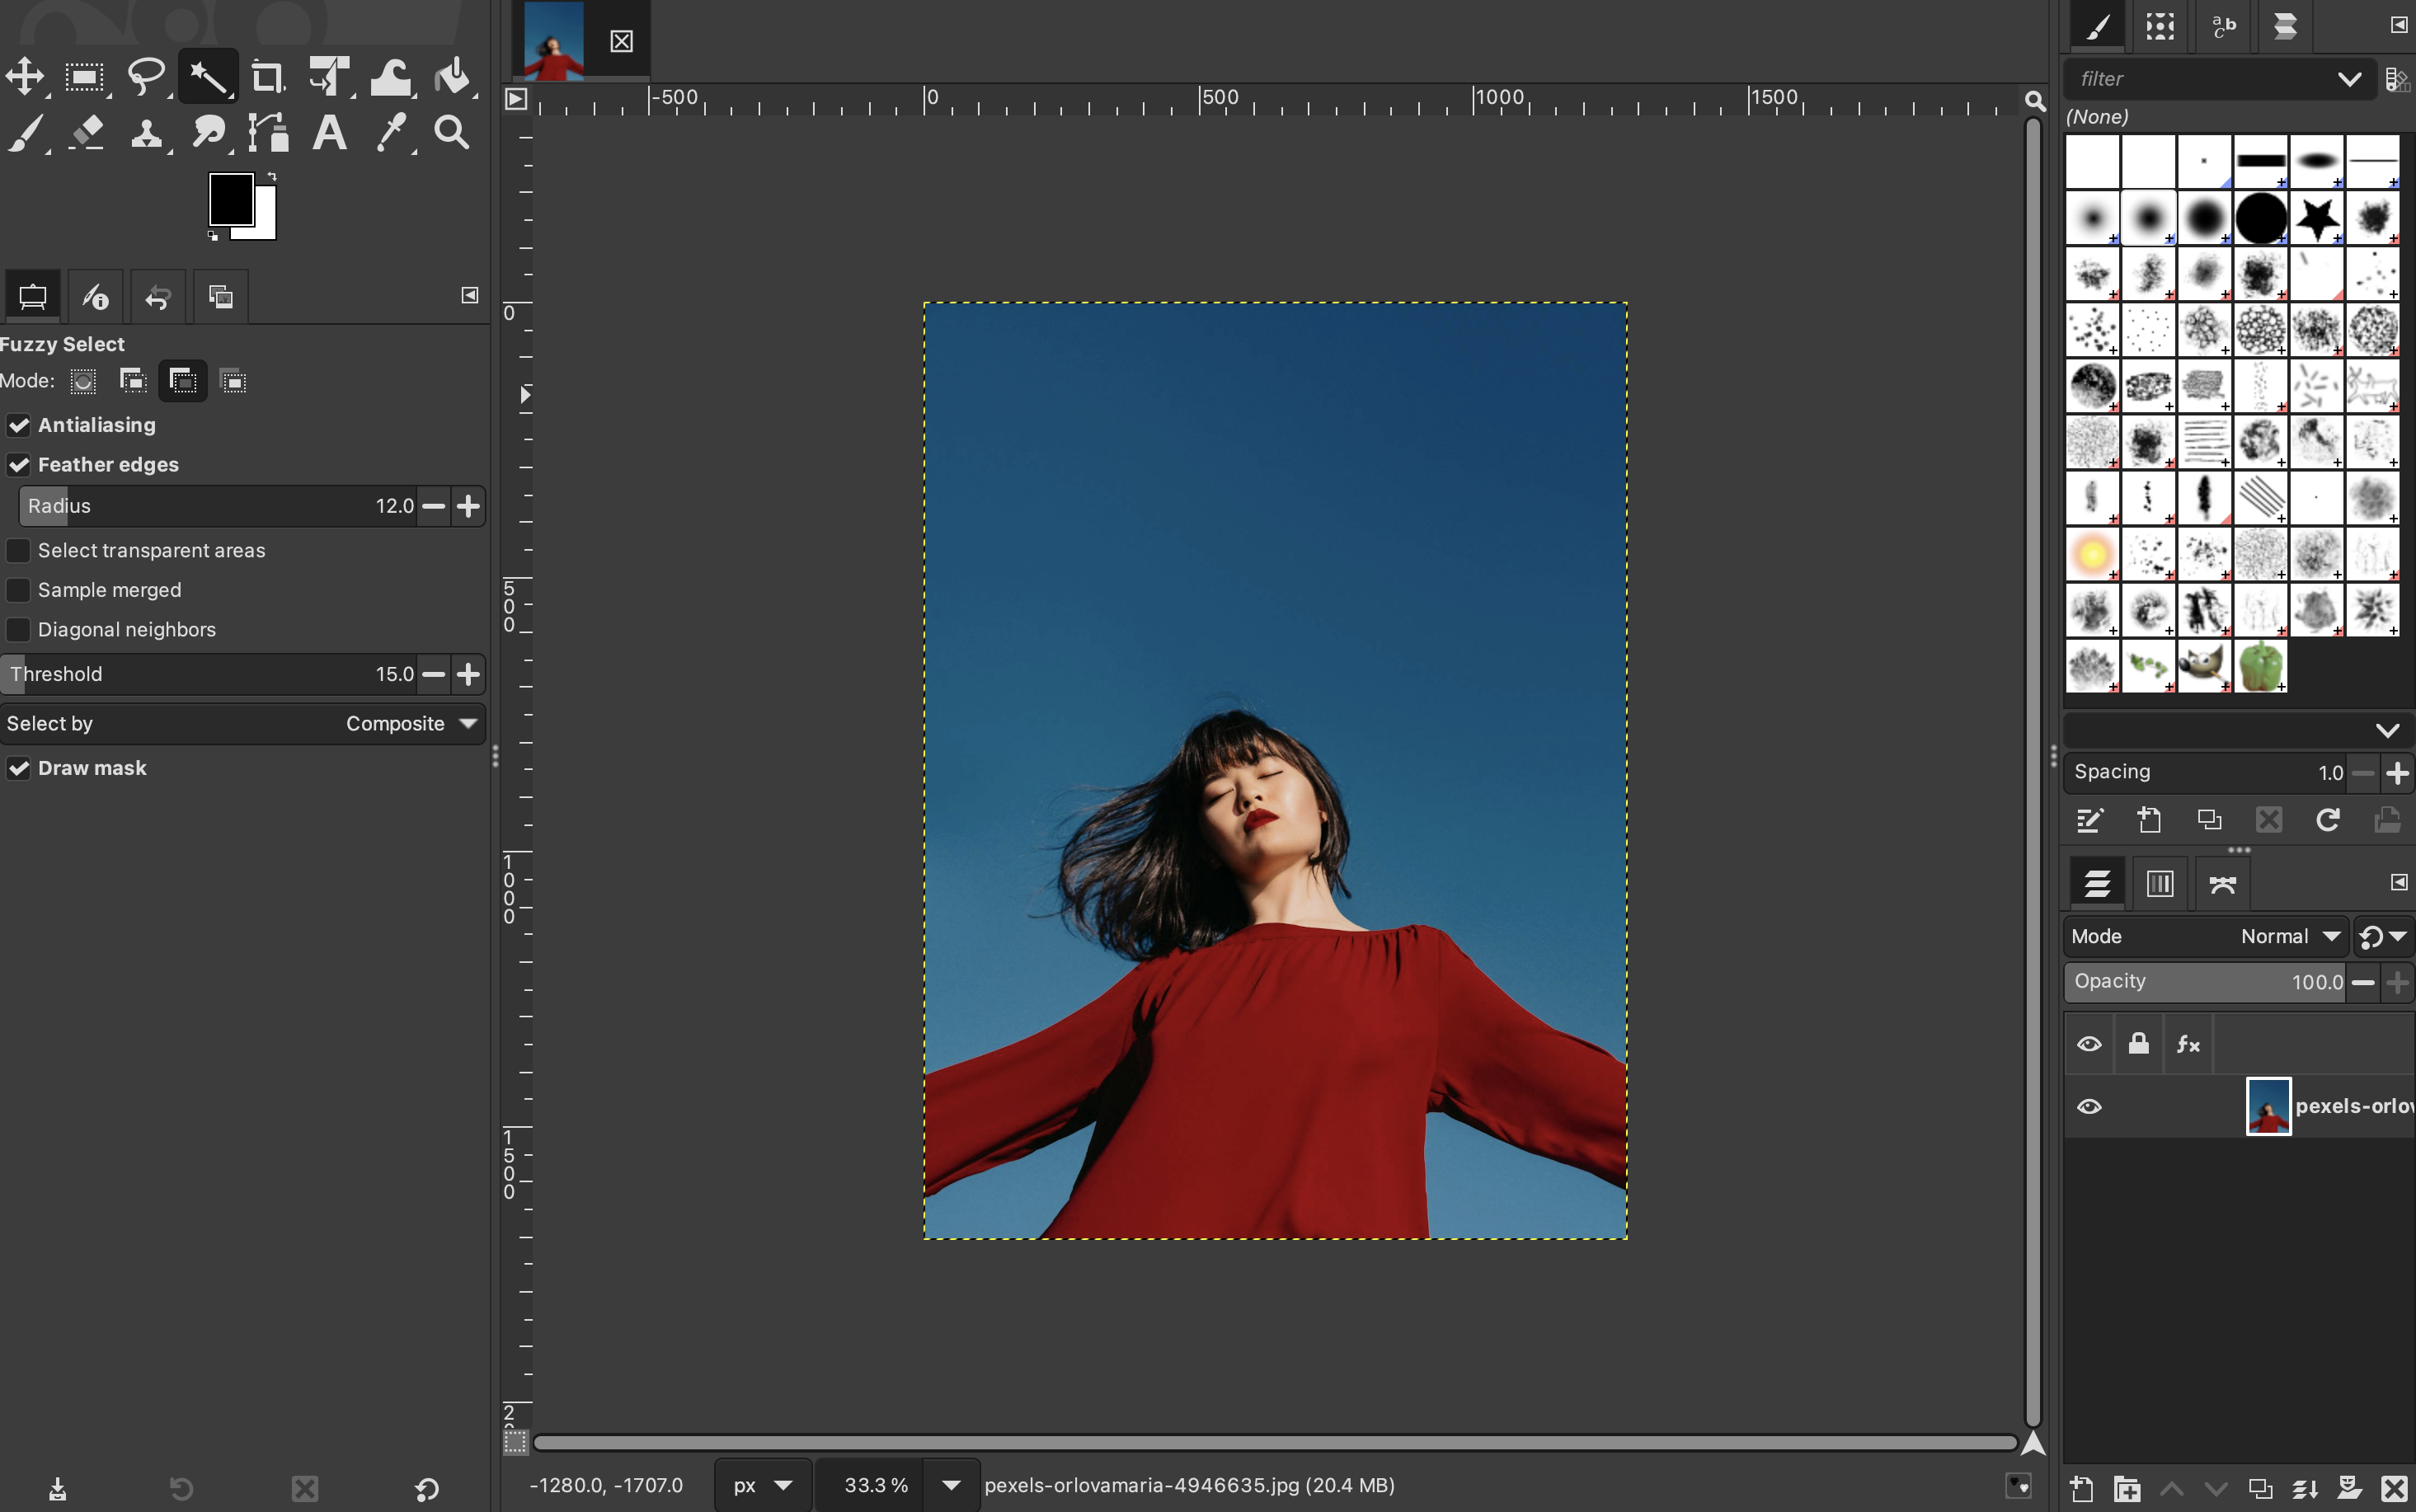
Method 1: Fuzzy Select
-
Select “Fuzzy select tool” (Magic Wand) in the toolbox. Ensure that “Antialiasing”, “Feather edges”, and “Draw mask” are all checked.
-
Once selected, click the background and move your mouse to add areas until all the background is selected. The colored mask represents the selection you are dragging.
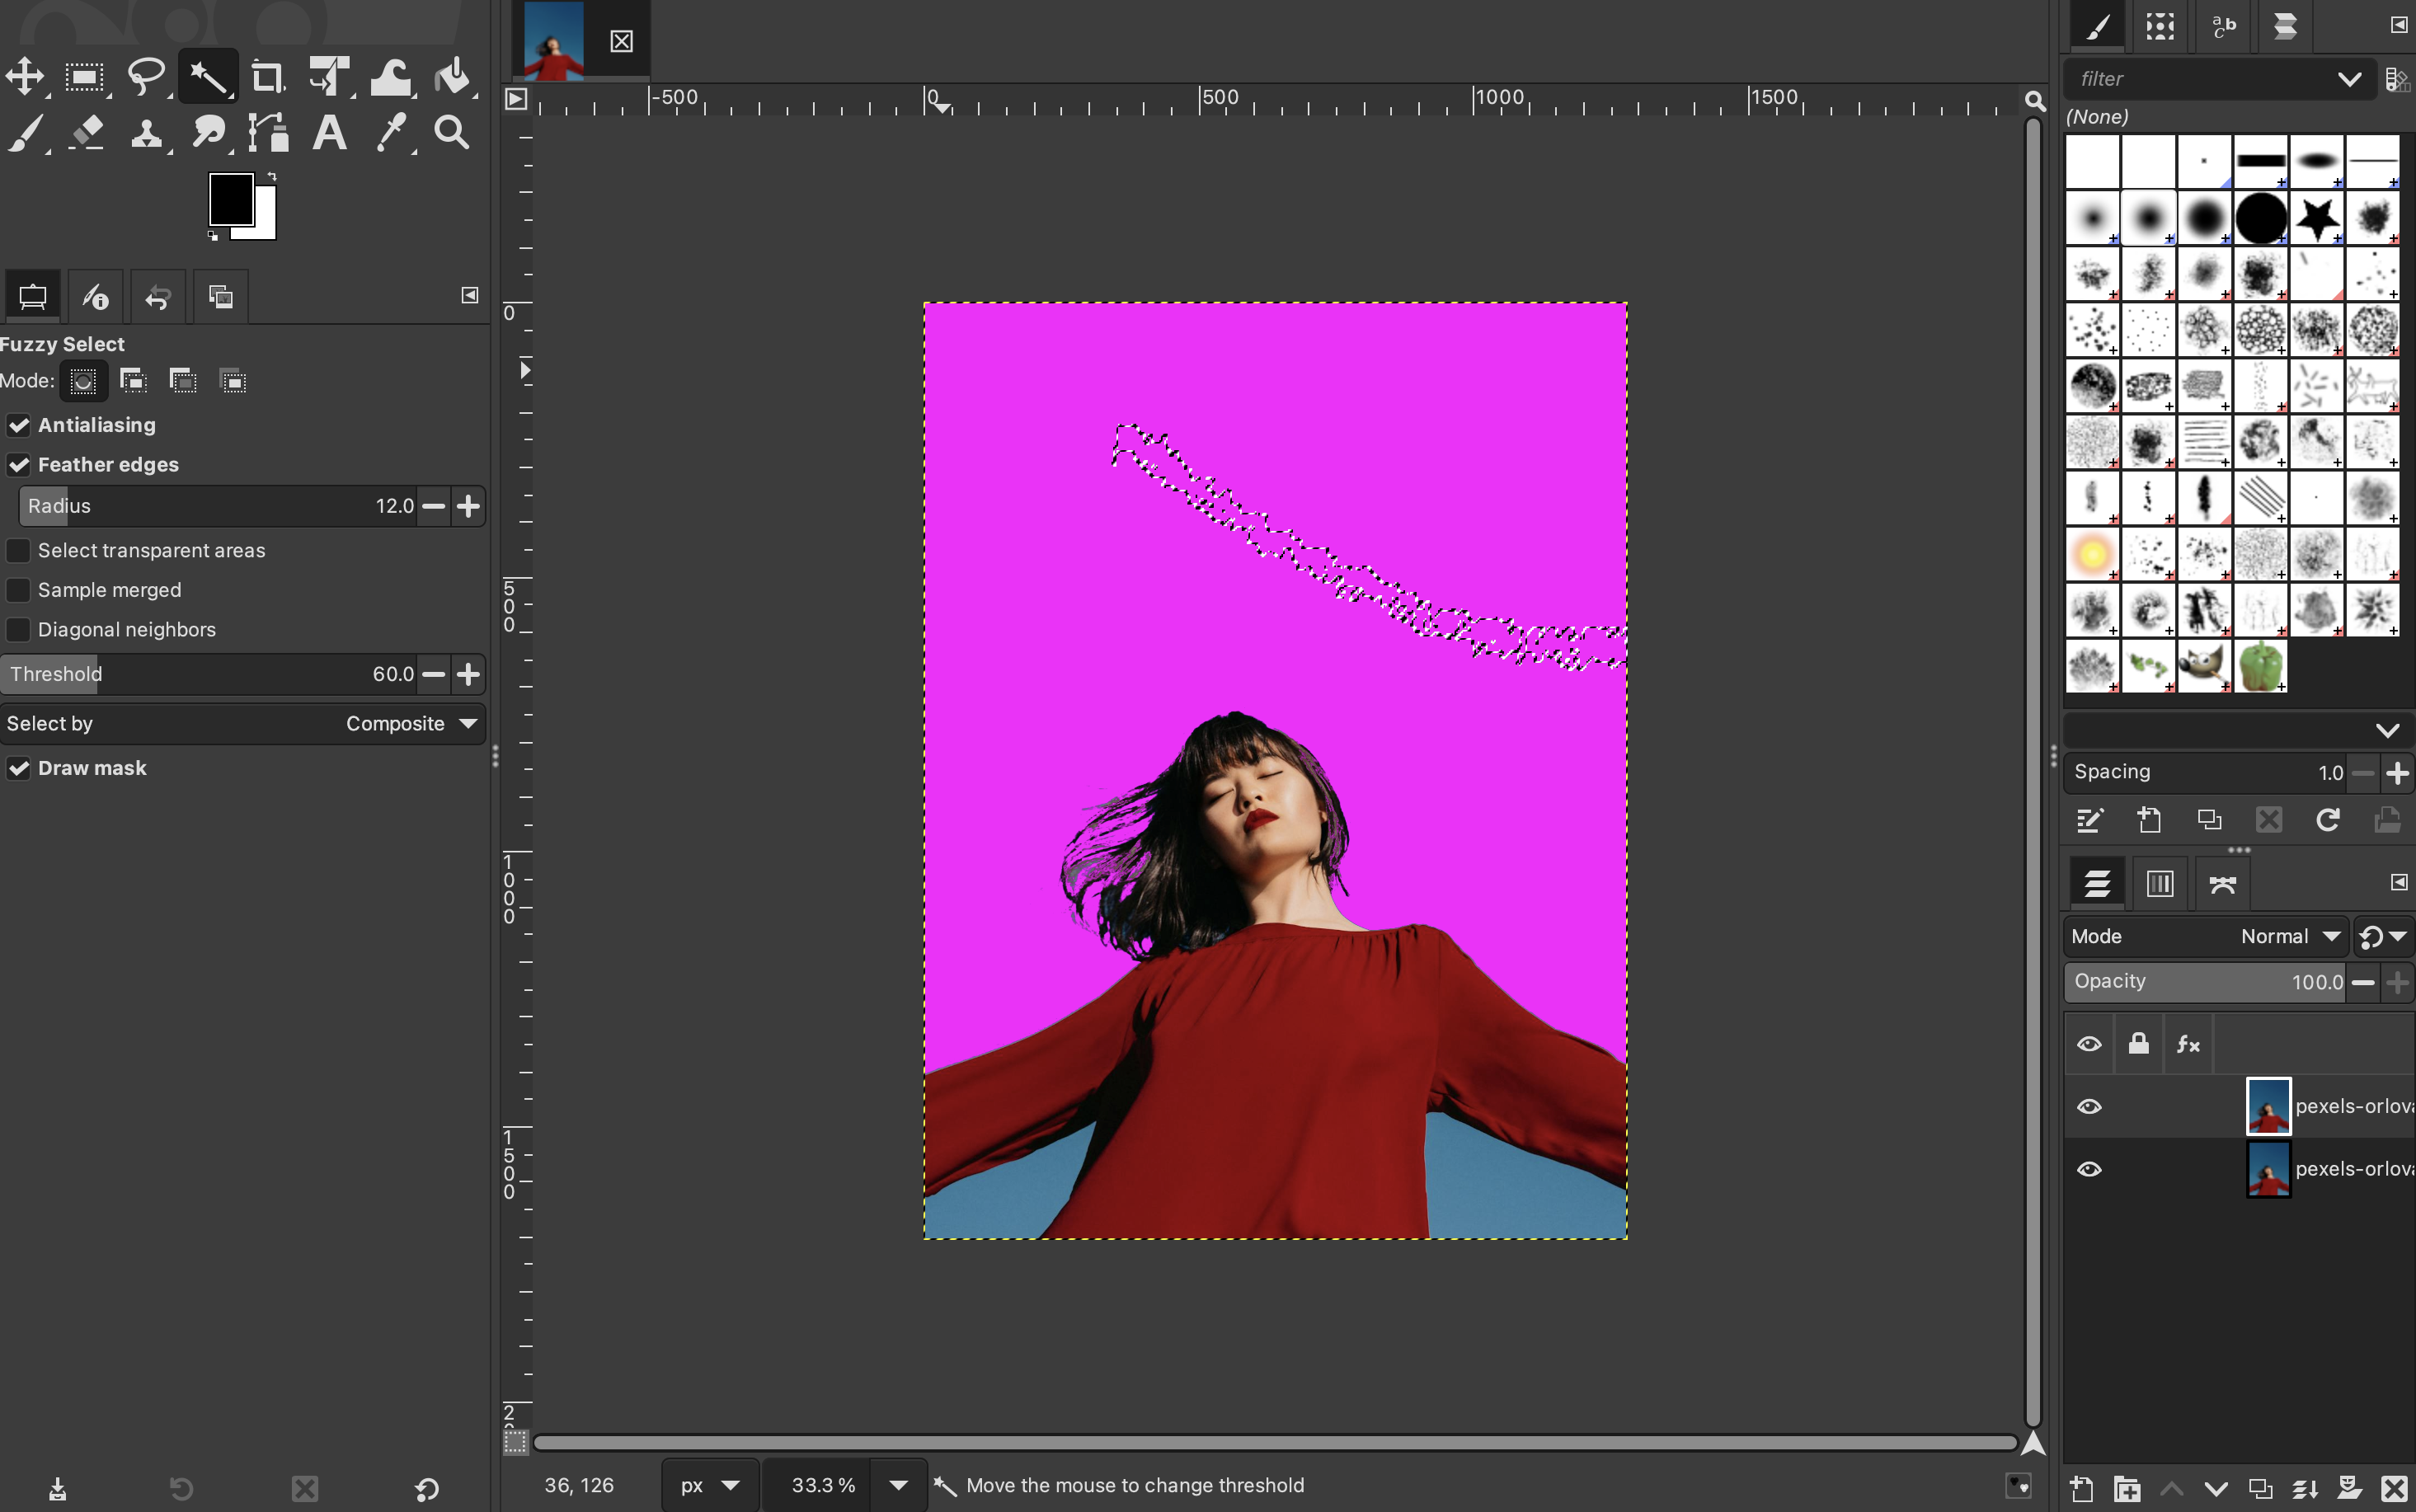
-
Once you are happy with your selection, press "Delete" on your keyboard.
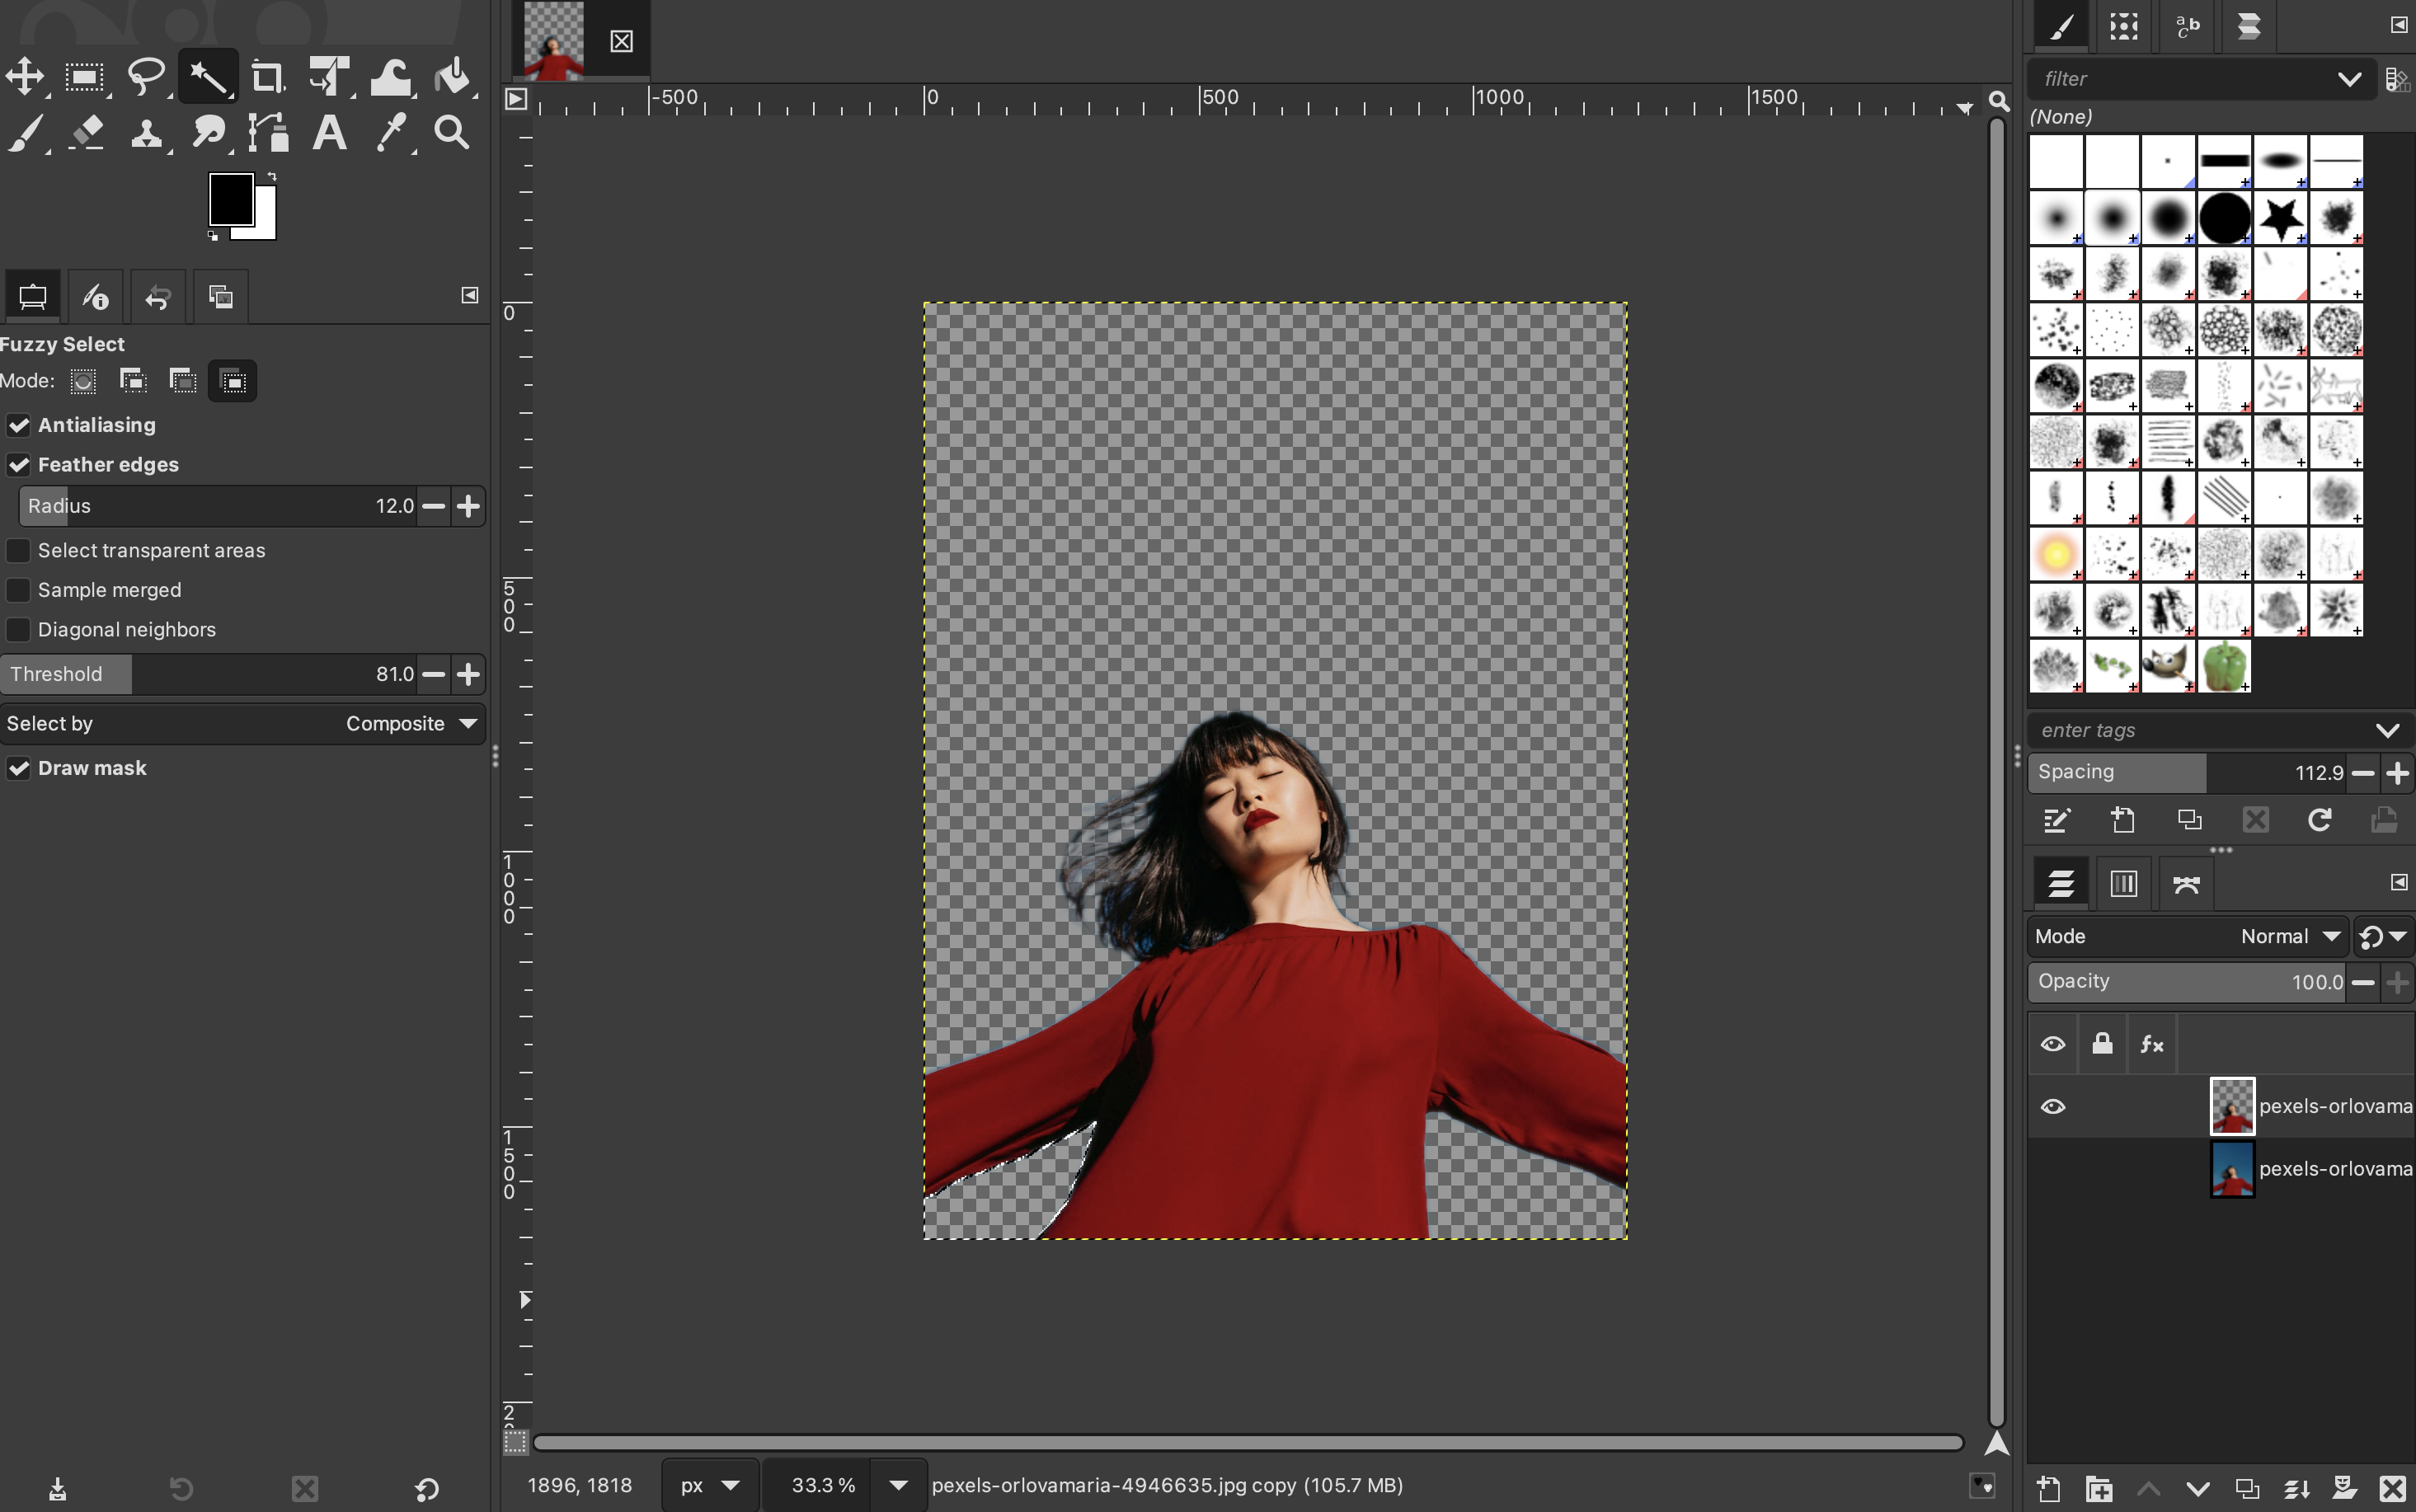
You may have to repeat this process multiple times, depending on the composition of your image.
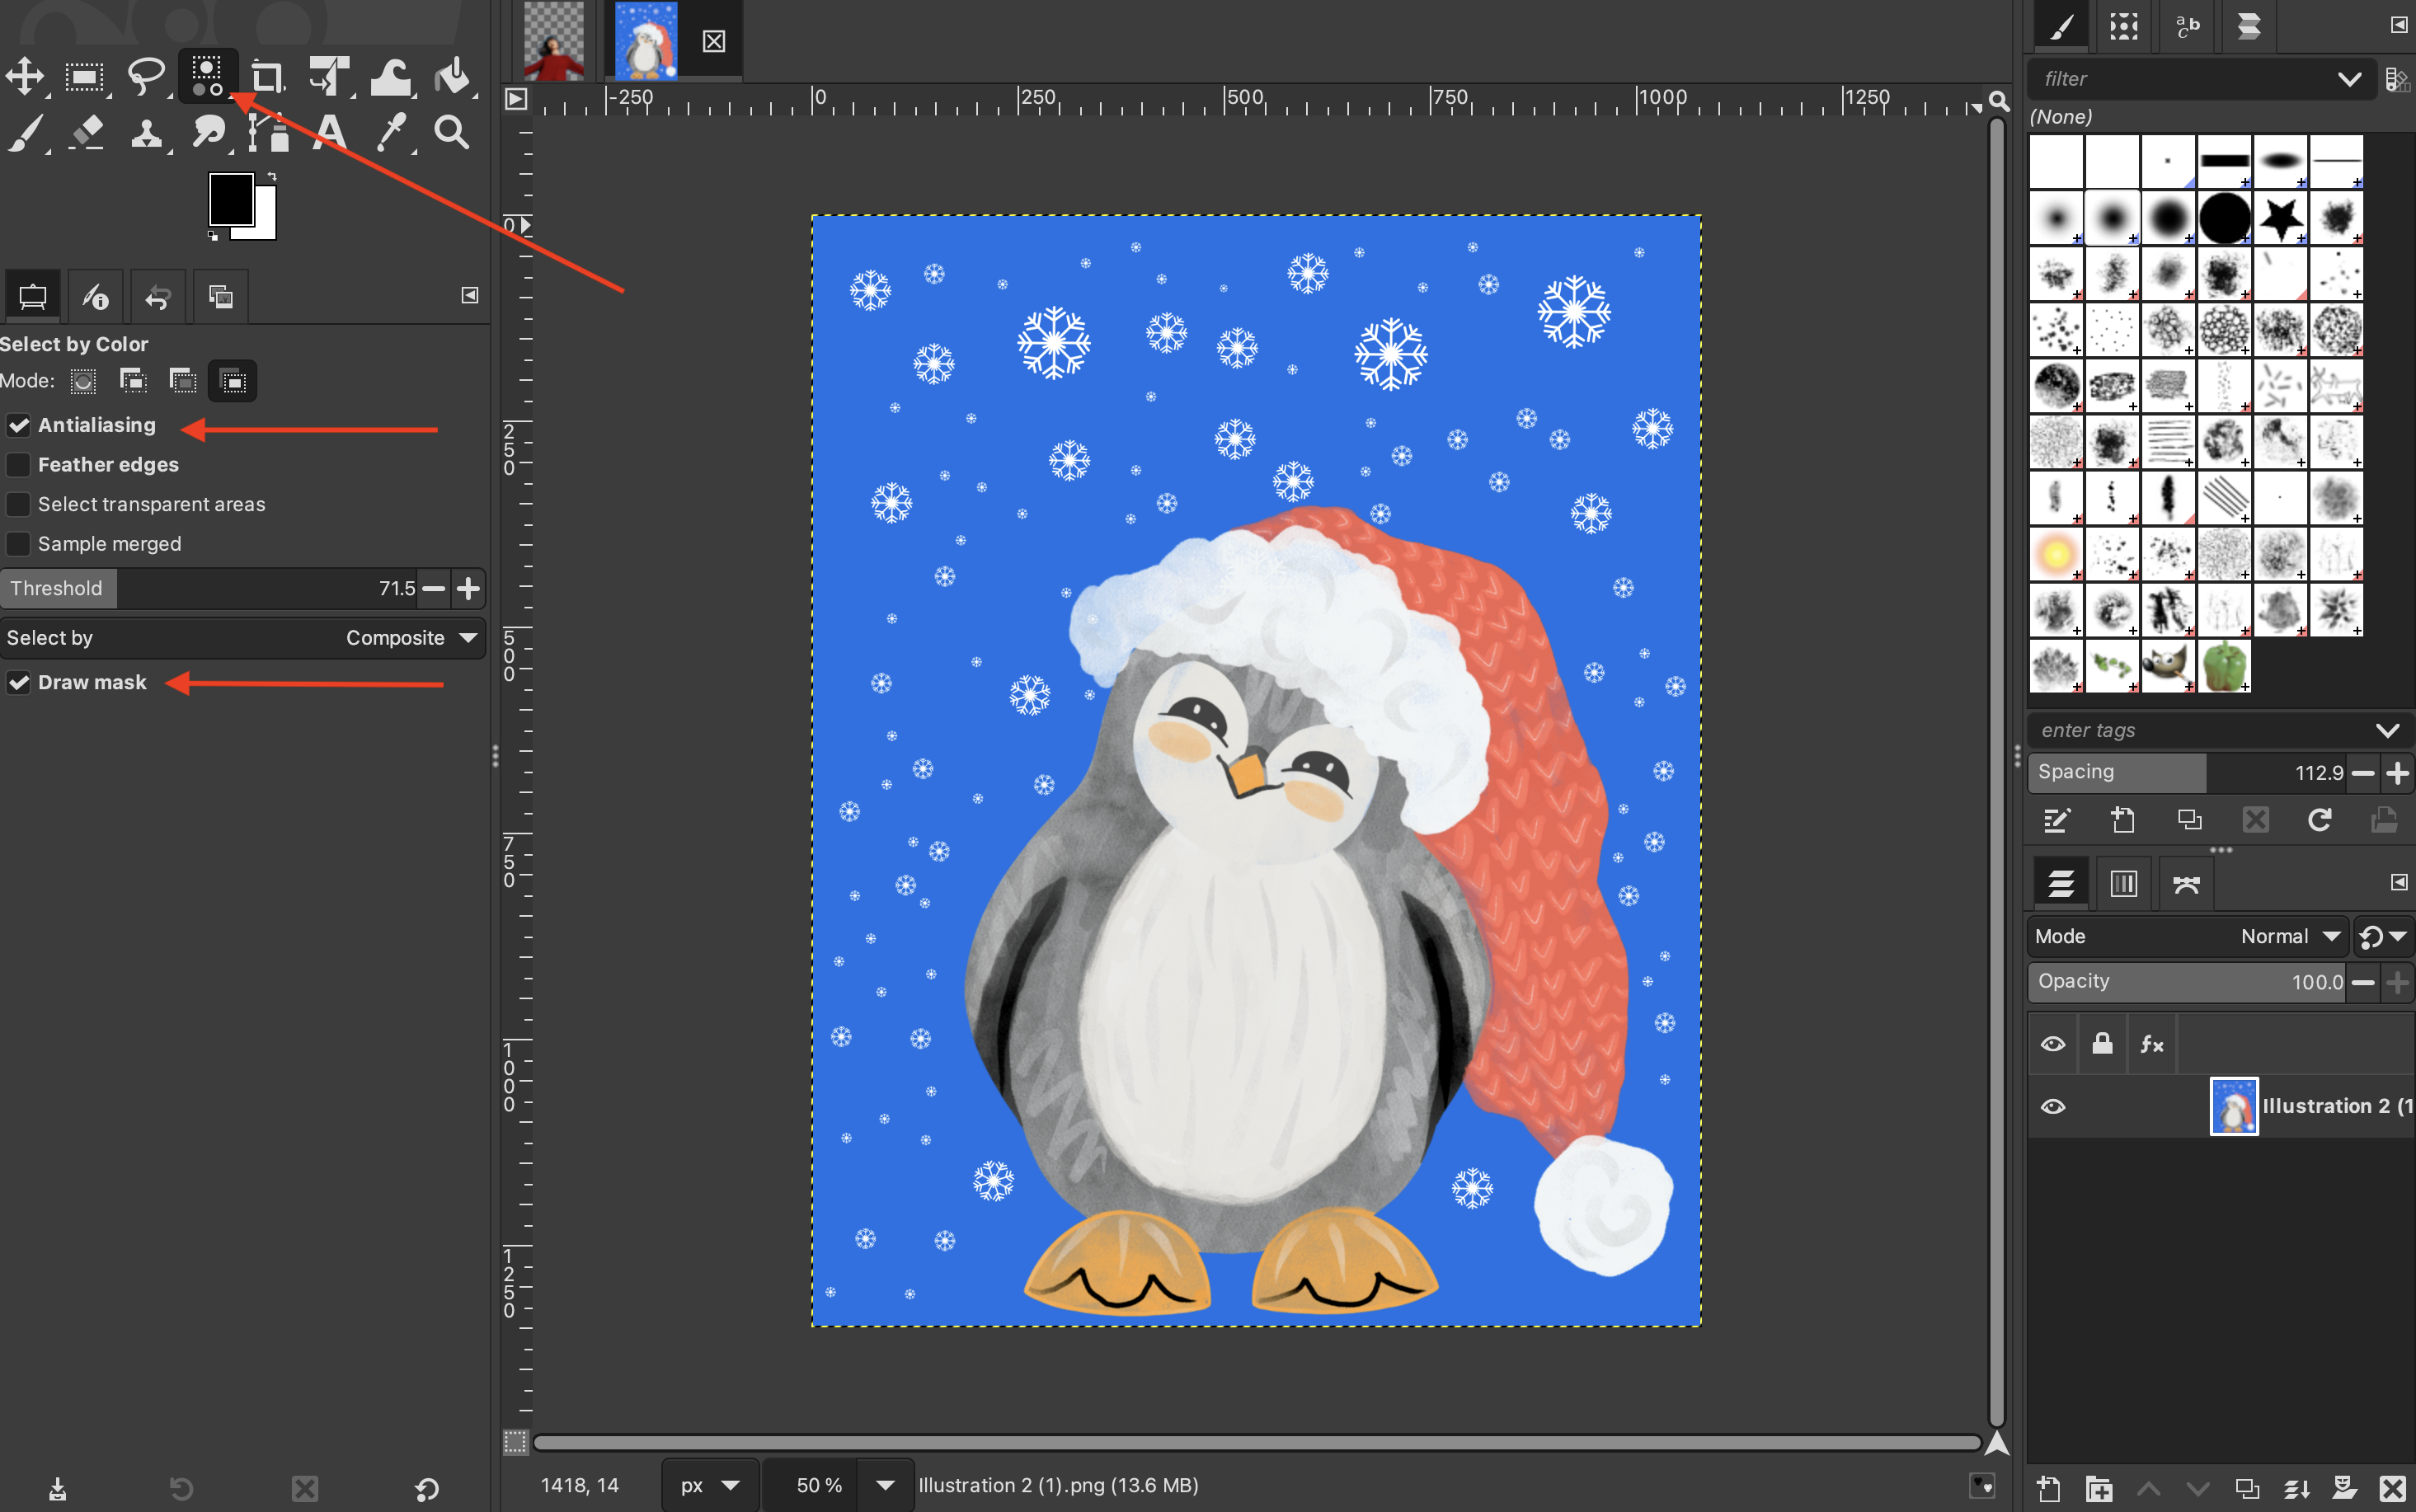
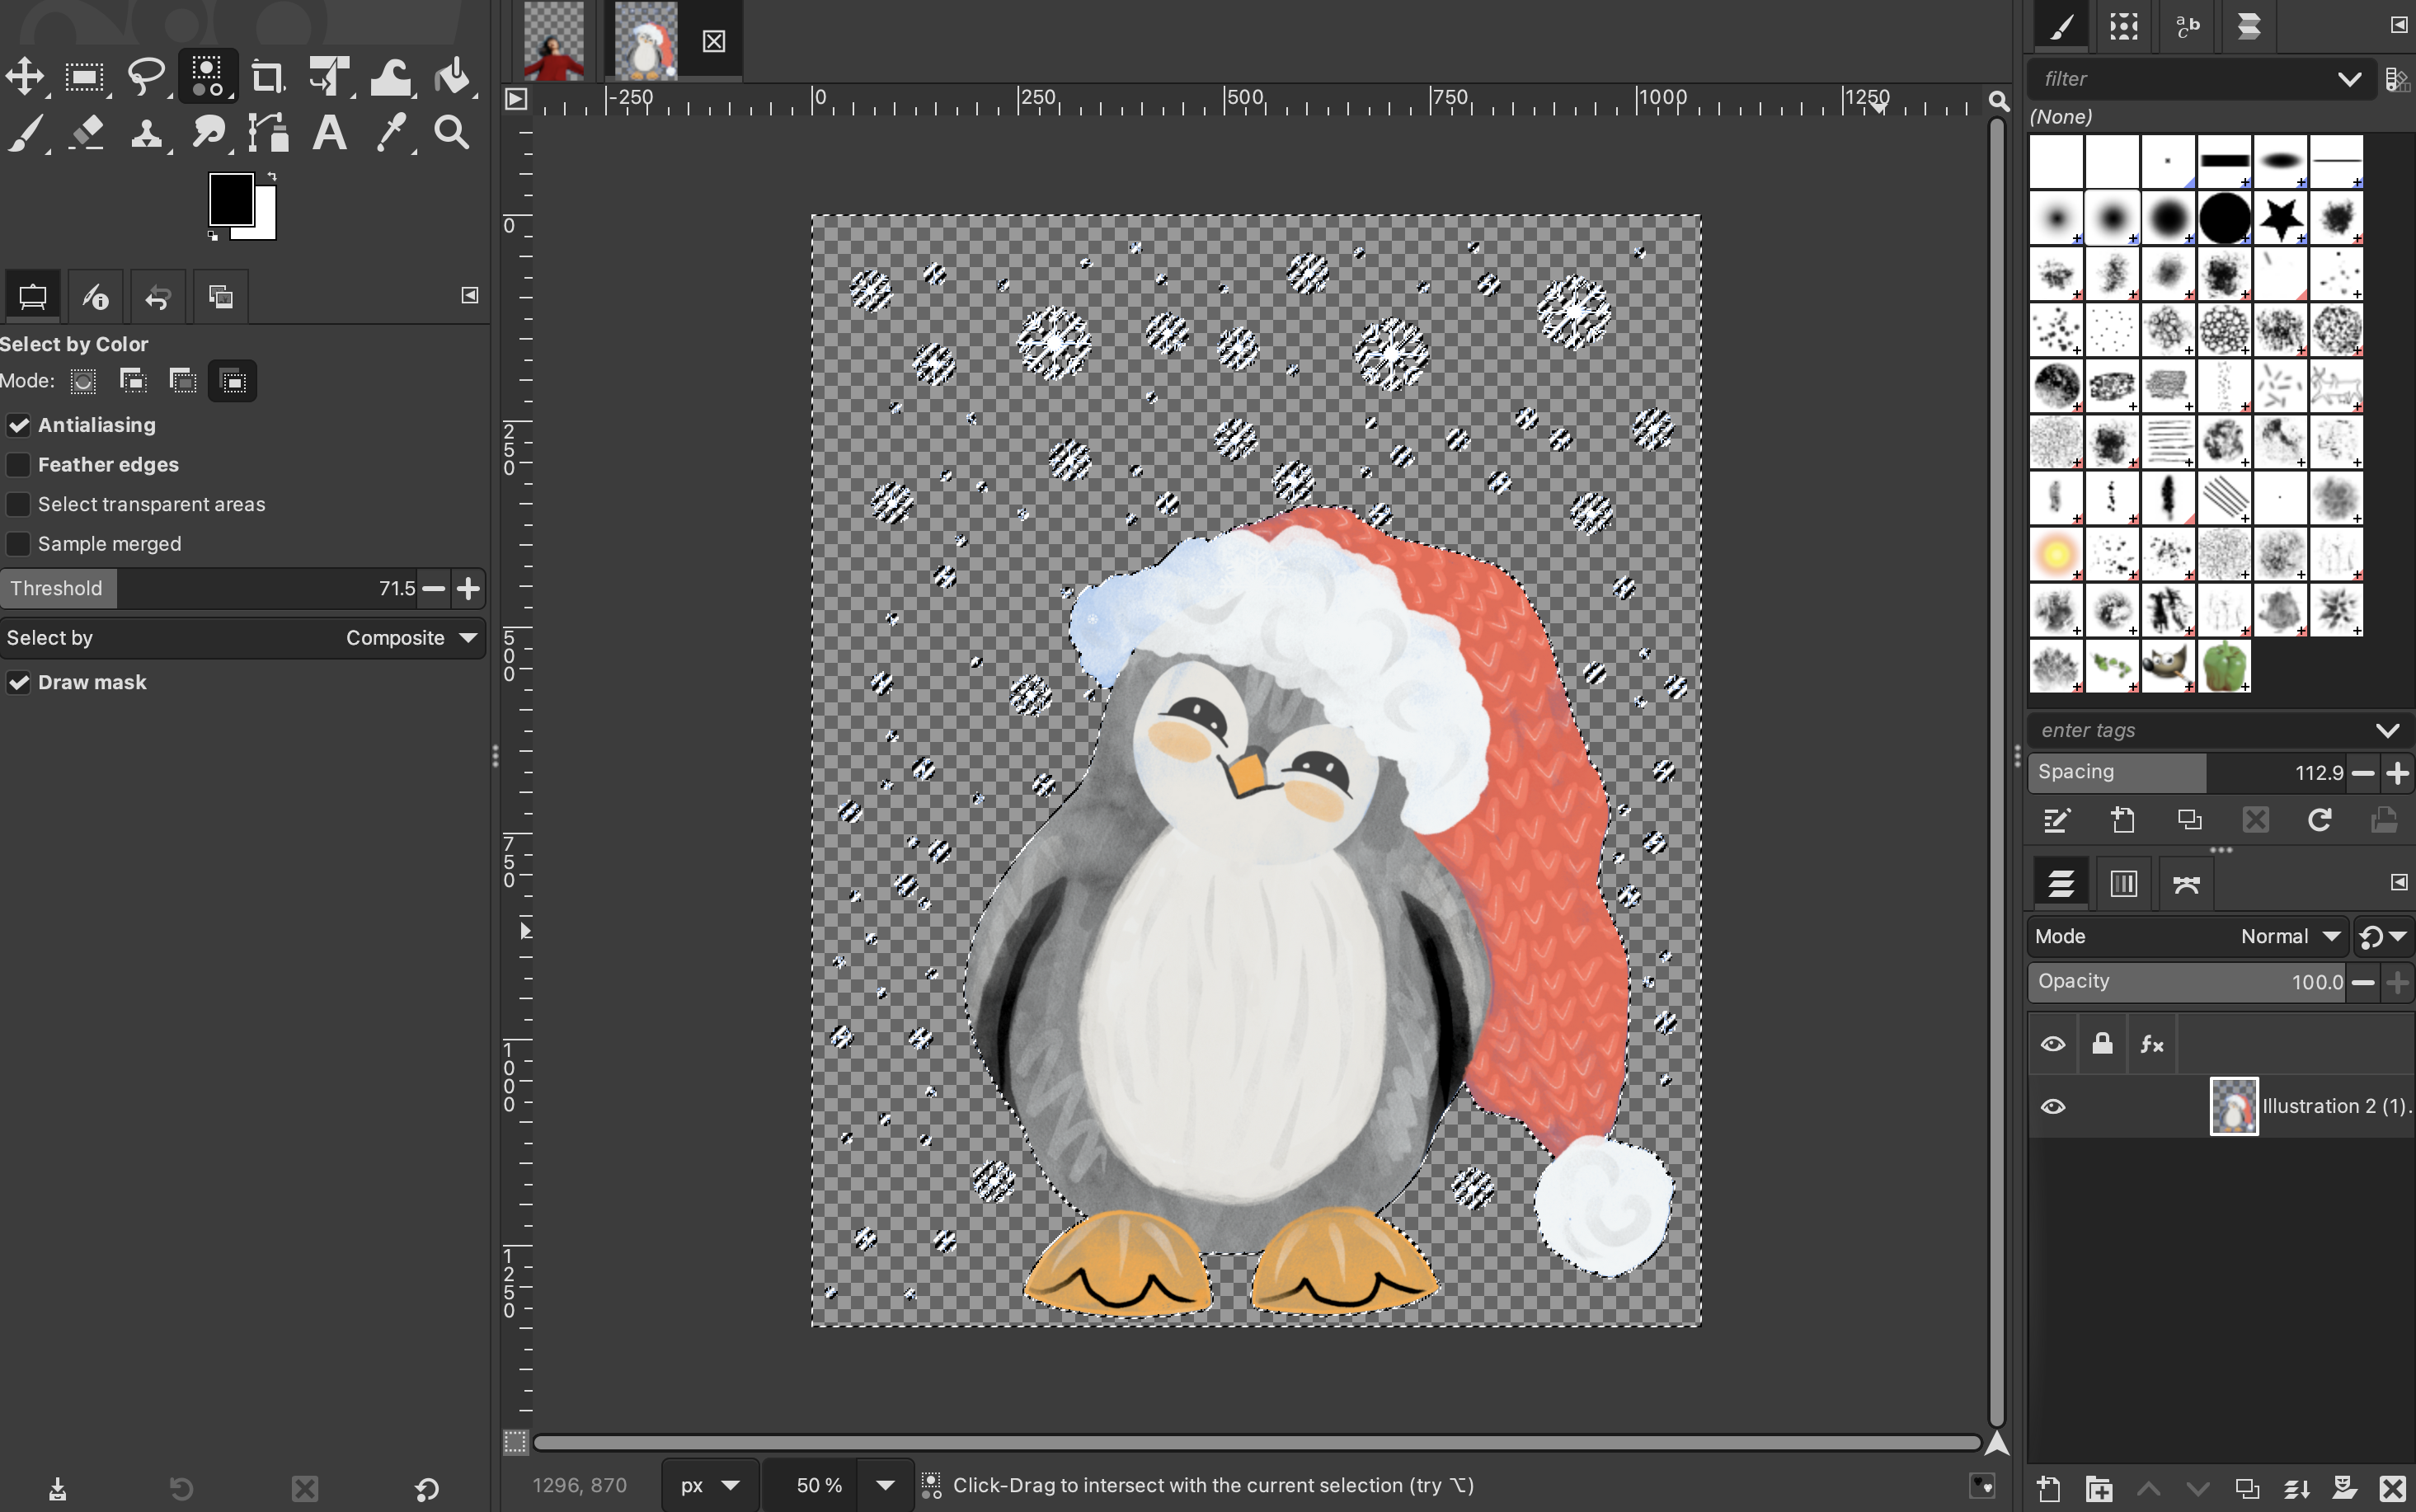
Method 2: Select by color
-
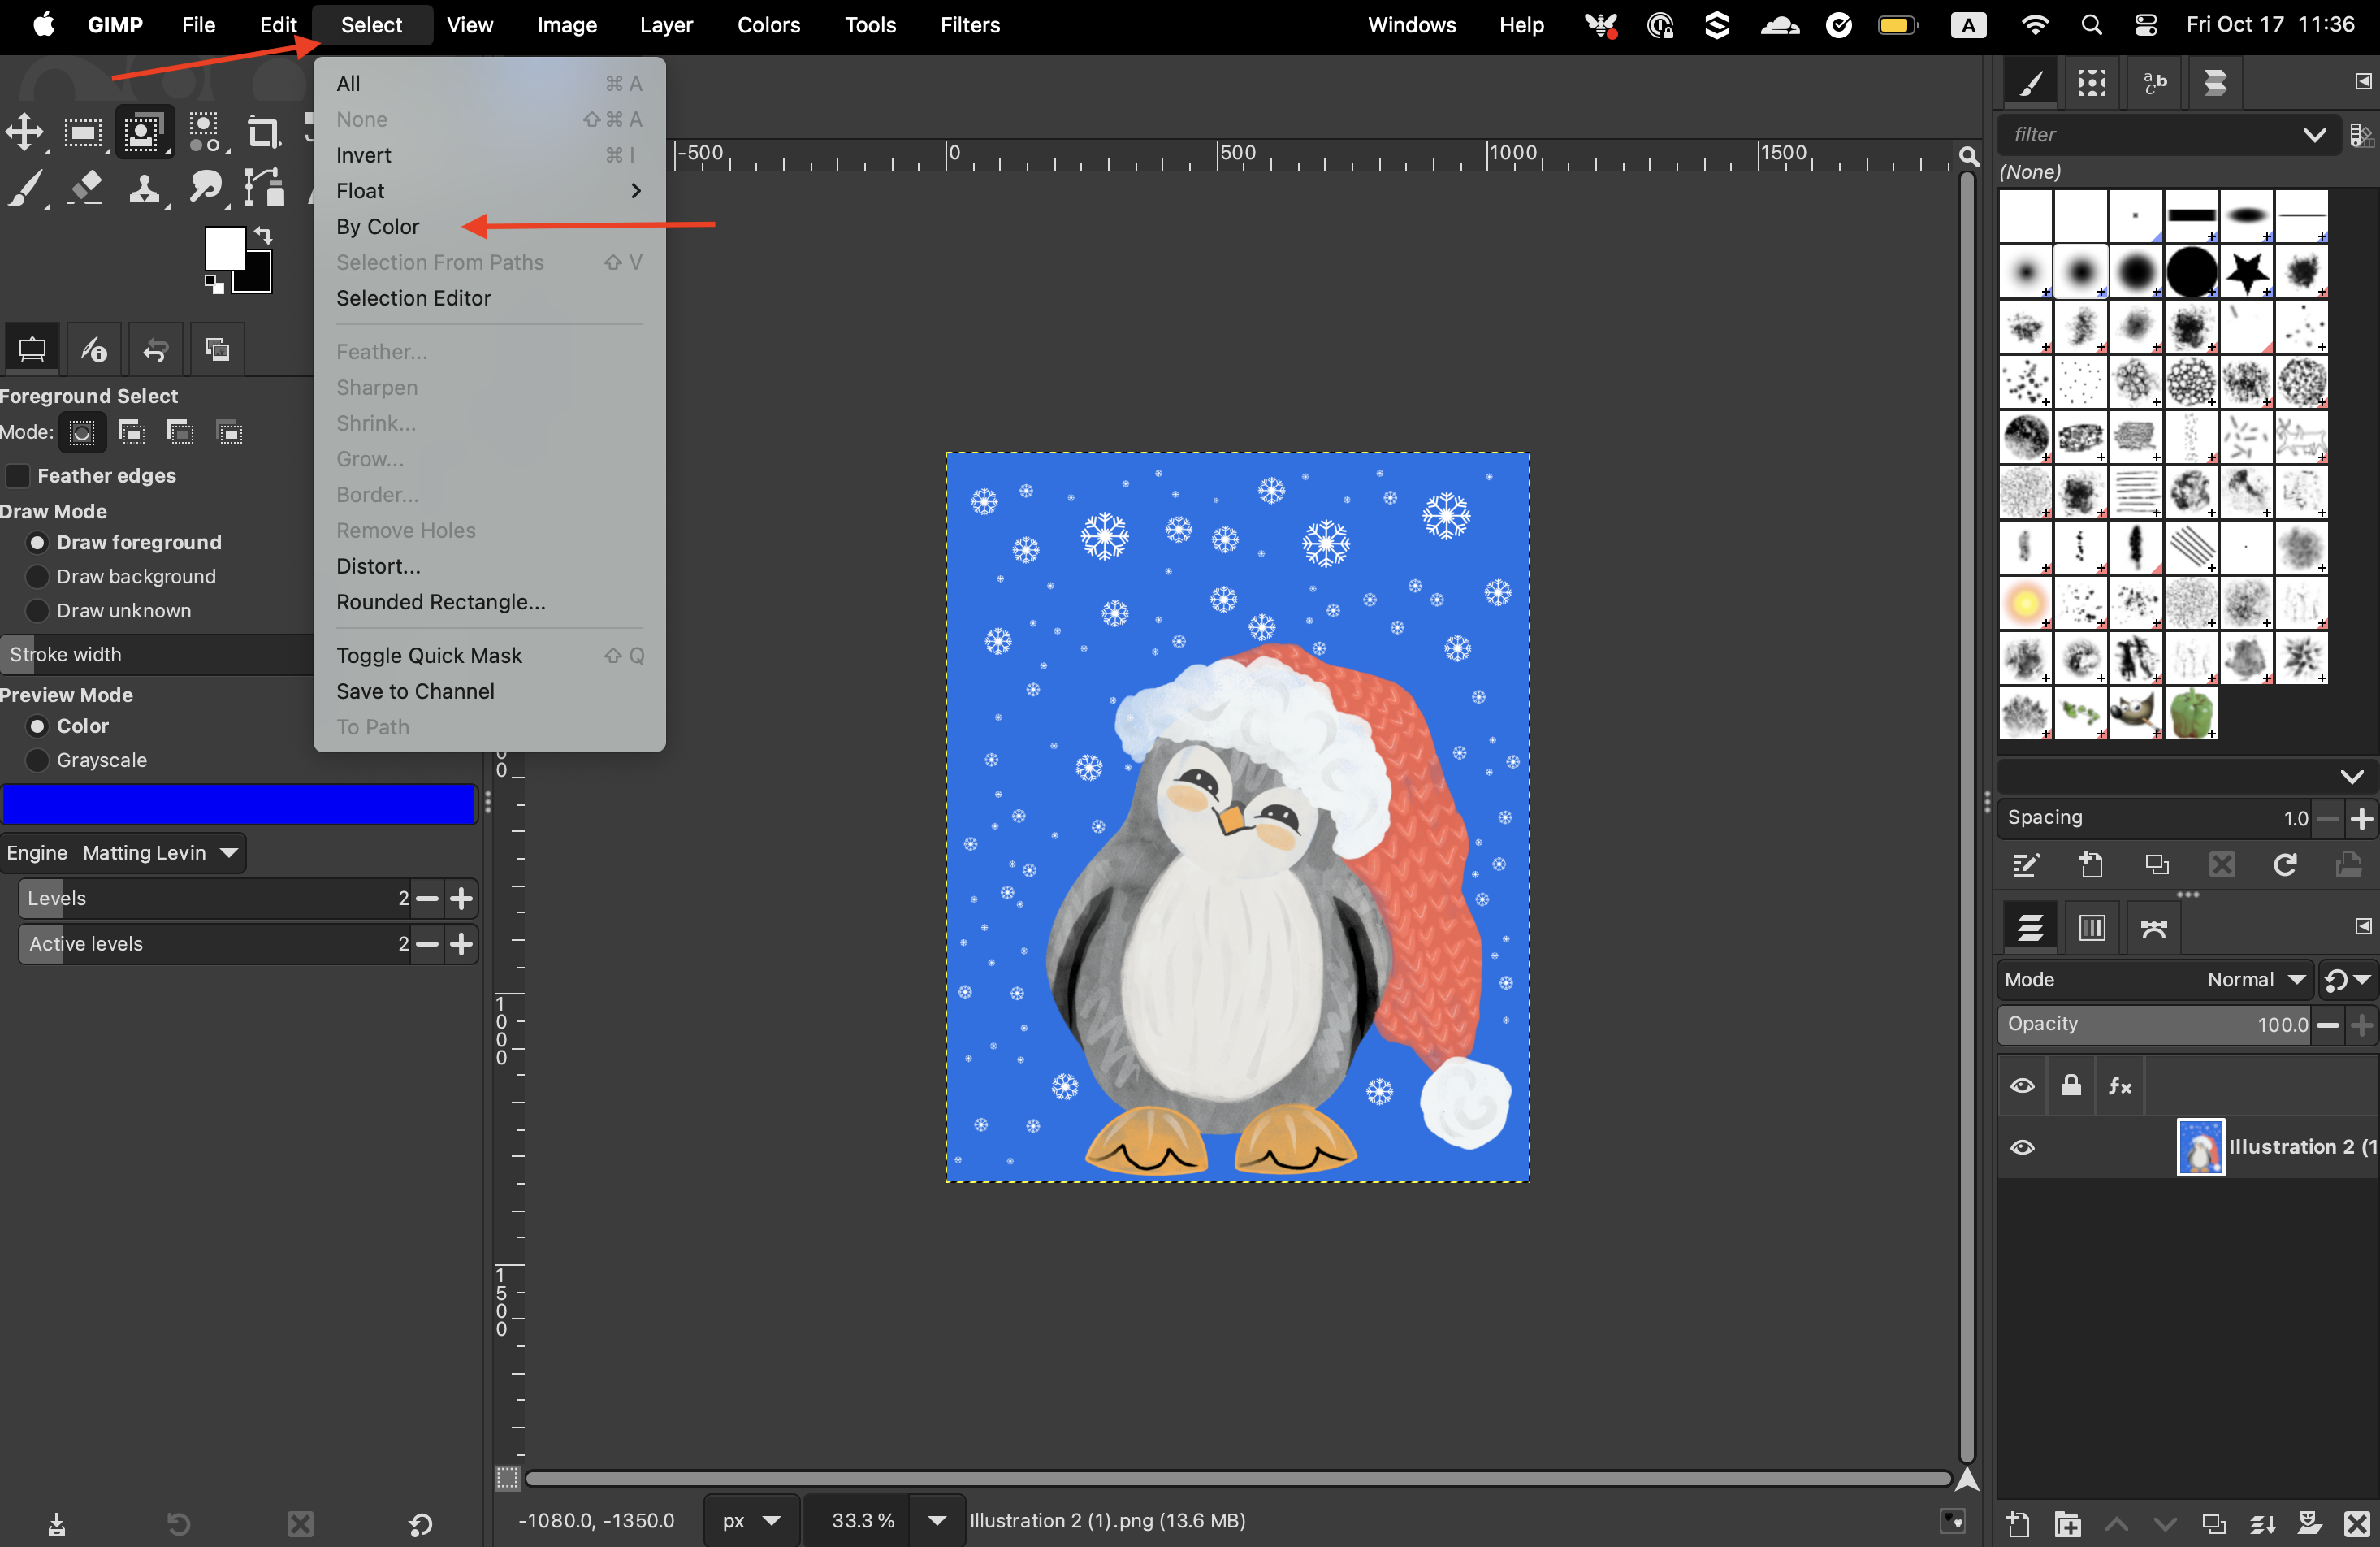
Ensure that “Antialiasing” and “Draw mask” are selected. If you are working with a photograph, you should also select “Feather edges”. If you are working with an illustration, then that won’t be necessary. Select the “Select by color” tool. If you cannot see it in your toolbox, you can access it by clicking on “Select” > “By Color” from the top menu.
-
Then click and hold on the area of your image that is represented by the color of your background.
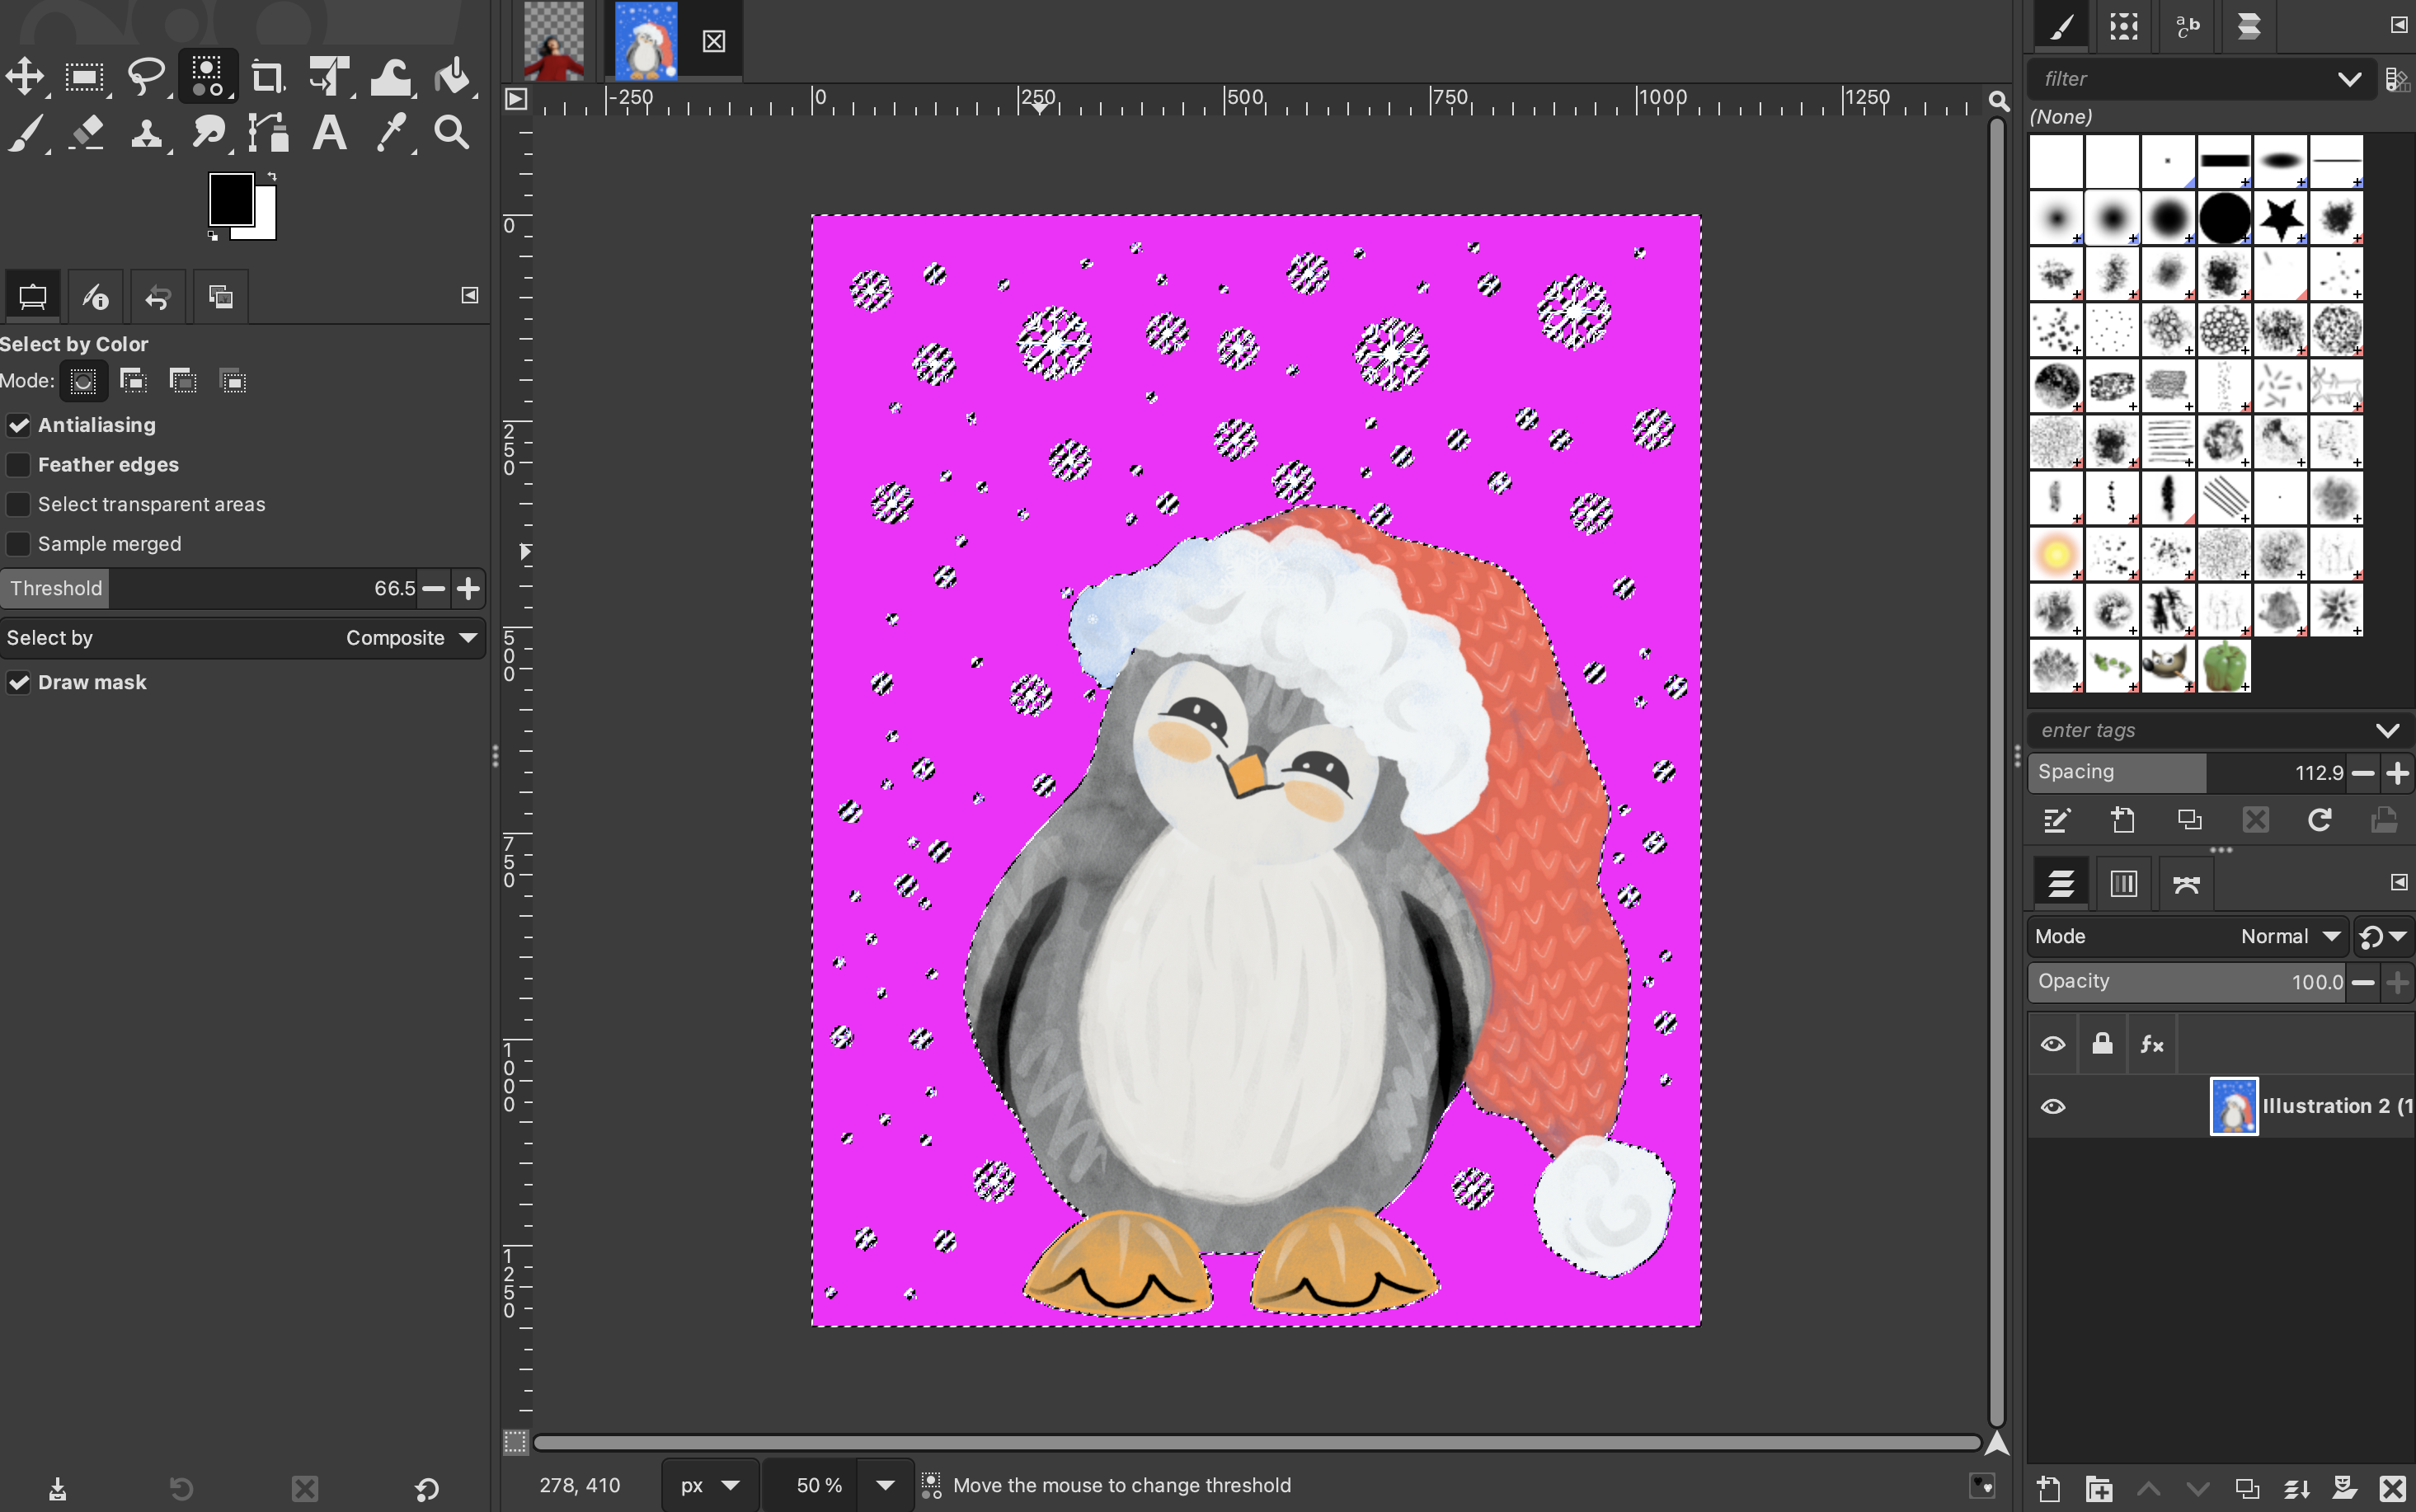
You can manually adjust the threshold by moving your mouse up or down.
-
Once you are happy, let go of the click and press “Delete” on your keyboard.
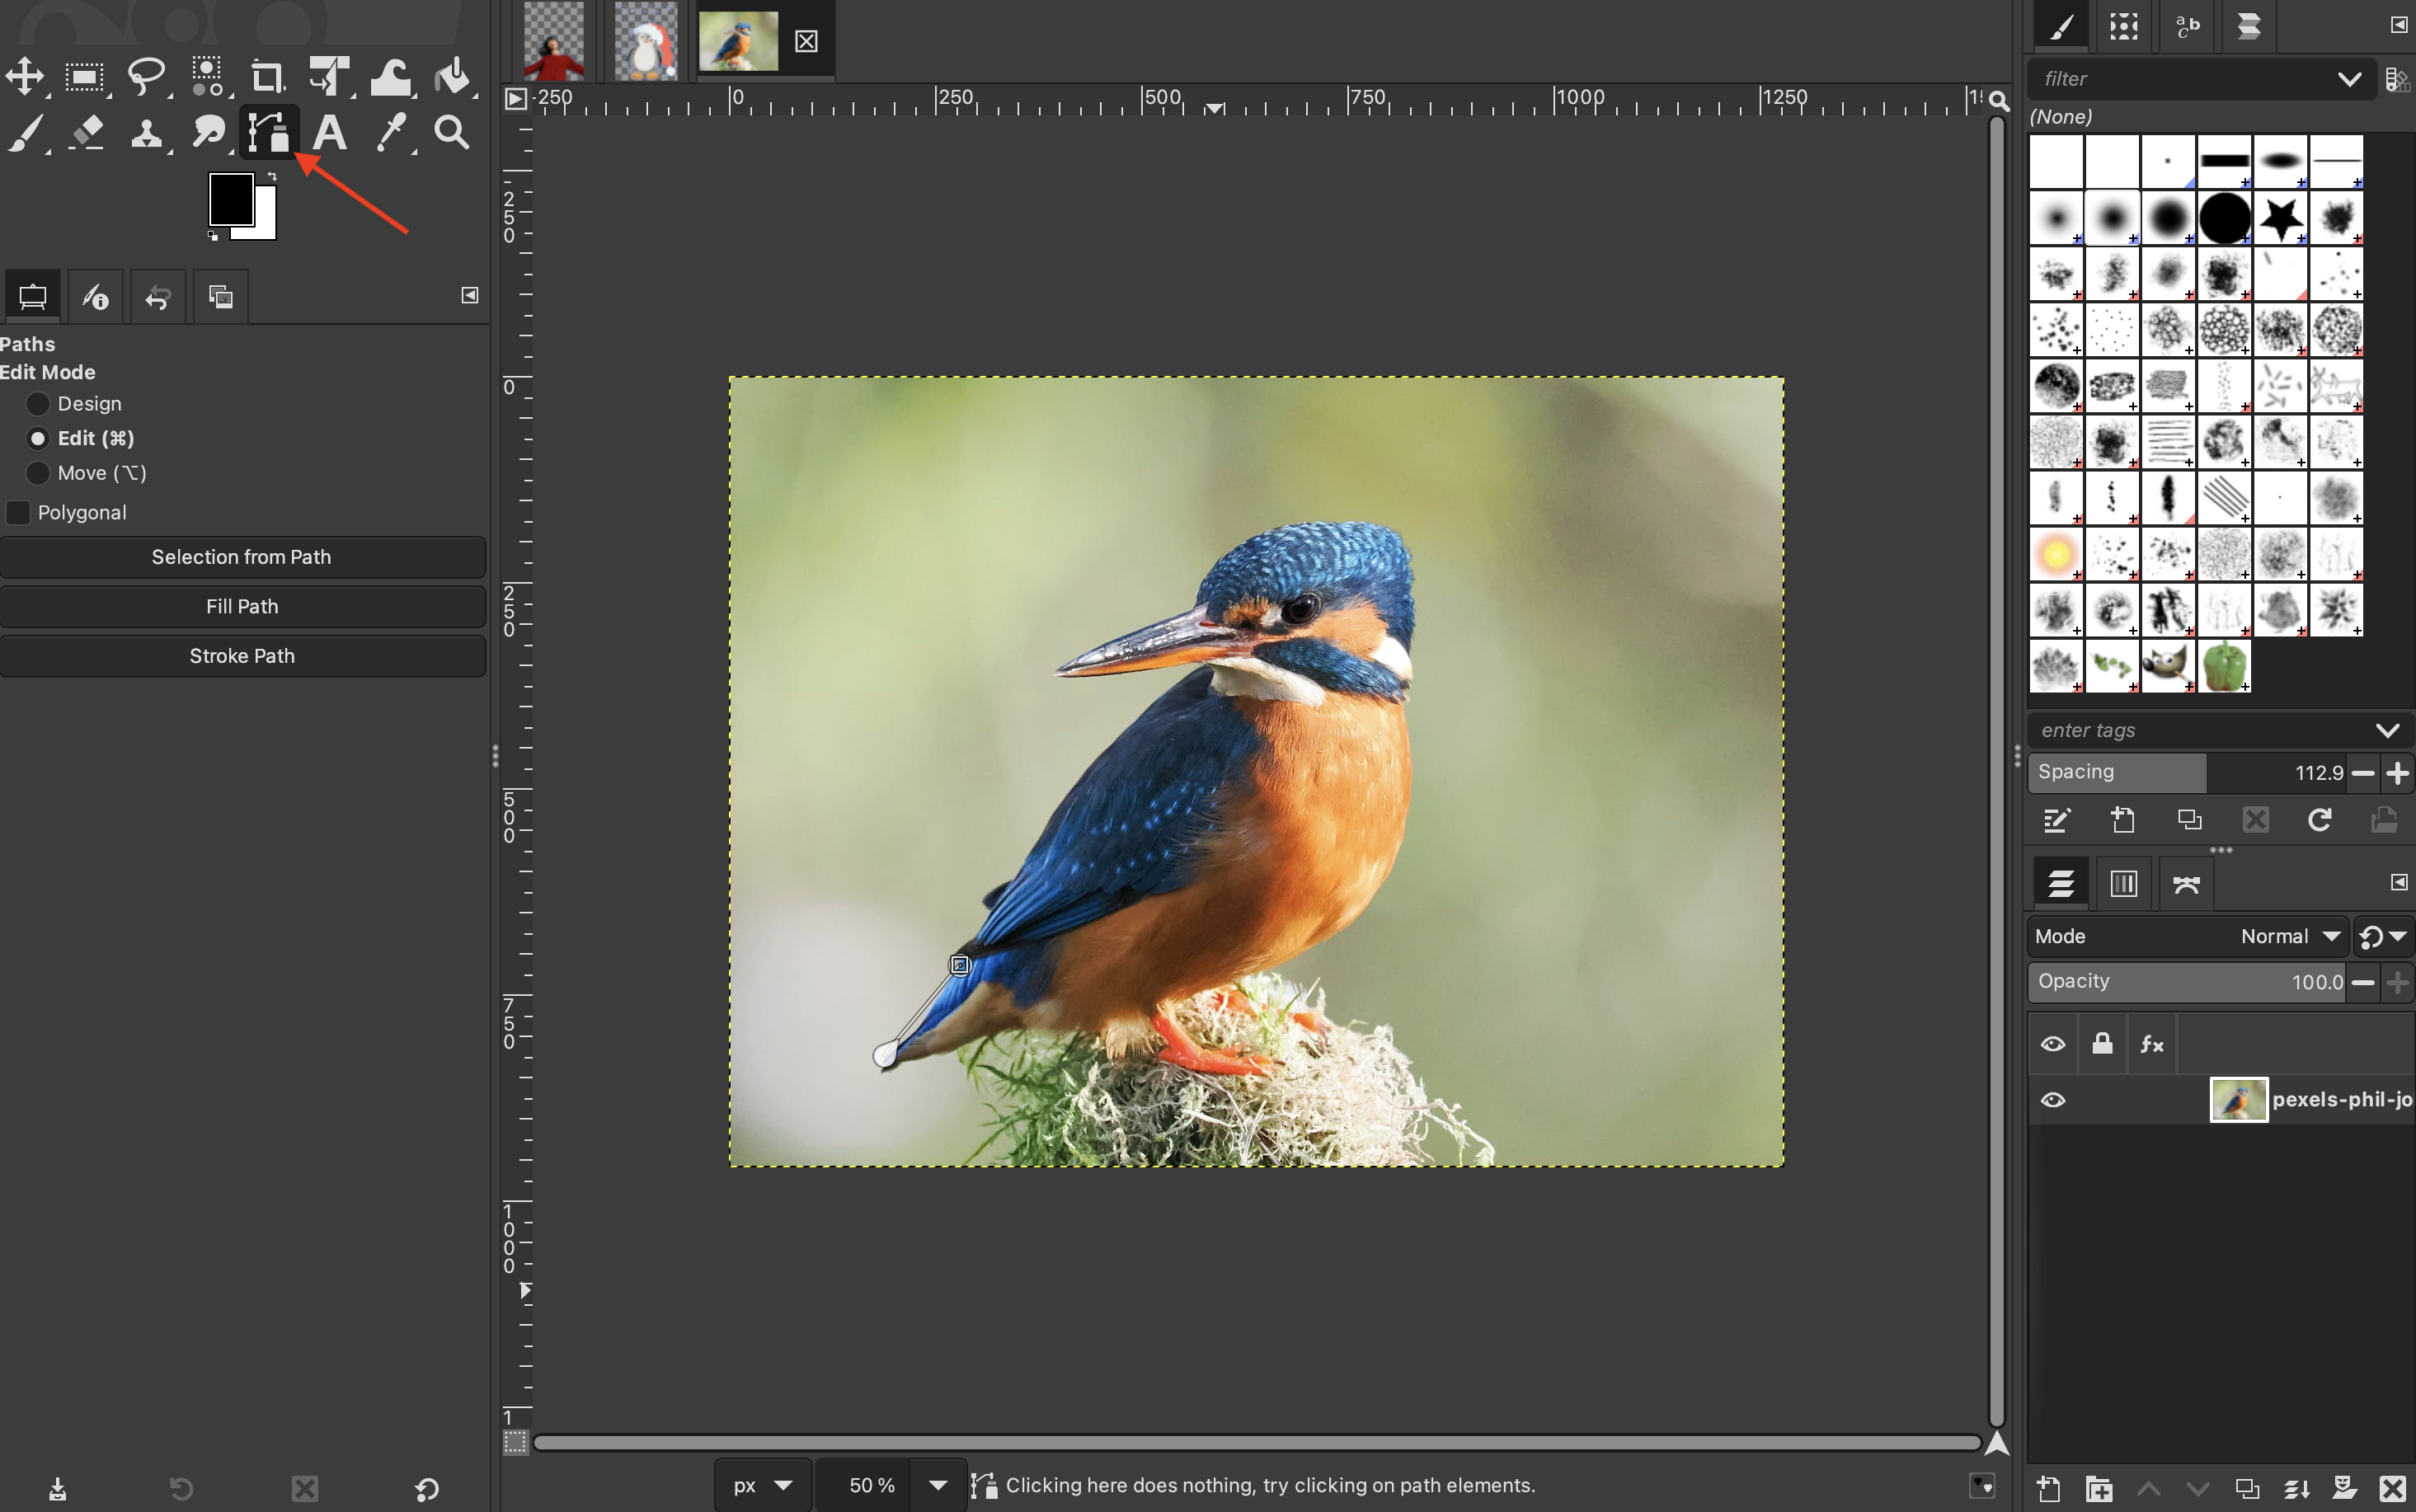
Method 3: Paths
-
Select the “Paths” tool.
-
Then, begin selecting the edges of your subject by placing individual points that will form an outline.

-
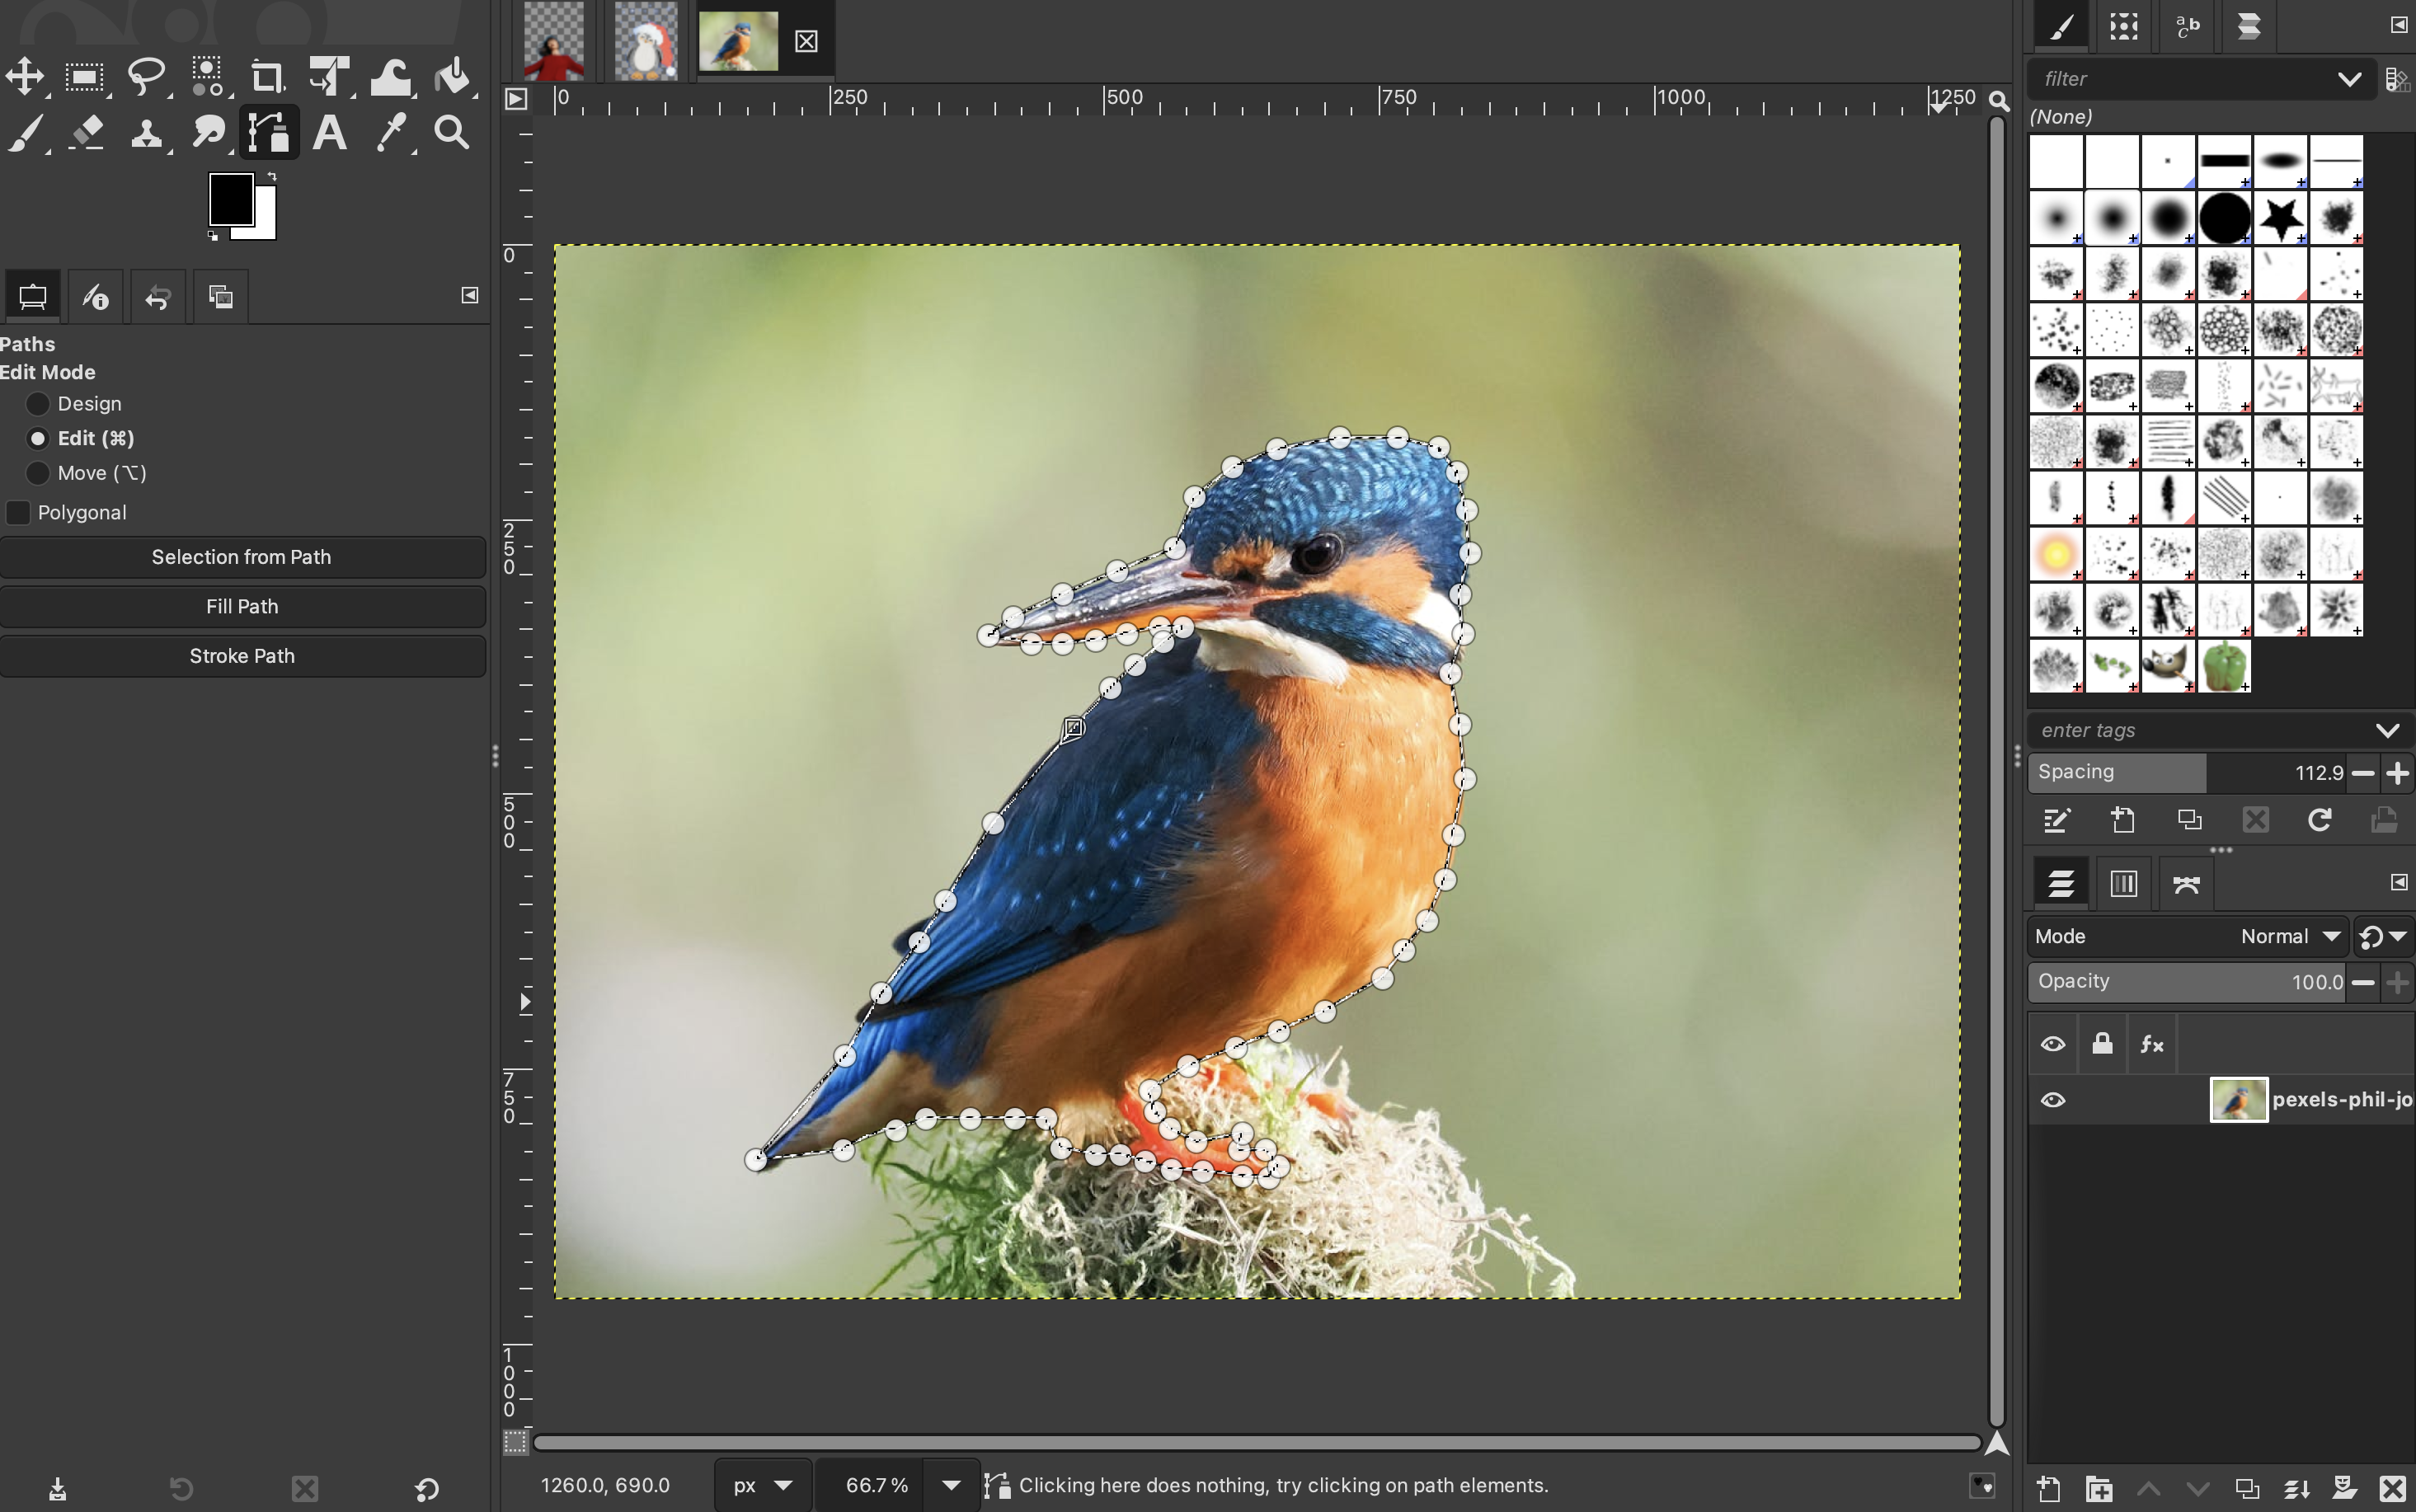
If needed, you can curve the lines between the dots by clicking and dragging them in the desired direction.

-
Once you are finished, you can close the path by holding “Control” and clicking on your original point. Then press “Enter” on your keyboard to create a selection around your subject.
-
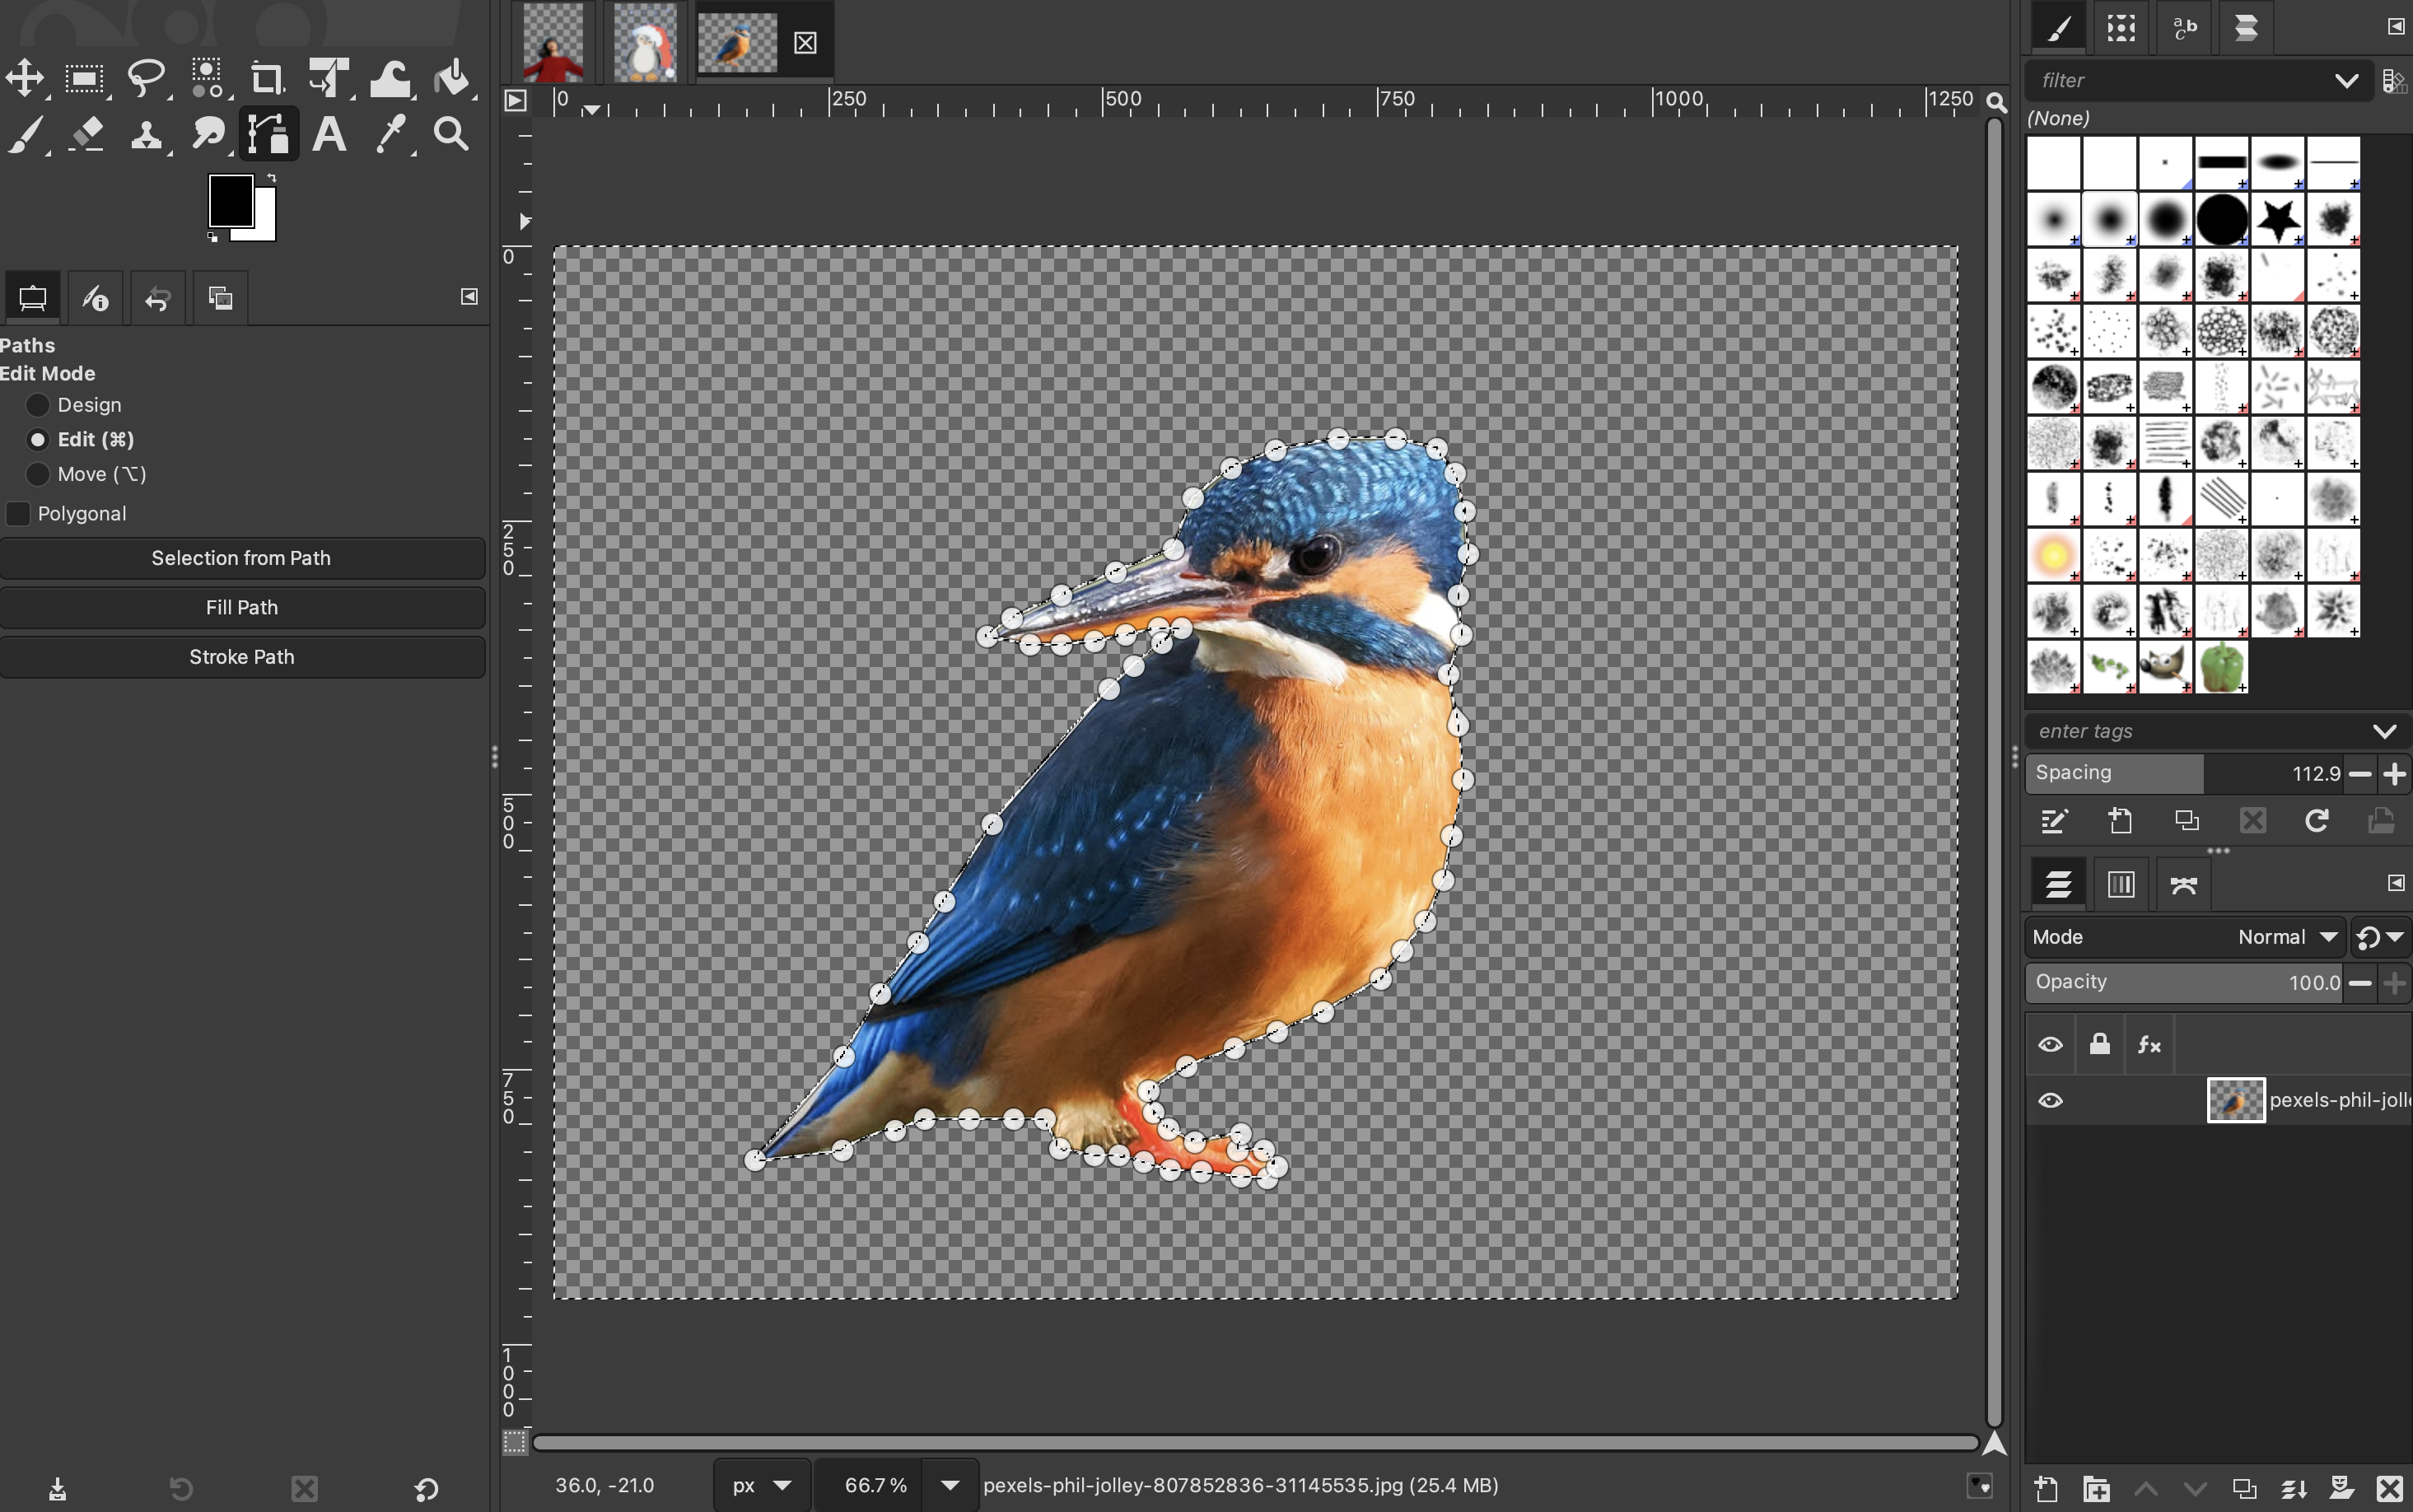
Since we want to remove the background in this case, we will need to click on “Select” and then “Invert.”

-
Press “Delete” on the keyboard.
Method 4: Layer masks
For images with fine details, this is the best method. There needs to be a lot of contrast between the subject and its background.
-
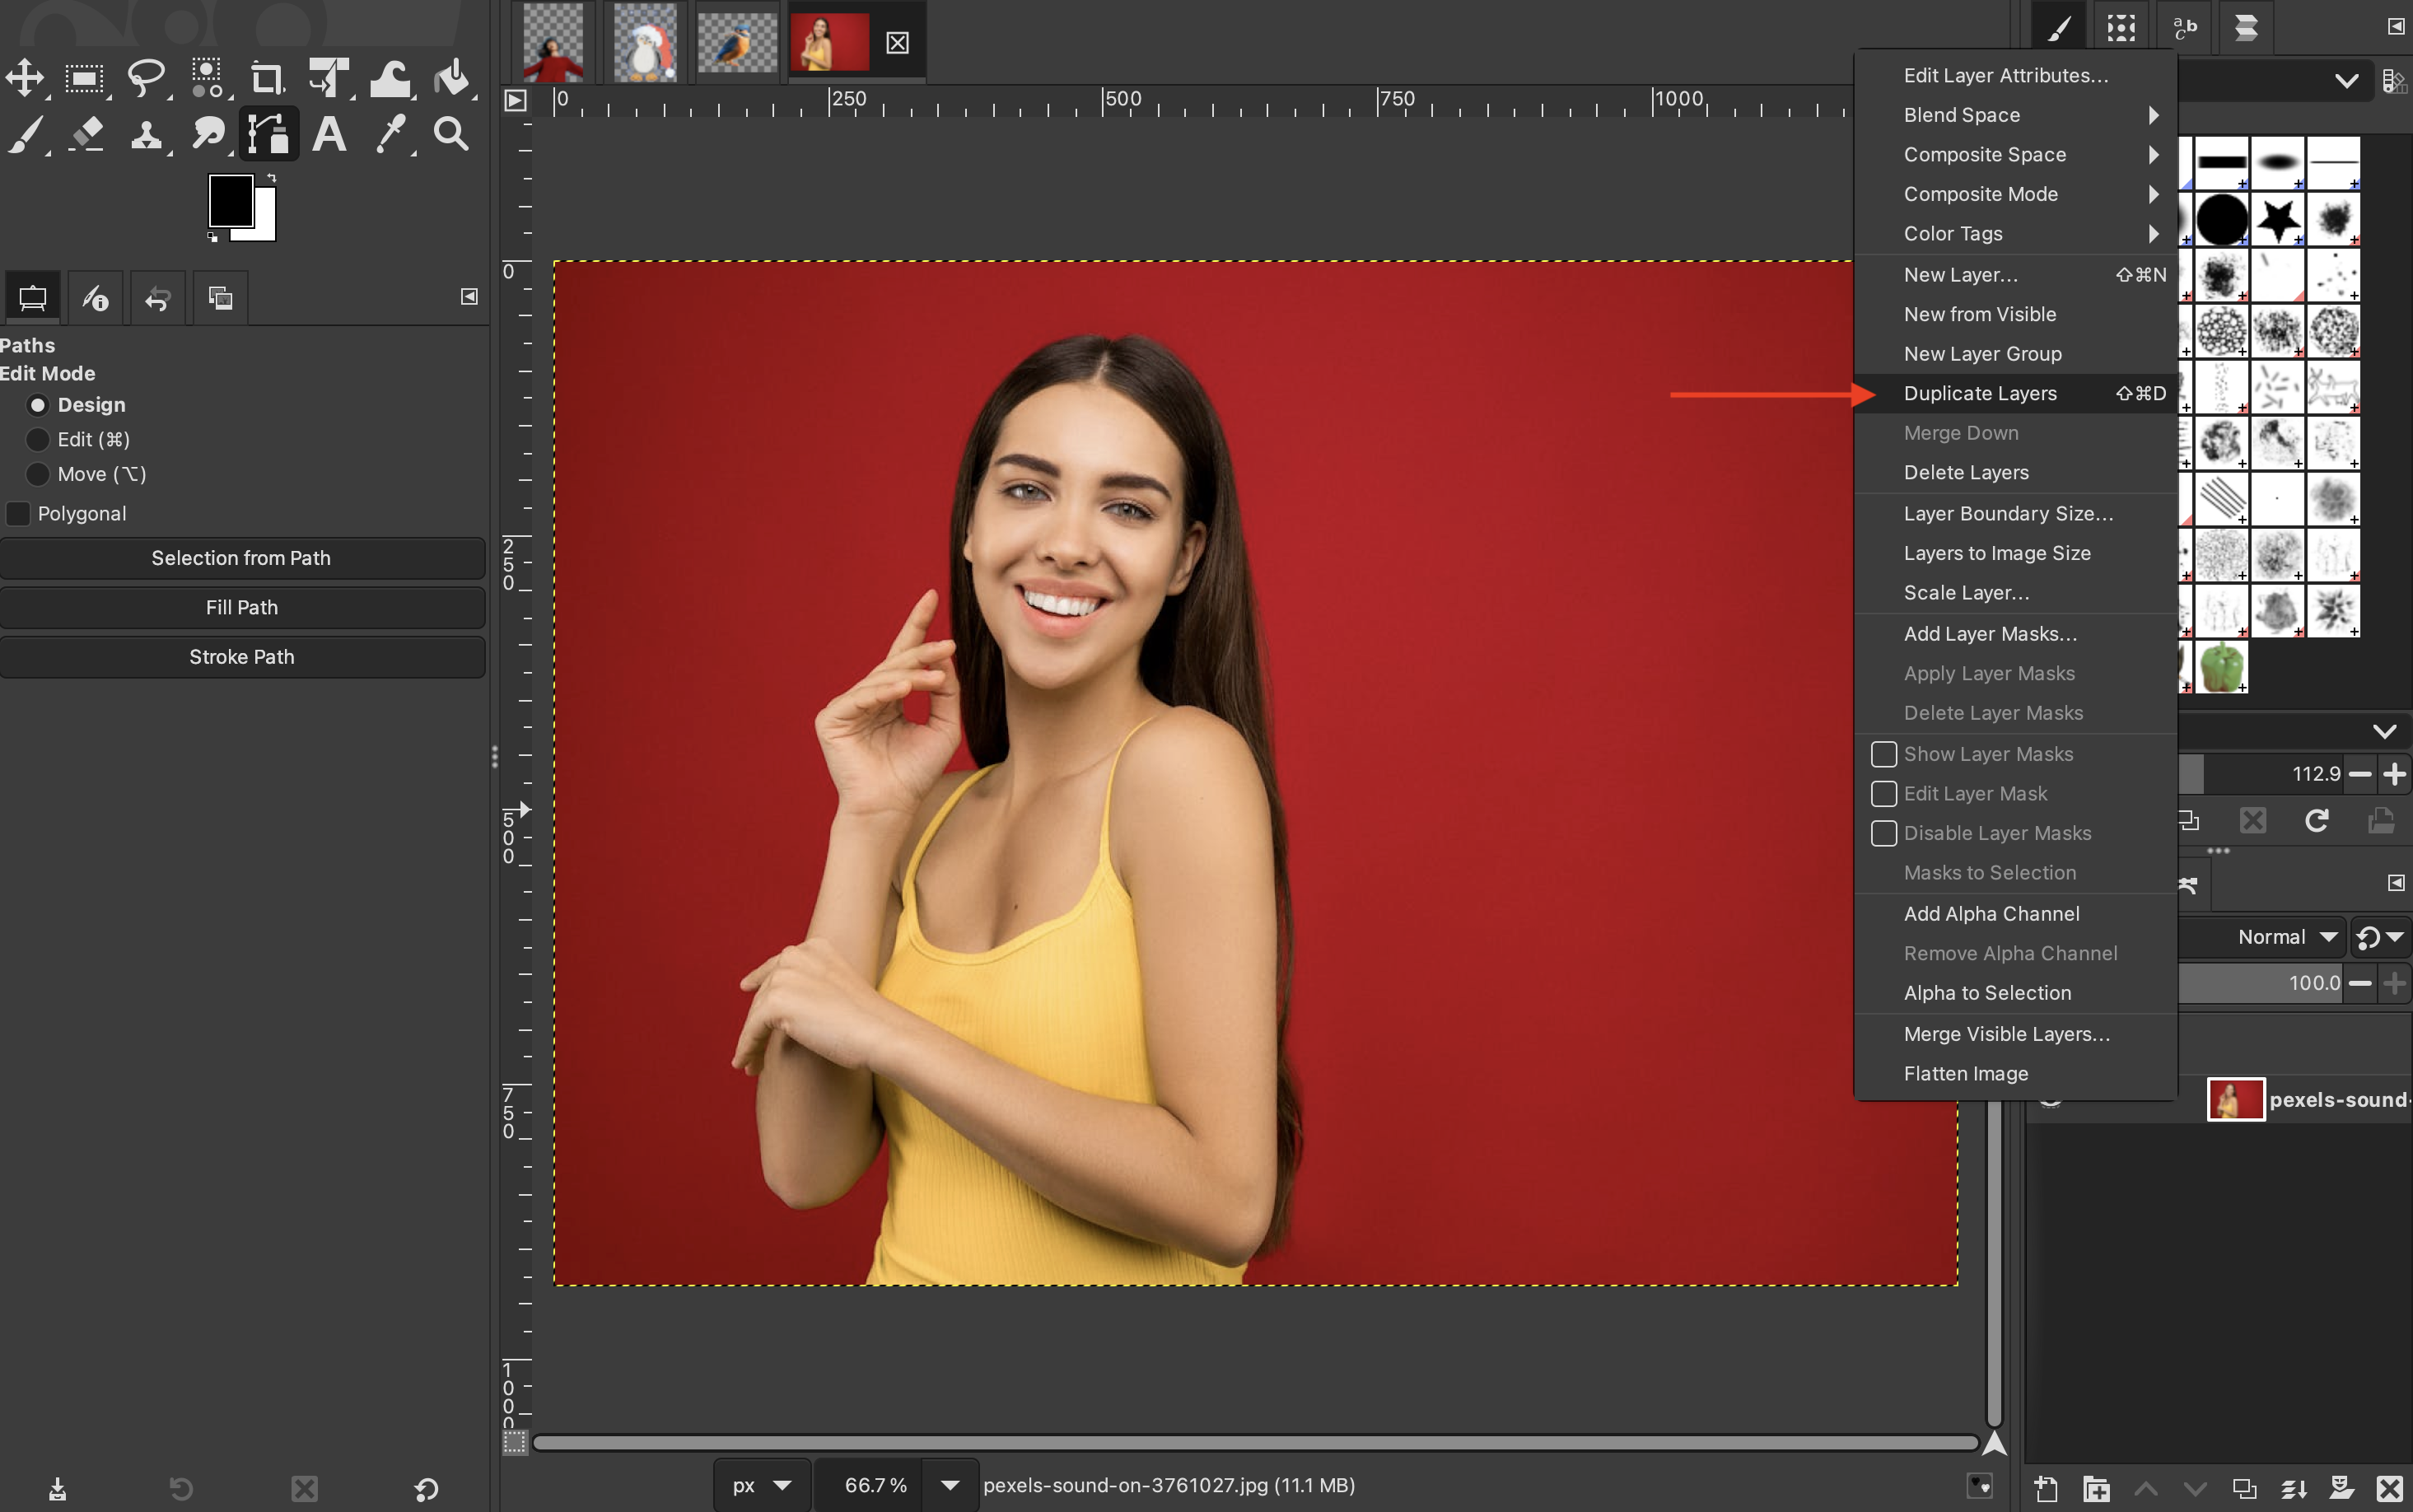
First, you will need to create a duplicate of your layer by right-clicking on your layer and selecting “Duplicate Layer.”
-
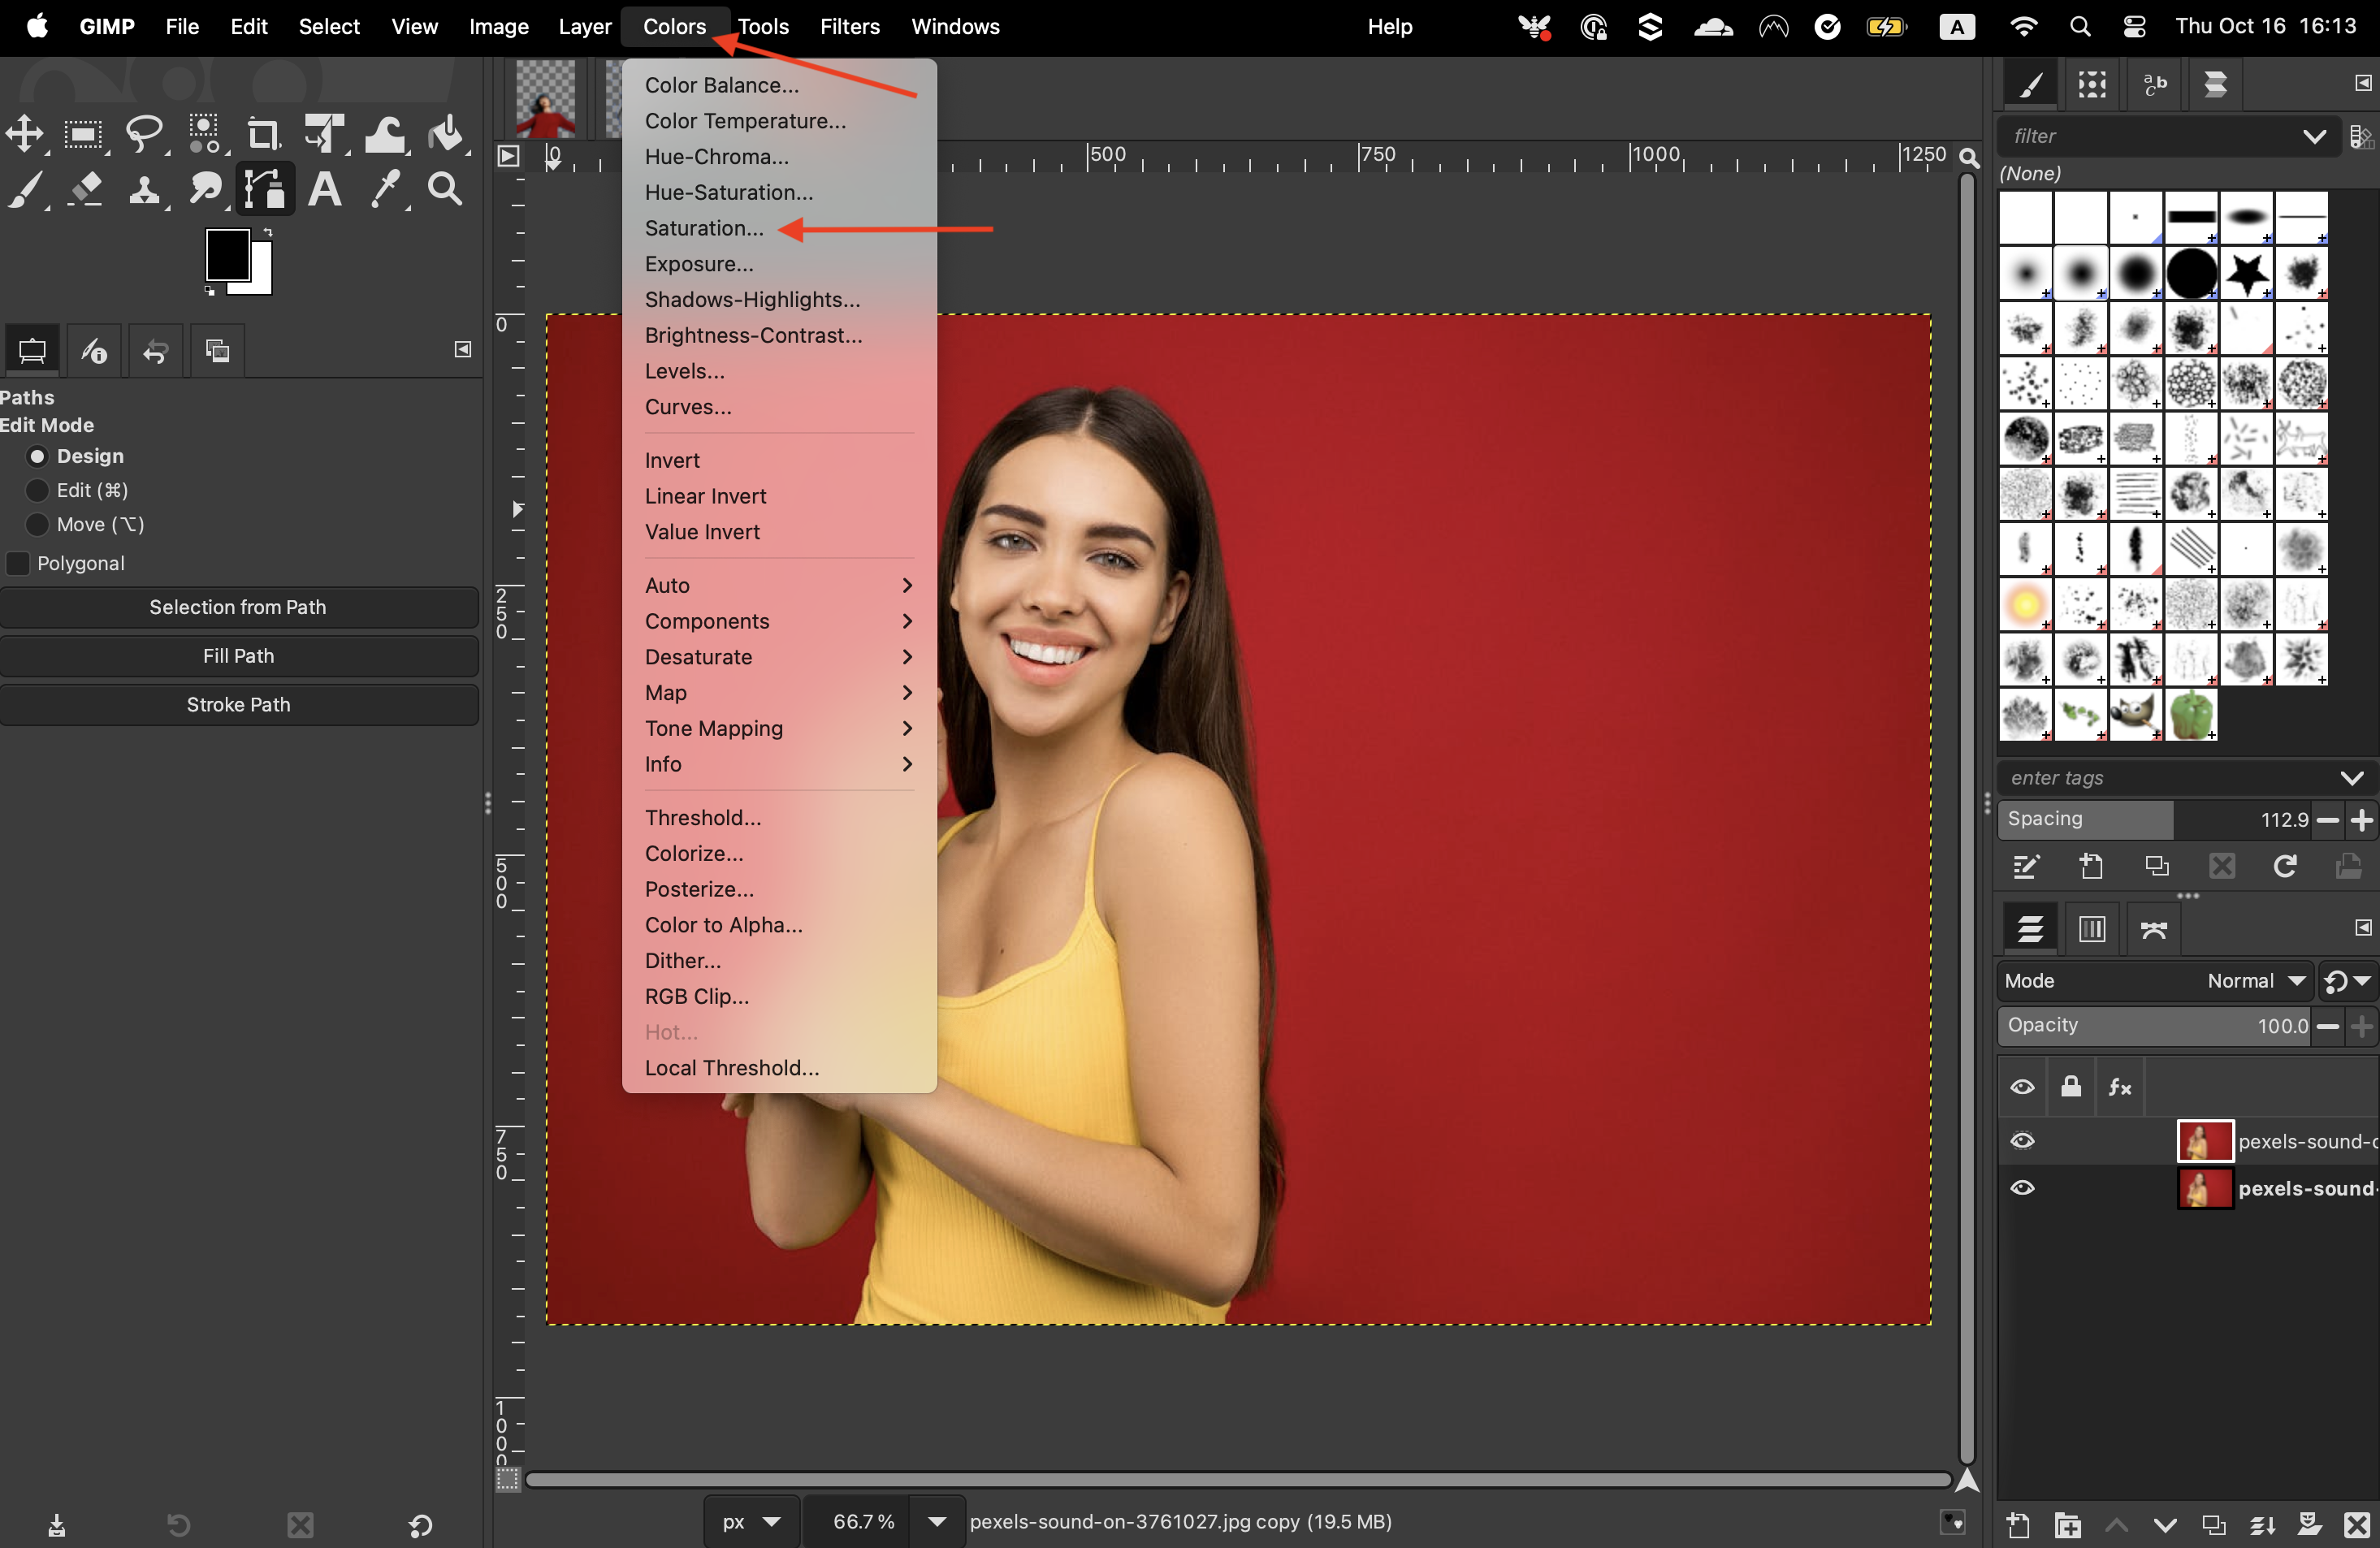
Then, on the menu, click on “Colors” > “Saturation.”
-
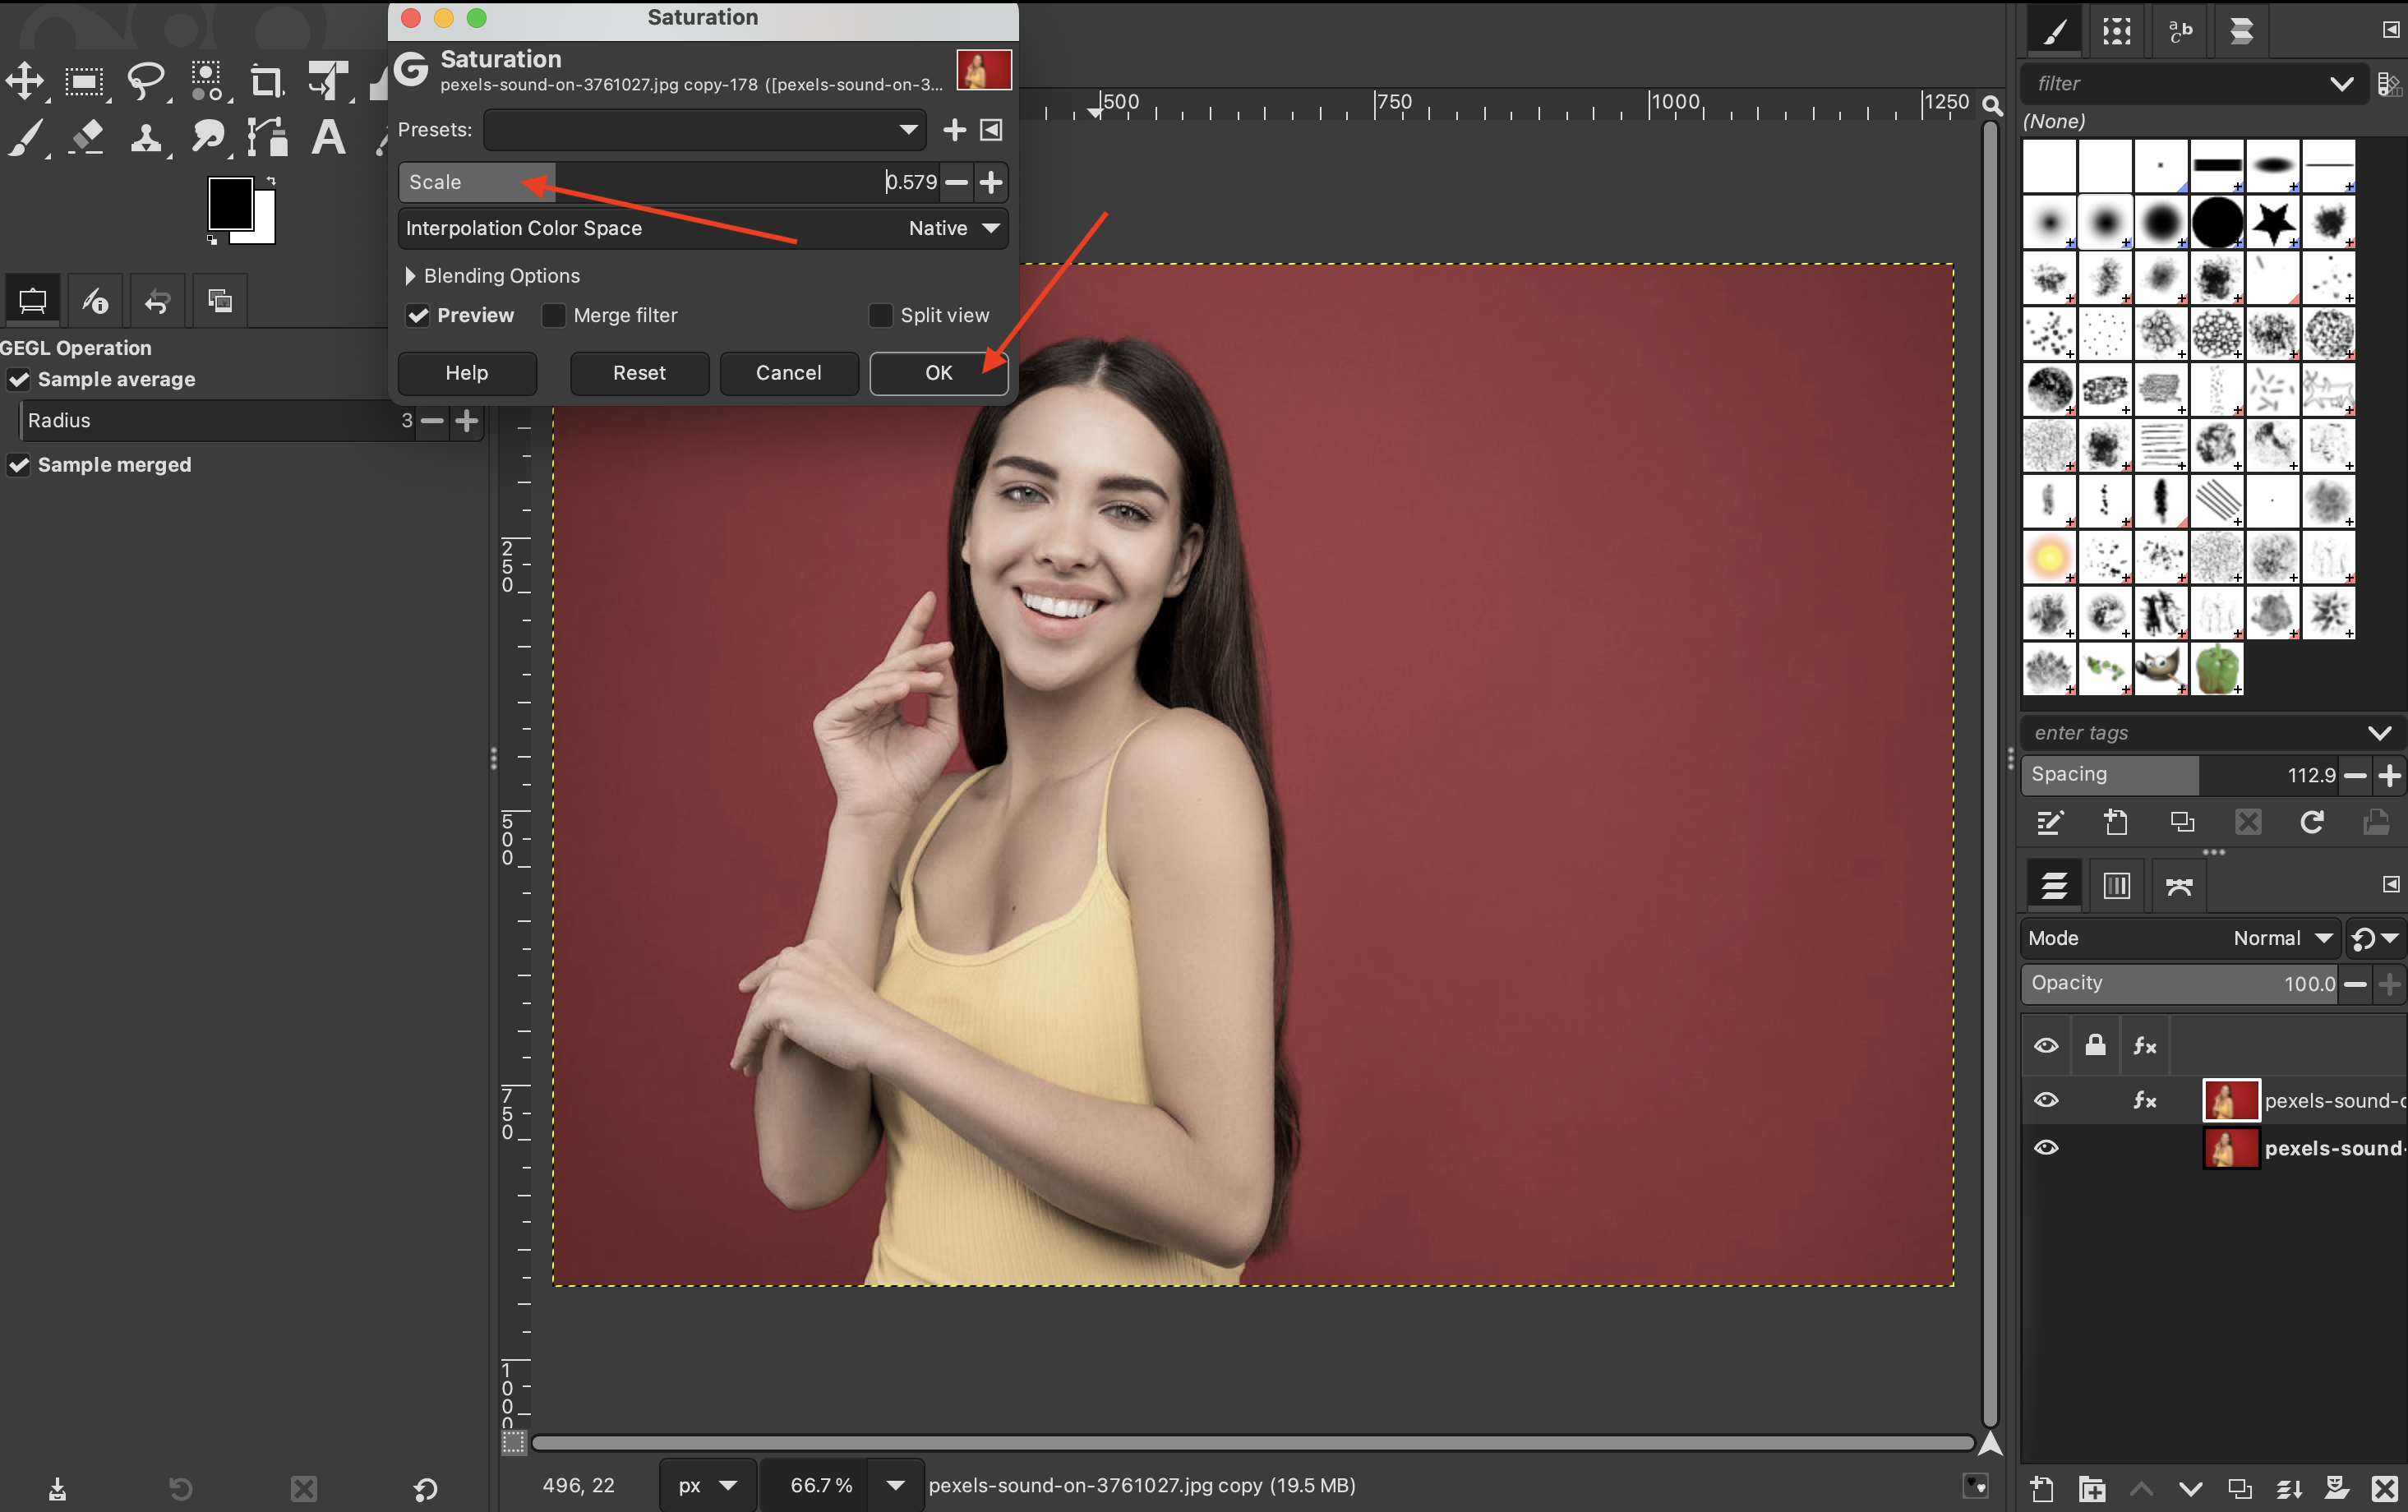
Bring the scale all the way down before clicking “OK.”
-
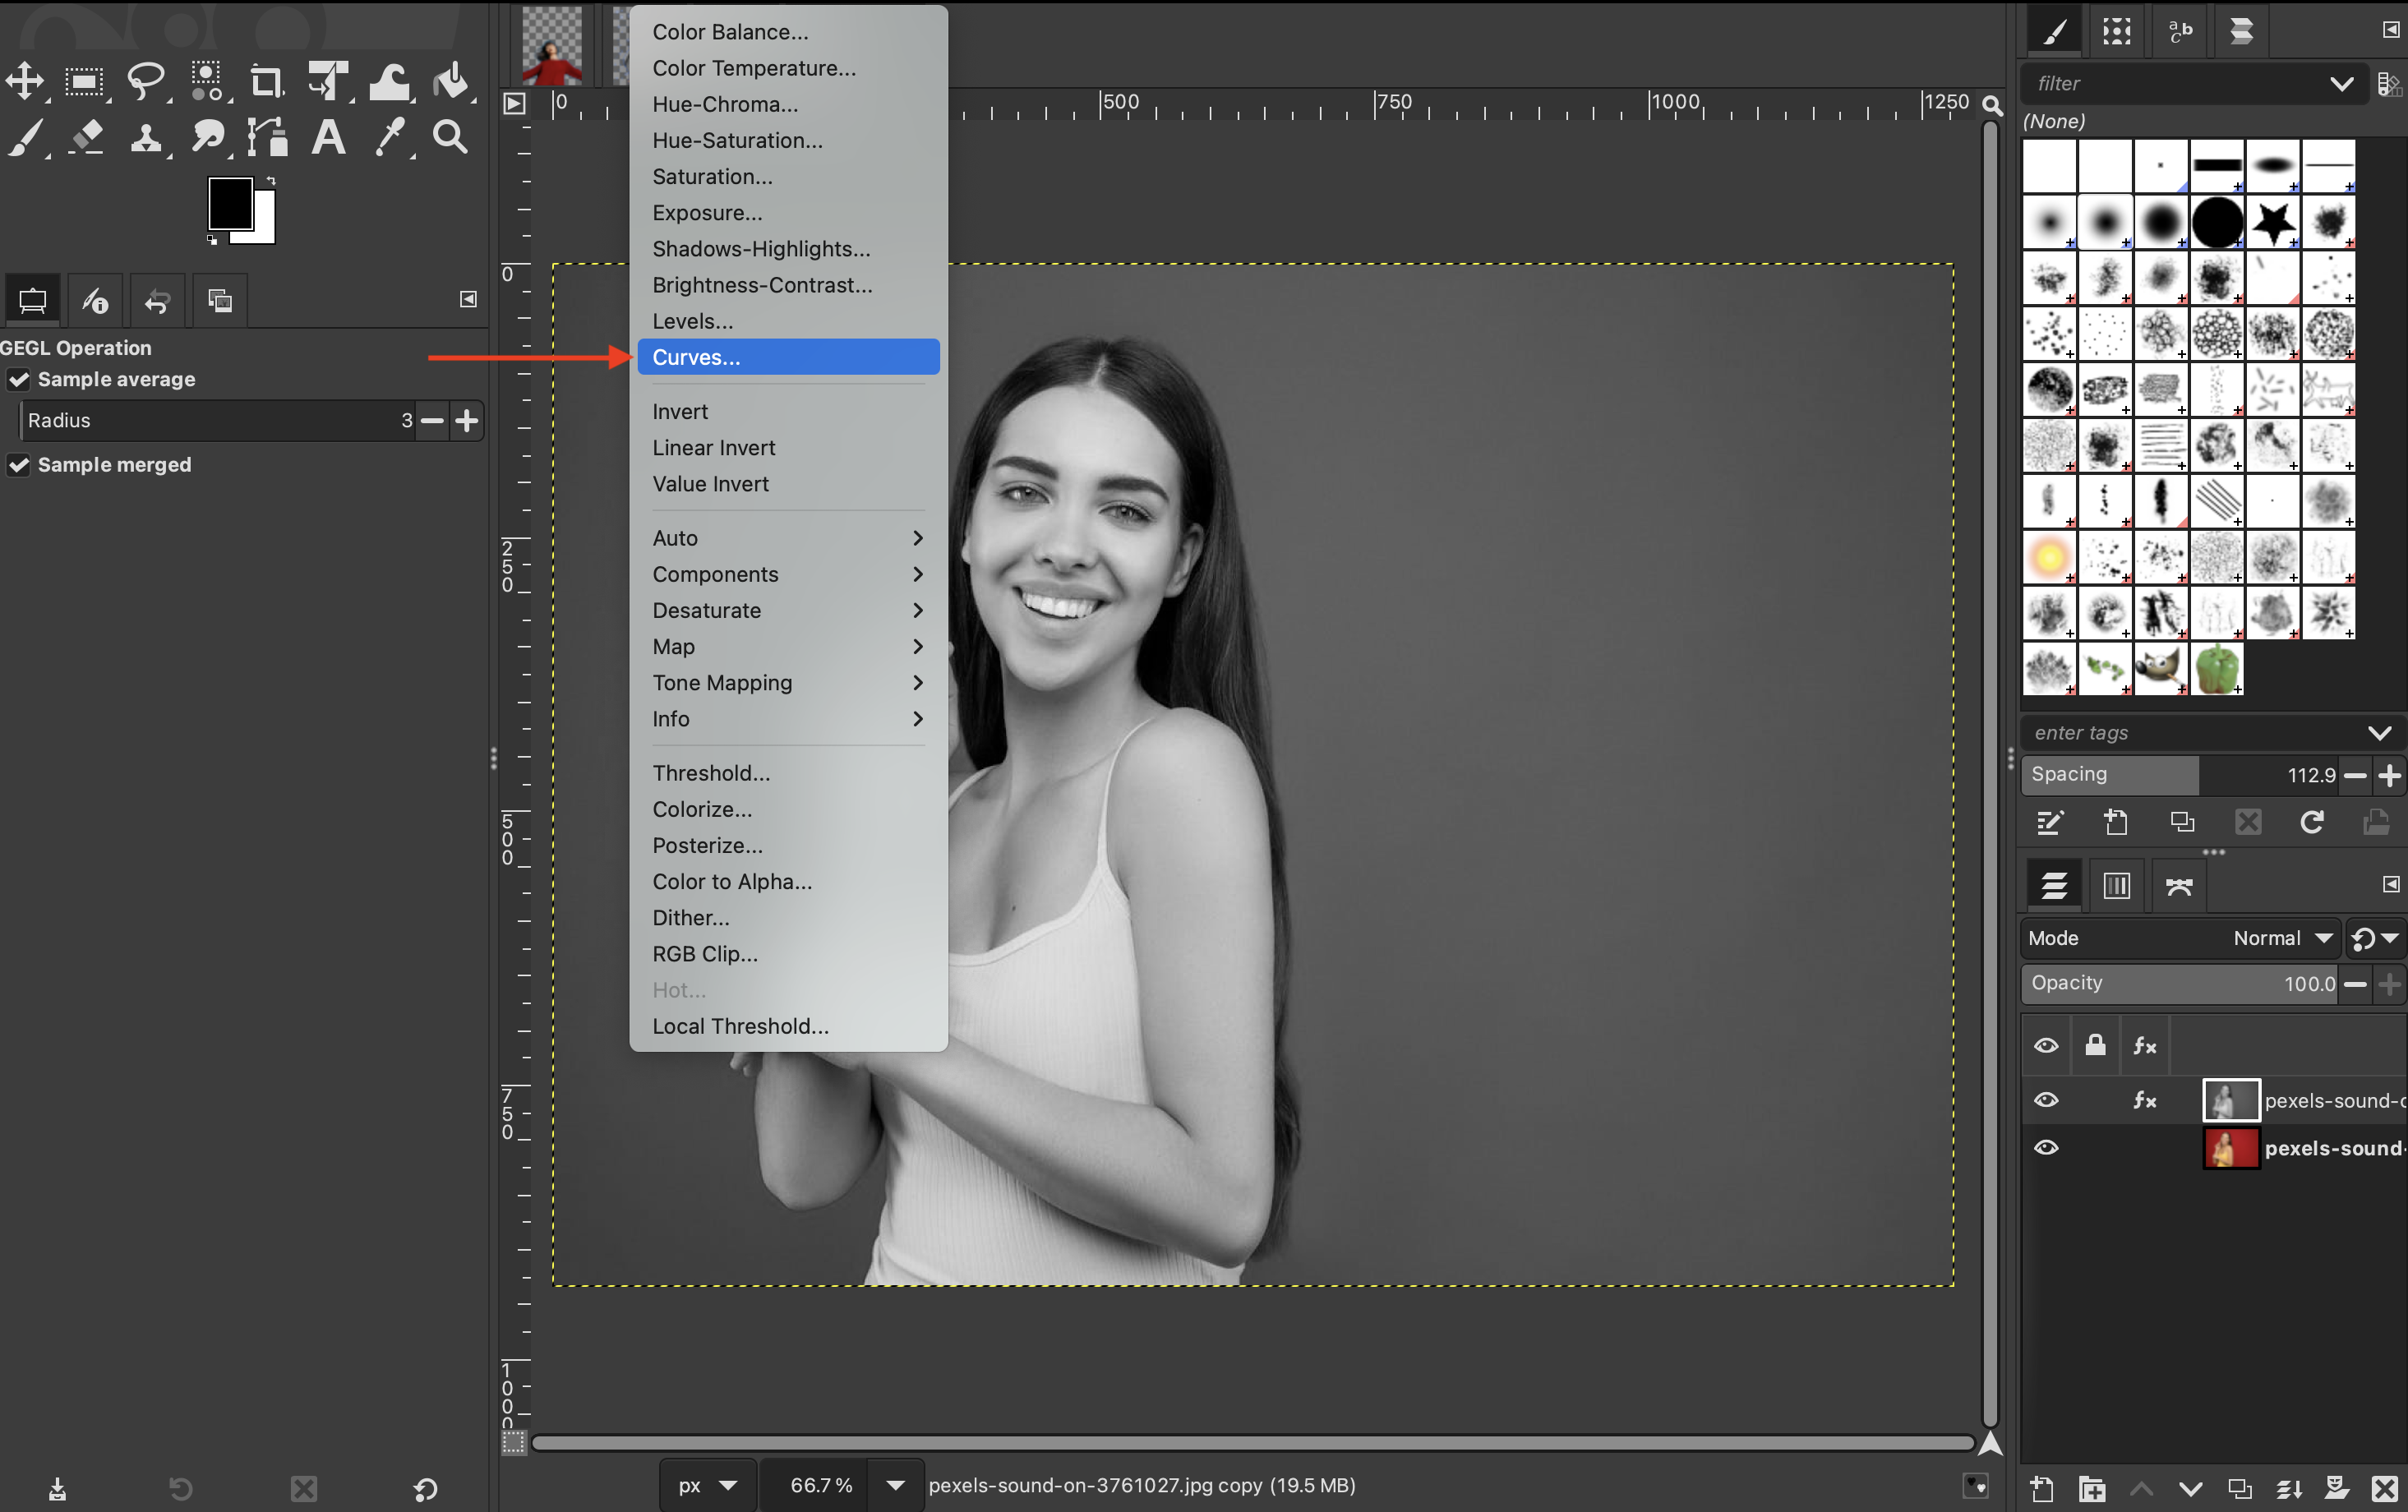
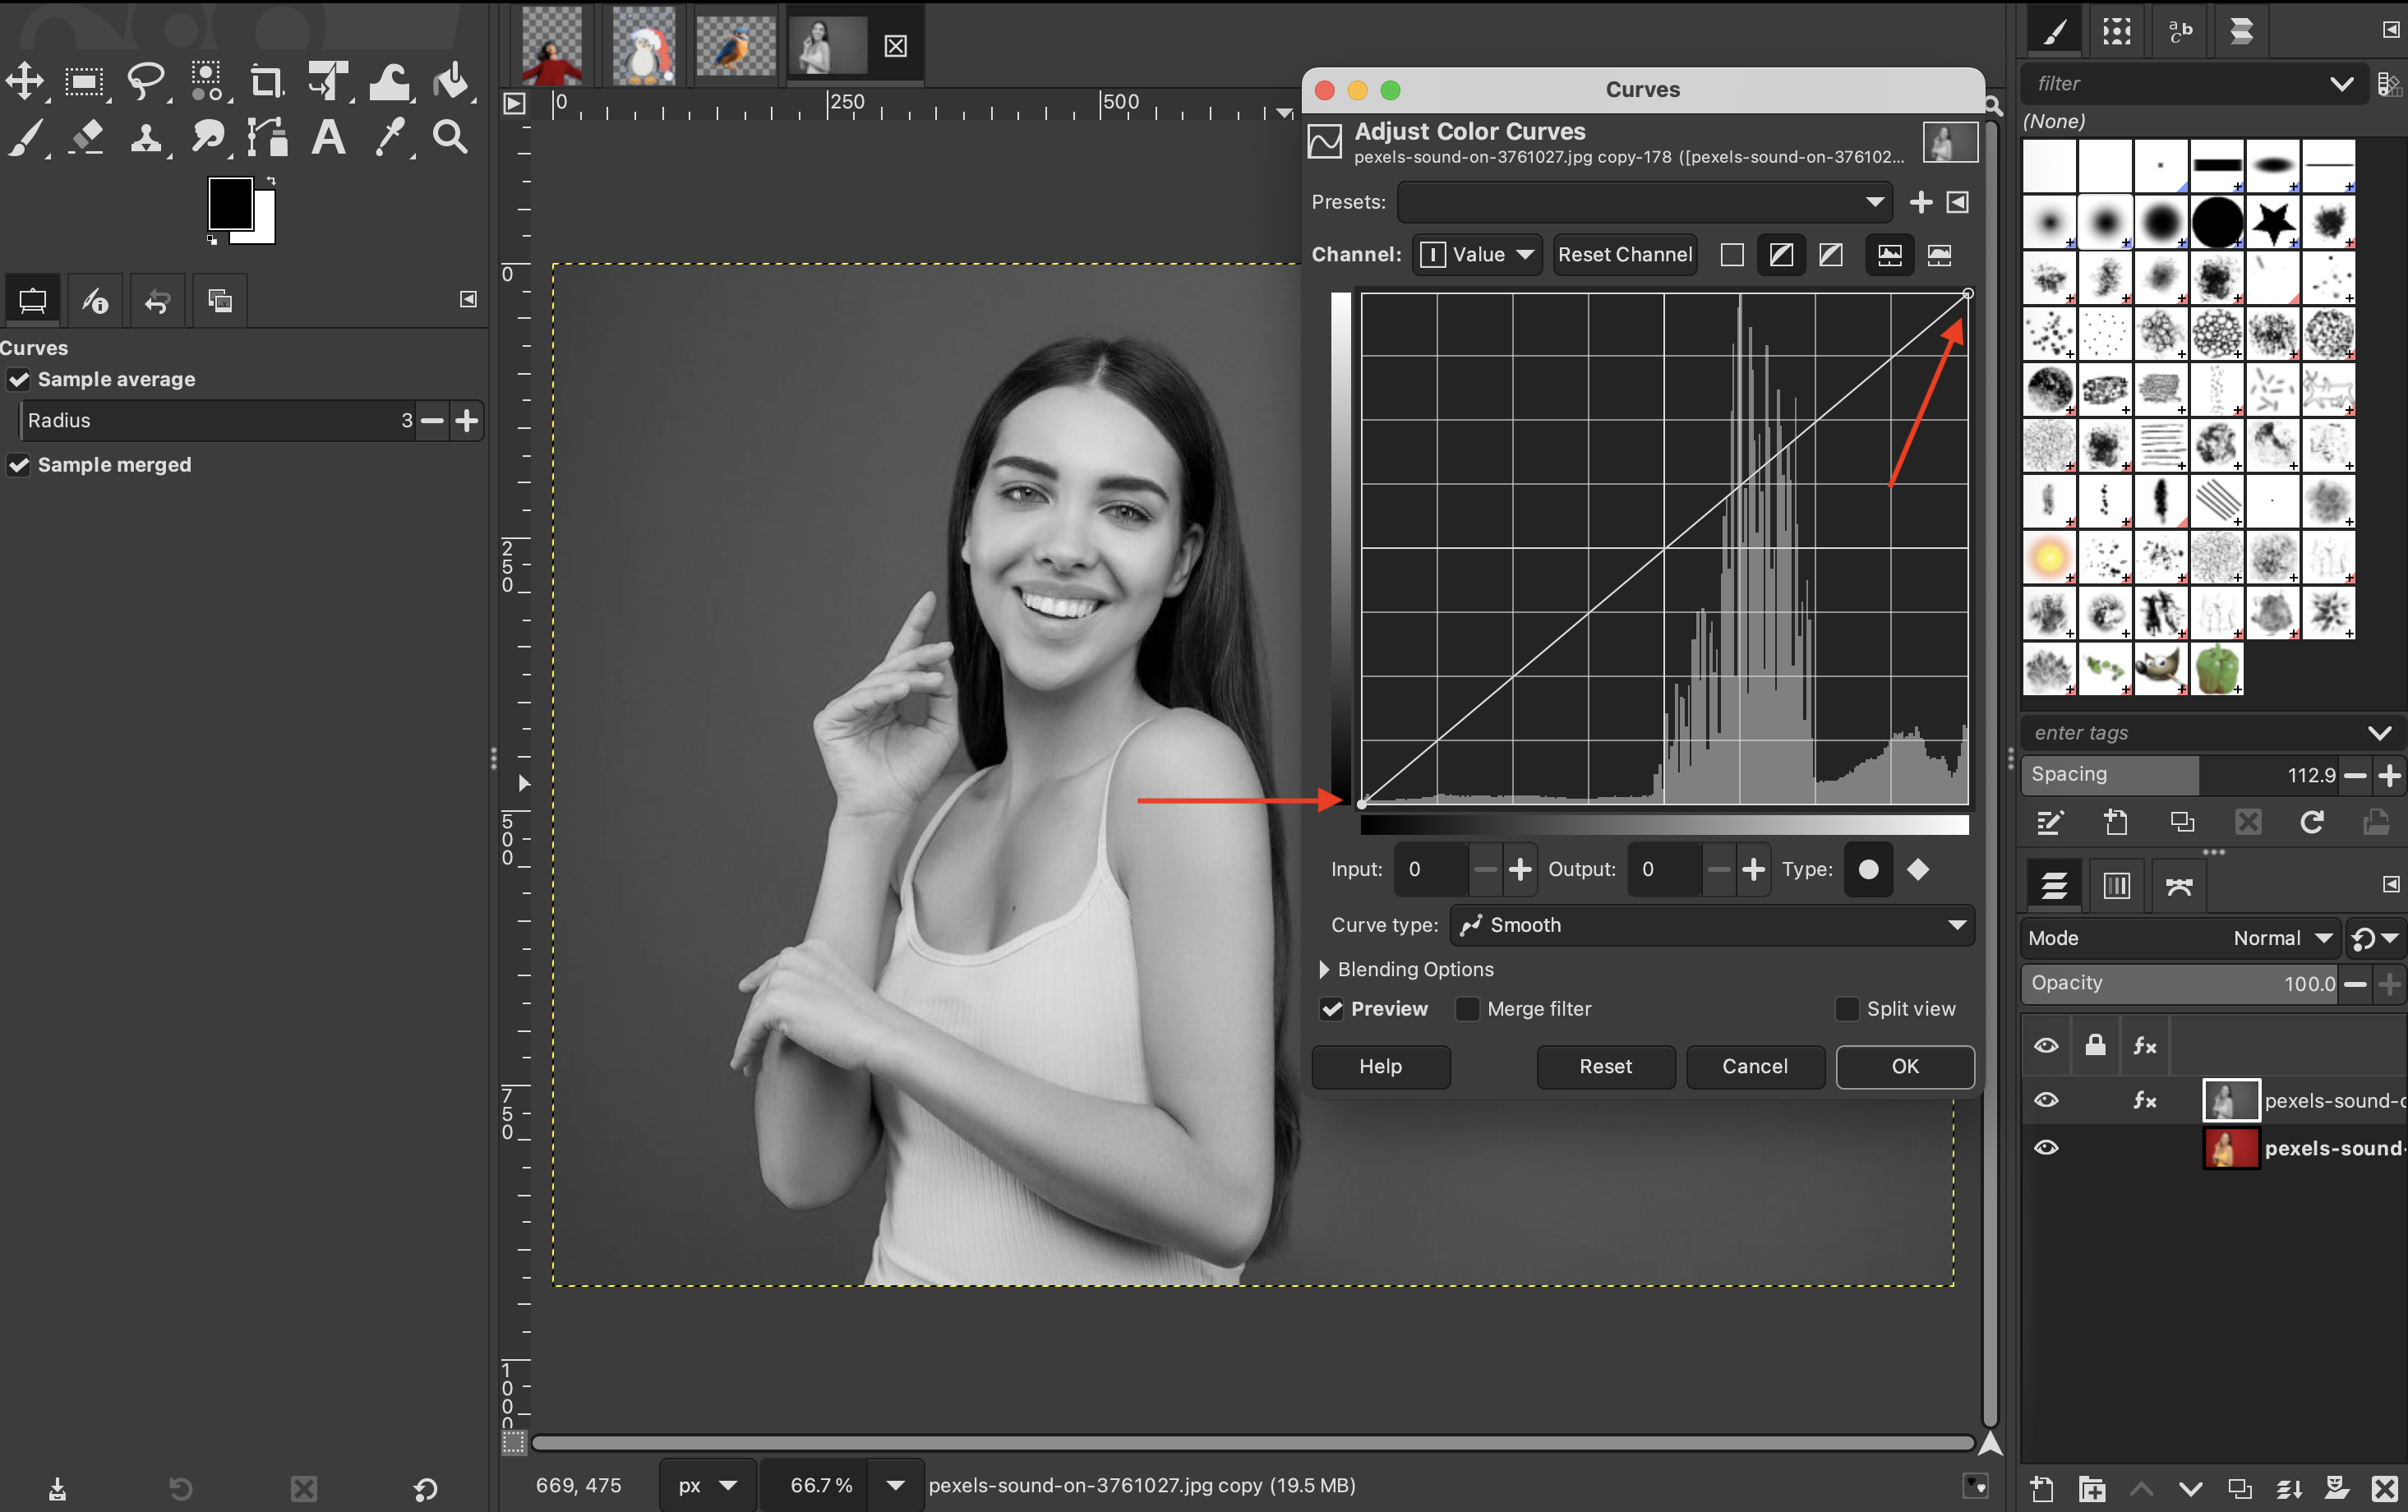
Then go back to “Colors” and select “Curves.”
-
Manually adjust the top and bottom nodes so that the subject is filled with black and the background is predominantly white.
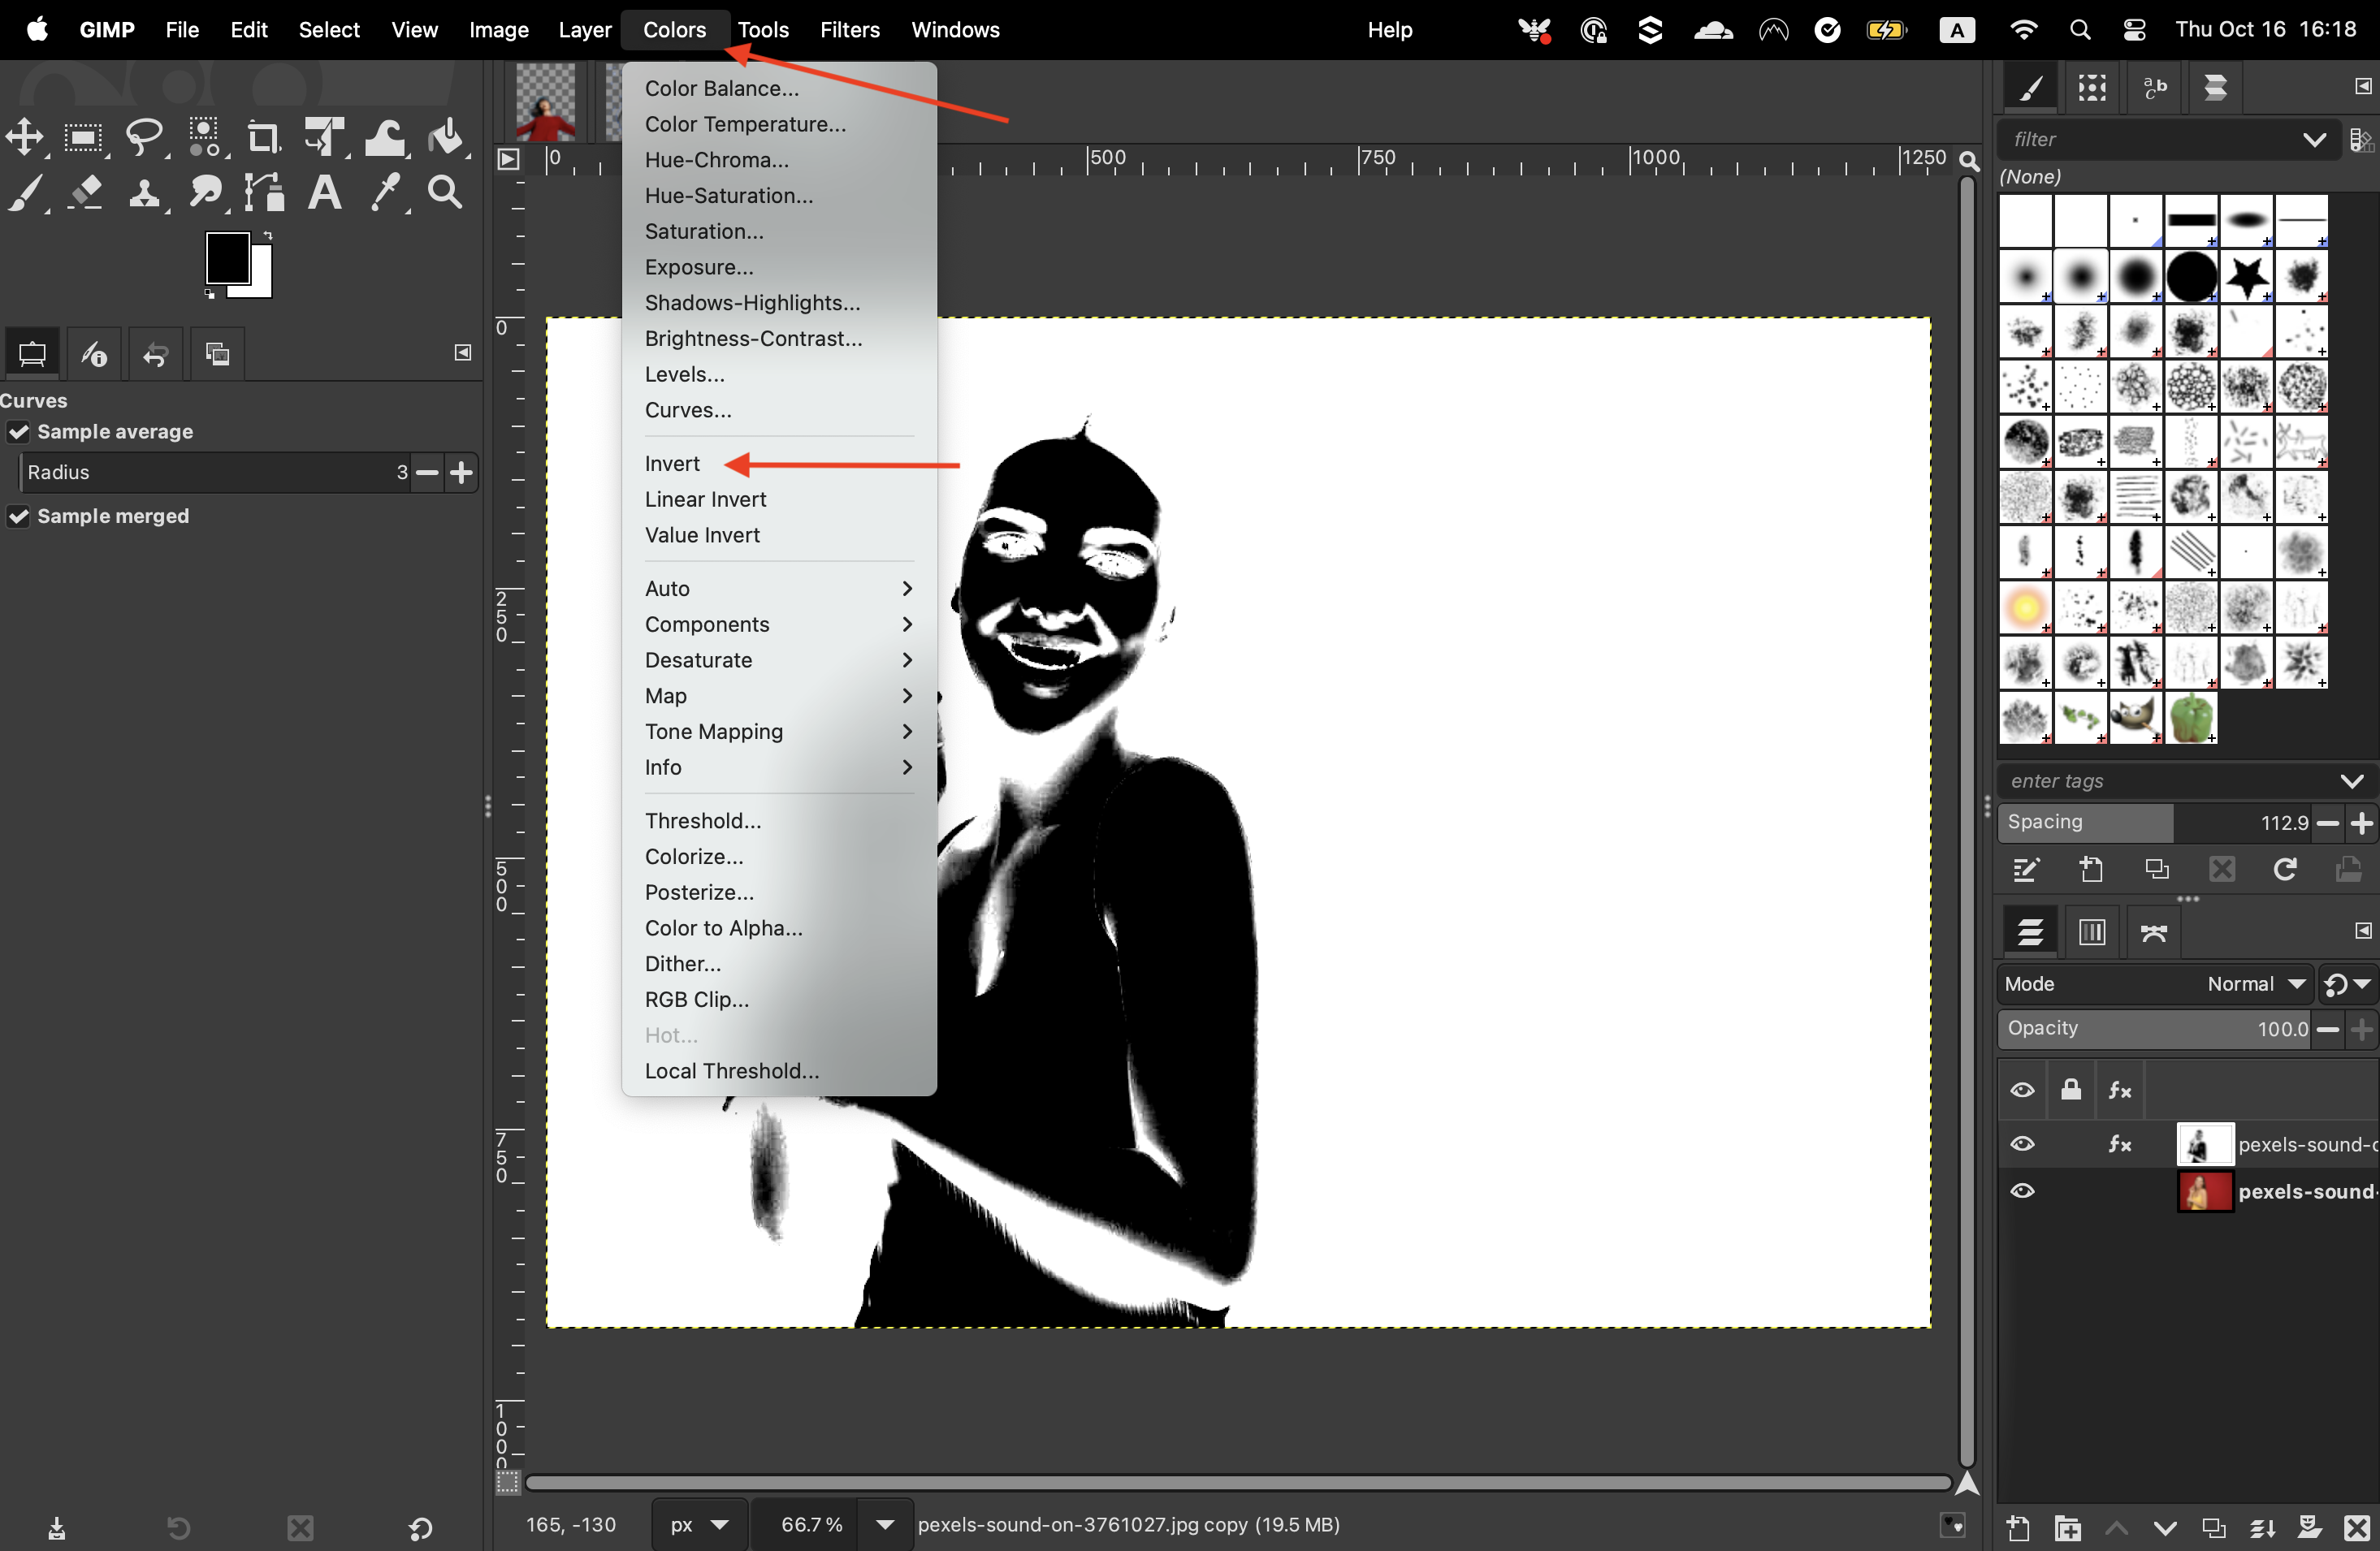
-
Then invert the colors by going to “Colors” > “Invert.”
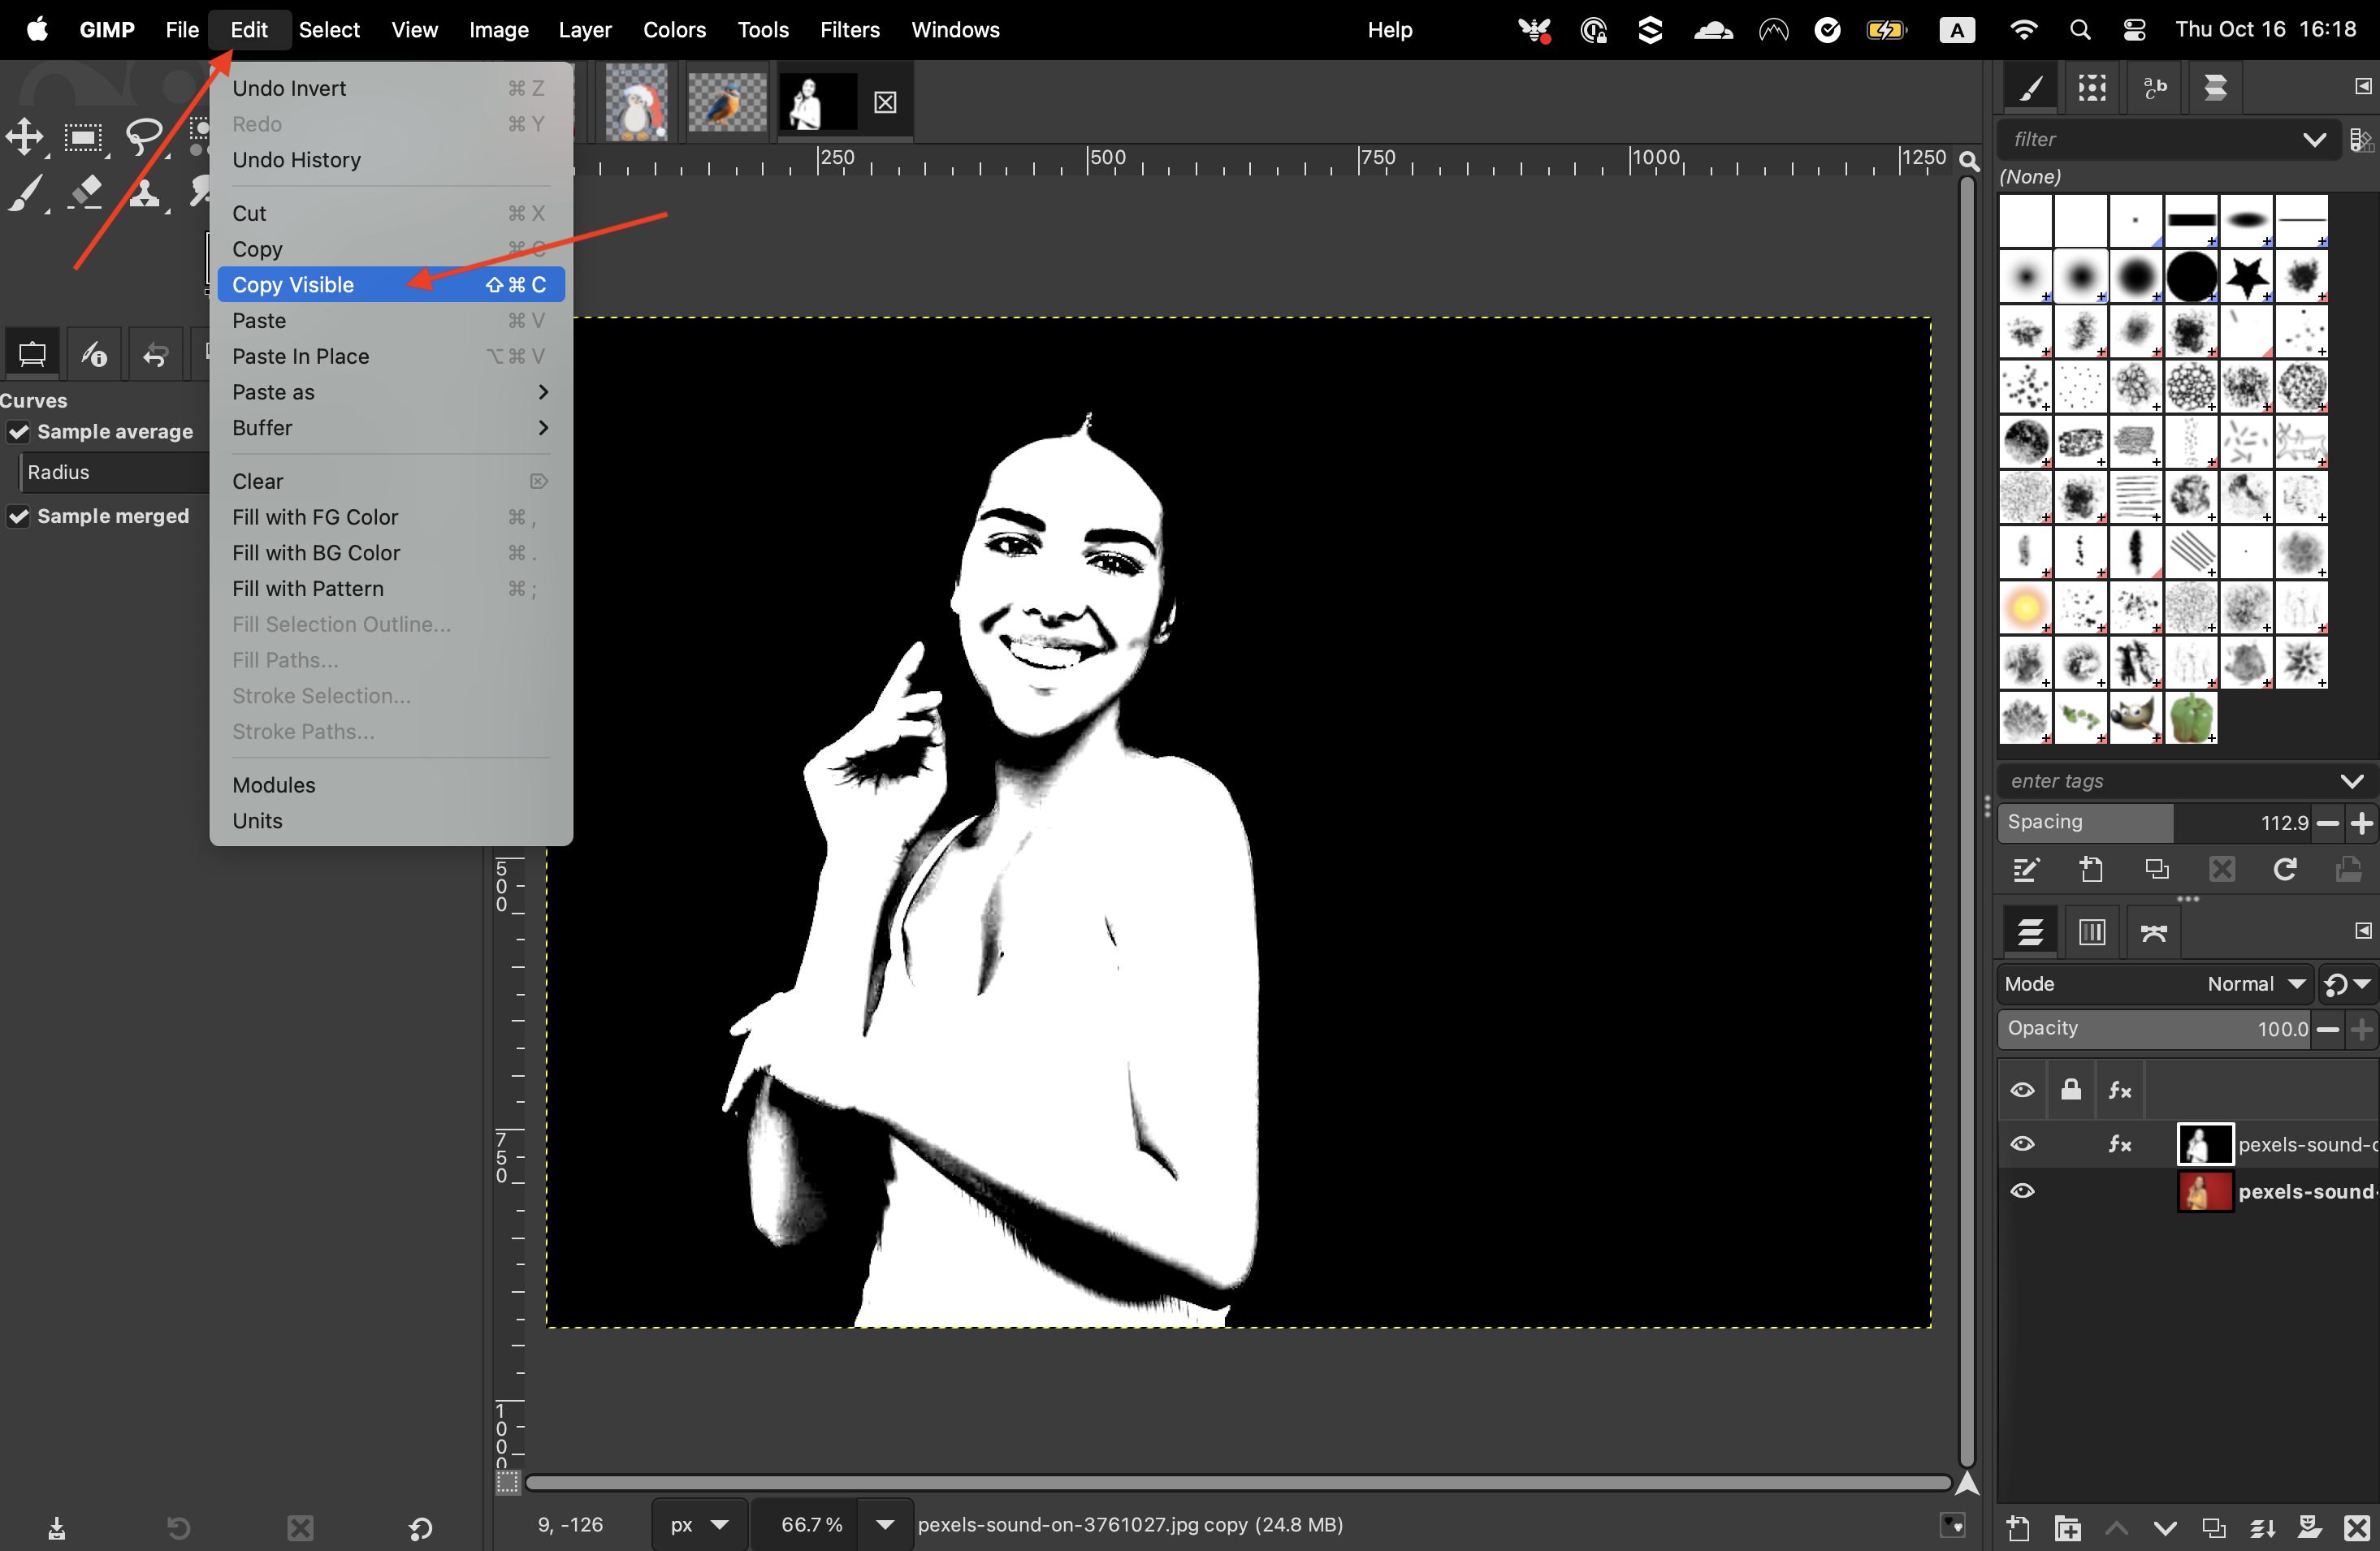
-
Then copy this image by going to “Edit” > “Copy visible.”
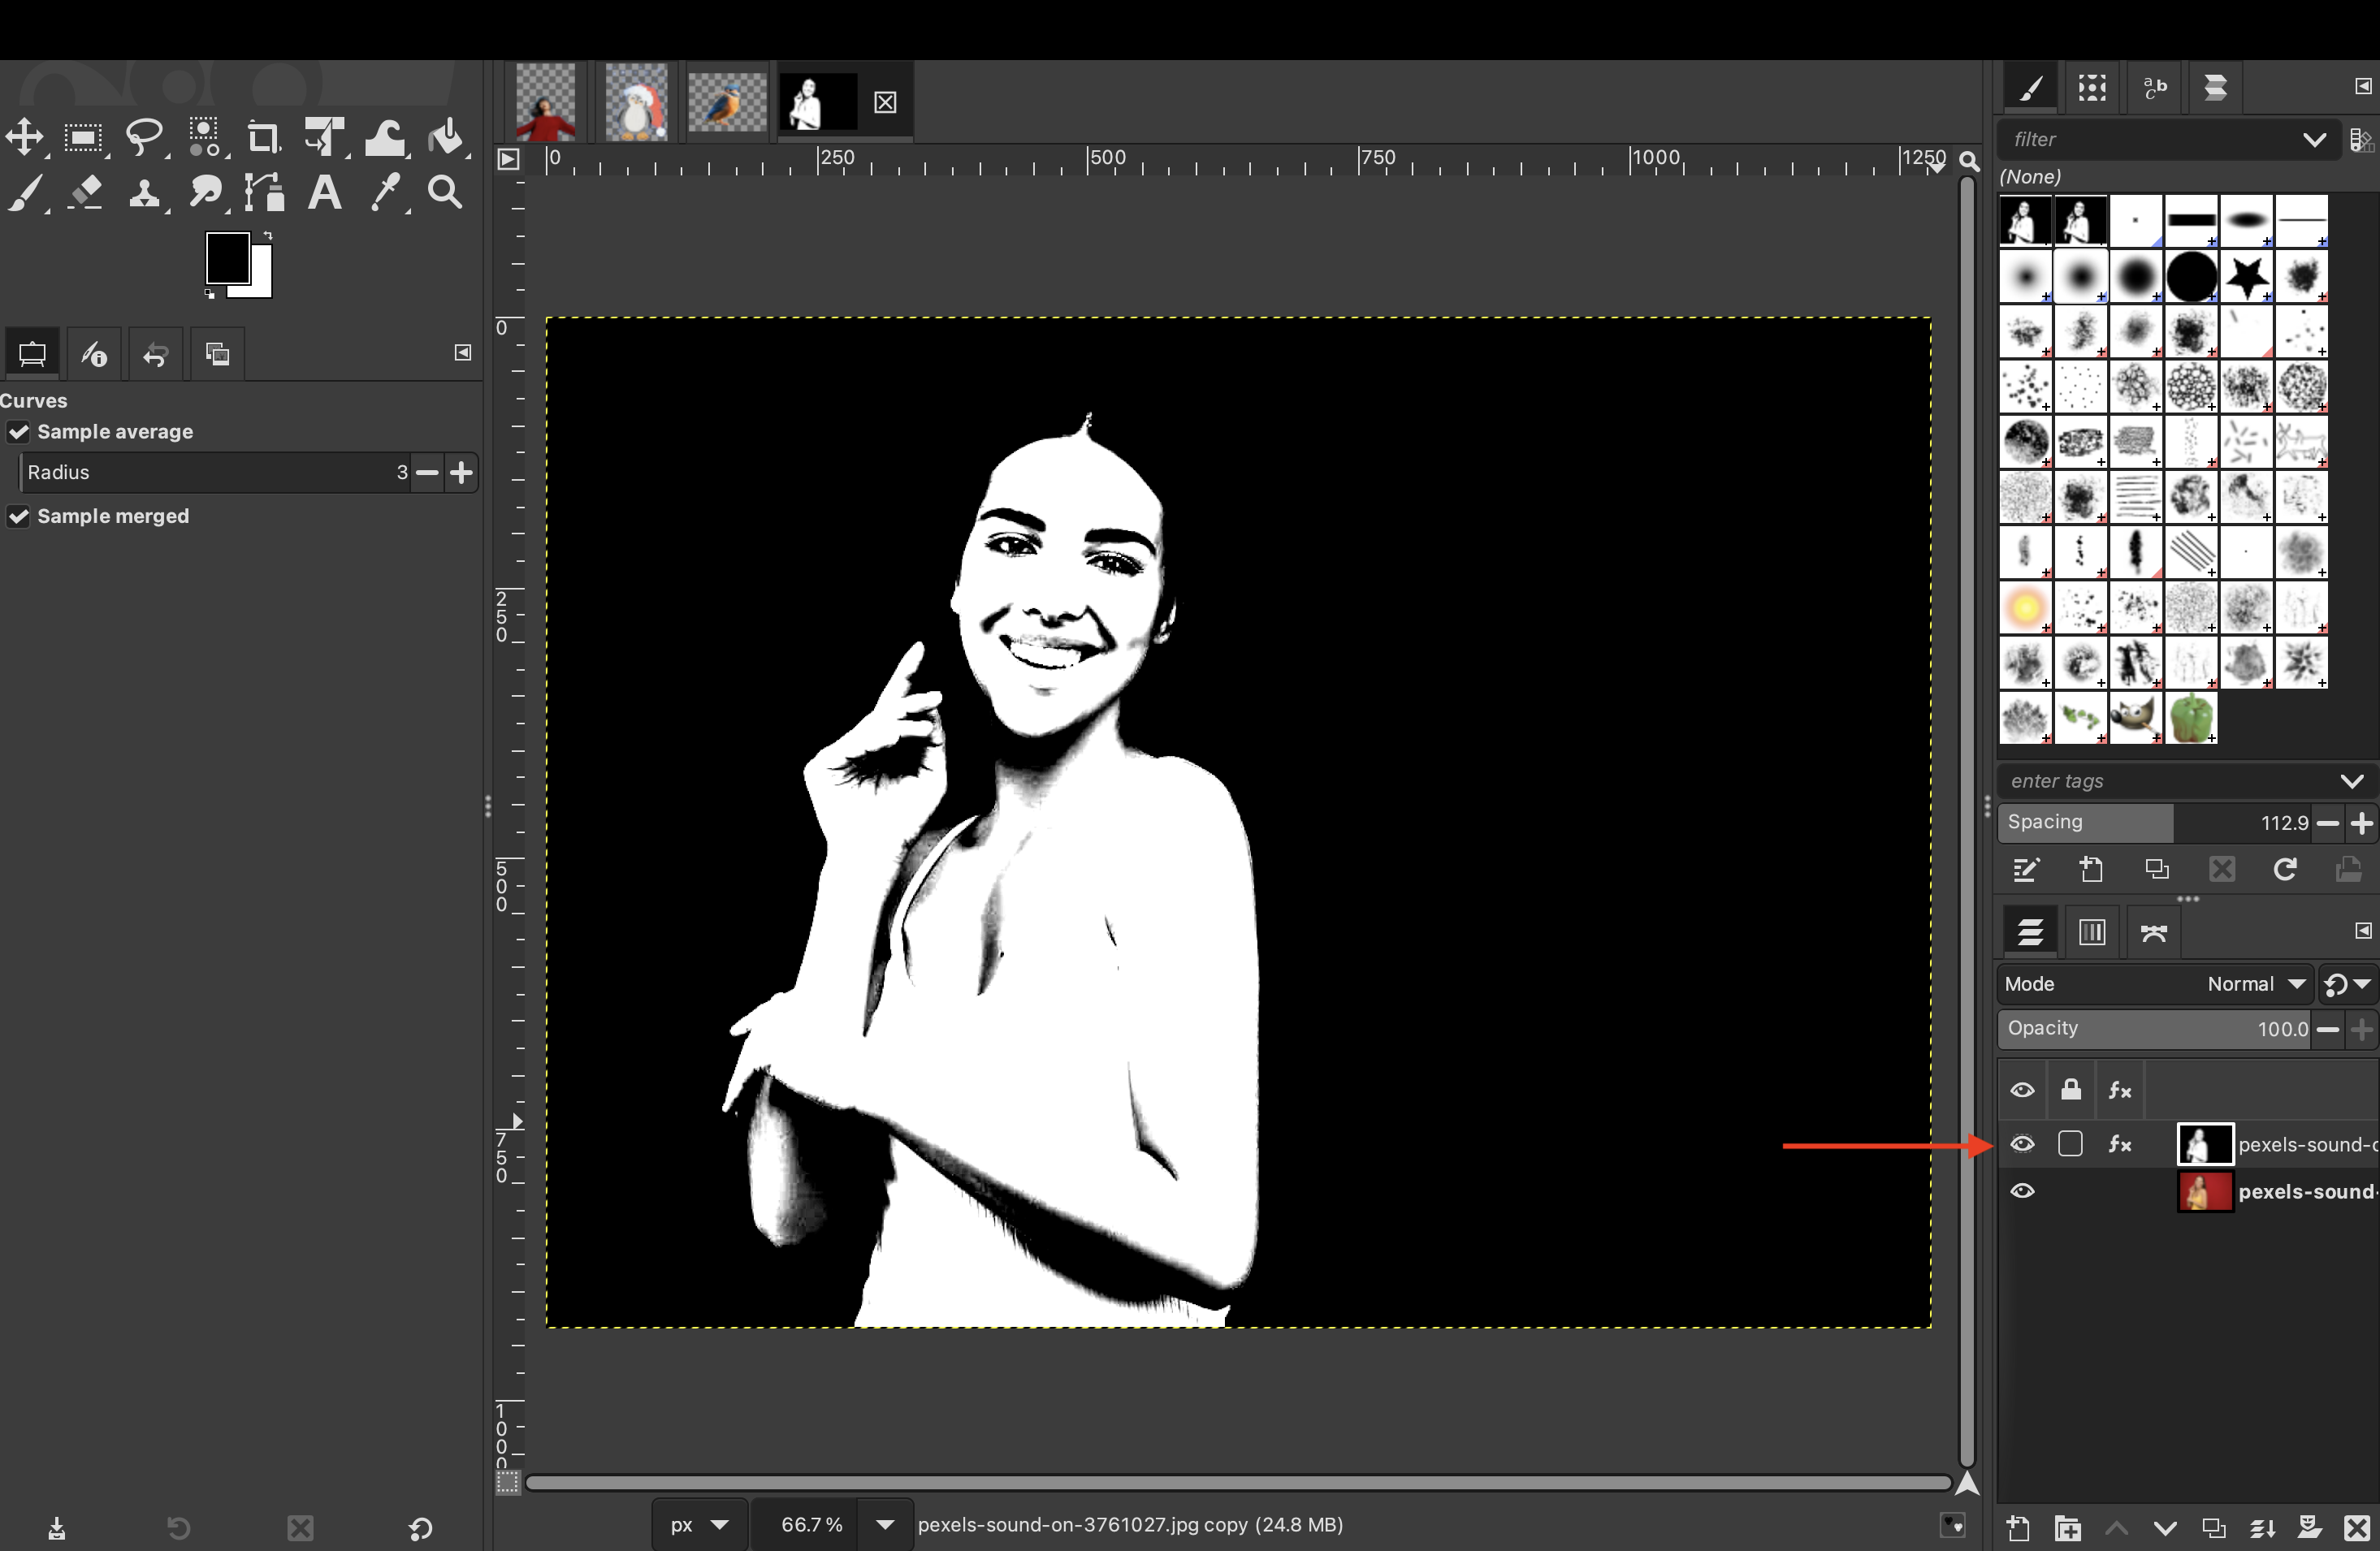
-
Now you can turn off the visibility of that layer from the layers panel by clicking on the eyeball next to it.
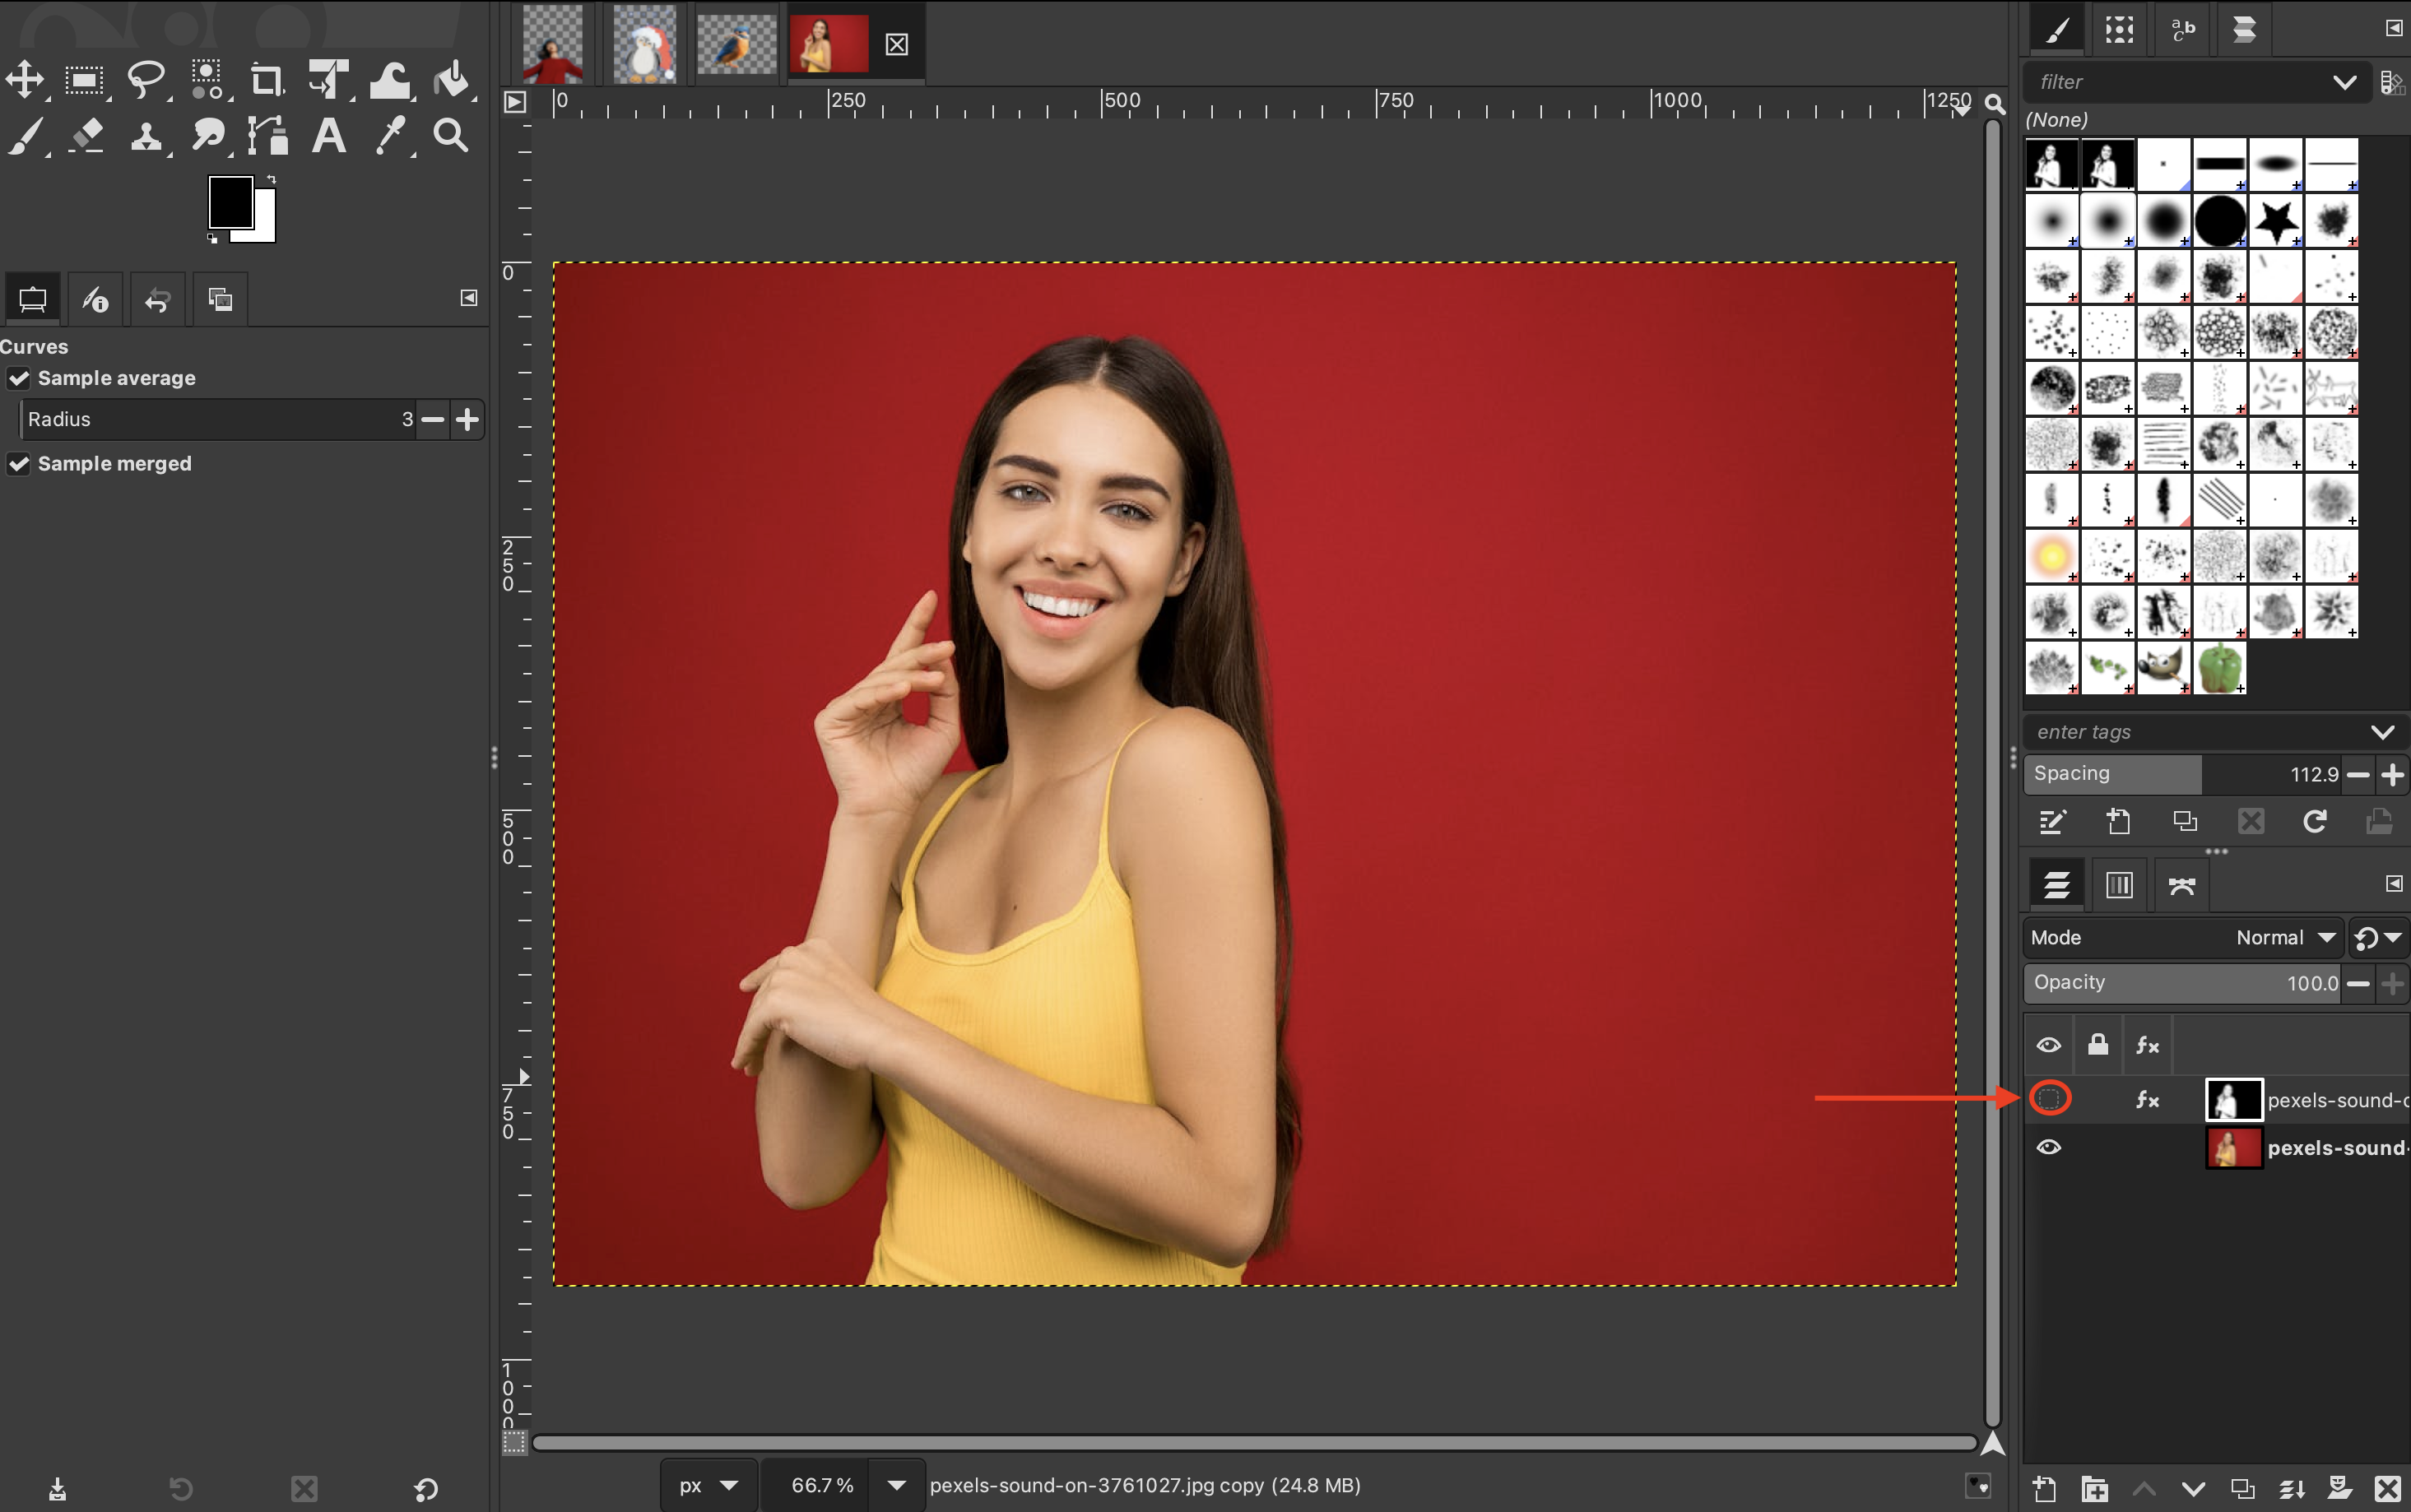
-
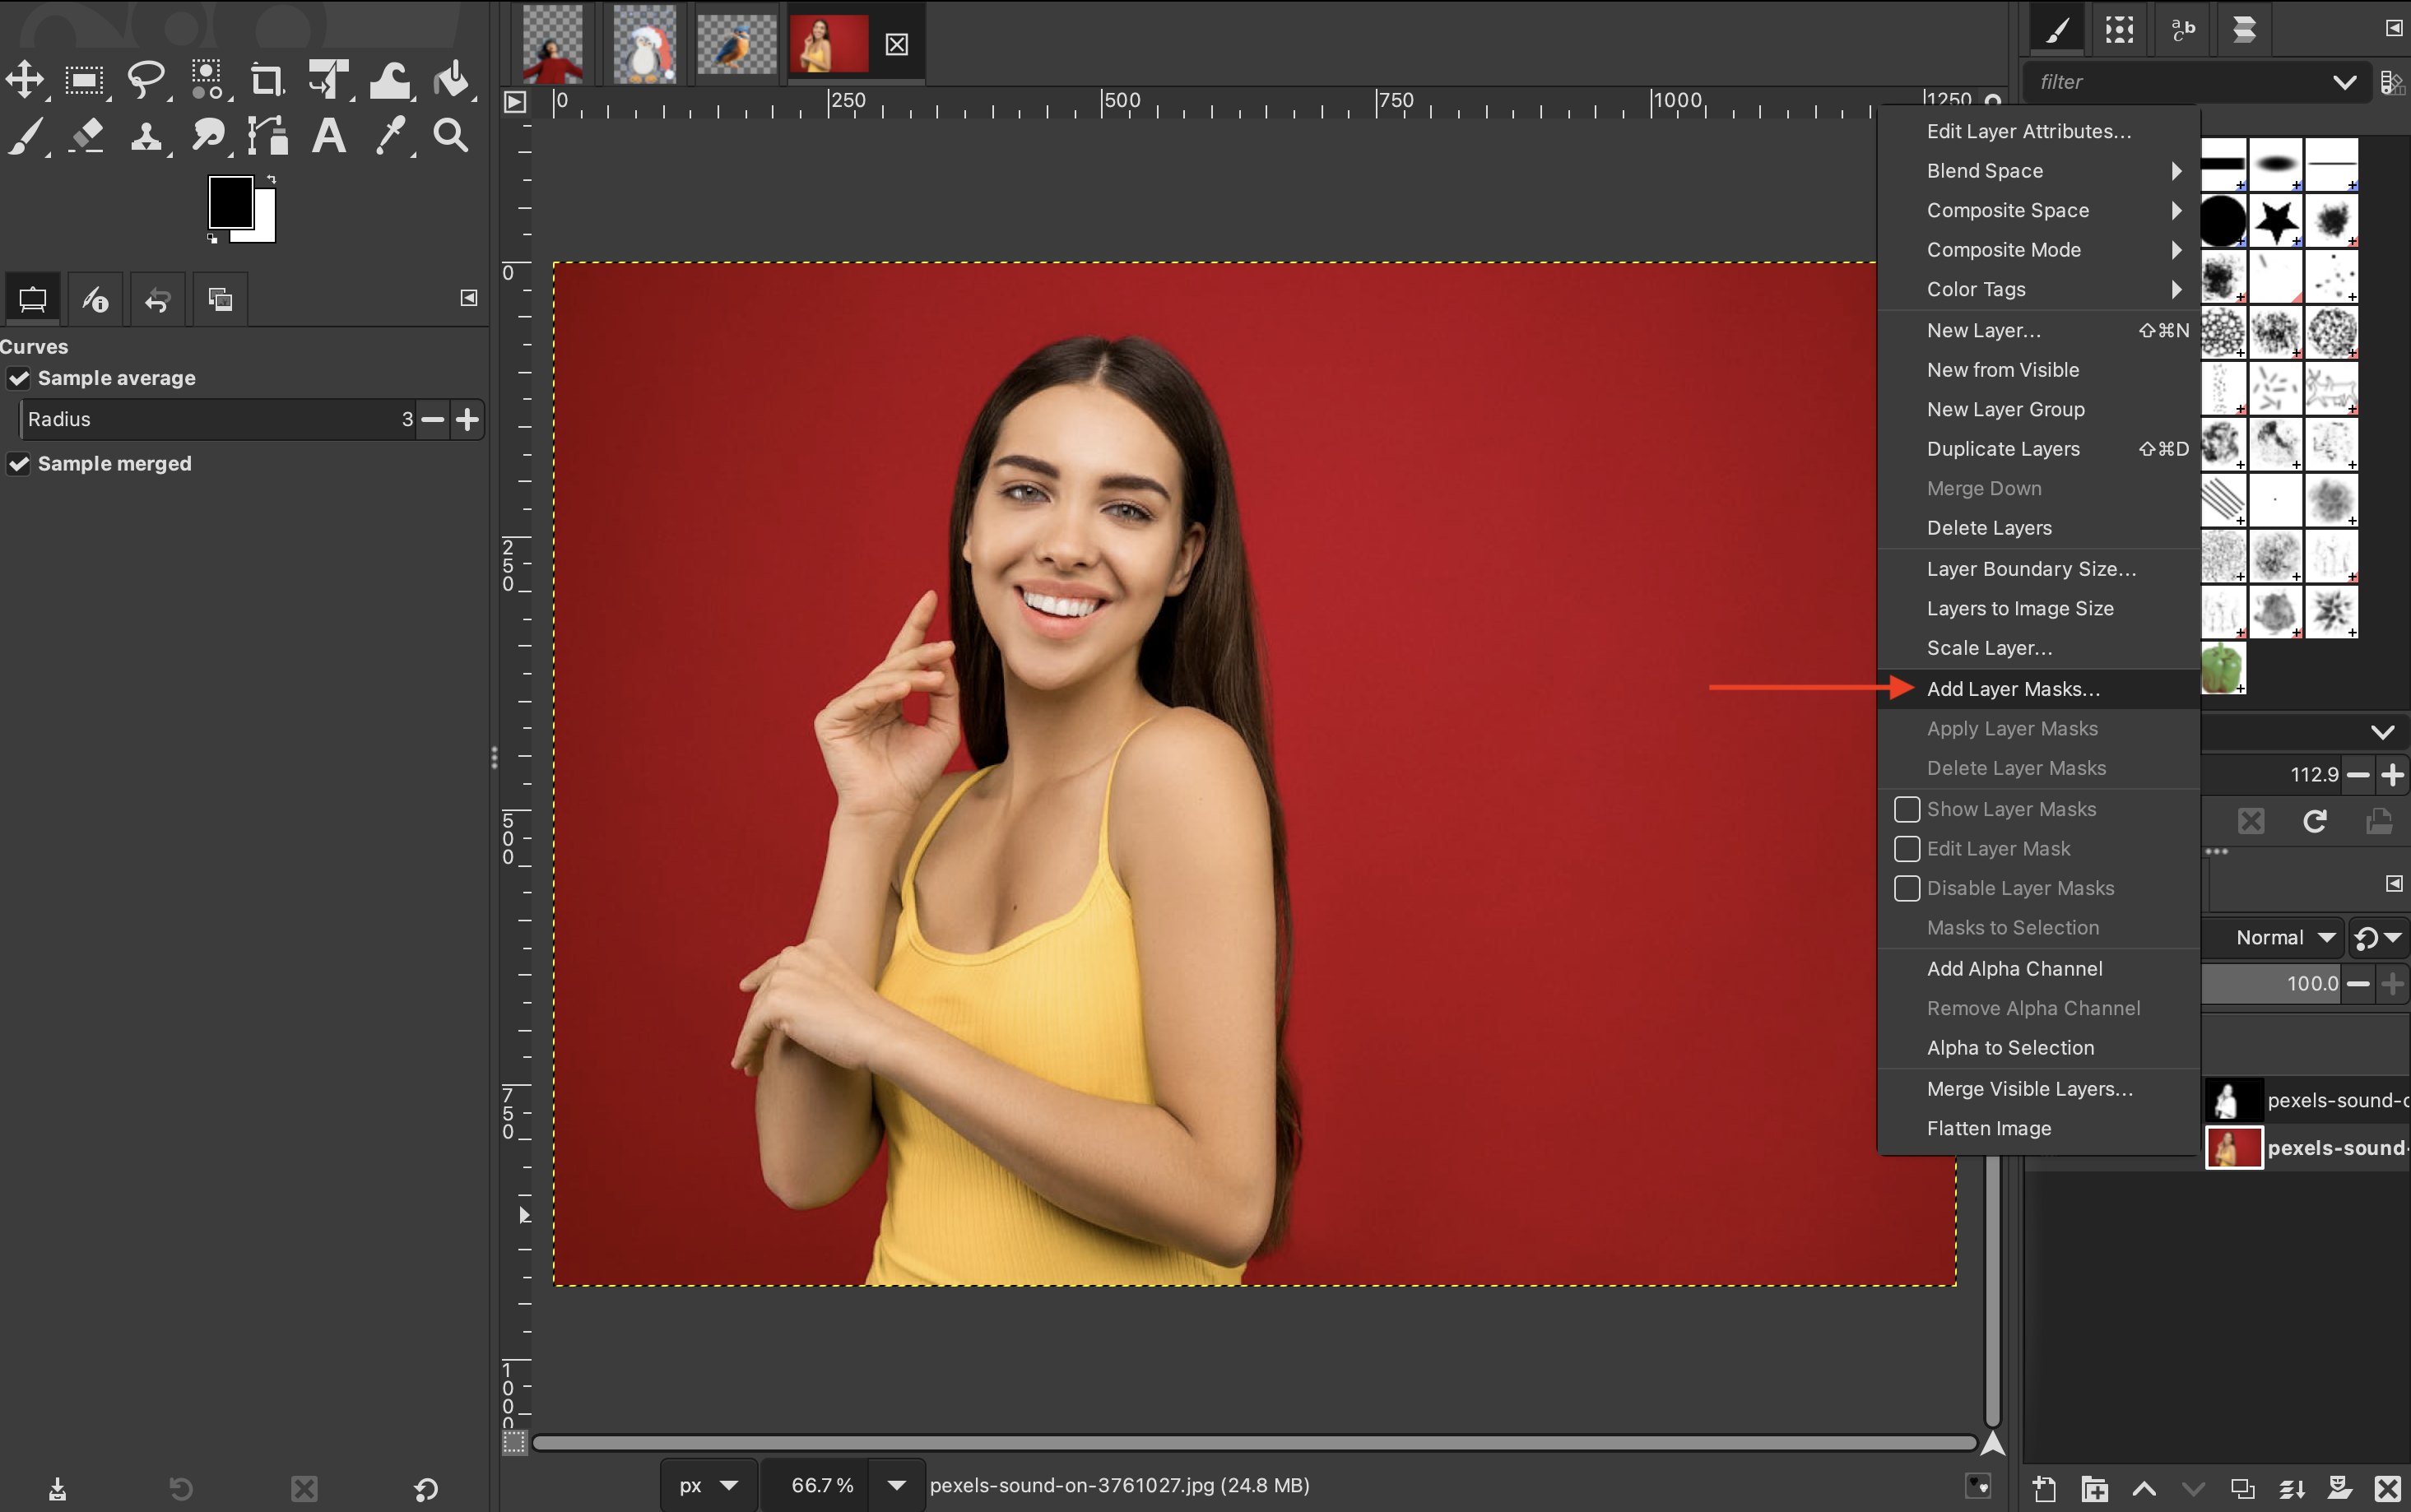
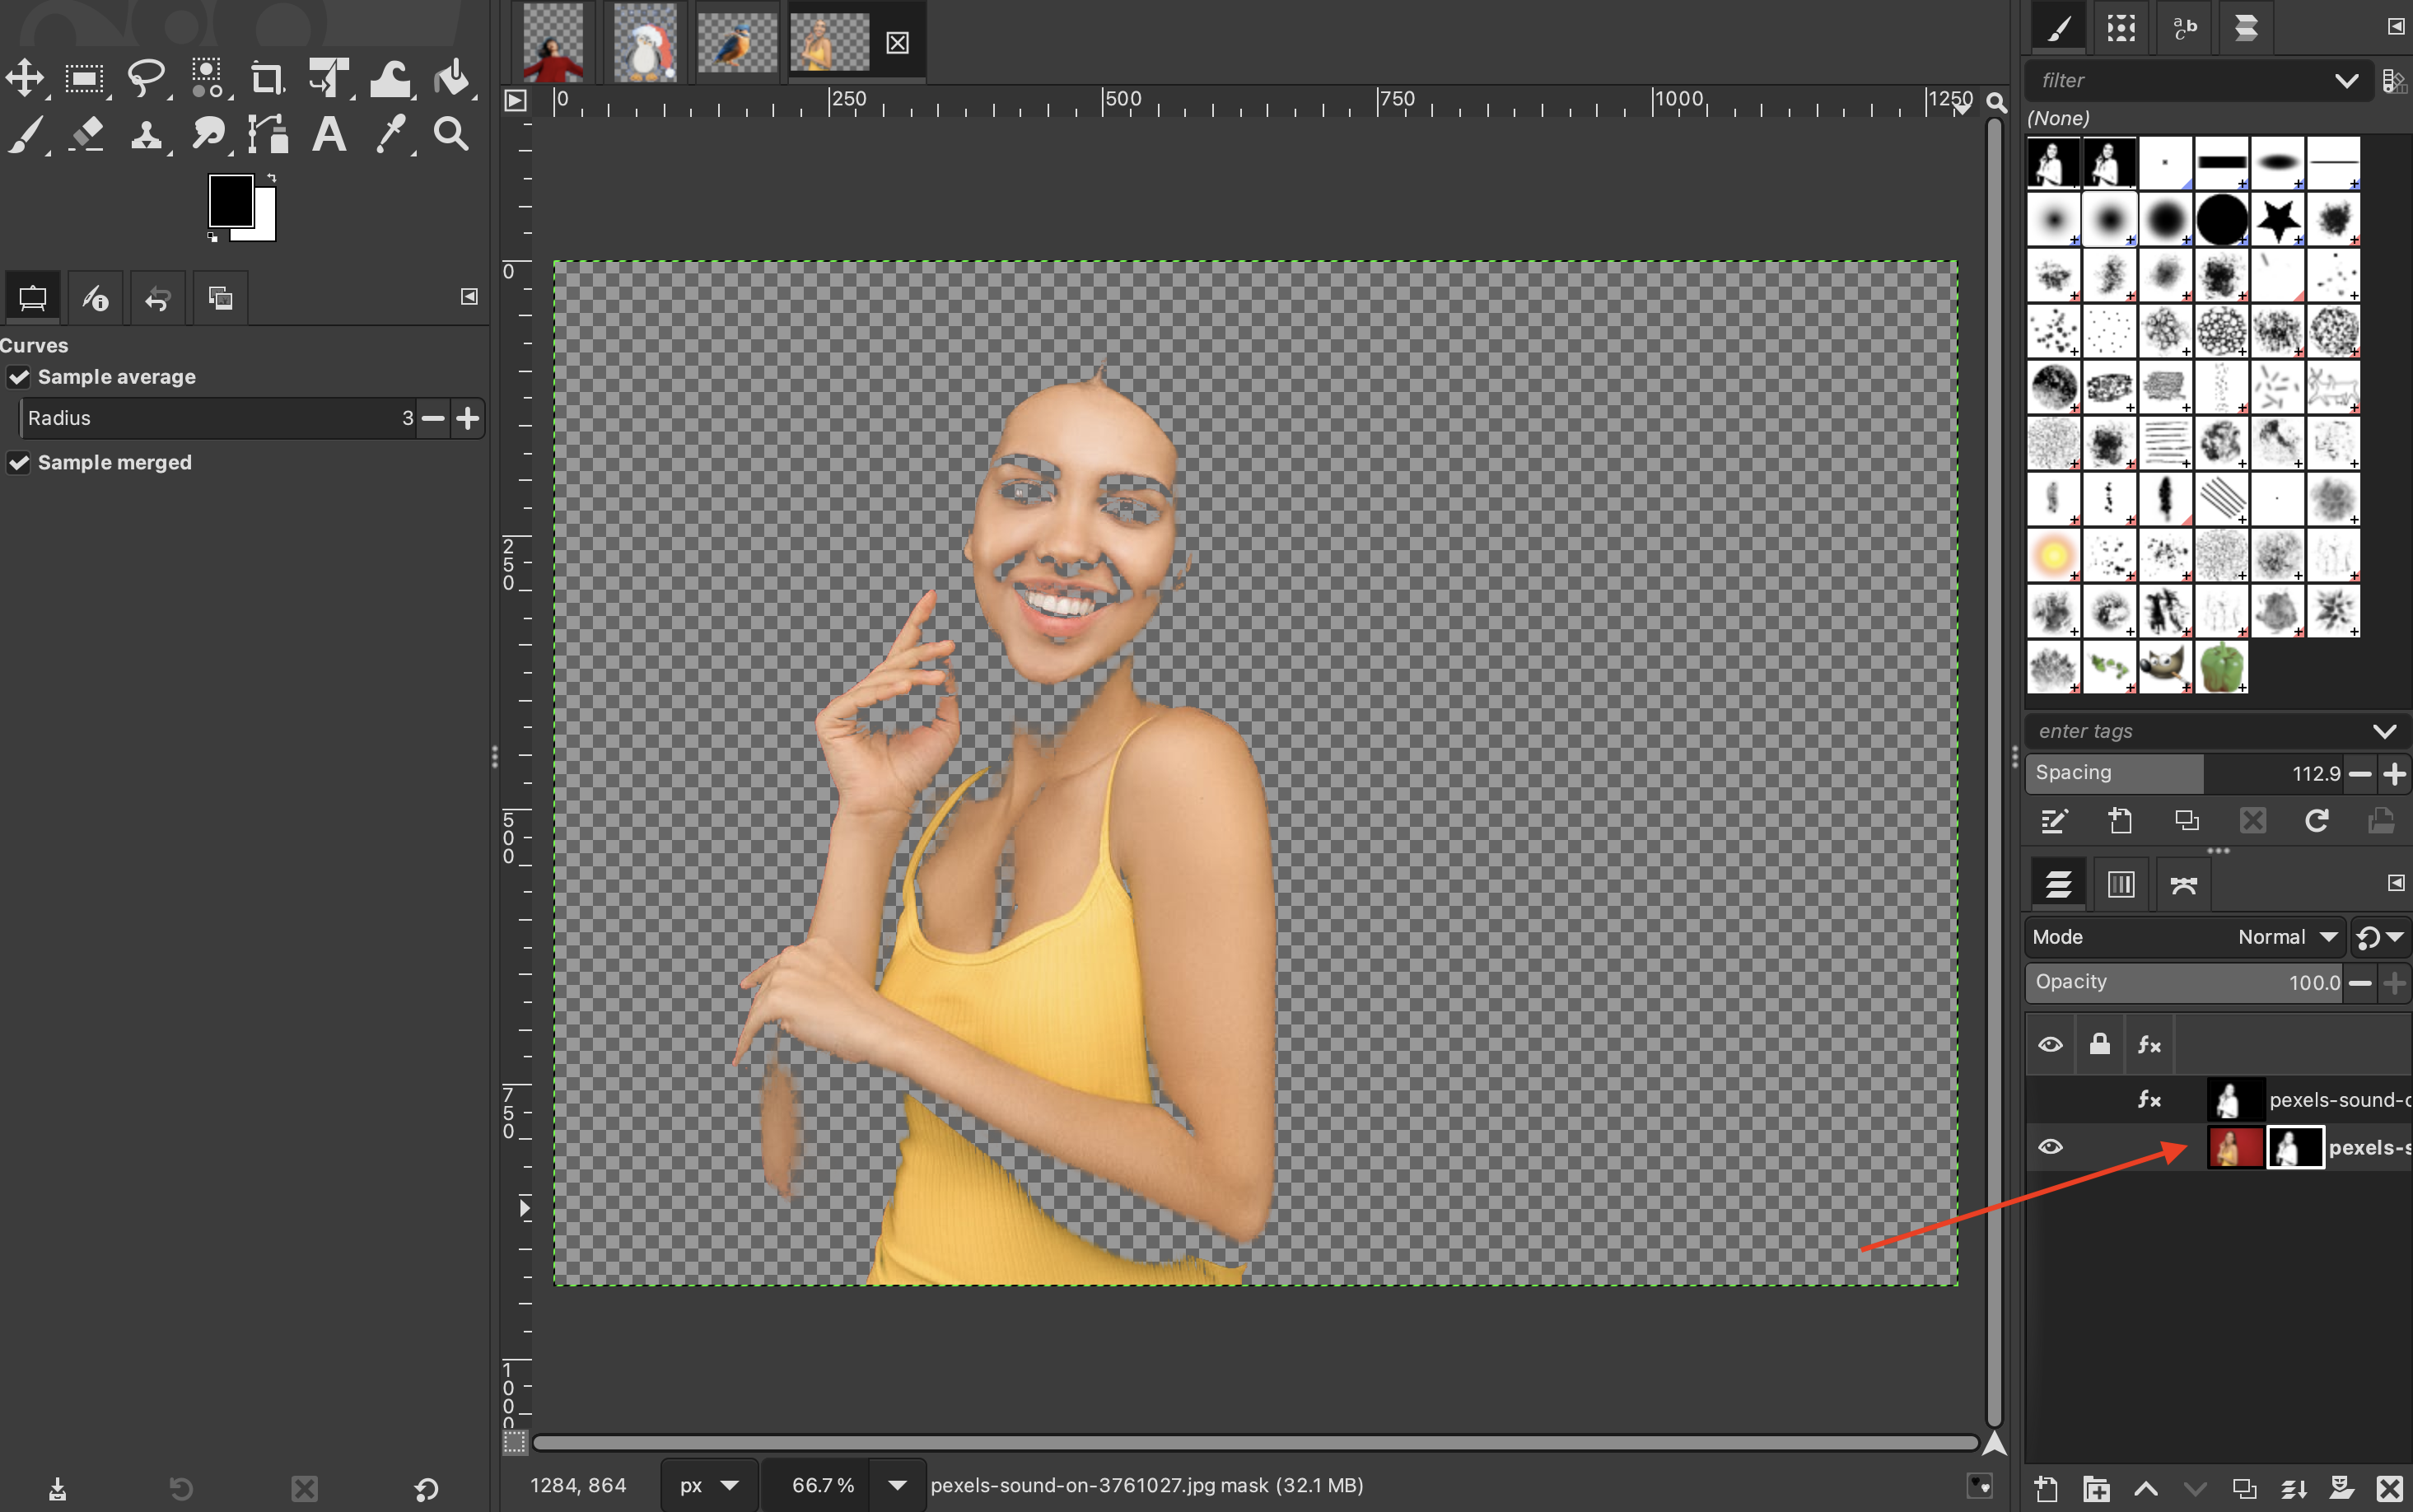
Then, right-click your original layer and go to “Add layer mask.”
-
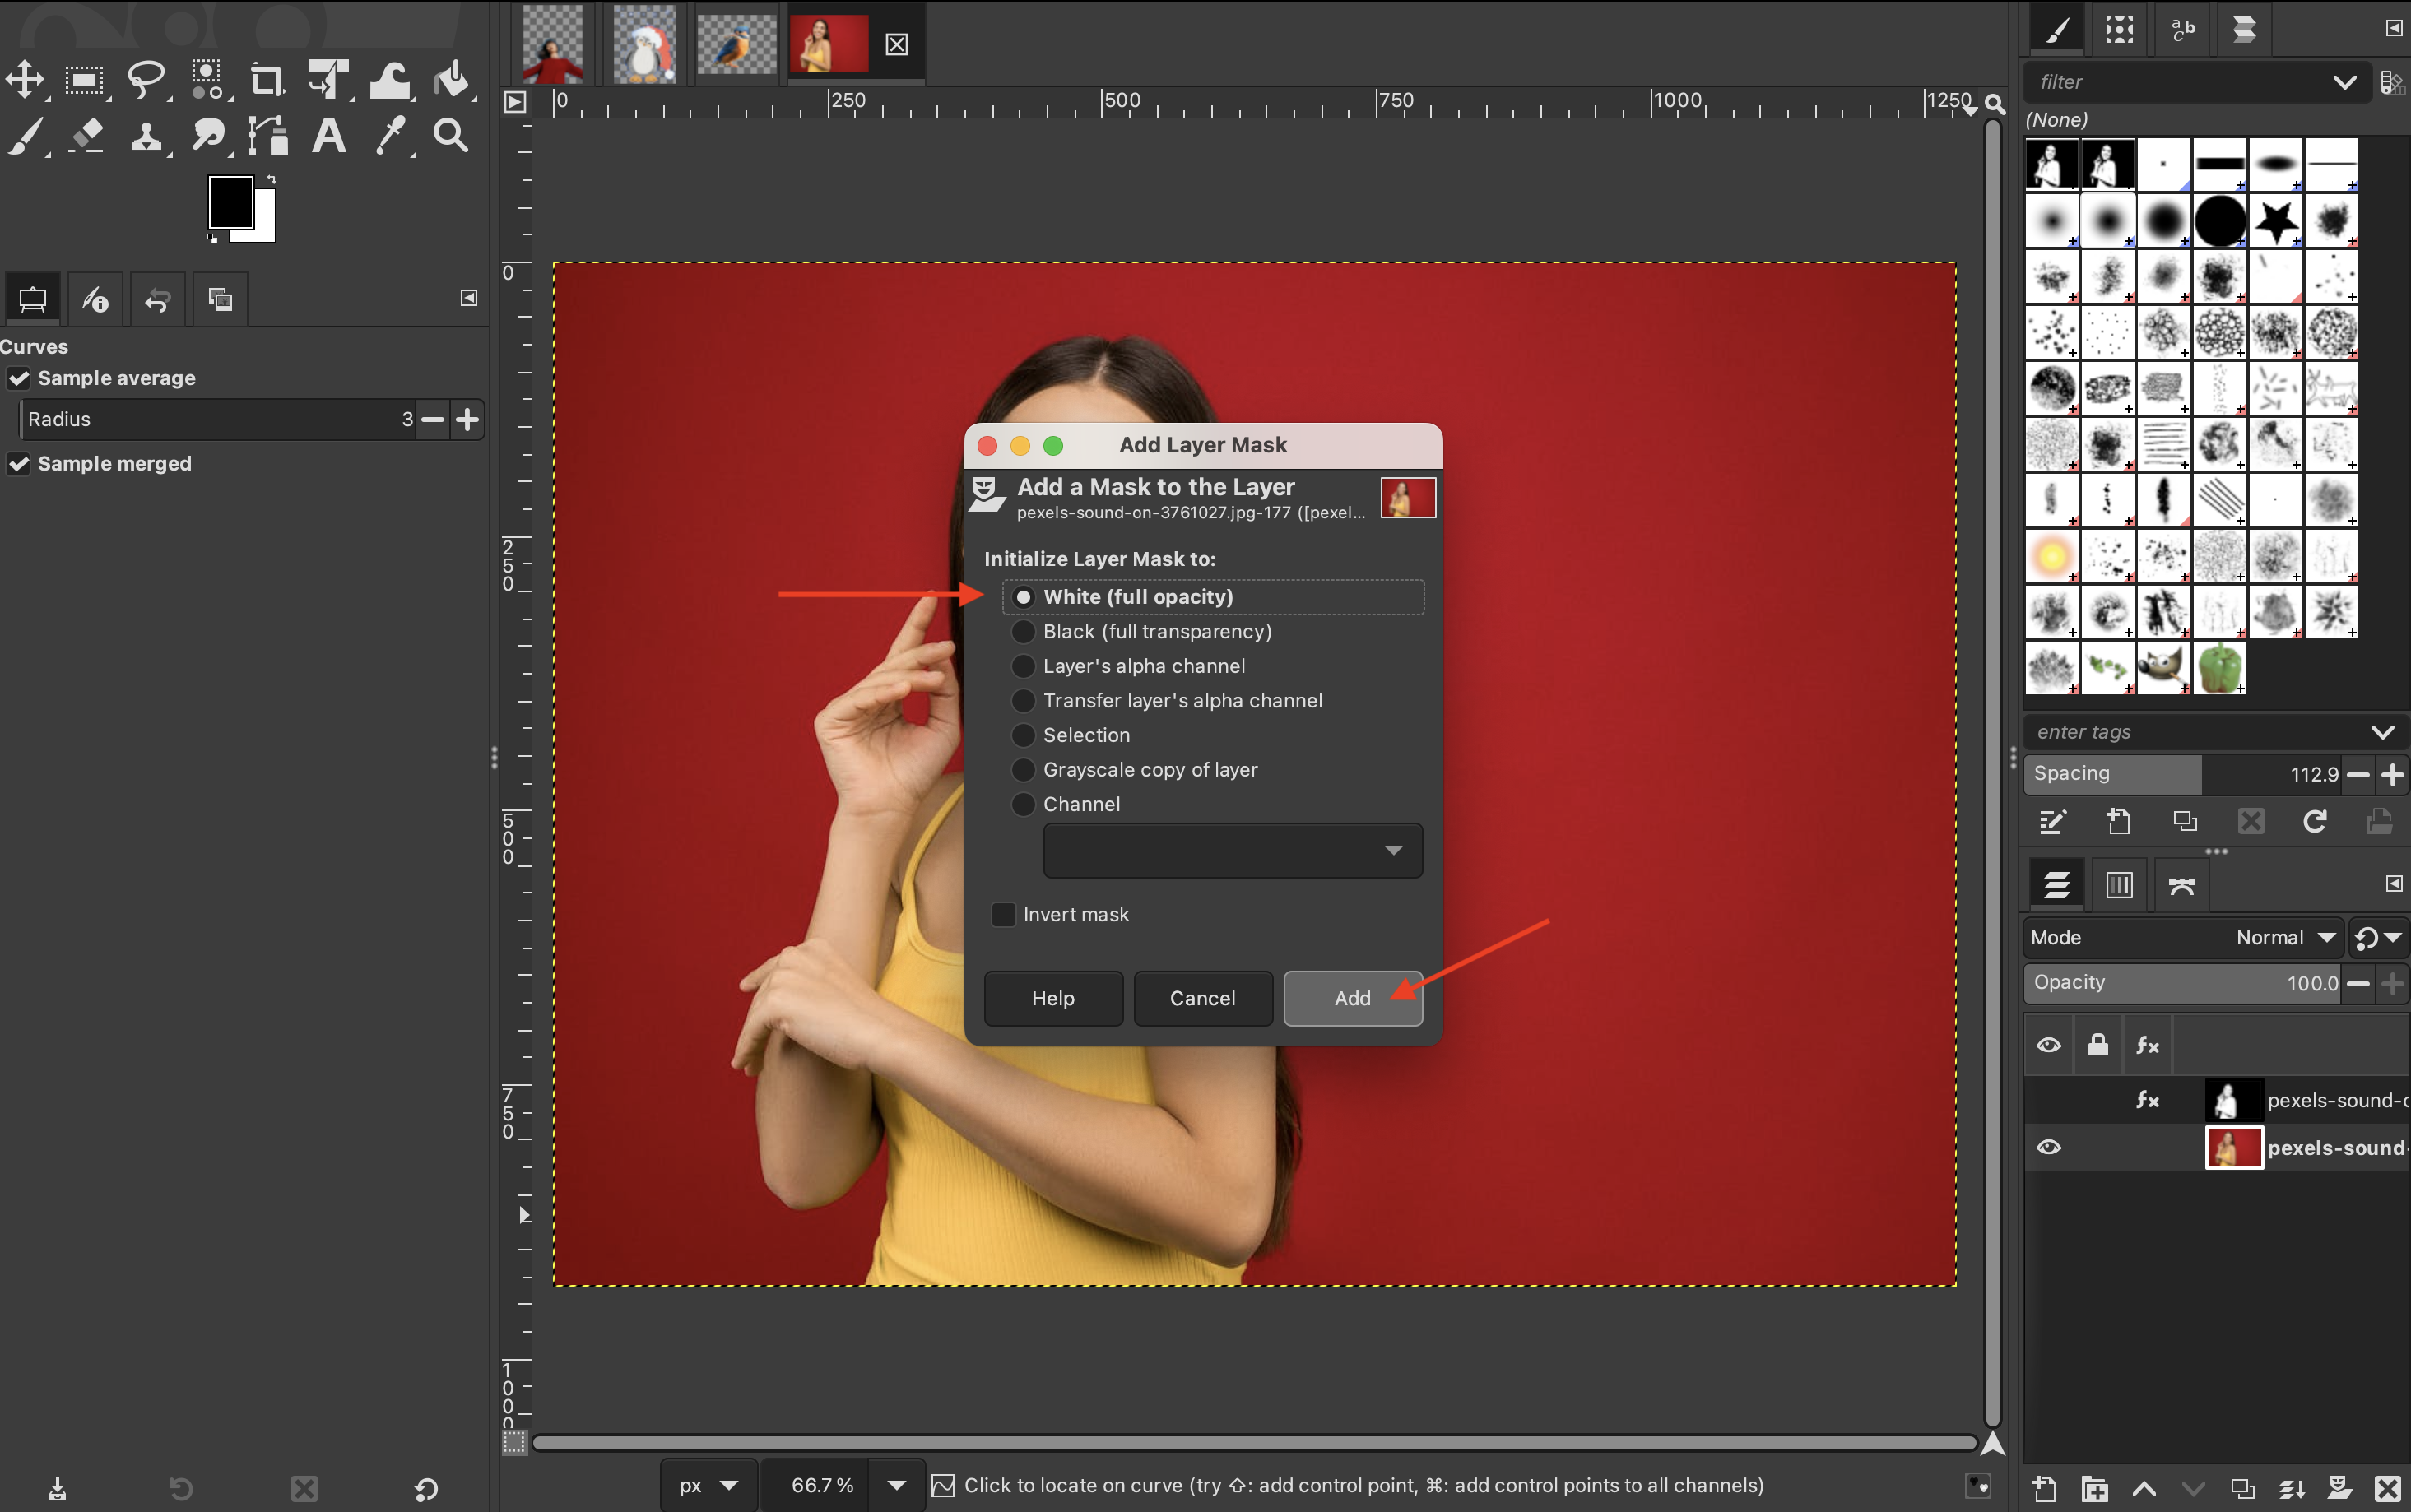
Leave the default settings as they are. If they are not set on “White (full opacity)", then make sure to select that and click on “Add.”
-
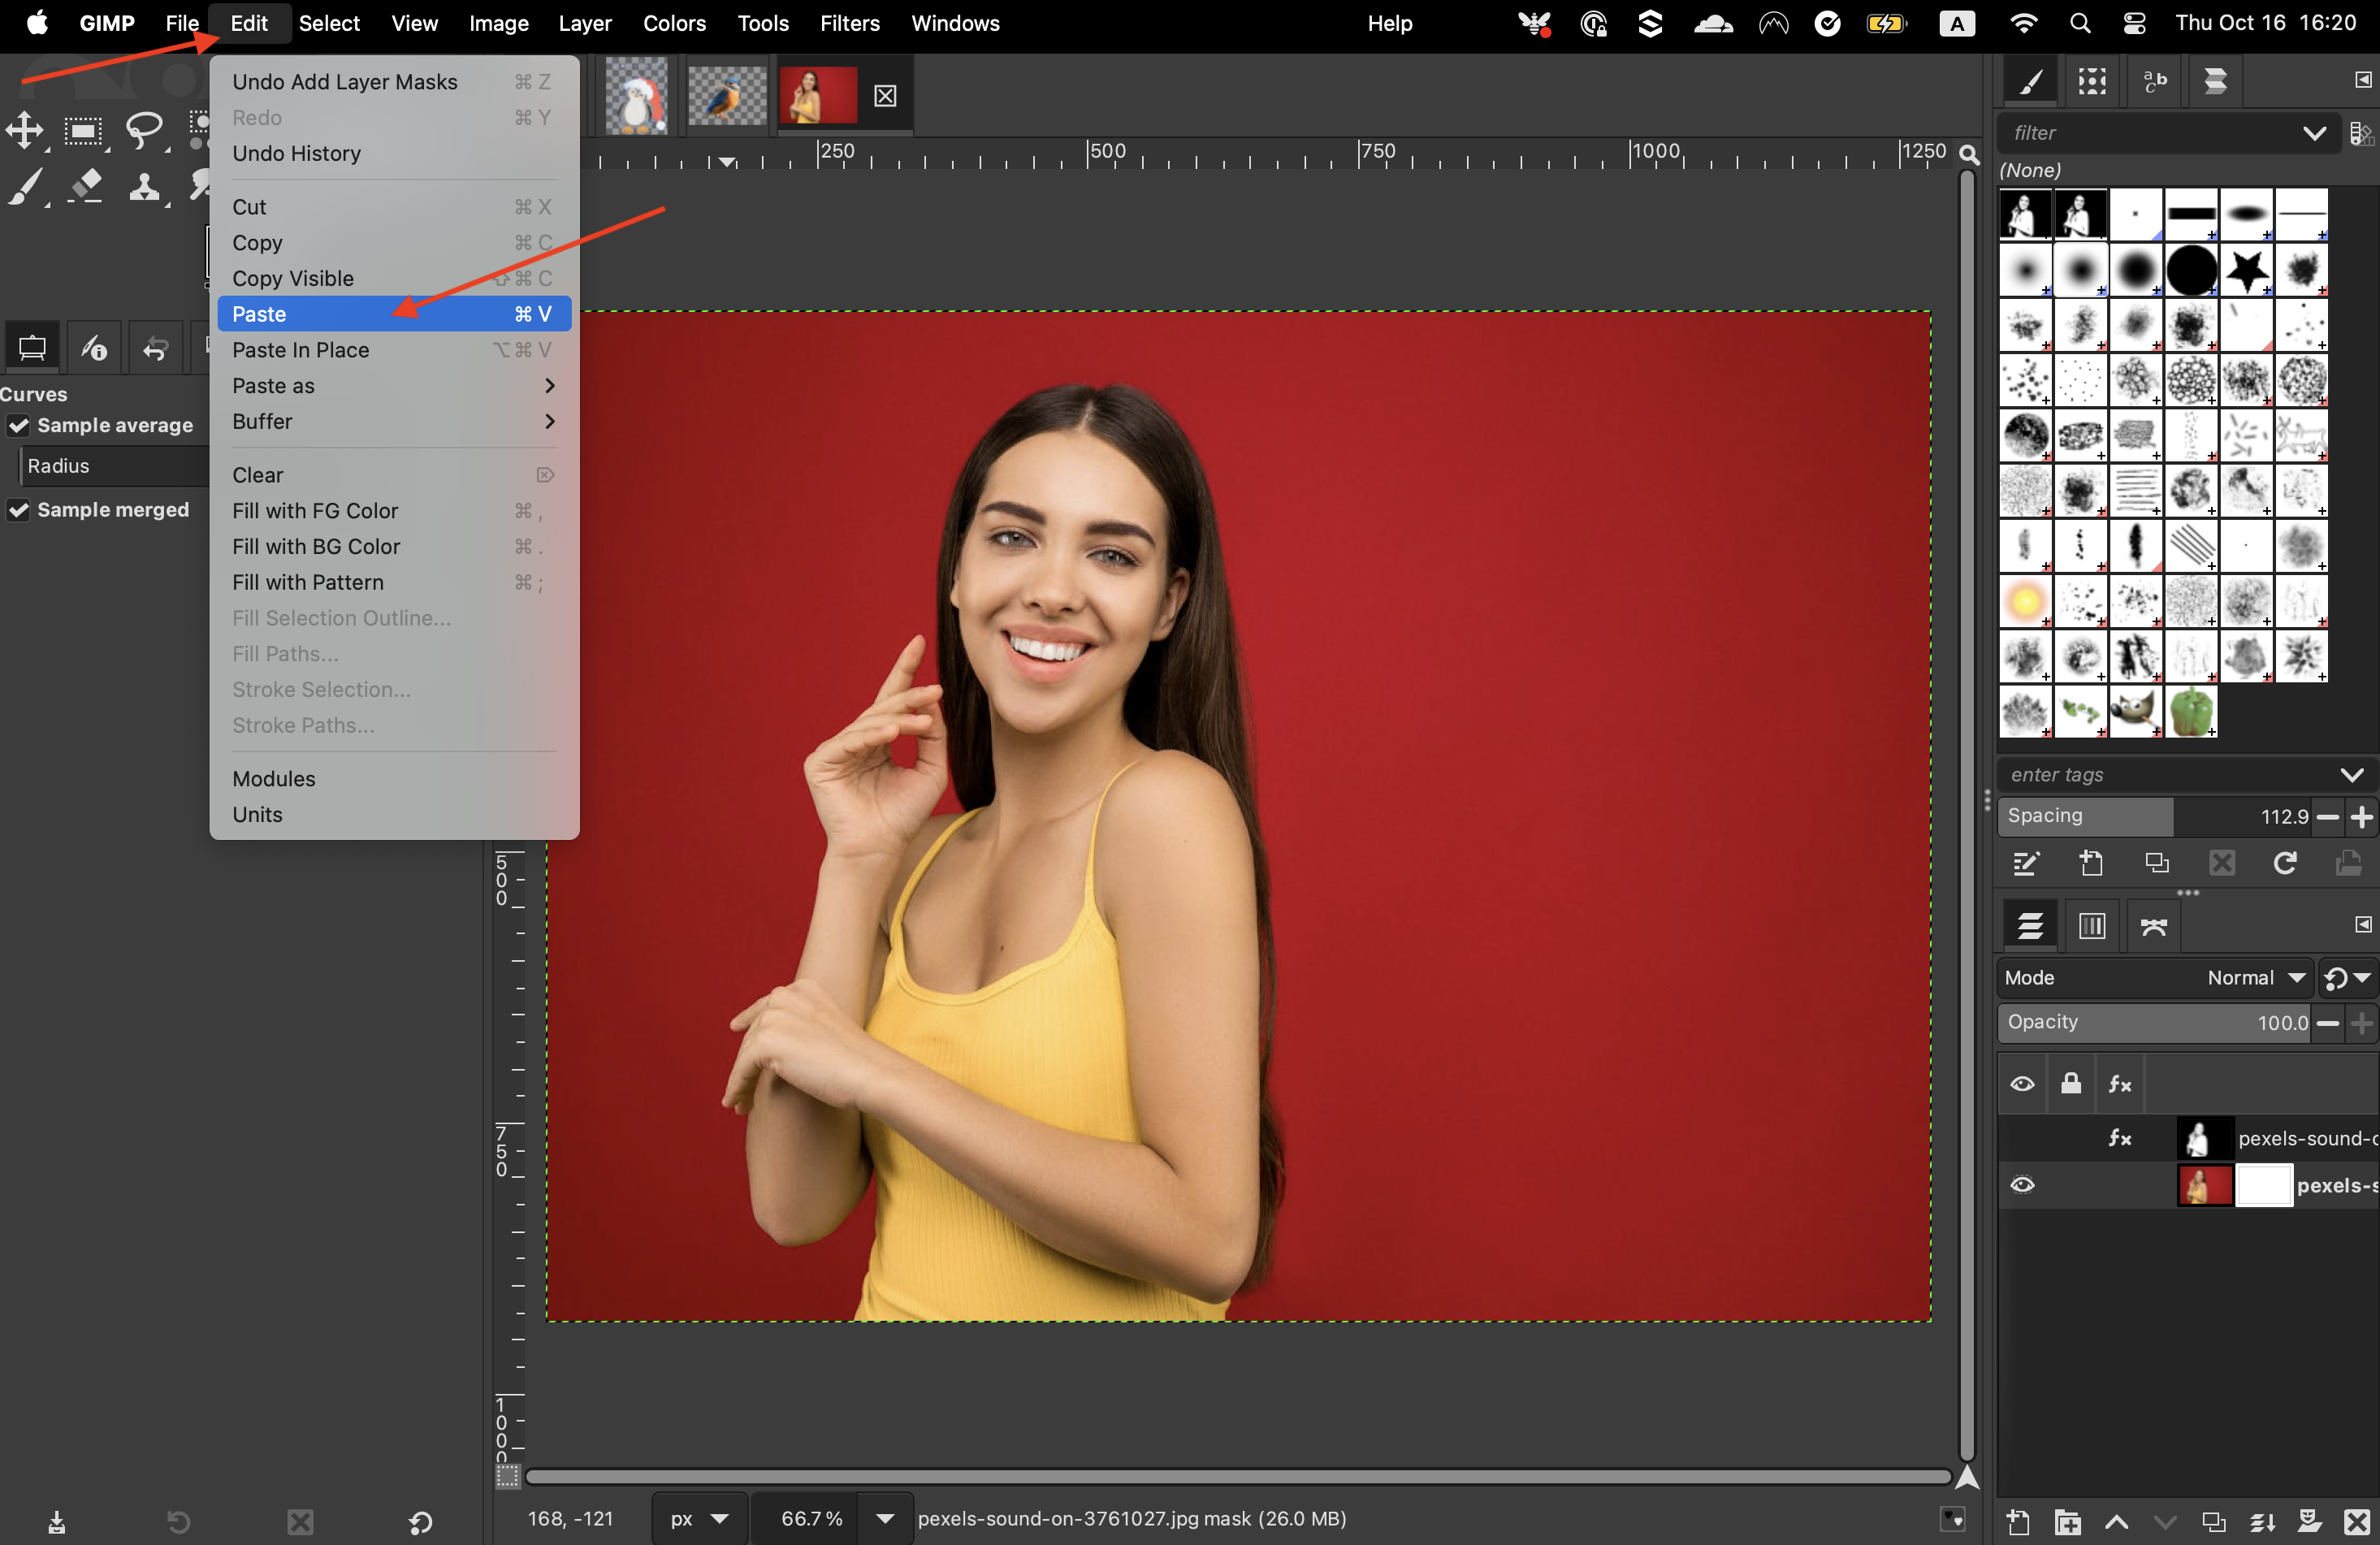
Then, from the menu bar, click on “Edit” > “Paste”, and click the anchor icon at the bottom of the page, to place that into the layer mask.
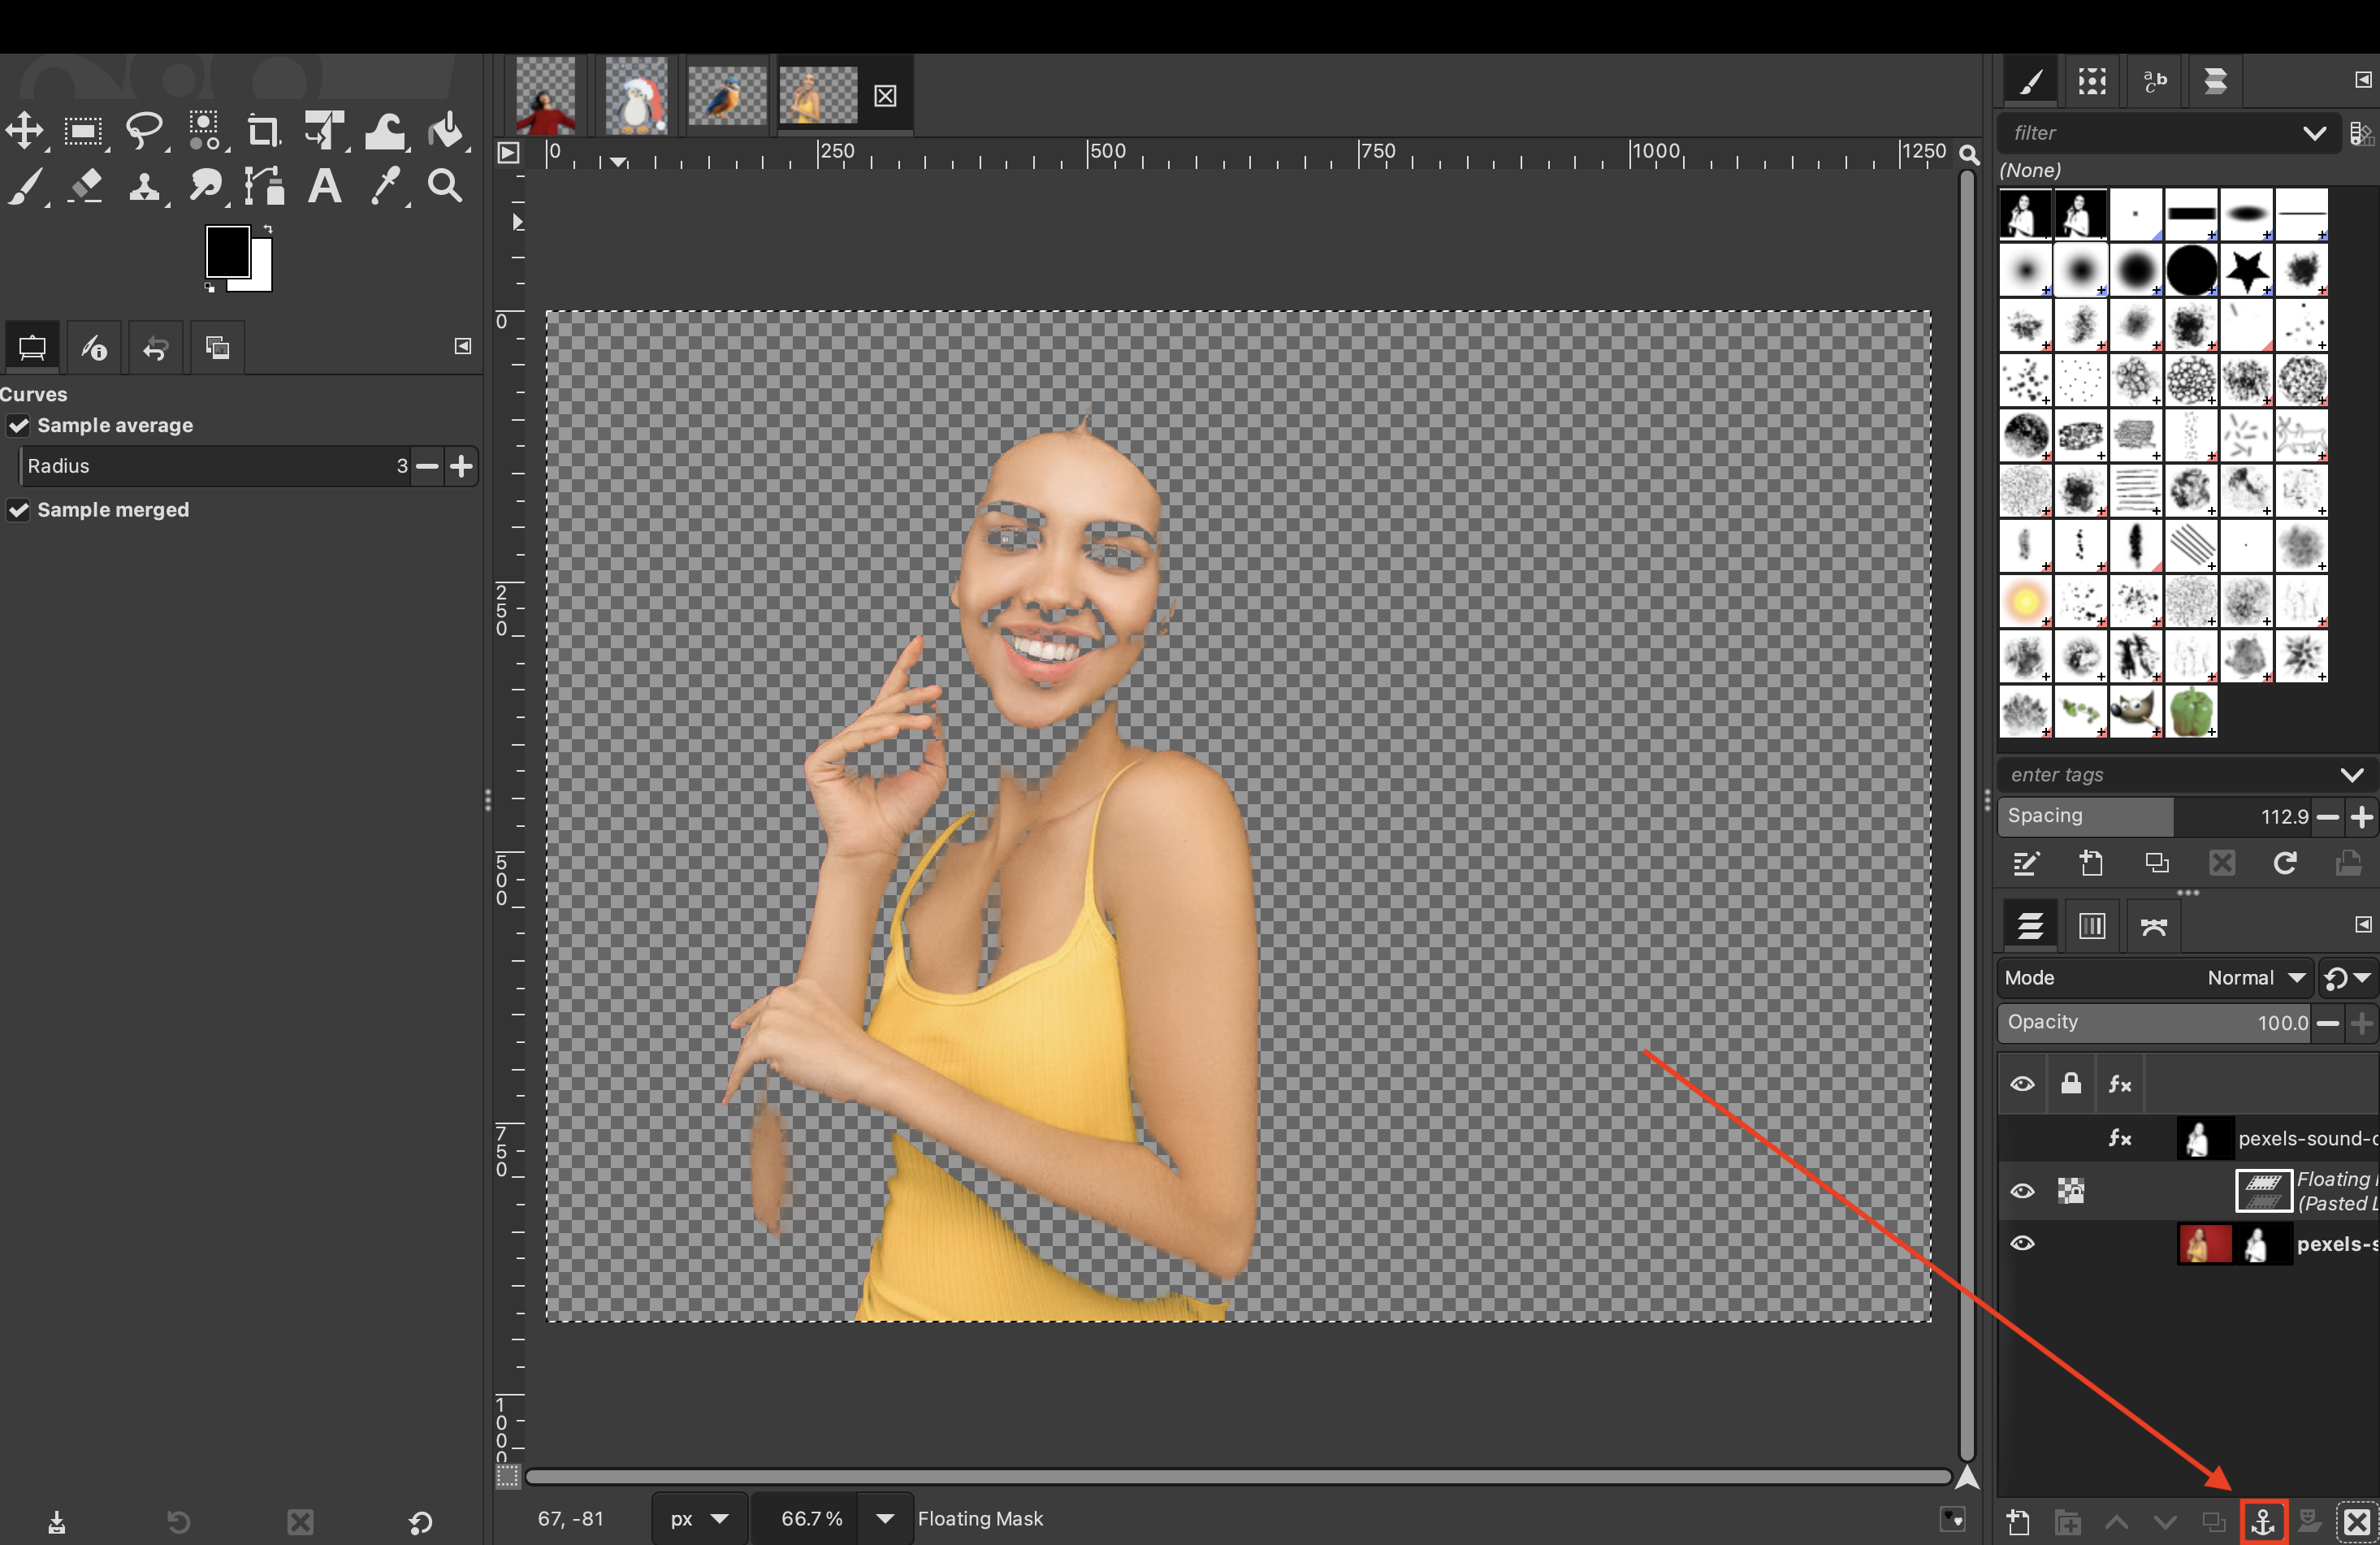
-
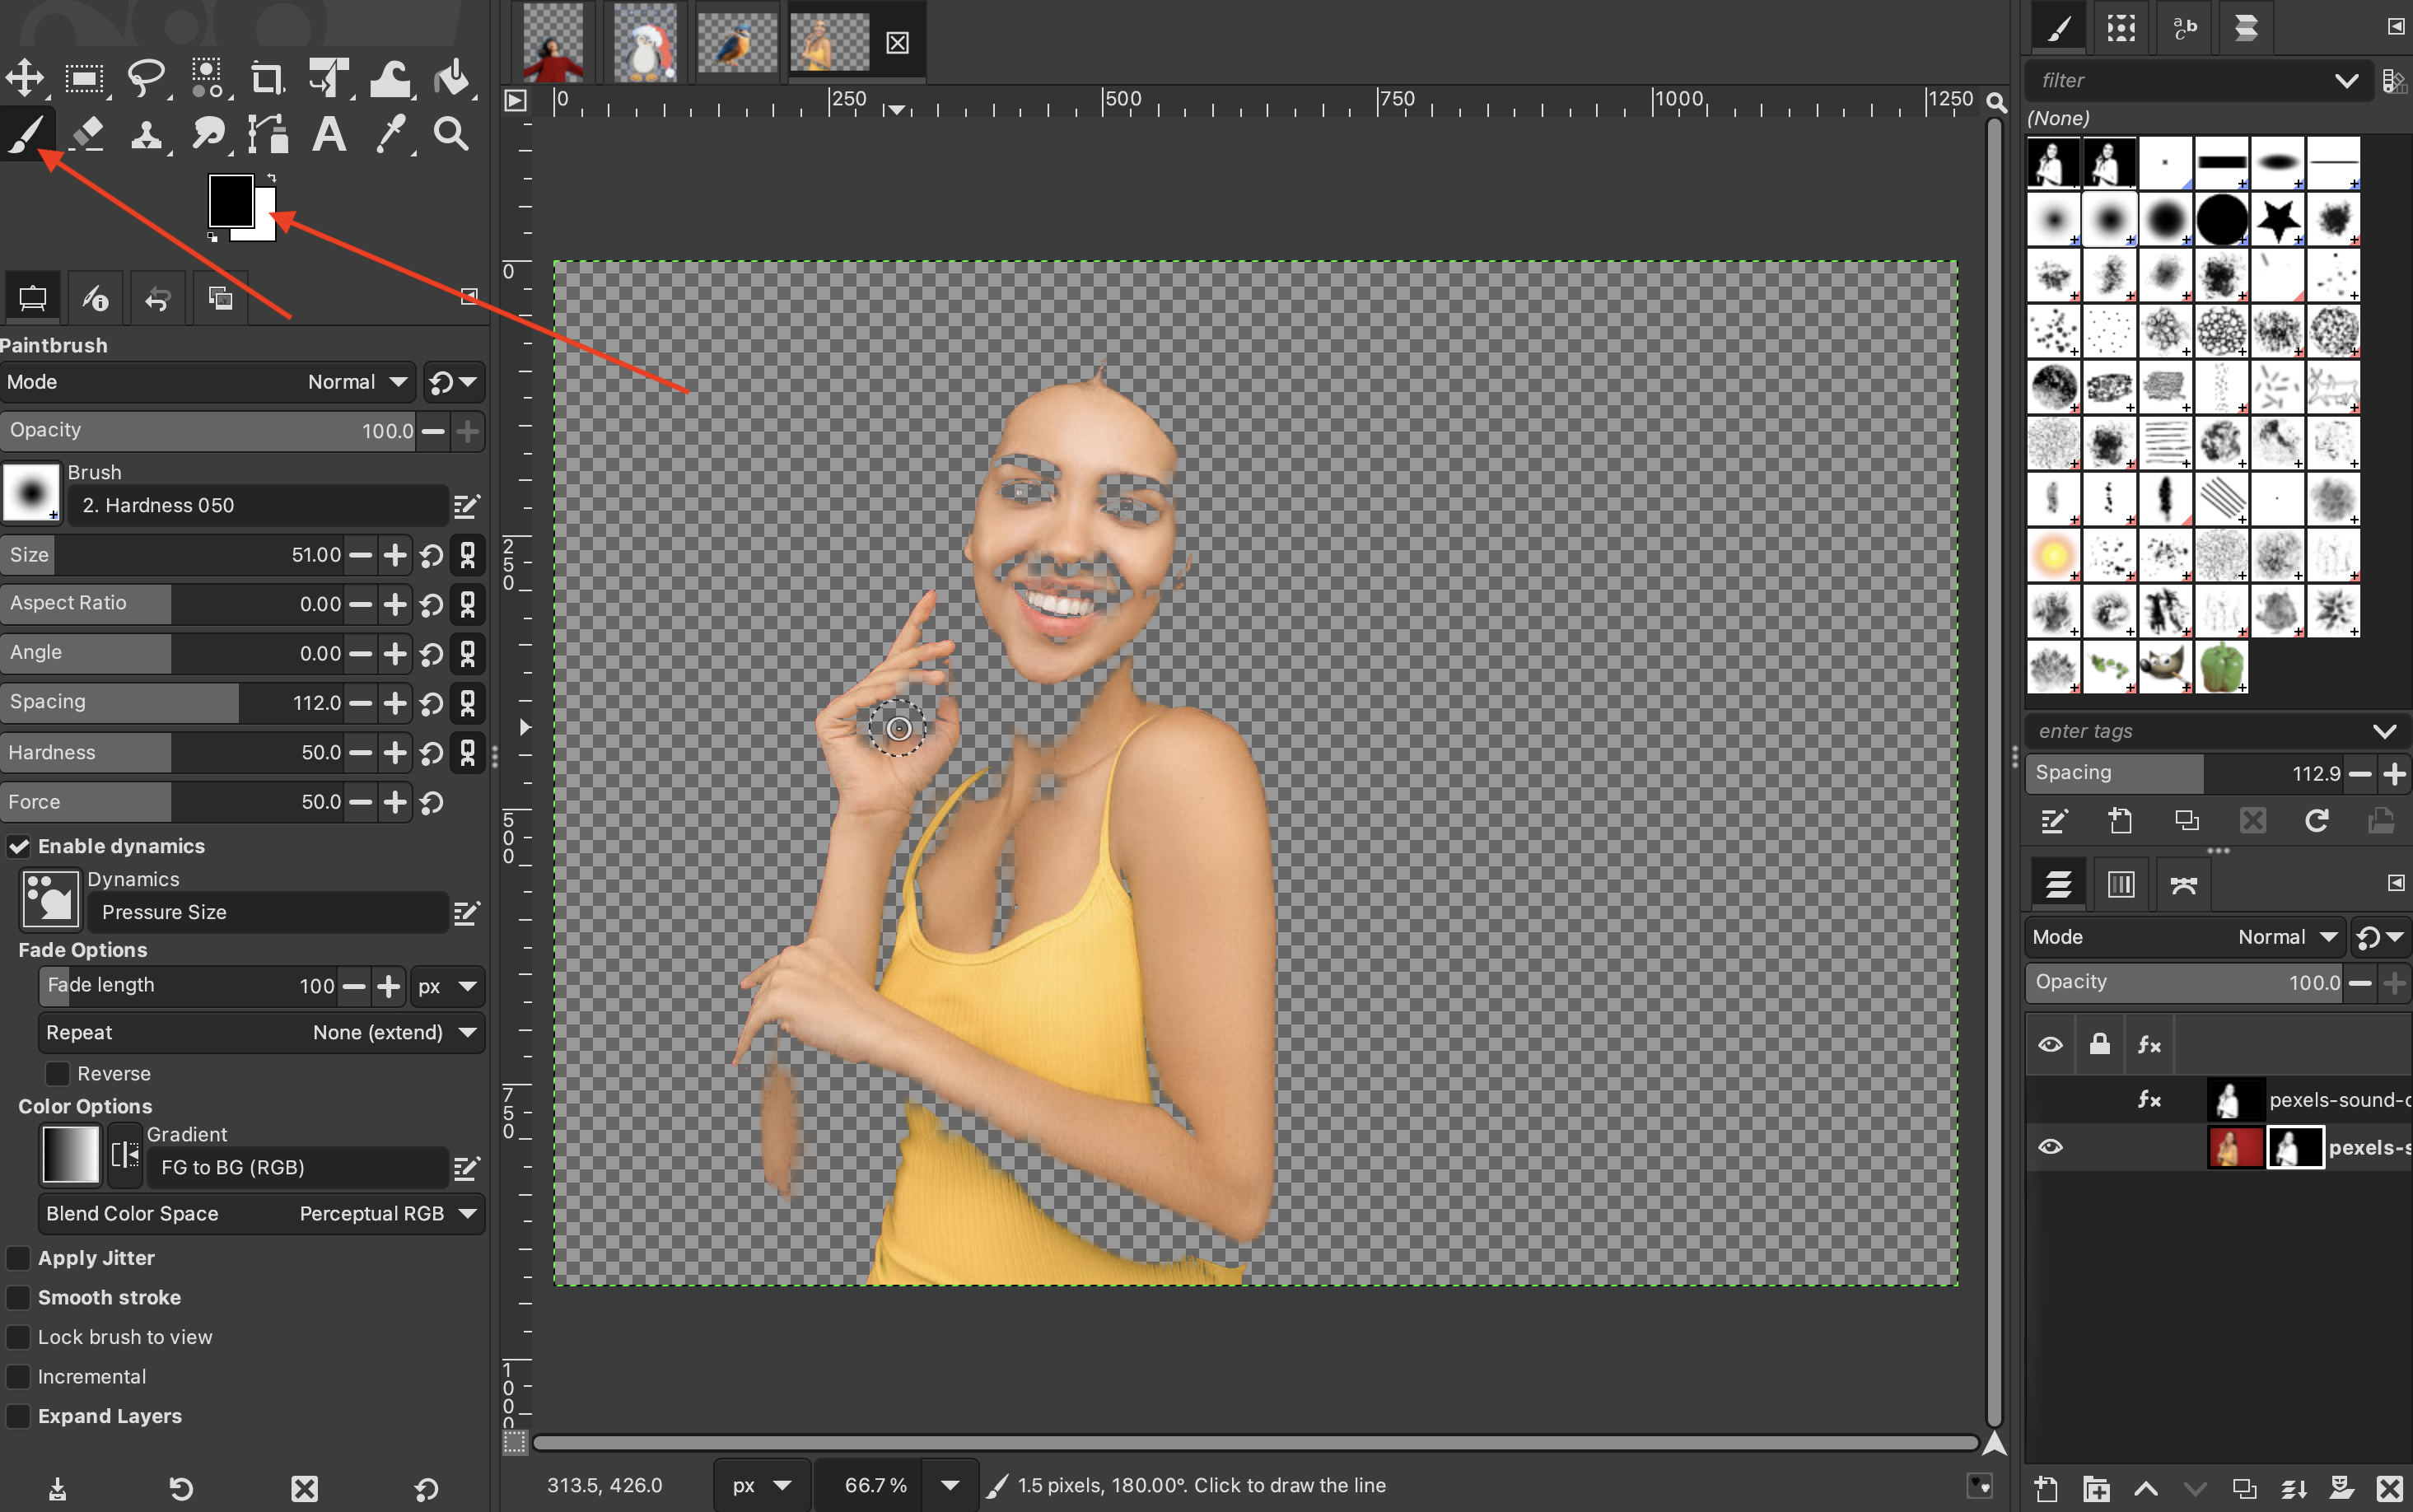
You will notice that the black areas remain visible and the white areas become transparent. You will have to grab a white brush and fill in the areas that shouldn’t have been deleted.

Method 5: Foreground Select Tool
-
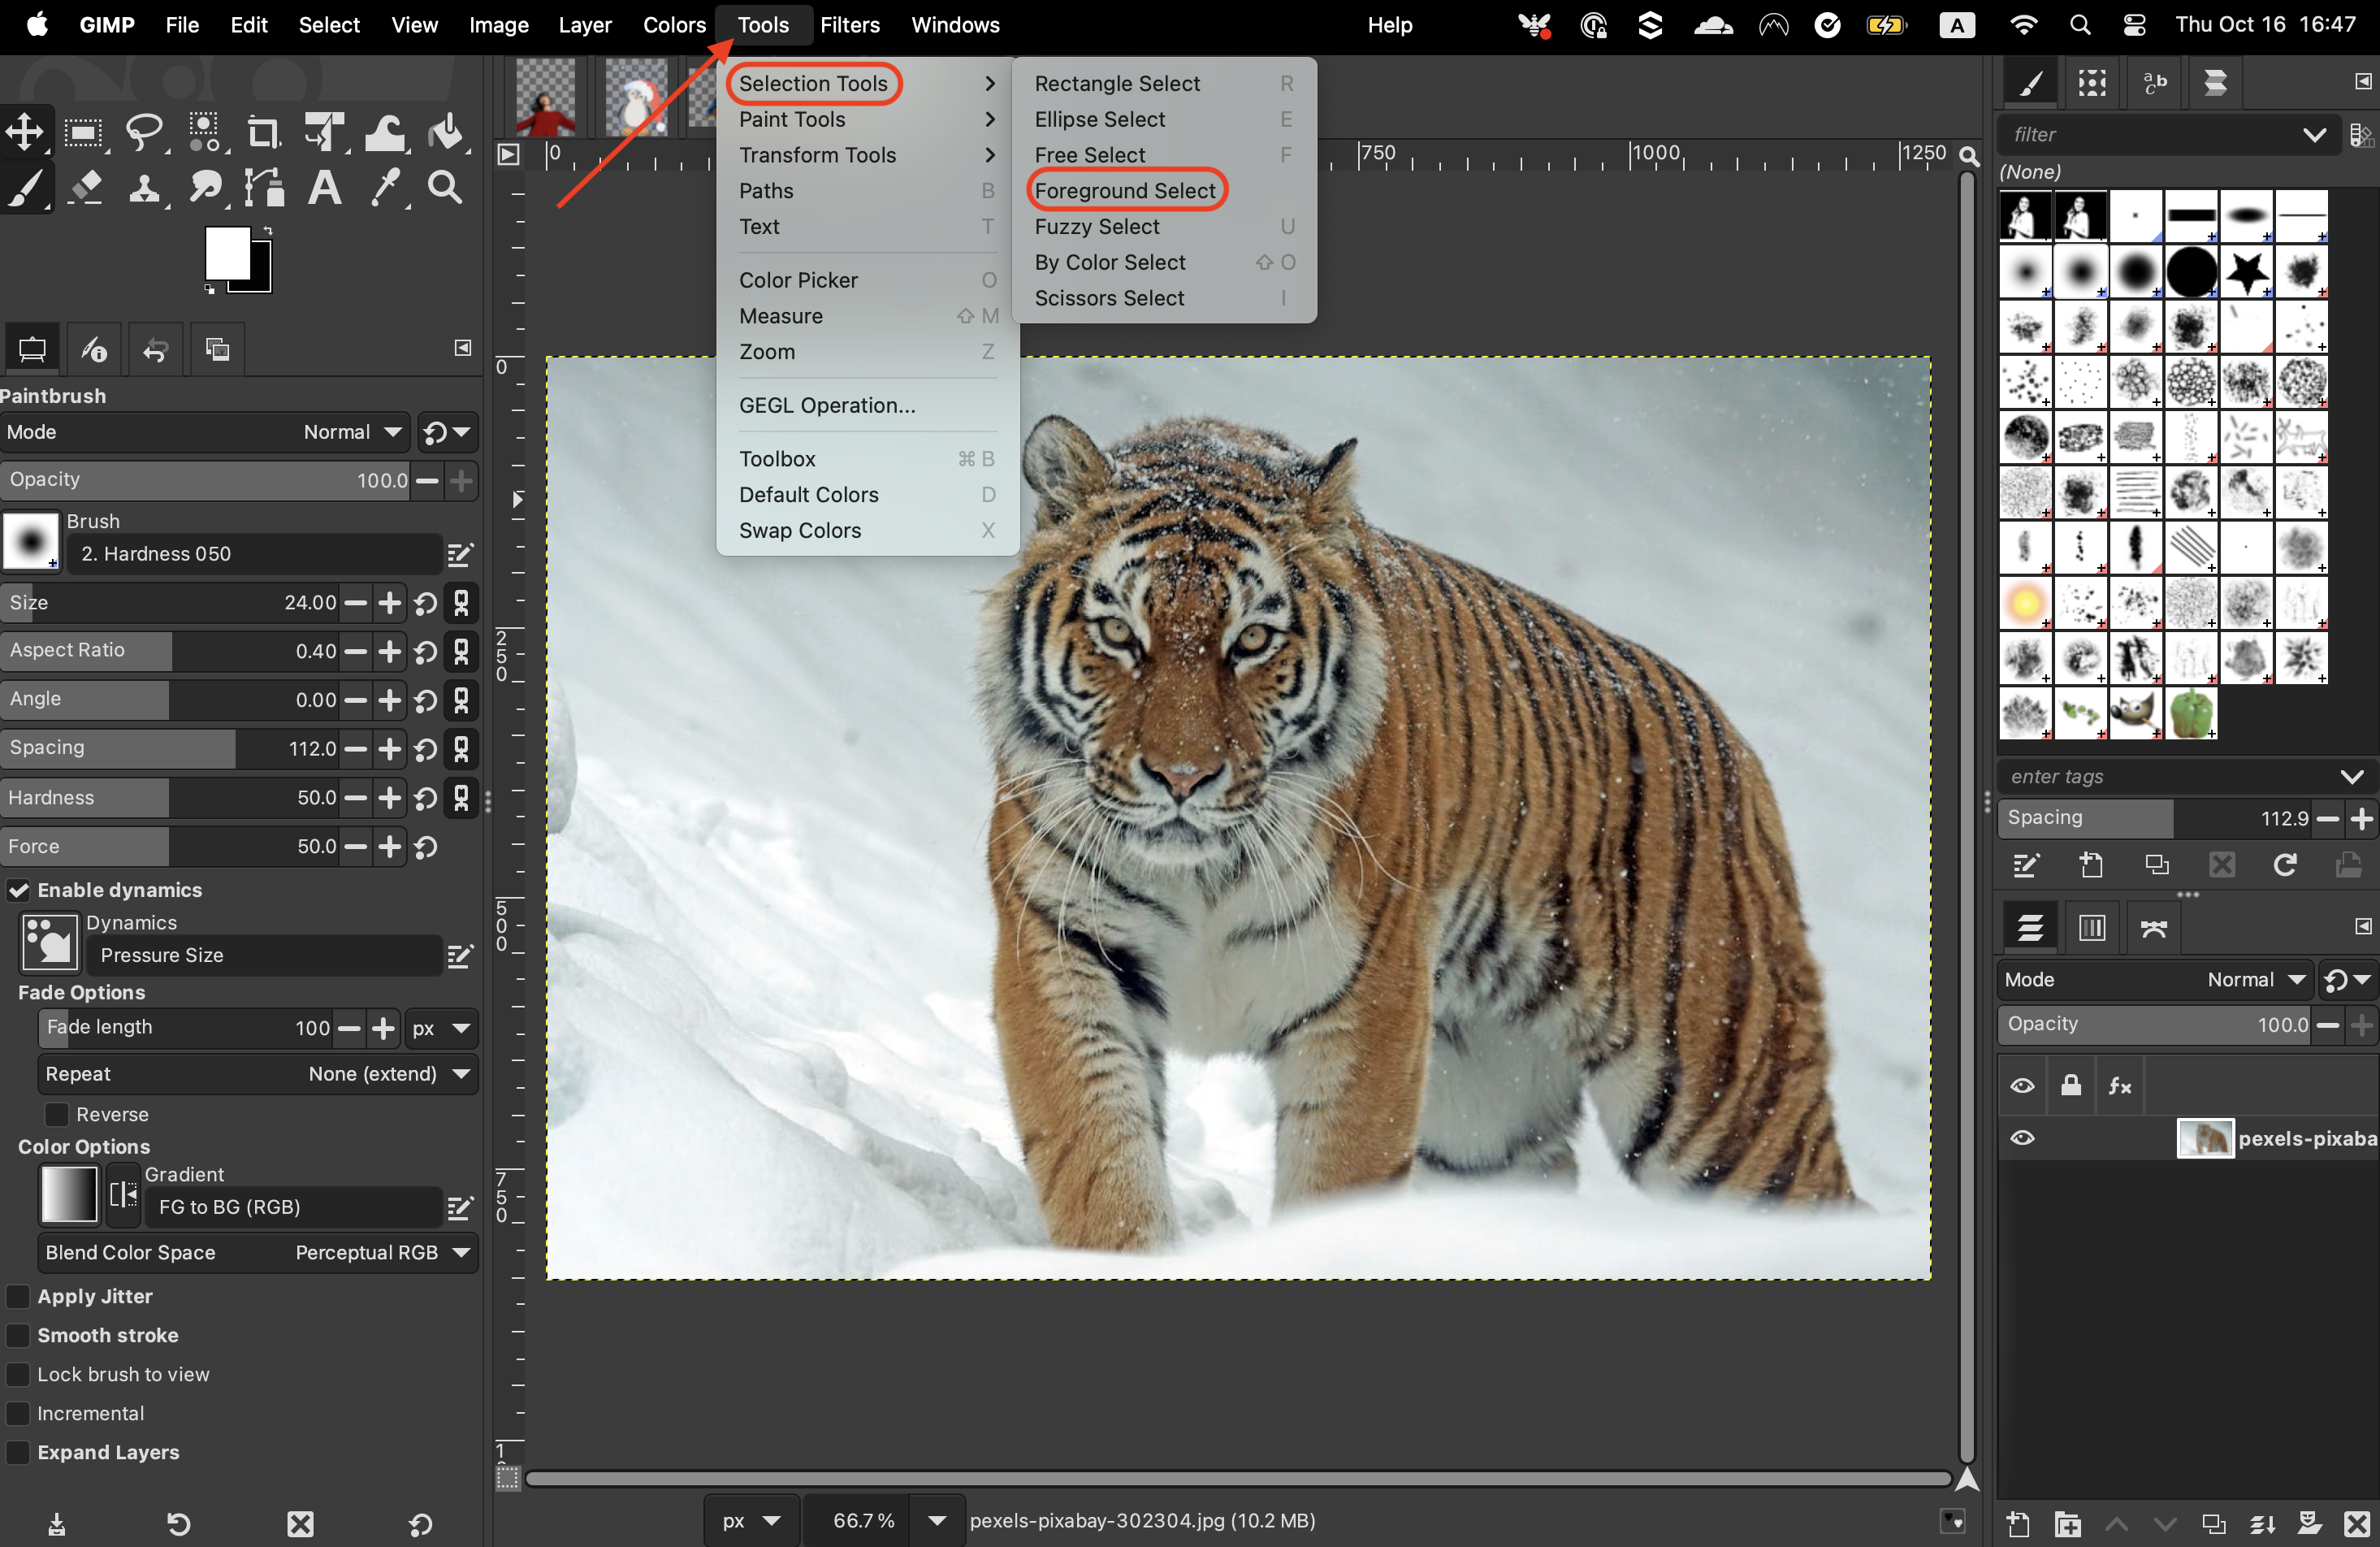
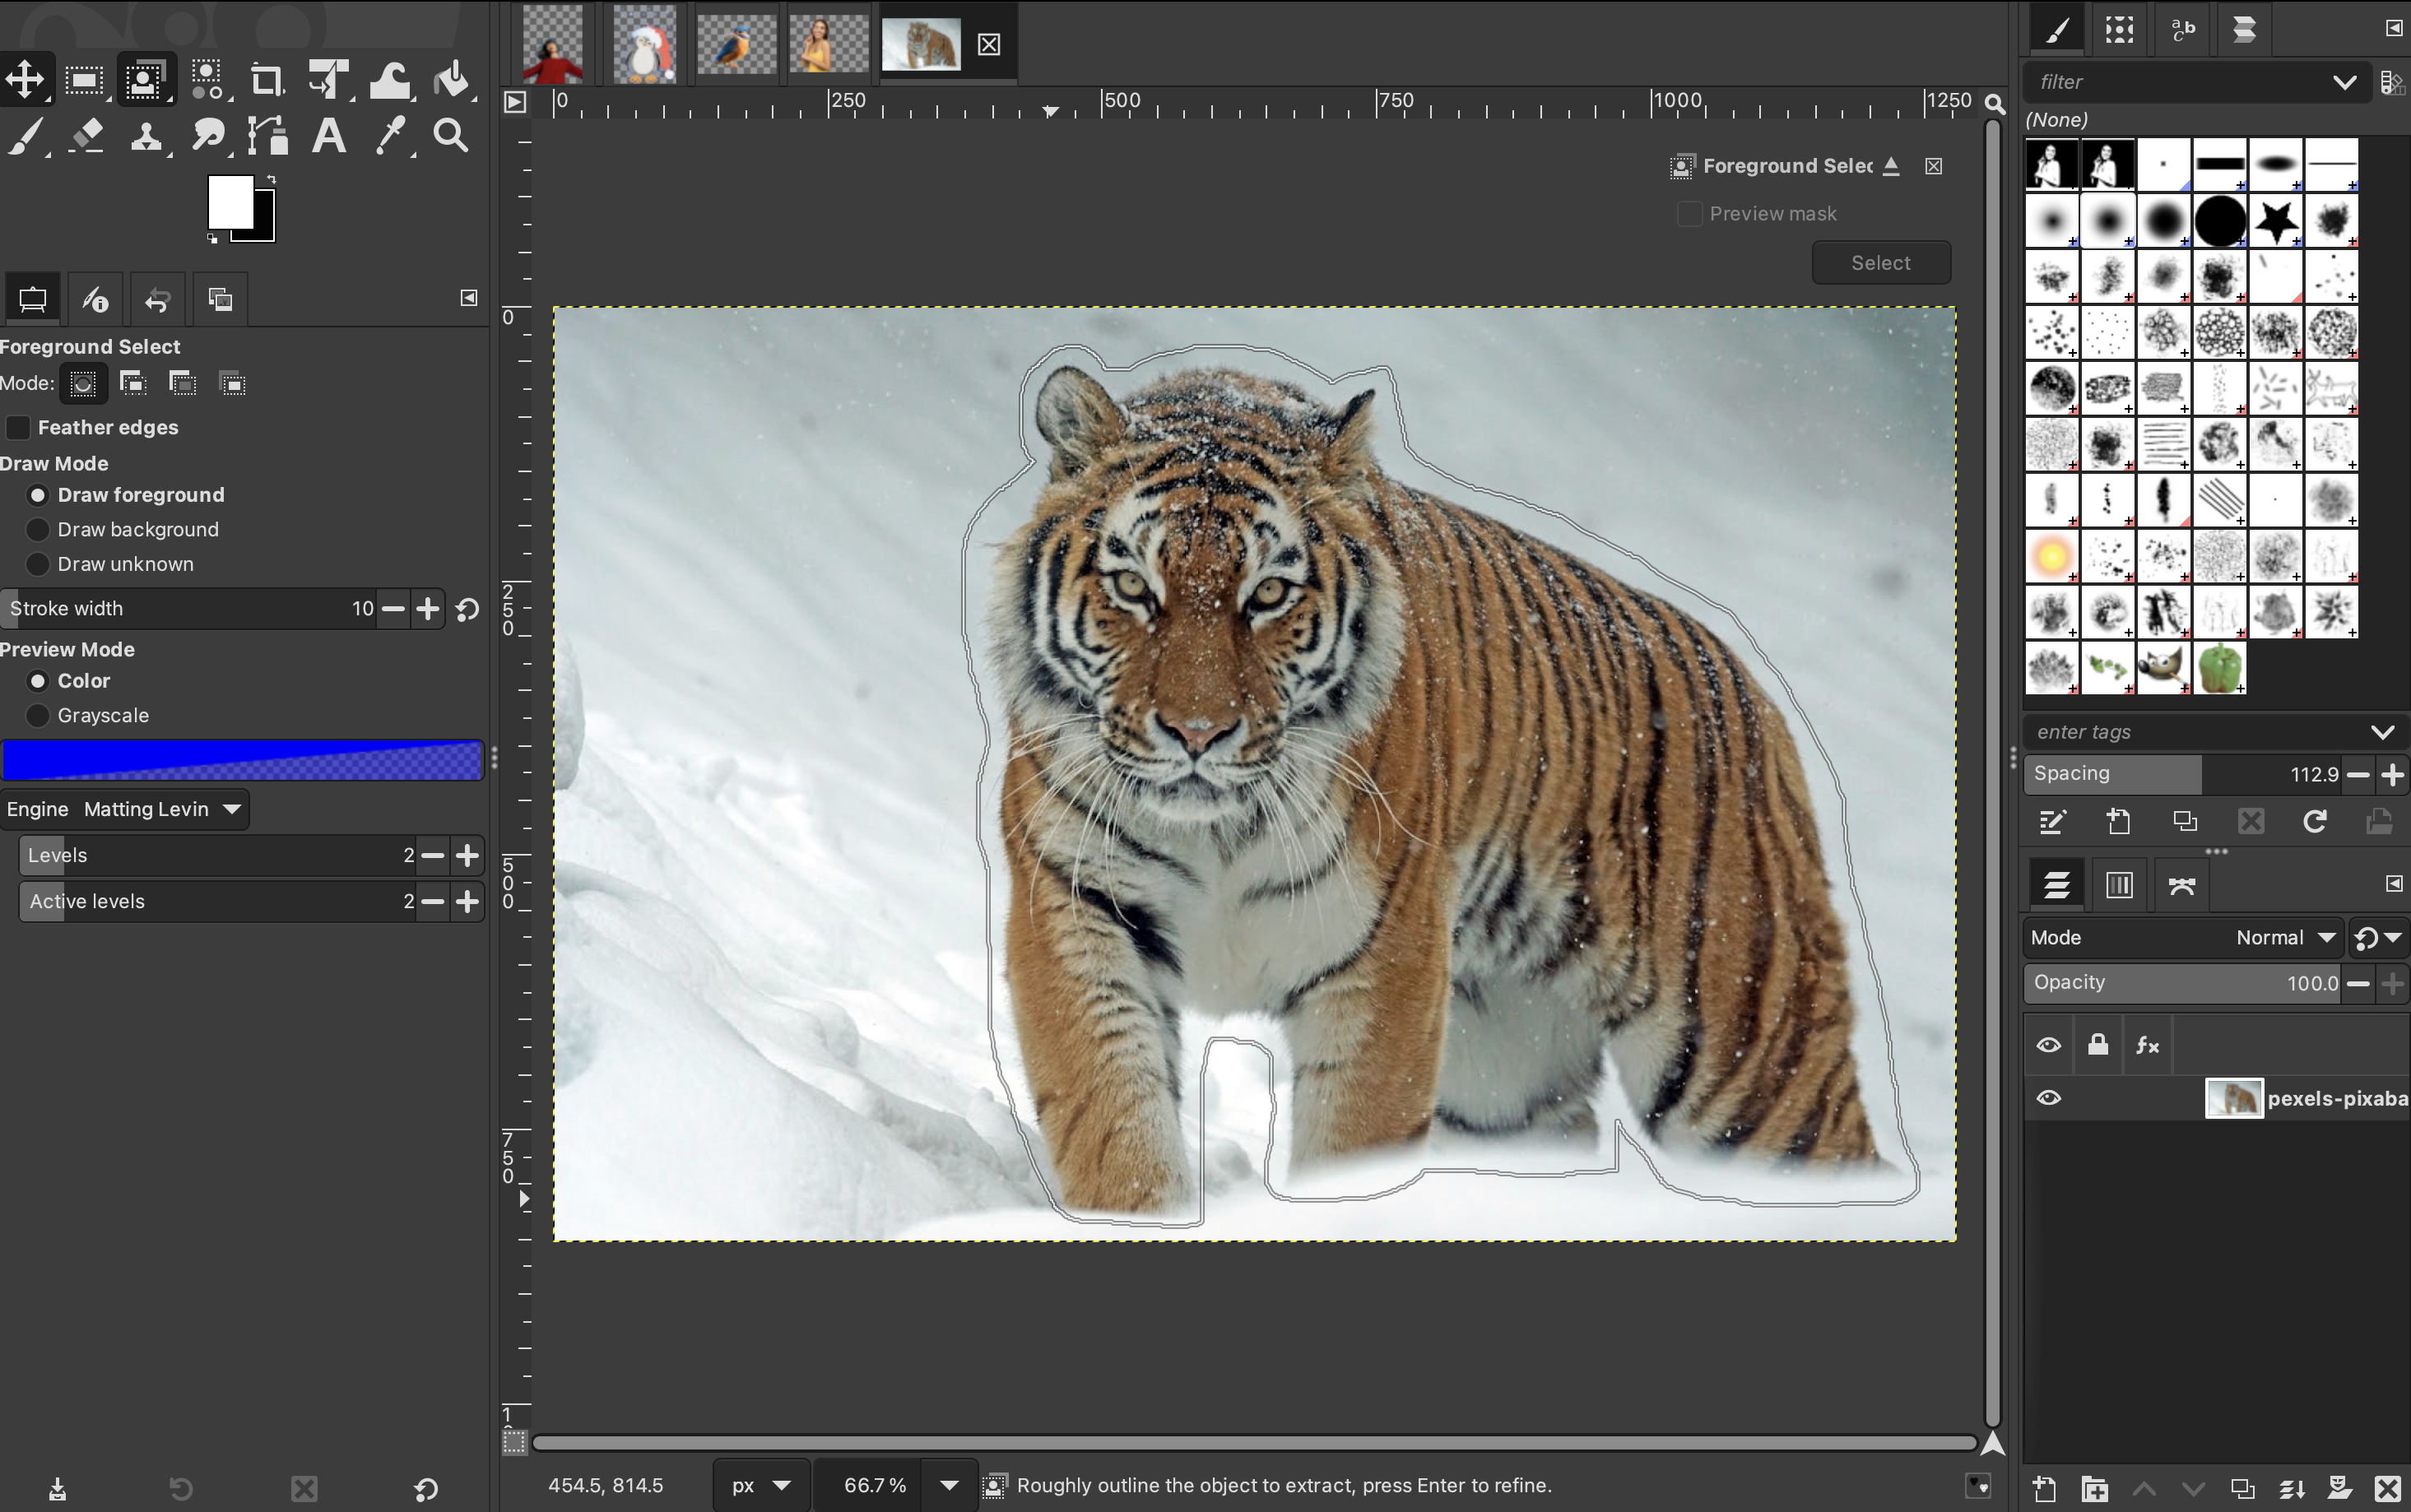
To begin with, select the Foreground Select Tool. If it’s not in the toolbox, go to “Tools”, “Selection tools”, and “Foreground Select.”
-
Draw an outline around your subject (it doesn’t have to be precise).
-
Bring the line back to the starting point and press “Enter” on your keyboard. This will create a dark blue area over your background and a light blue area over your subject.

-
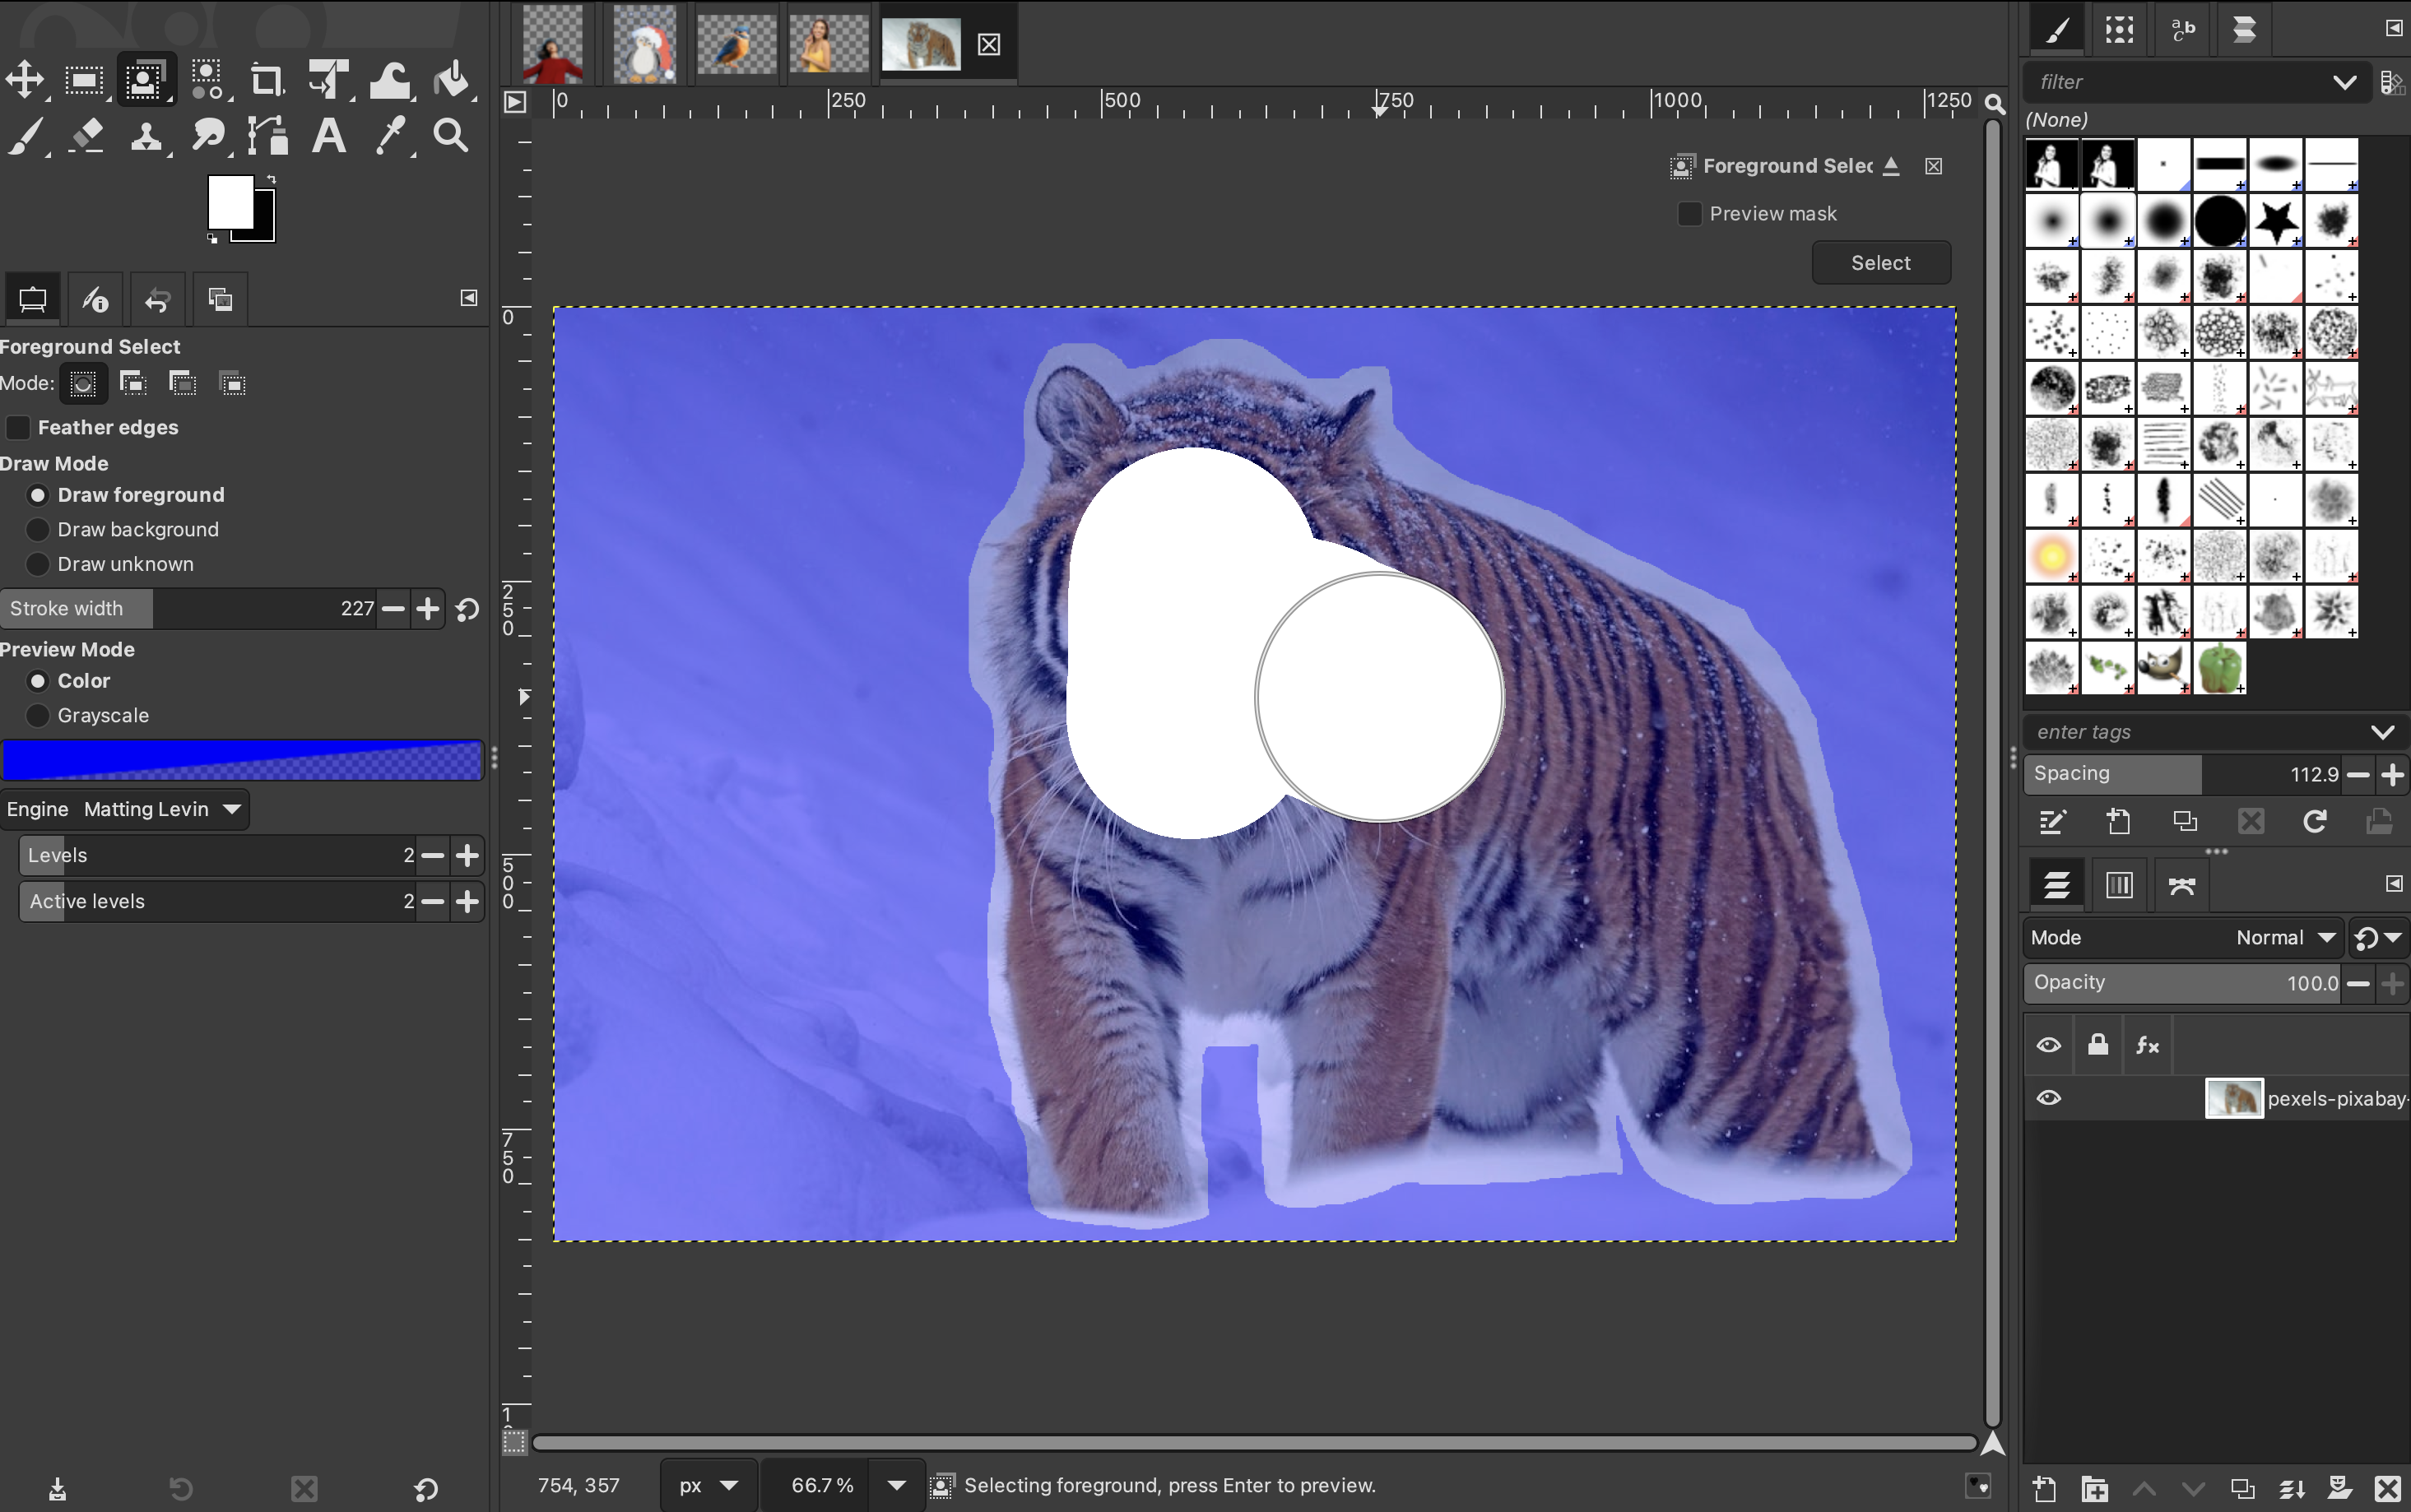
Now brush over your subject - it doesn’t need to be super precise.

-
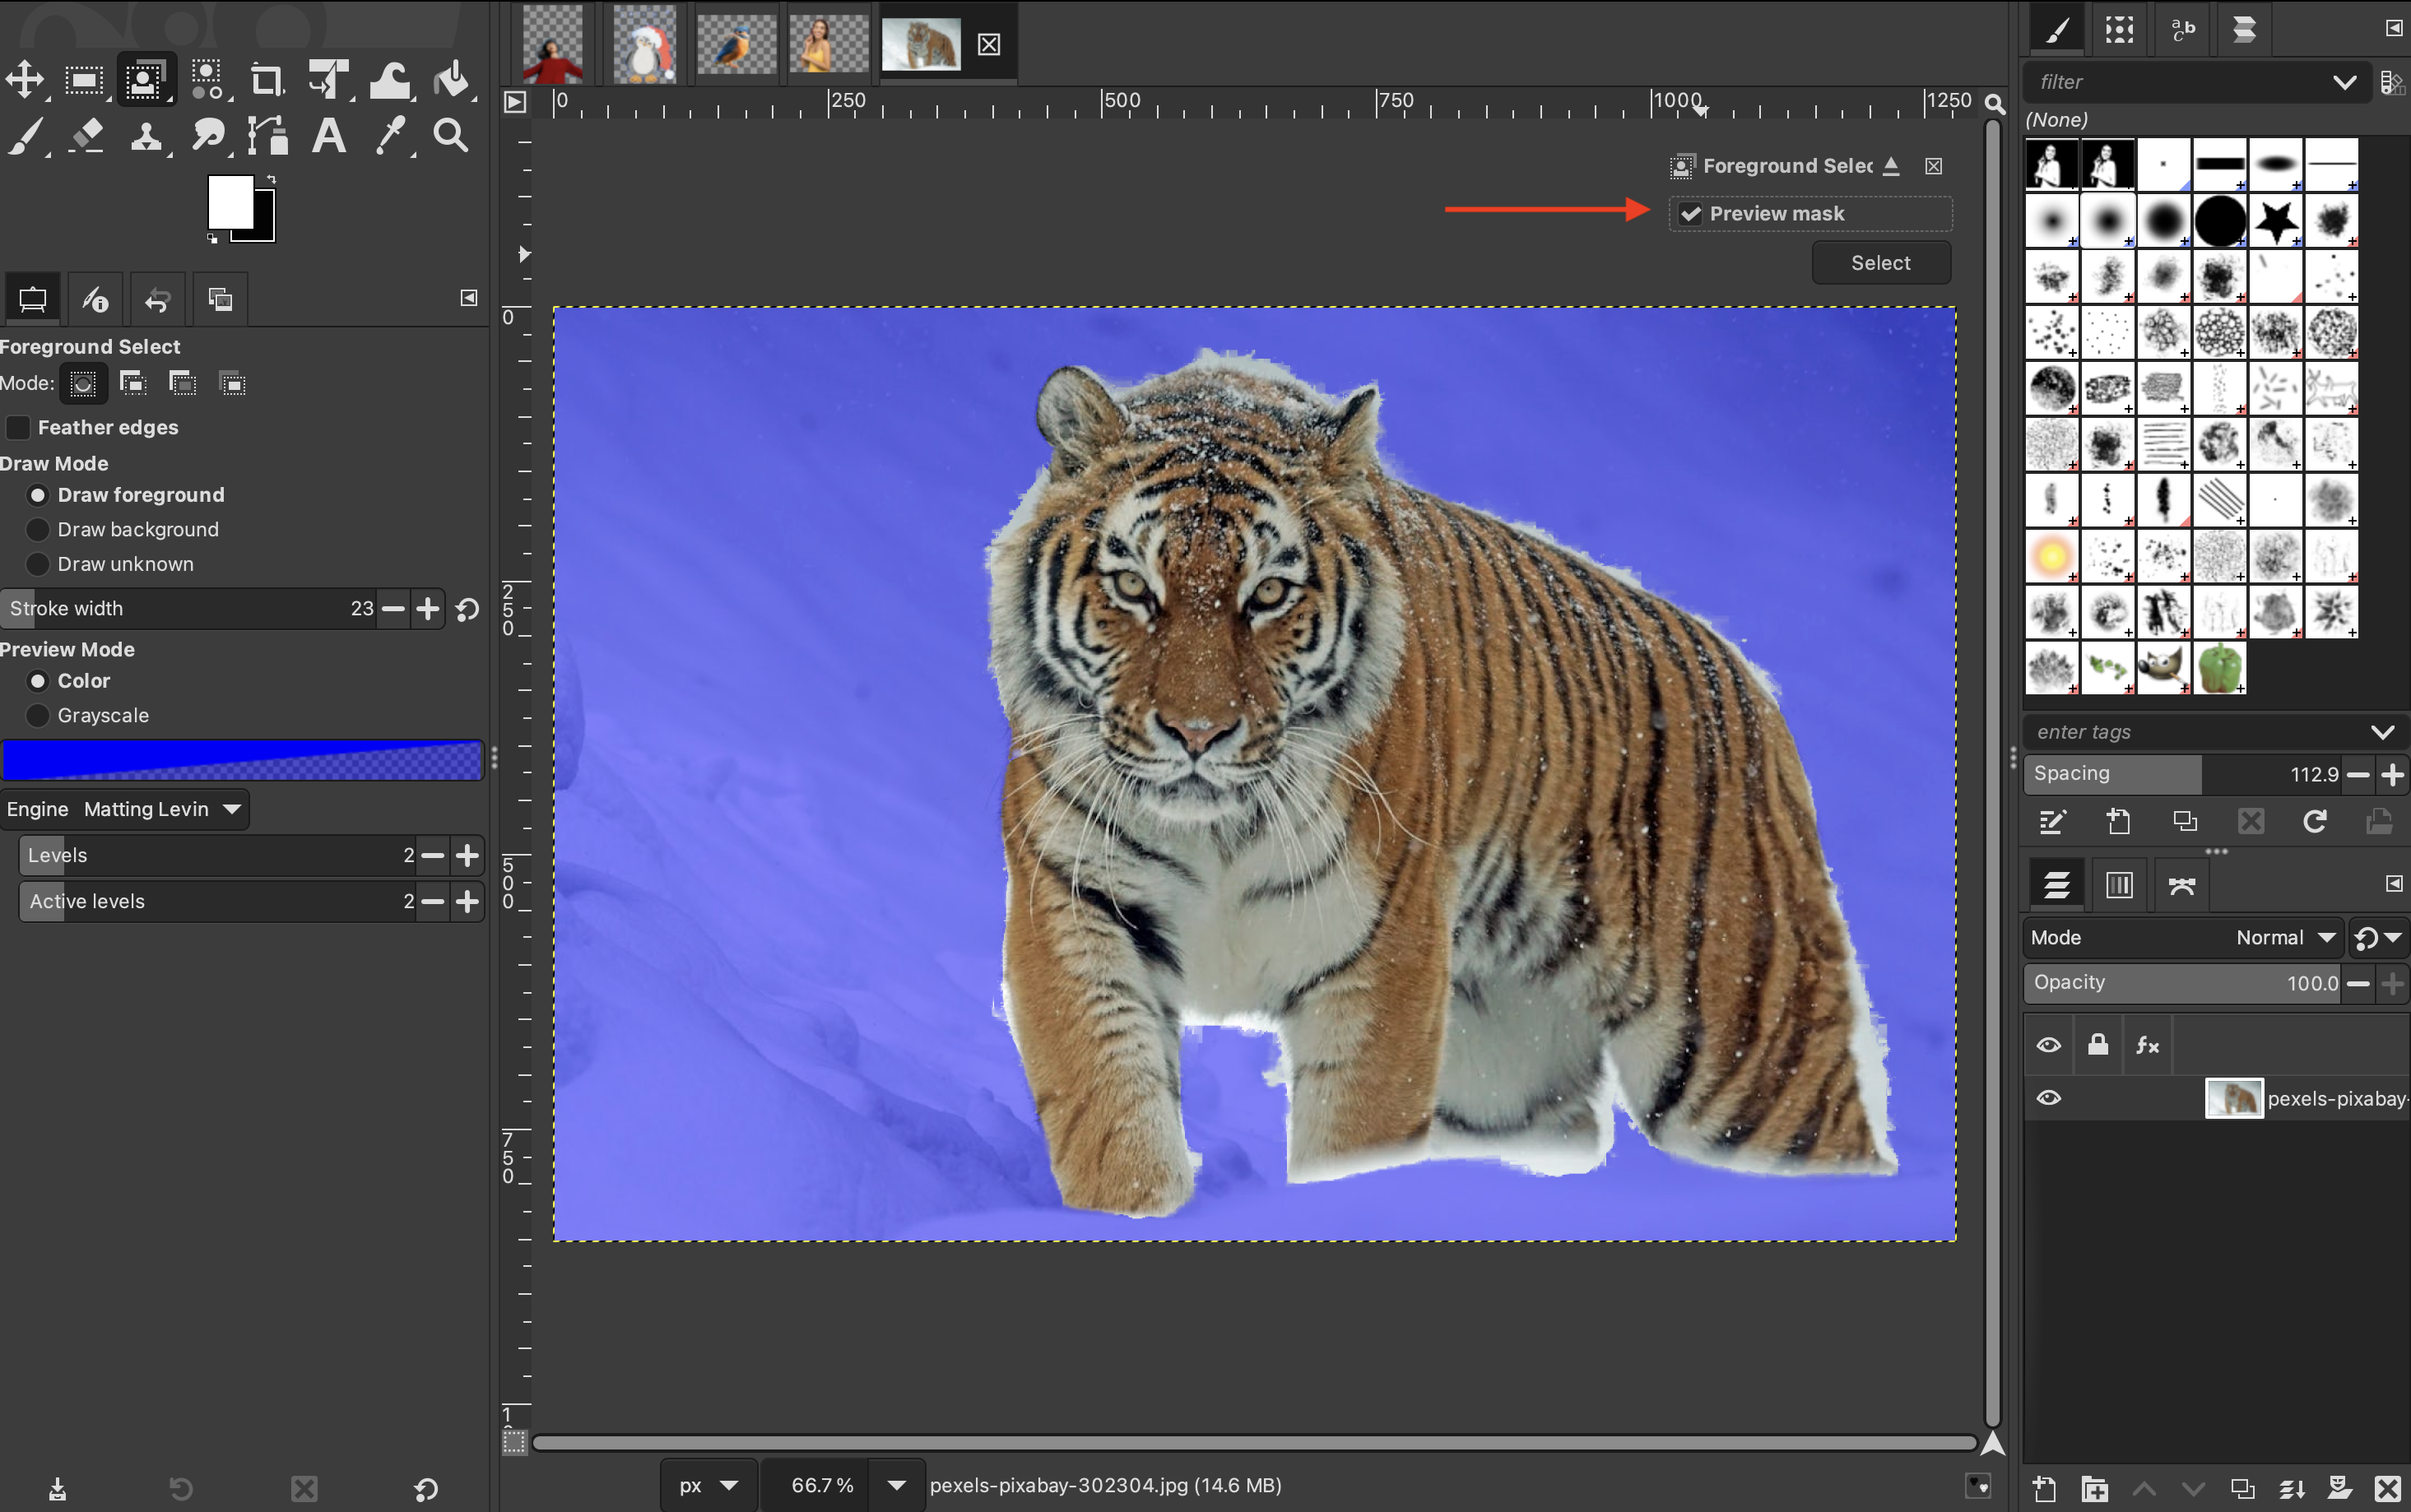
Once you are finished, you can toggle the “Preview mask” setting to see how it looks. If you are happy with it, you can press enter on your keyboard.
-
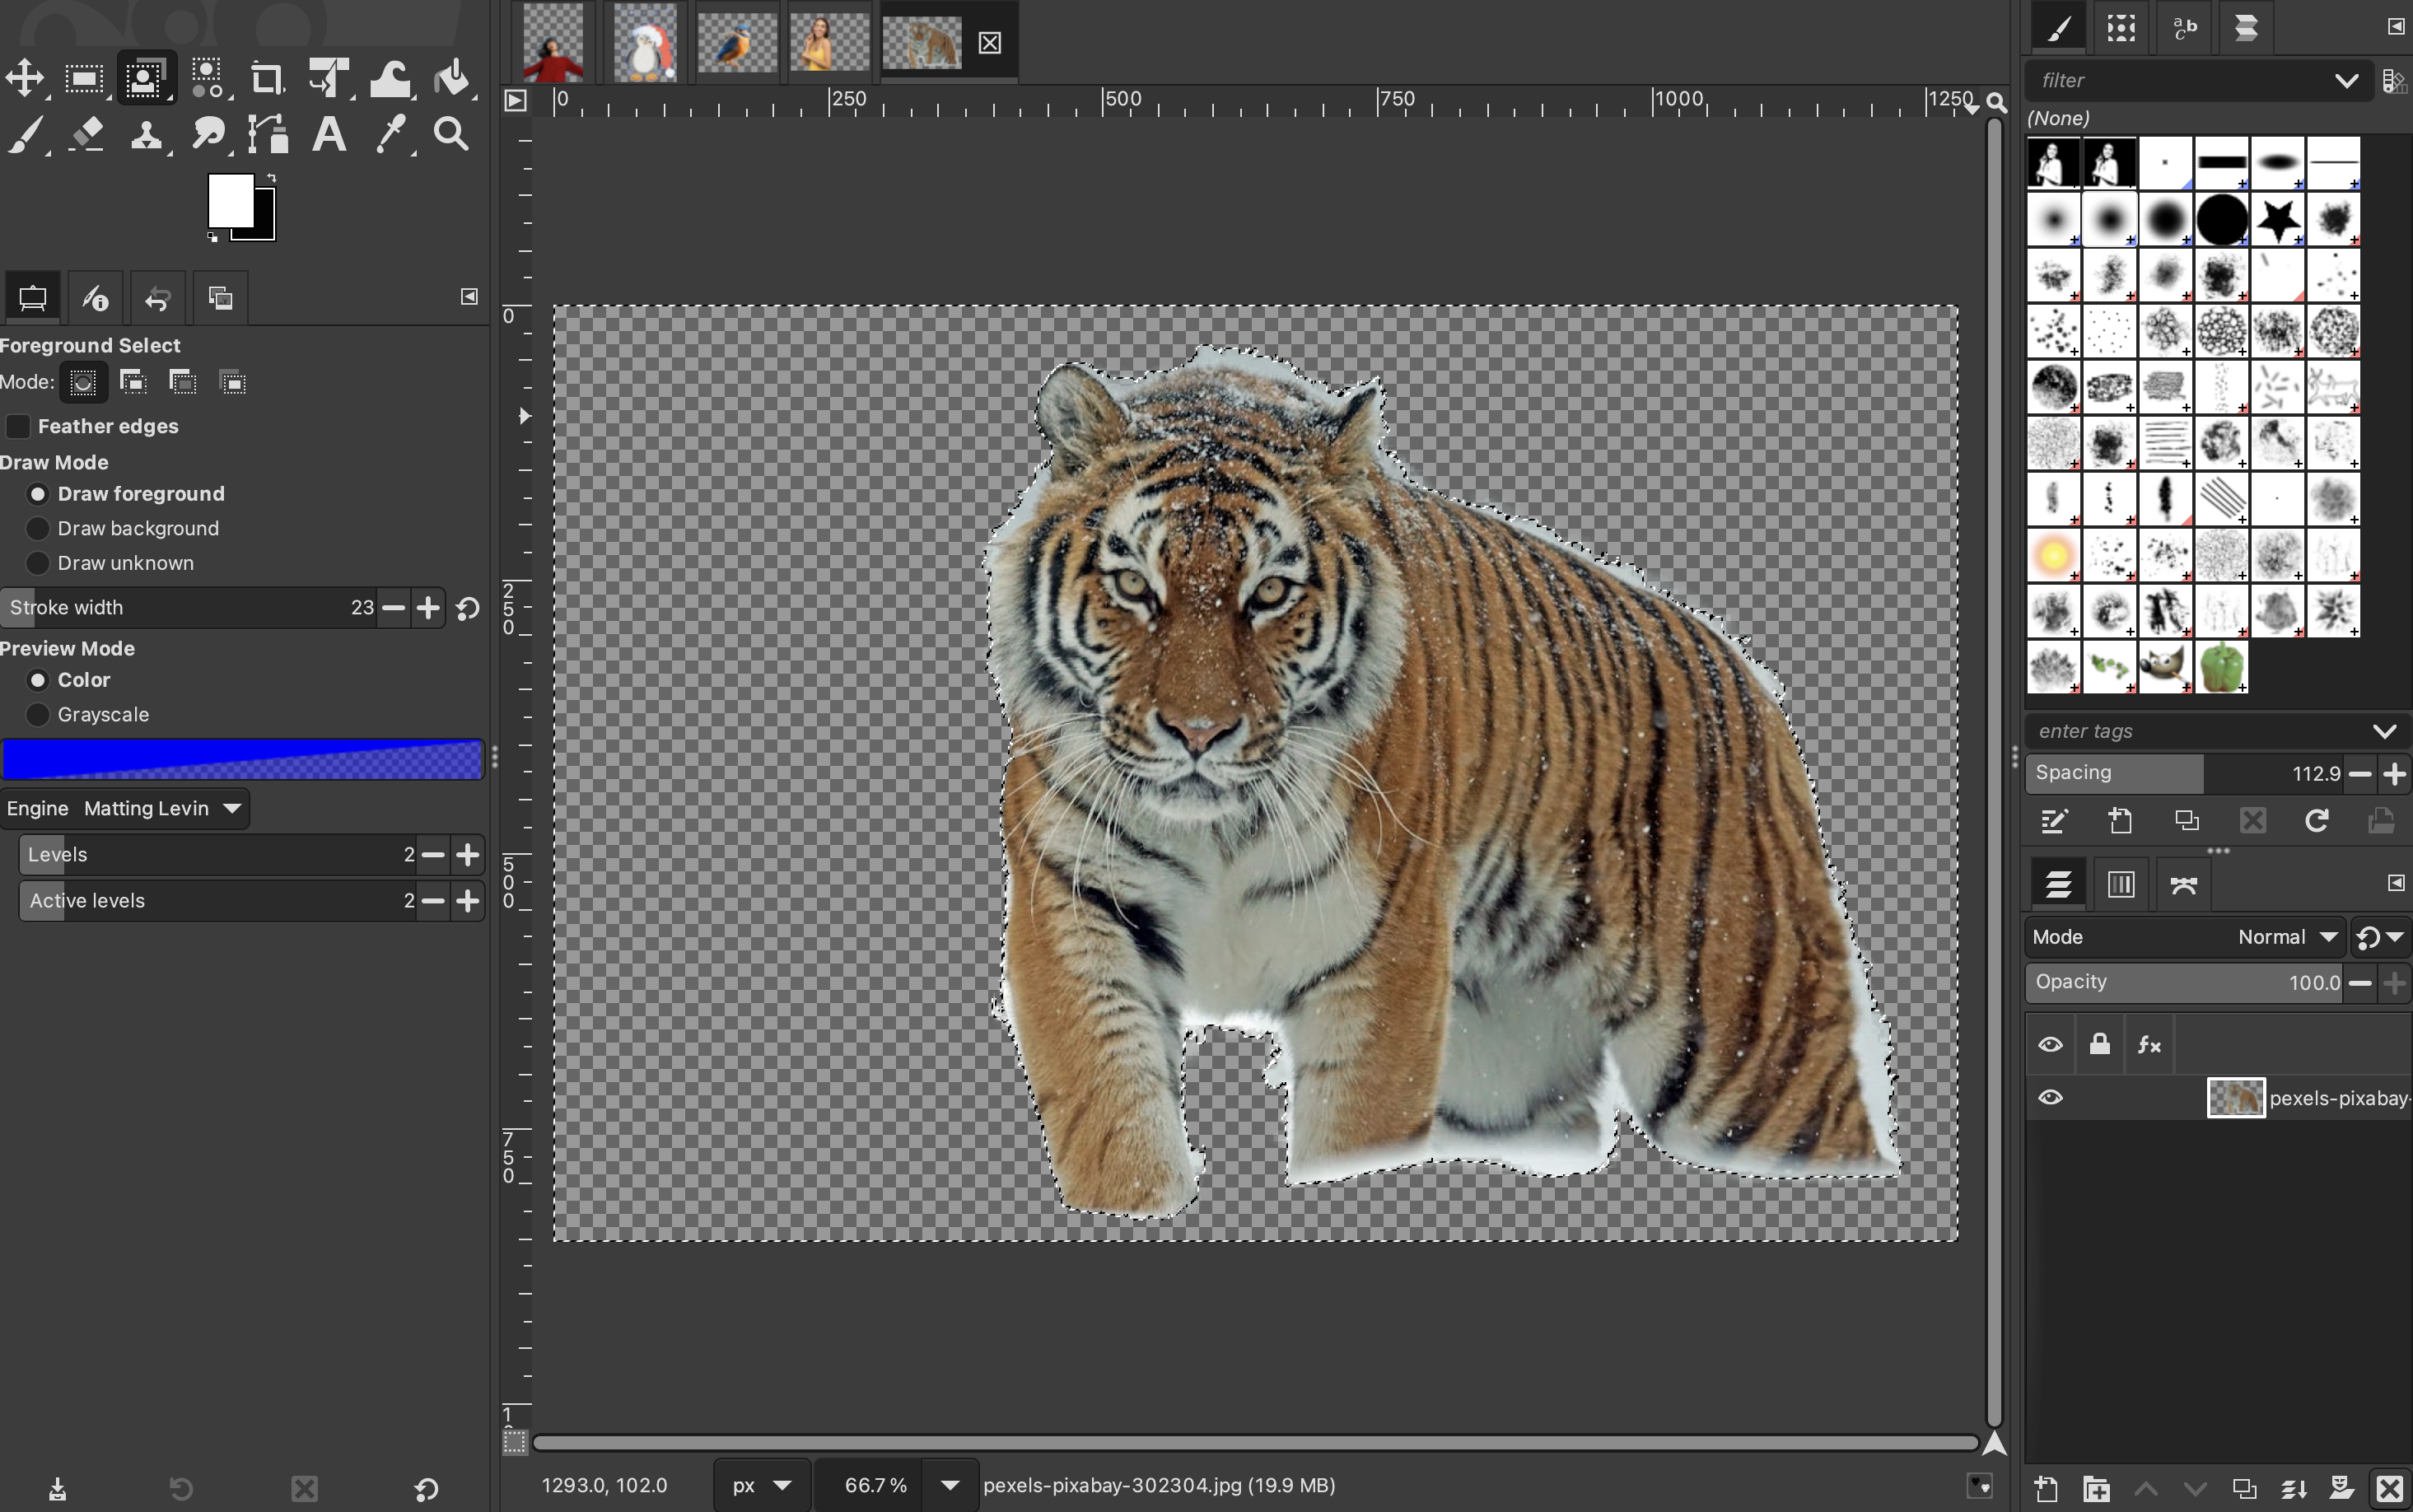
Then invert your selection by going to “Select” > “Invert.”

-
Finally, press the Delete key on your keyboard, and the background will be removed.
Use an online background remover like remove.bg
We have gone through 5 different ways to remove the background of an image manually on GIMP.
However, if you are short on time but still want a high-quality result, the easiest and fastest way to cut out an image is by using an AI-powered online tool.
These tools handle the heavy lifting for you, eliminating the need for manual work or tedious masking. With just a few clicks, you will have a clean, high-quality cutout ready to use anywhere.
Here’s how you can cut out an image by using remove.bg:
-
Upload your image: simply drag and drop your photo into remove.bg.
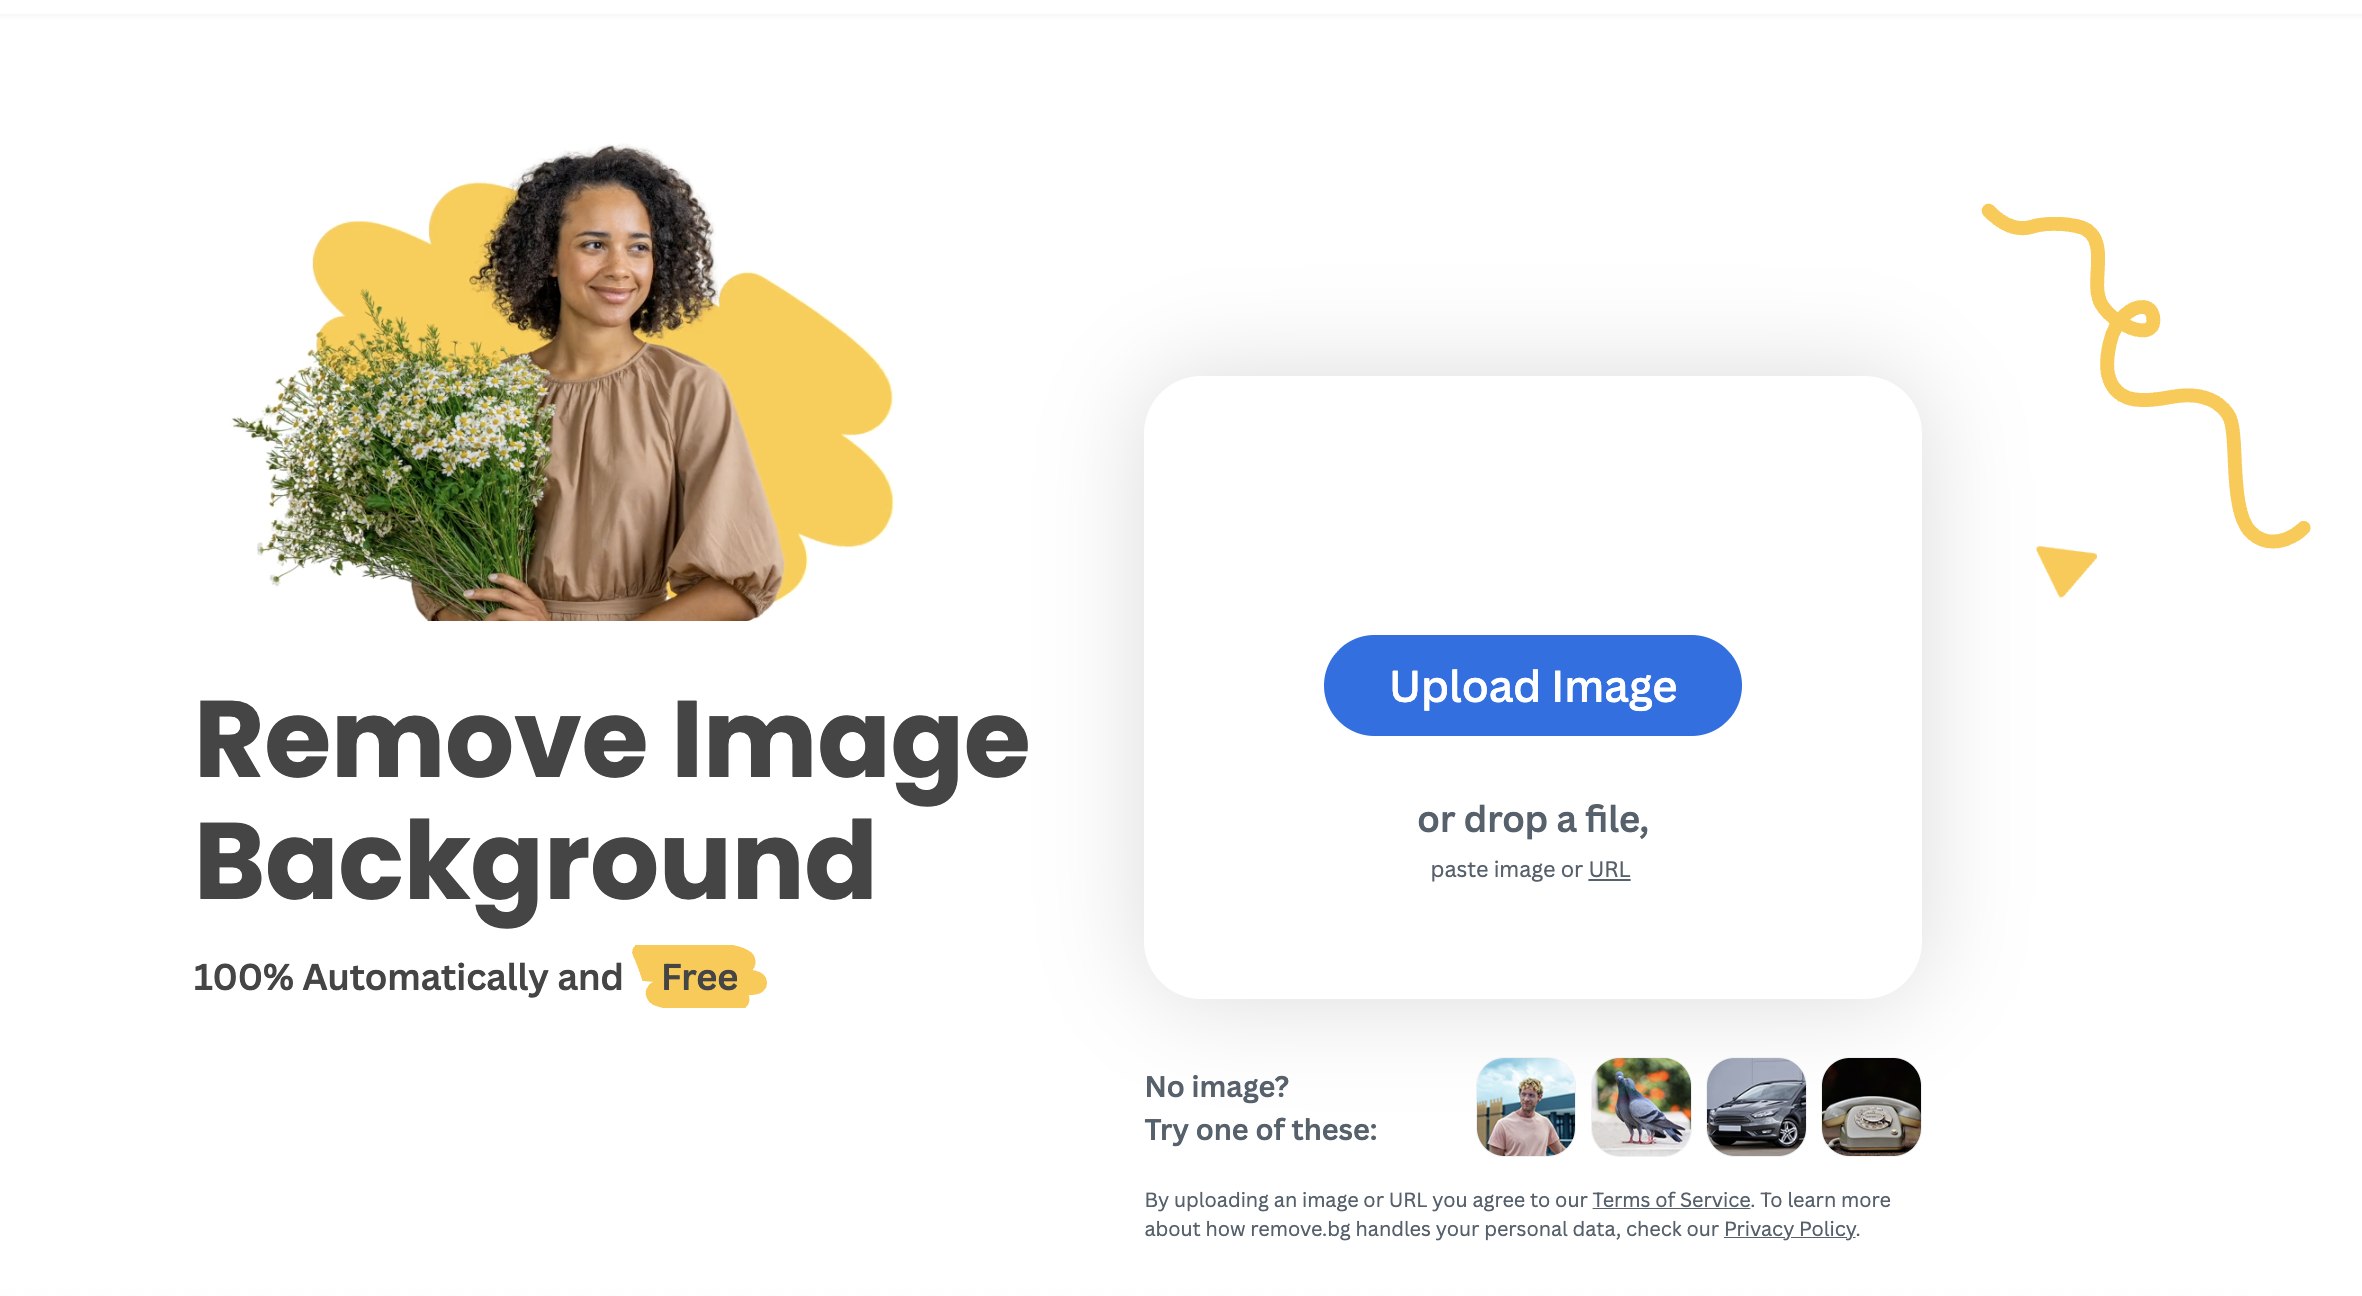
-
The AI automatically removes the background within seconds.
-
Download your image, either as a preview or in high quality, and that’s it!

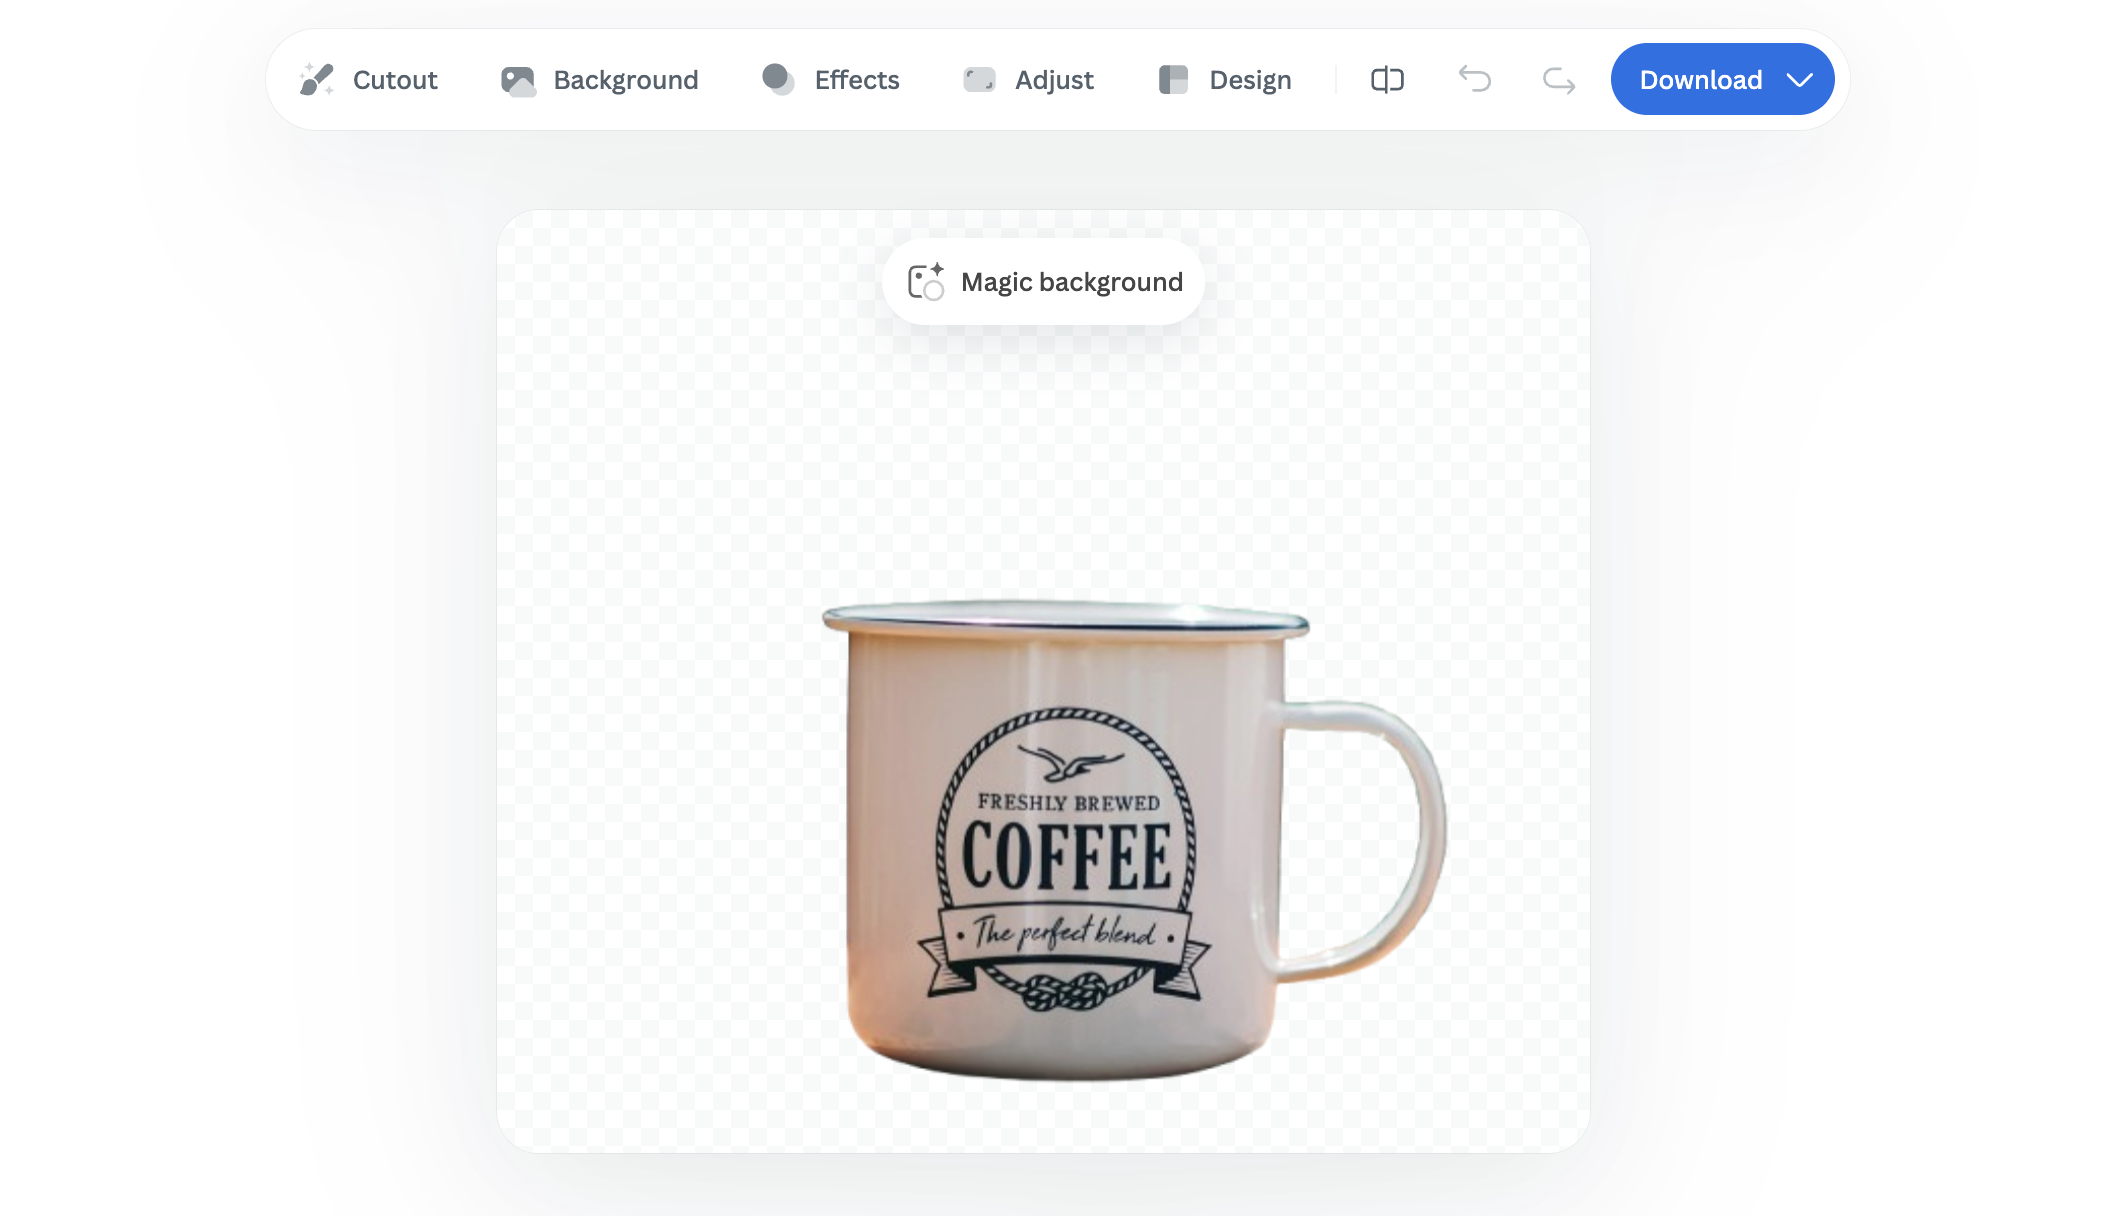
It’s that quick and easy.
If you want to keep editing, you can do so directly inside remove.bg.
-
Click on the “Background” tab to choose between a solid color or a photo background.
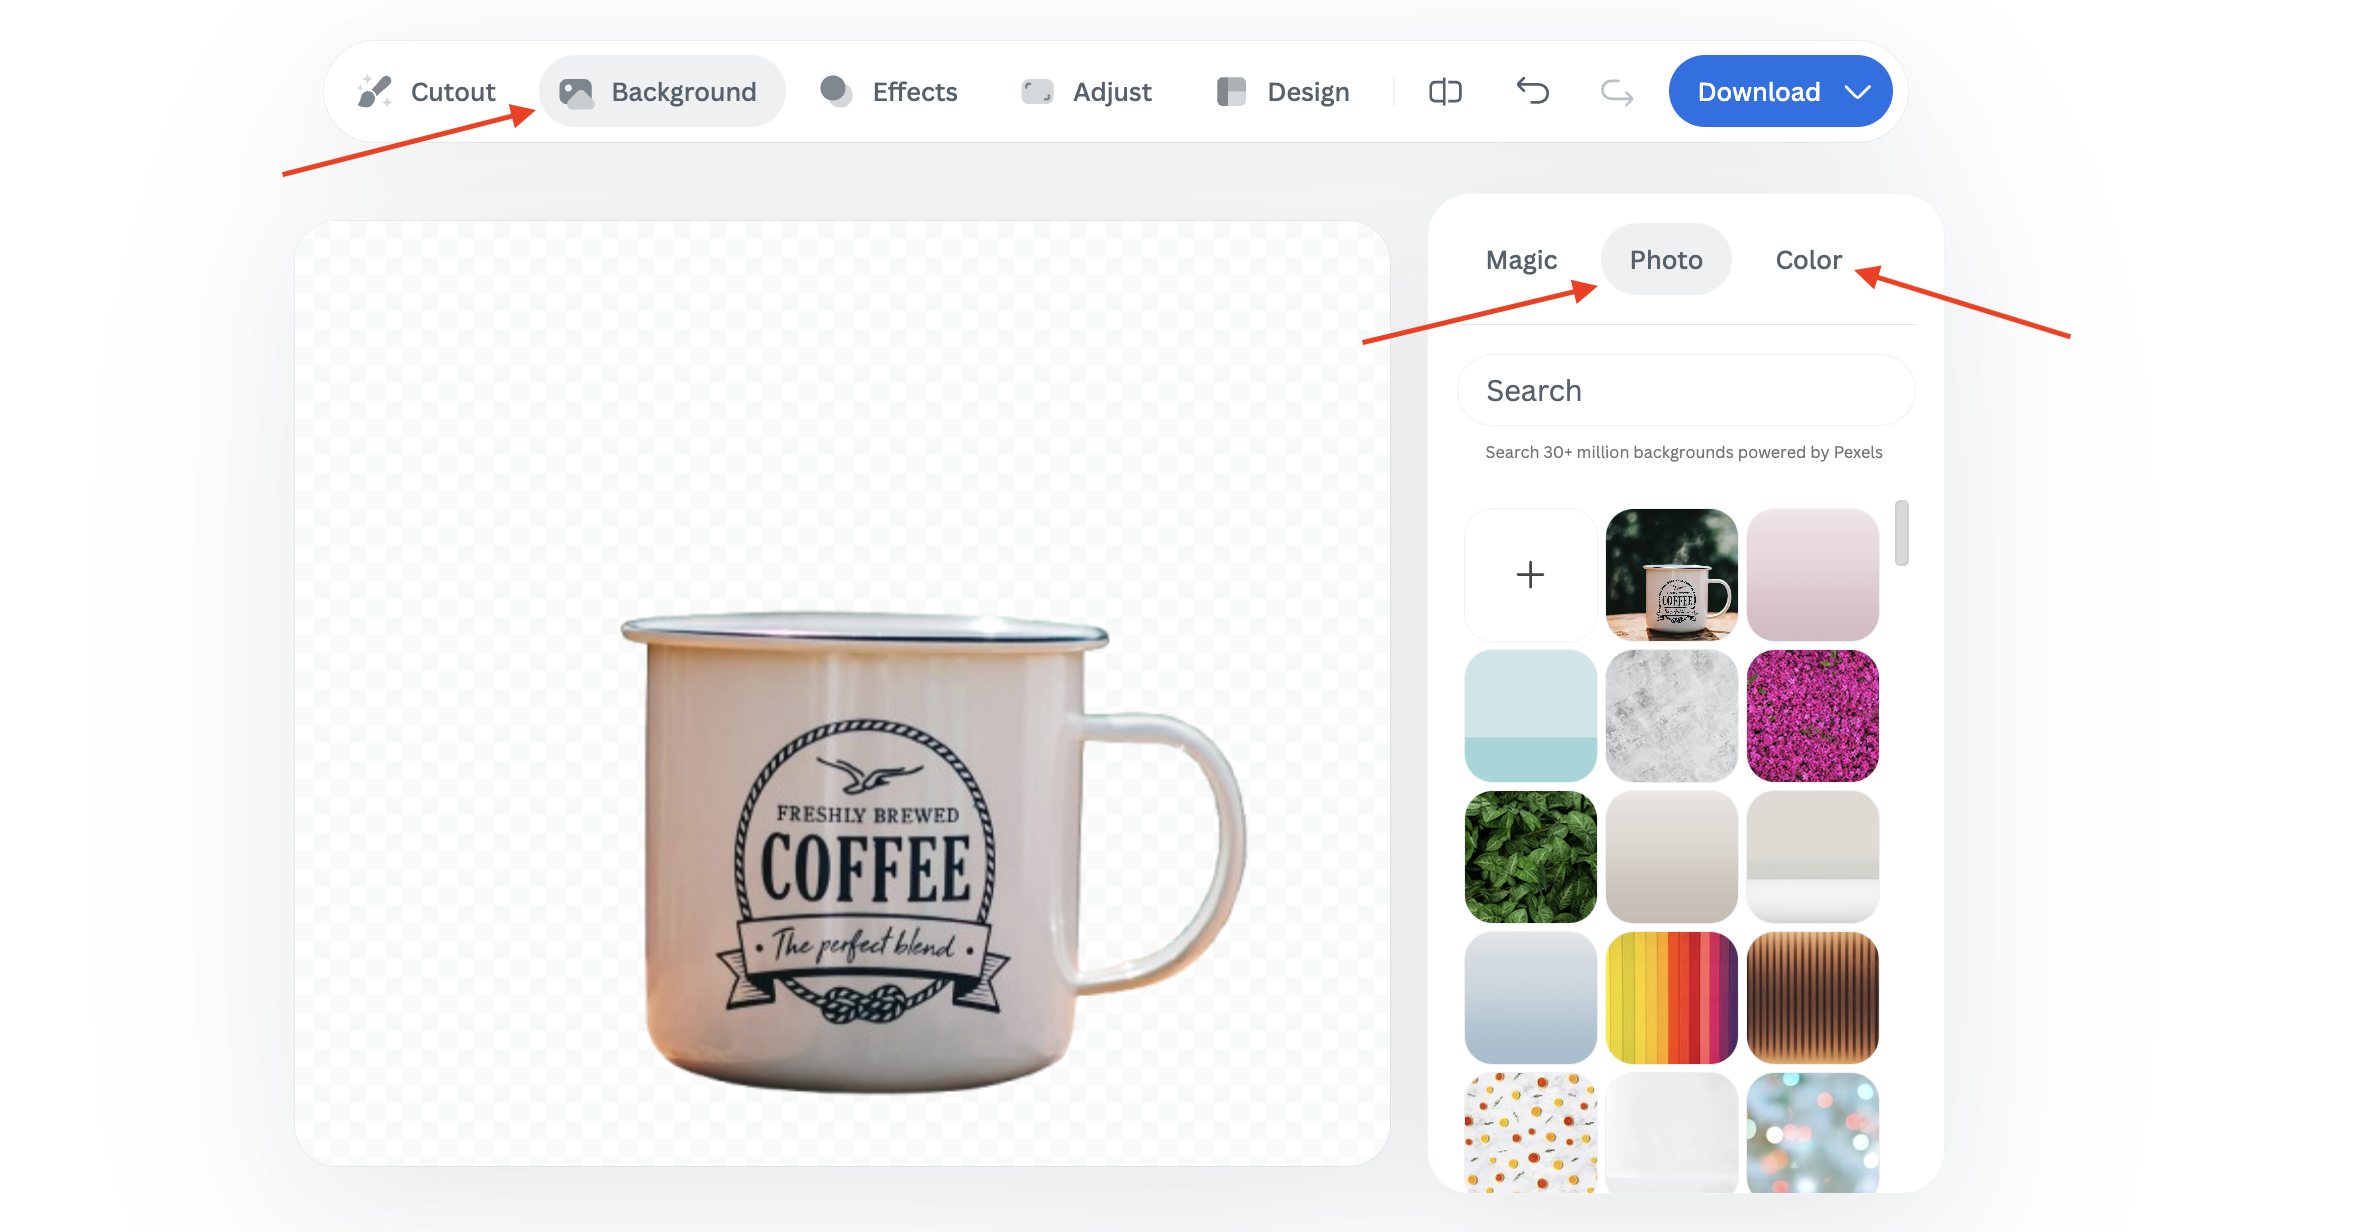
-
You can use the search bar to refine your search. For instance, you can type “table” to instantly find matching backdrops.

-
For additional enhancements, click on “Effects” to blur the background or fine-tune elements, such as shadows and filters.

-
You can also select “Adjust” to edit color and lighting, crop, or expand your photo. You’ll then be redirected to Canva for a seamless editing experience.

To get even more creative, try the Magic Background tool. It uses AI to generate realistic, customized backgrounds that perfectly match your subject’s lighting and perspective. No more mismatched angles or shadows.
-
Click on the “Magic” tab, choose a background for inspiration, and let the AI create a unique scene based on your selection by clicking on "Generate Background."
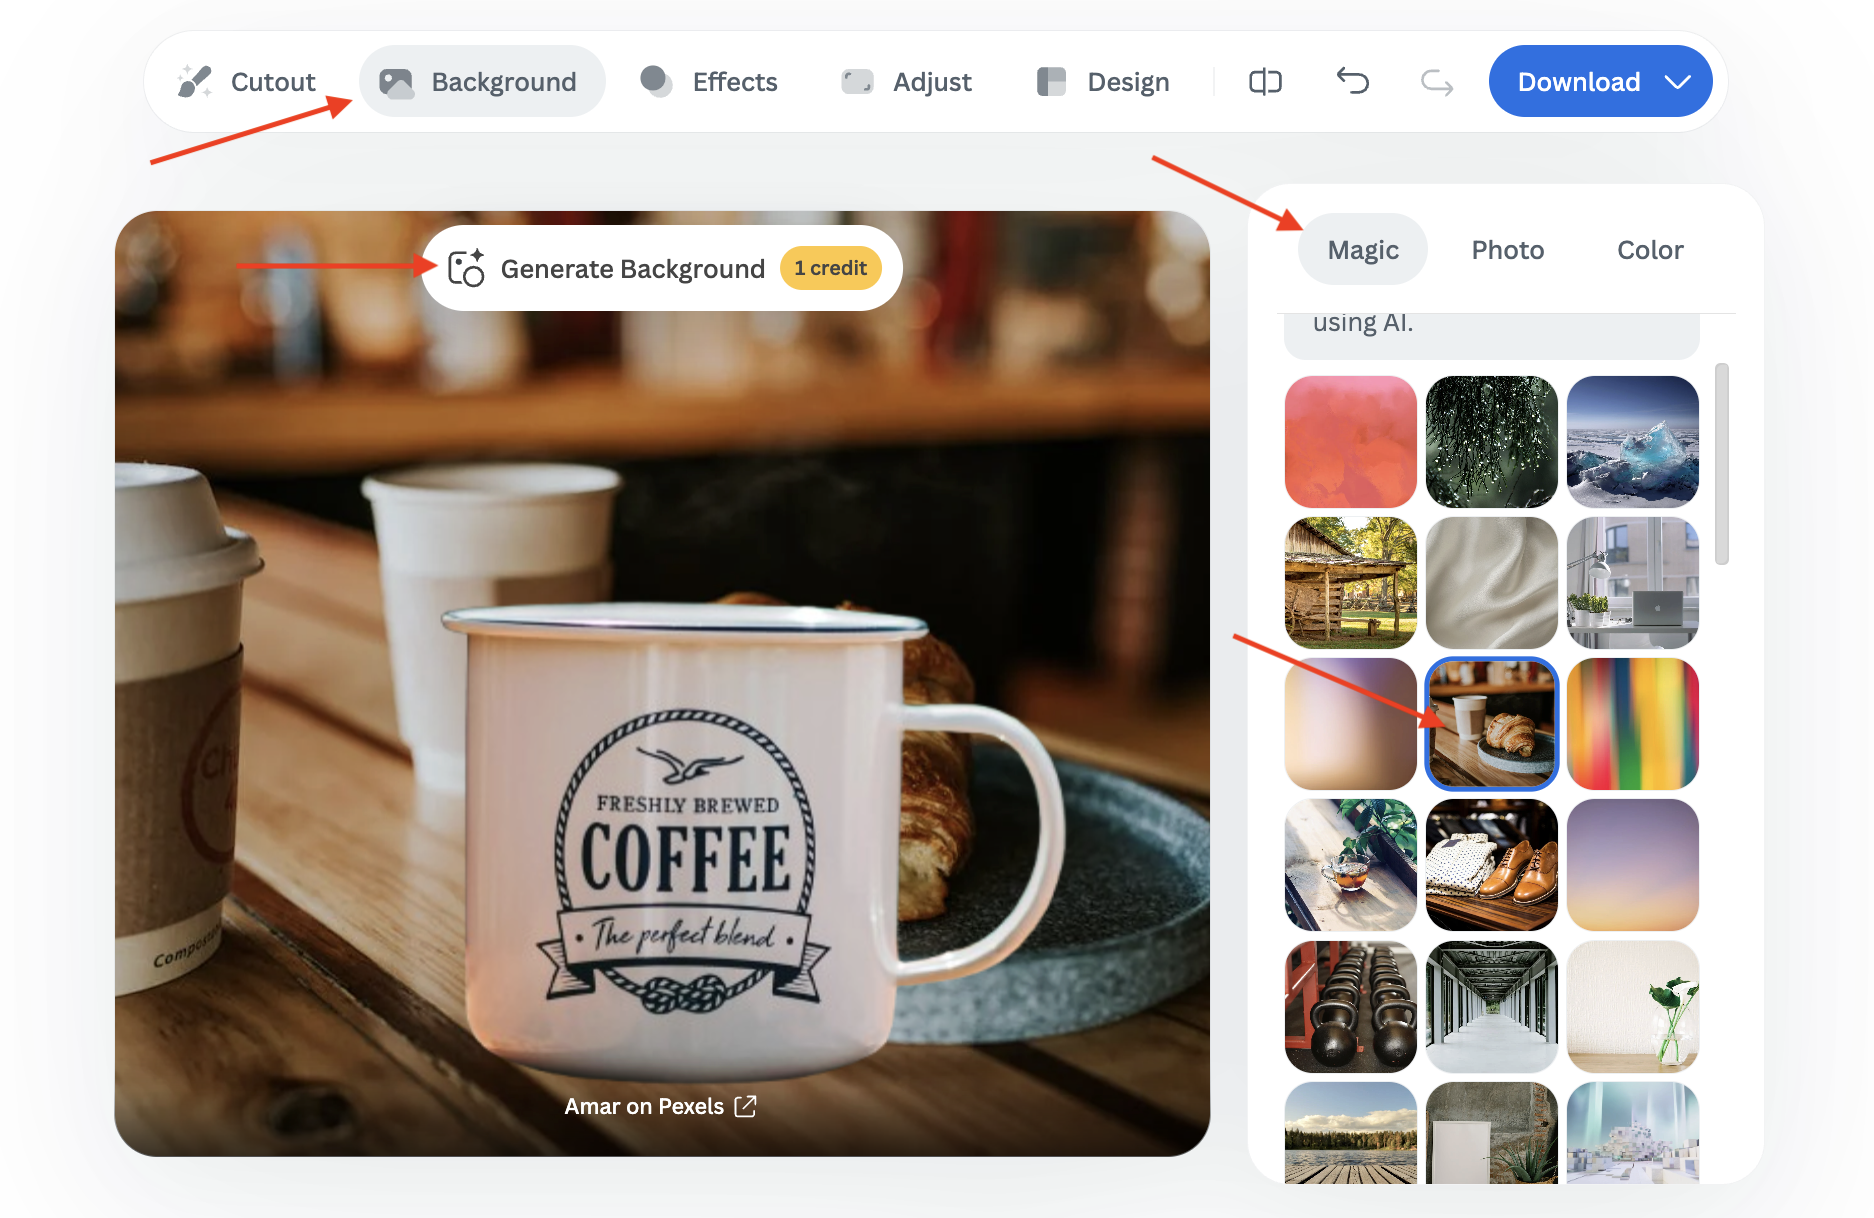
-
If you are not satisfied with the result, you can click on "Generate again" to obtain another variation.

remove.bg GIMP plugin
If you love GIMP’s creative flexibility but want the speed and precision of remove.bg’s background removal, you don’t have to choose between them. The remove.bg GIMP plugin lets you remove backgrounds automatically, right inside GIMP, so you can streamline your editing workflow without switching tools.
In order to use it, you will have to sign up to remove.bg and create an account. Then you can download the plugin and connect your accounts via the API key.

Wrapping up: Removing backgrounds made easy
Removing backgrounds doesn’t have to be a tedious, time-consuming task. With tools like GIMP and remove.bg, you can combine creative control with the power of AI for fast, professional-quality results.
Whether you prefer to fine-tune every detail manually in GIMP or let remove.bg handle the background removal automatically, both options give you the flexibility to create stunning, polished images in no time.
Kommentare
Noch keine Kommentare.